Our Location
304 North Cardinal St.
Dorchester Center, MA 02124


1. Check the ID of the hard drive that requires pass-through. If you do not need pass-through, you can skip it.
Click on the terminal and enter
ls /dev/disk/by-id2. Check the hard disk ID that has not been assigned to the array, such as ata-WUH721818ALE6L4_3GG3AUSE. Remember this ID and add the prefix /dev/disk/by-id/ to the hard disk location where the Synology virtual machine is created, as follows:
/dev/disk/by-id/ata-WUH721818ALE6L4_3GG3AUSE
/dev/disk/by-id/ata-WUH721818ALE6L4_3GGUMJTE
3. Place the BlackSynology boot in the domains folder

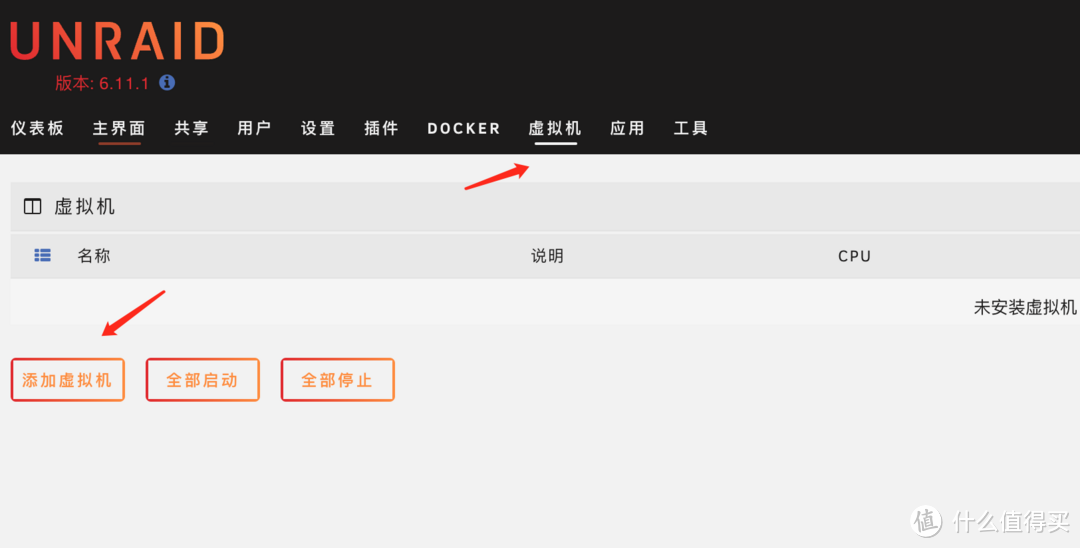
4. Select Virtual Machine-Add Virtual Machine
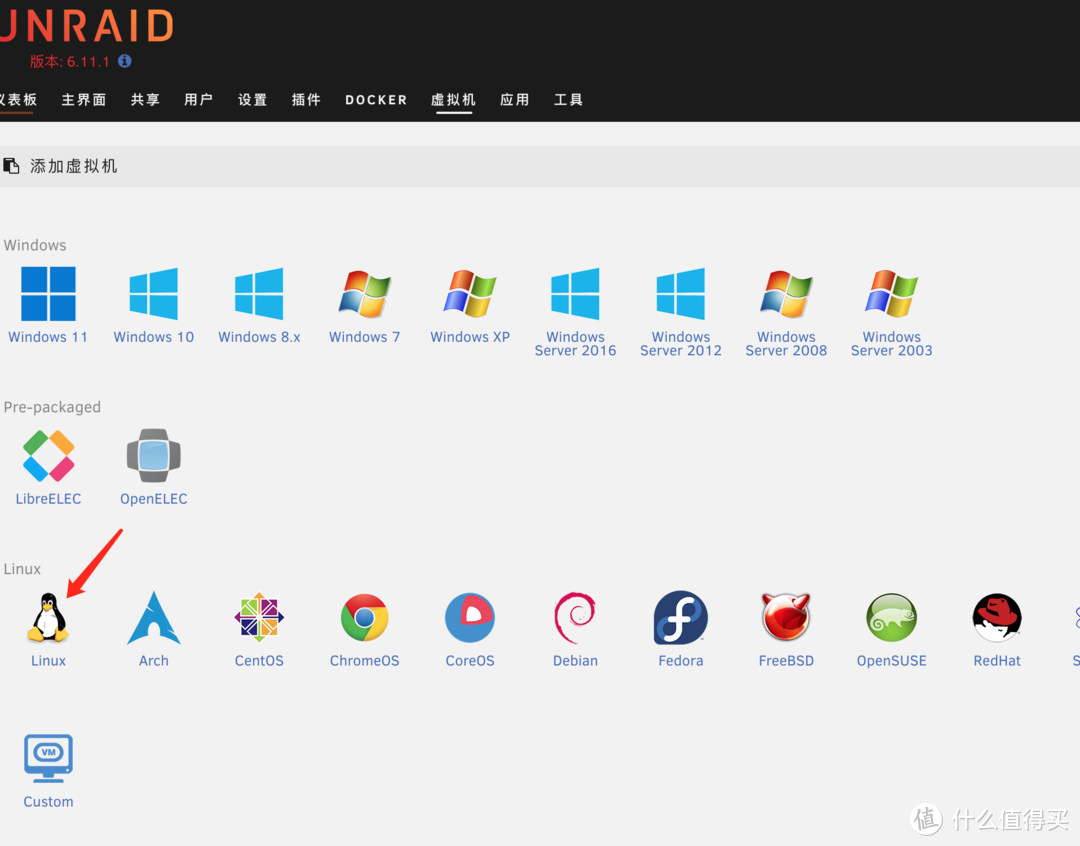
5. Choose linux
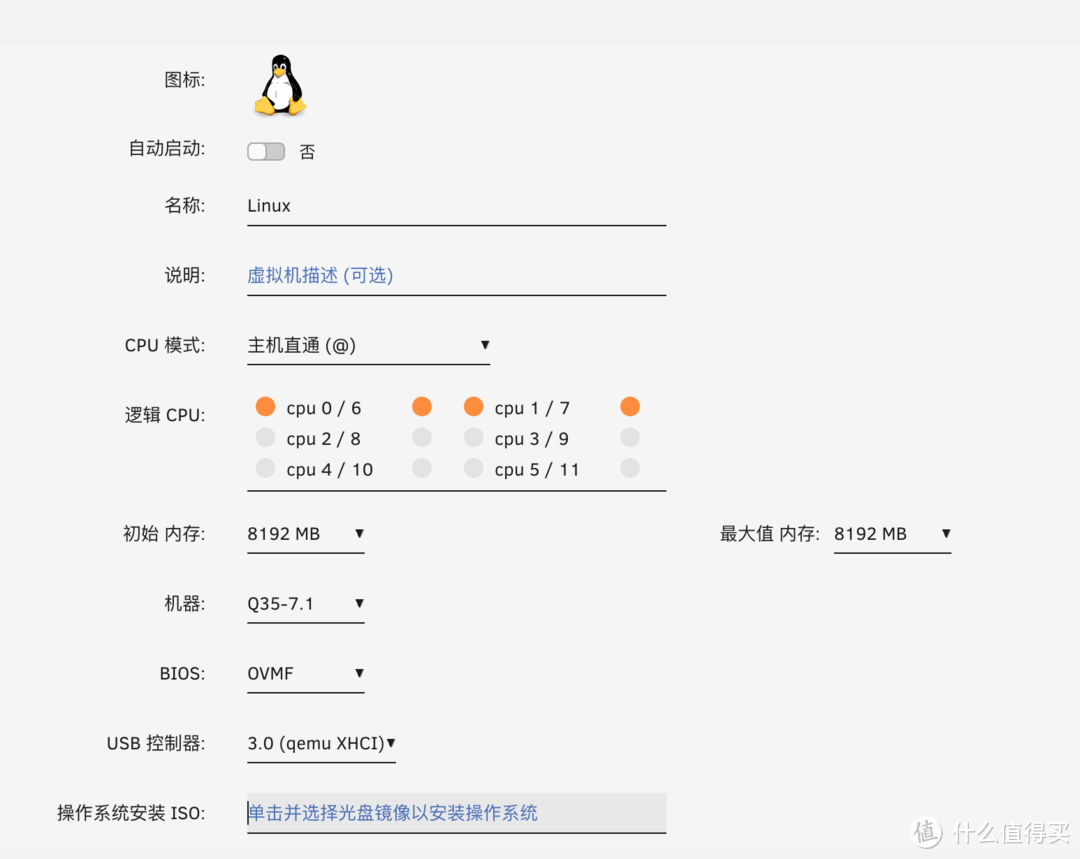
6. Fill in the configuration as shown in the picture. I gave 4 cores for the CPU, which is probably enough. The 32G memory is divided into 8G for Black Synology. The machine is Q35, the BIOS is OVMF, and the USB controller is 3.0 (qemu XHCI).
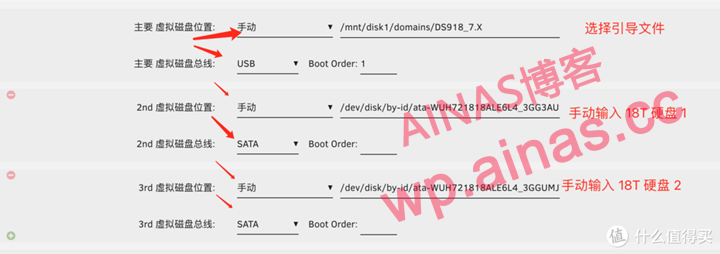
7. Select the boot file for the first manual disk, select USB for the lower bus, and then click the small green plus sign on the left. The 2nd and 3rd disks are 18T disks. Manually enter the path you just prepared. Different disk names are different.
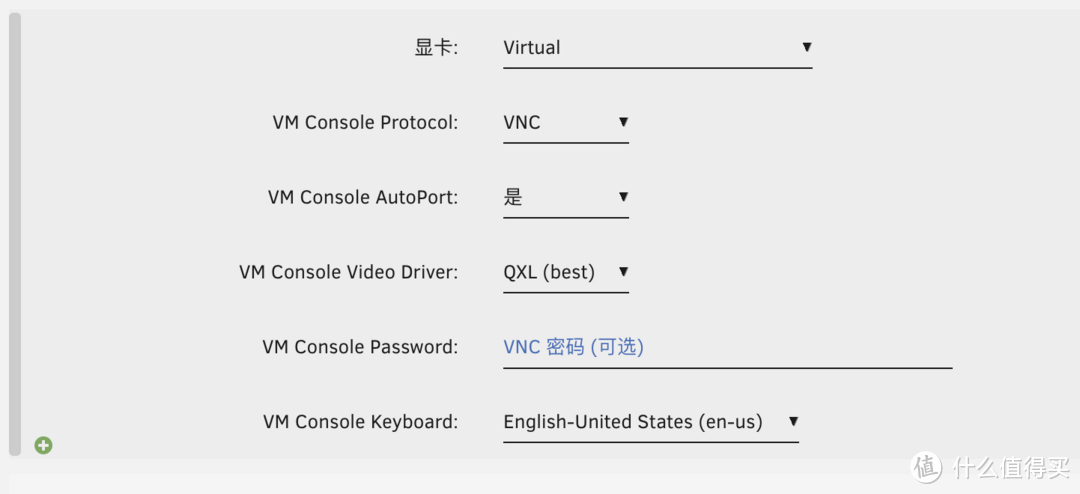
8. The graphics card is virtual by default and VNC is started.
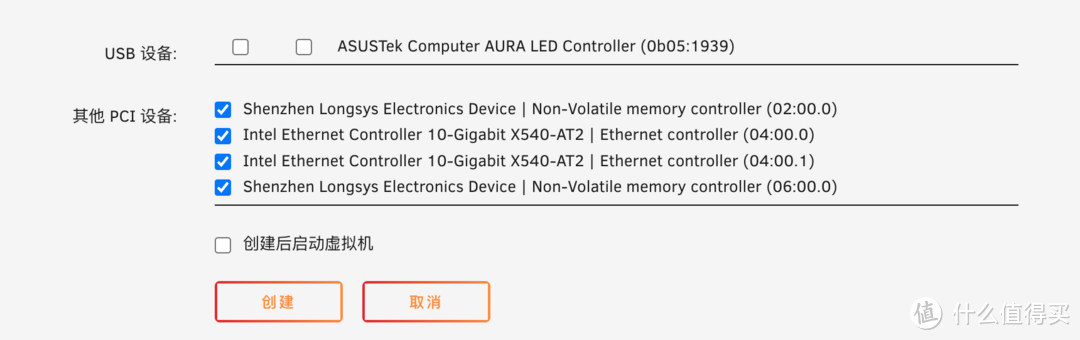
9. Here you can check the PCI device that needs passthrough as needed, or you can not select it, and then click Create.
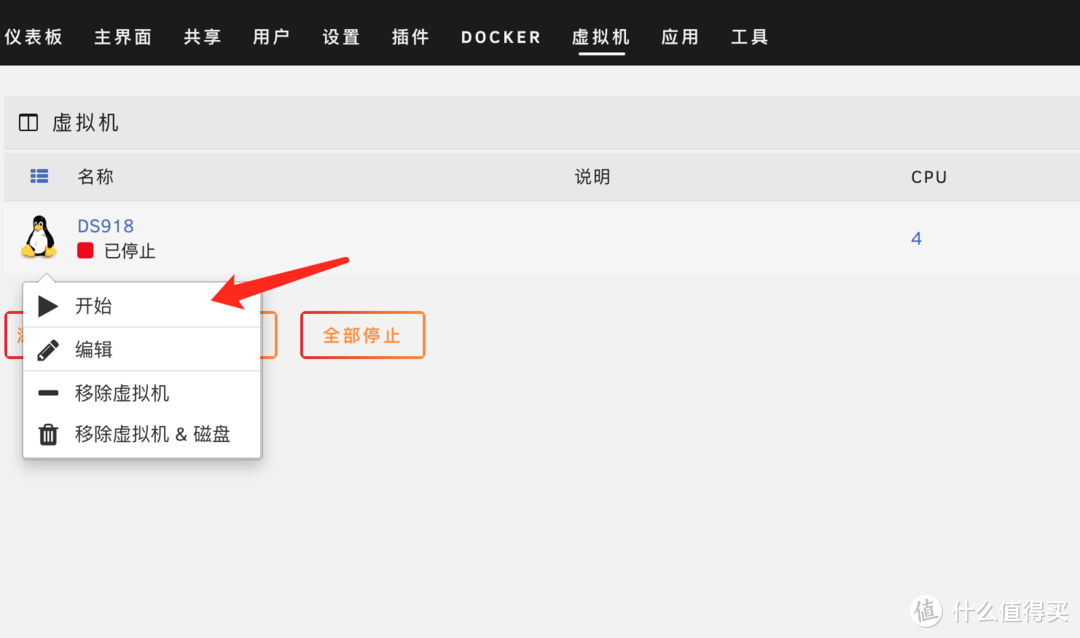
1. Return to the virtual machine window, click the DS918 icon, and click Start.
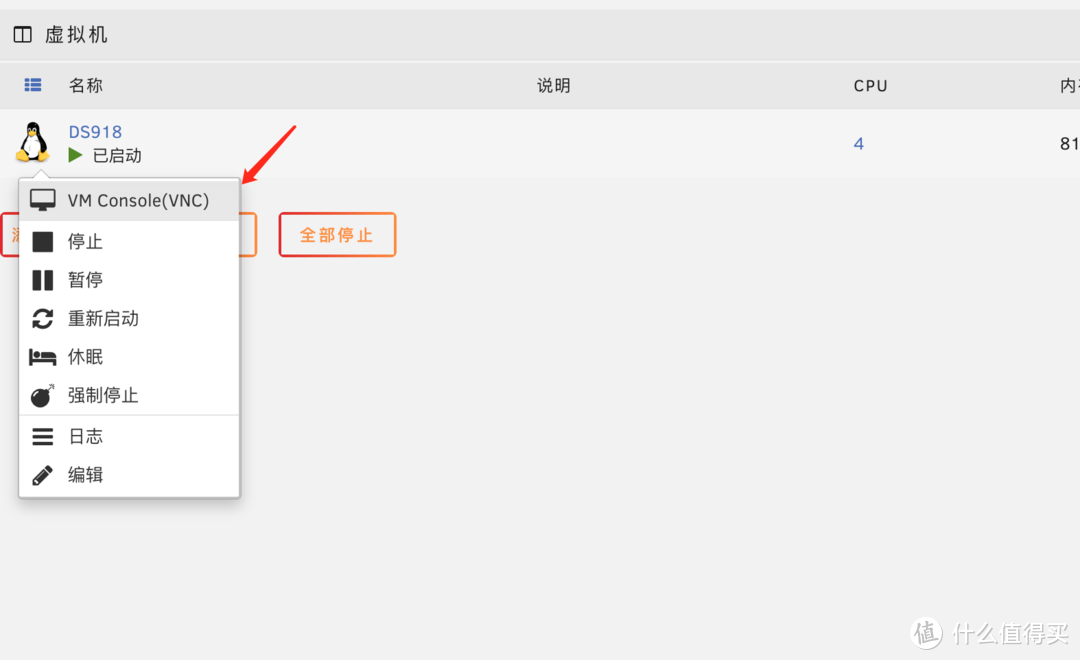
2. After seeing that the DS918 status changes to started, click the icon and click VNC to see if it is normal.
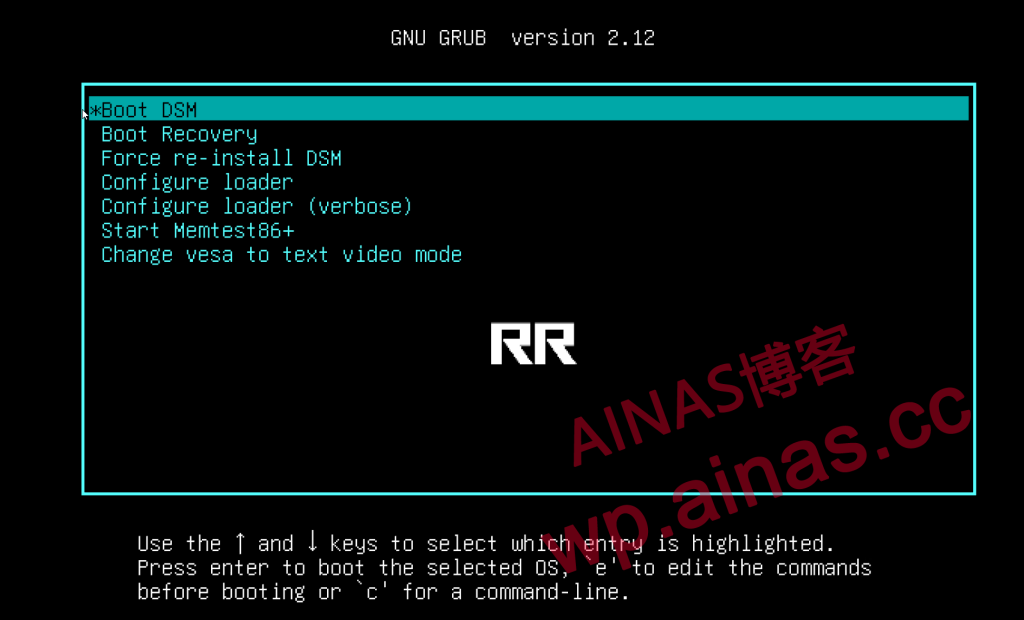
Start to install the DSM system, seeRR finished boot disk installation tutorial, Chapter 4 and beyond