Our Location
304 North Cardinal St.
Dorchester Center, MA 02124


1. RR translation system download address:RR download Essential downloads for DSM installation
2. github address:https://github.com/RROrg/rr
3. PAT installation file download address:https://dsm.ainas.cc:88/PAT/
1. Download and unzip the latest version of RR.
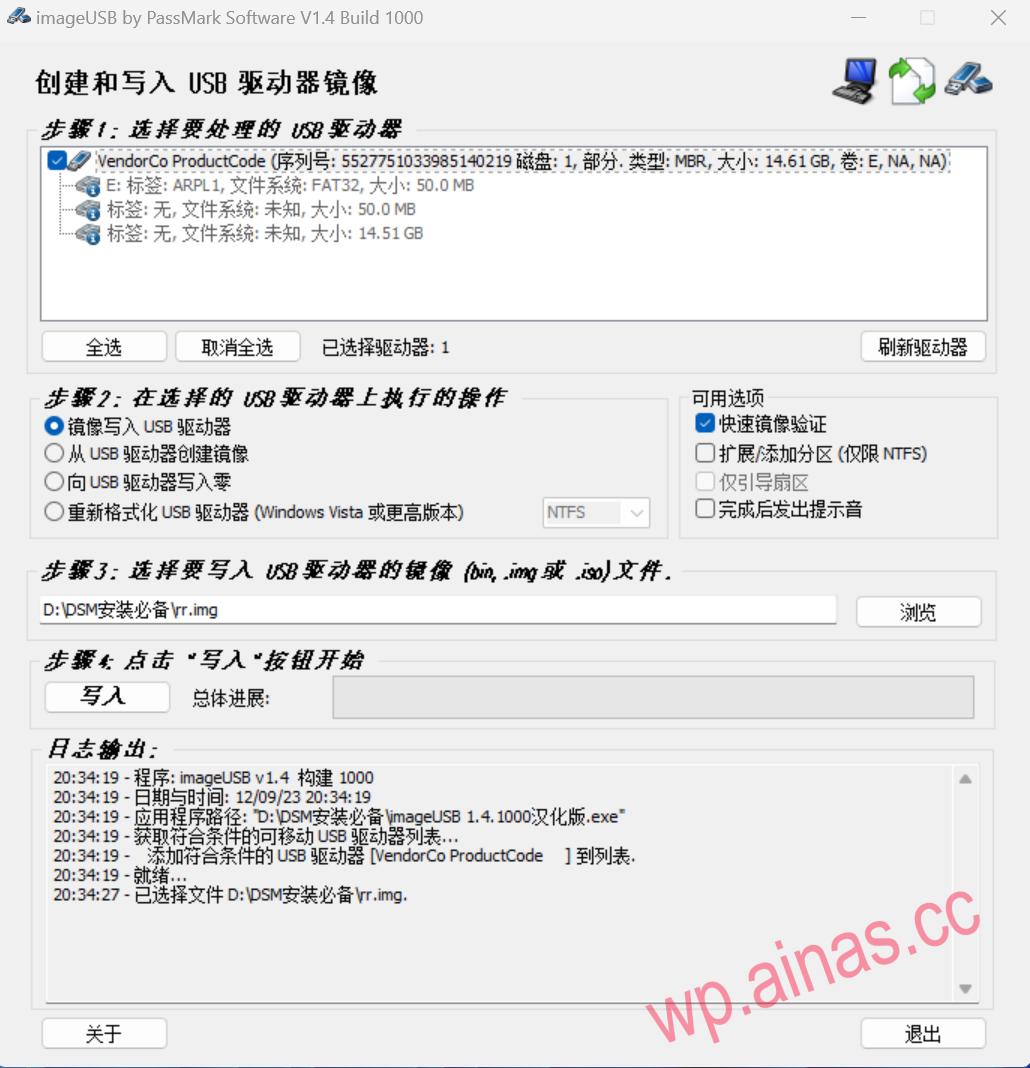
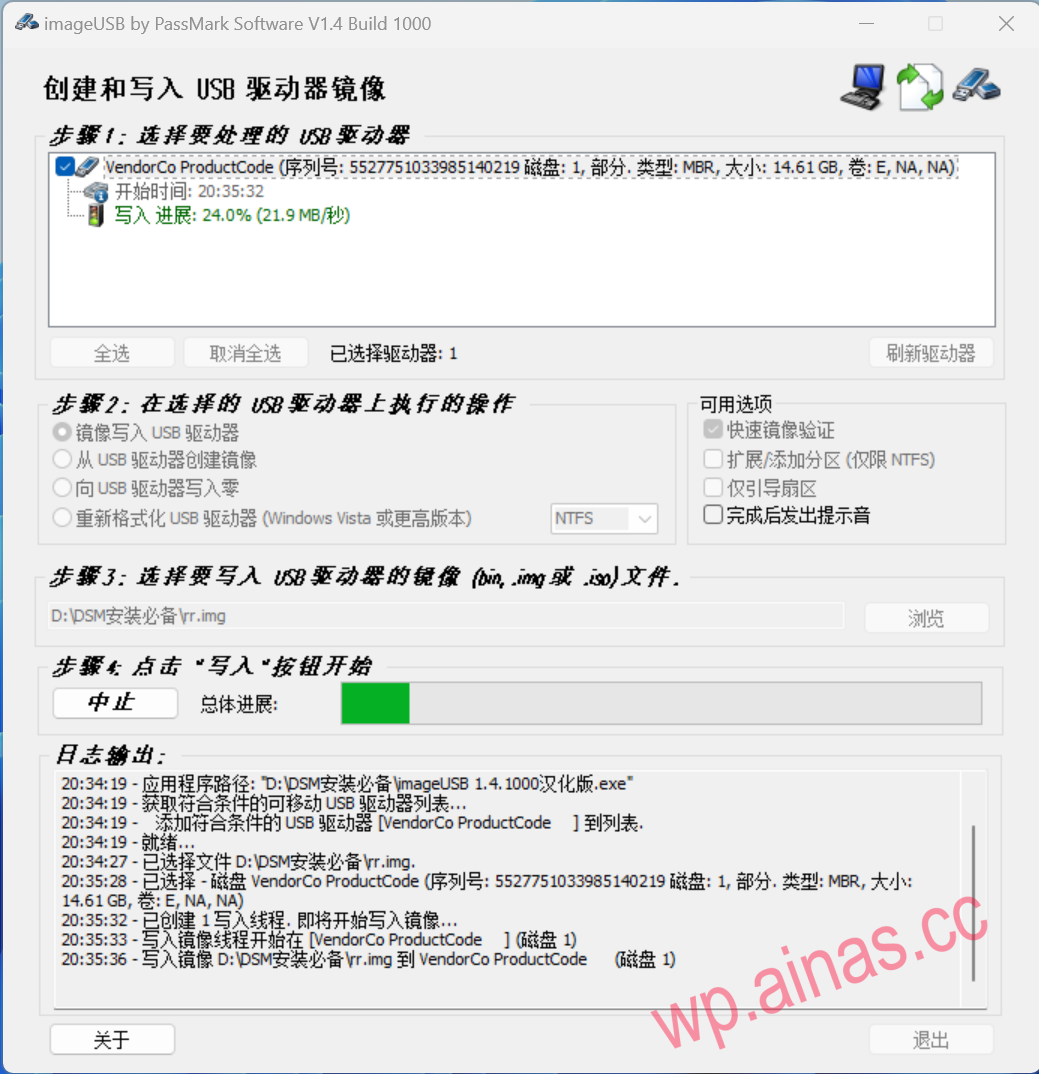
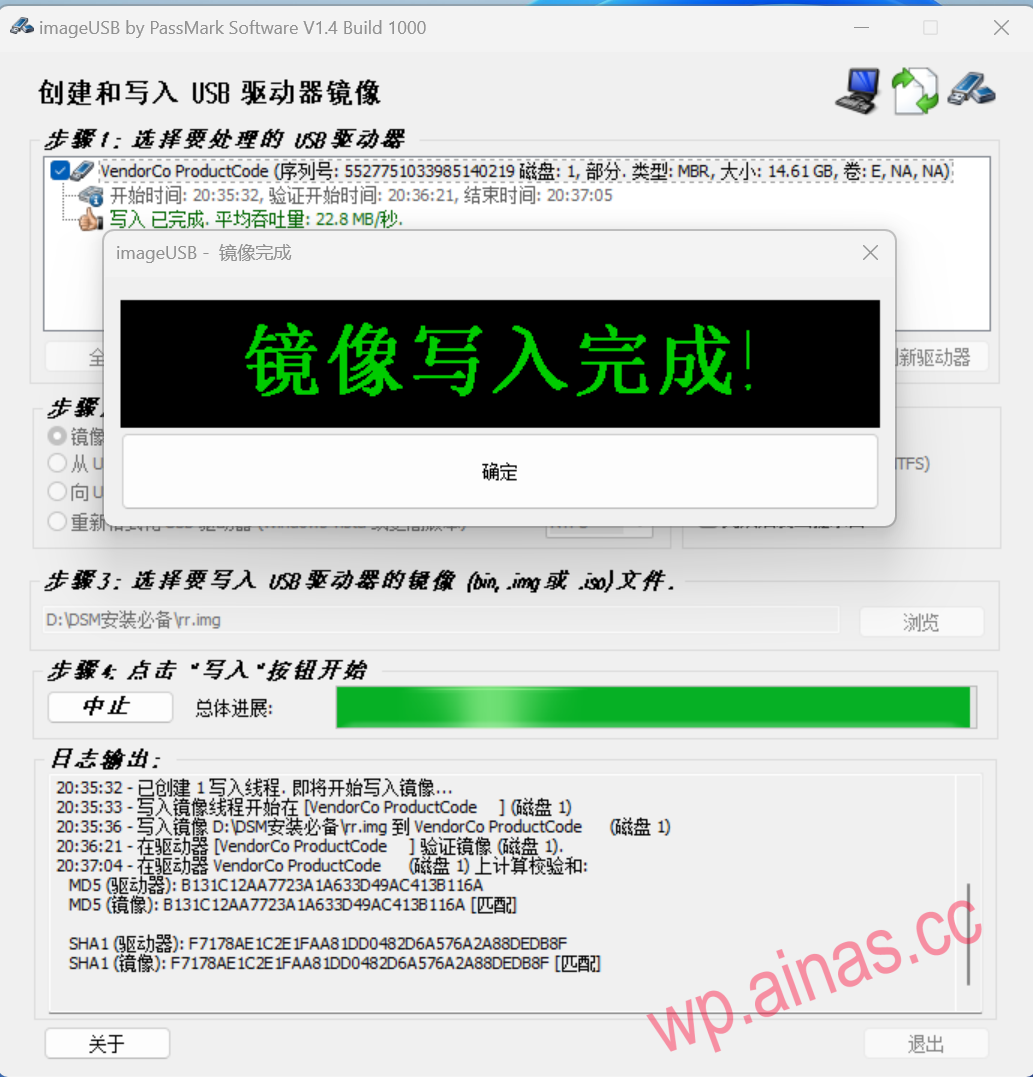
2. Use the burning file to burn the rr.img file into a USB flash drive or other boot disk. Here we recommend imageUSB, which is small and simple, and can be opened and used without installation.
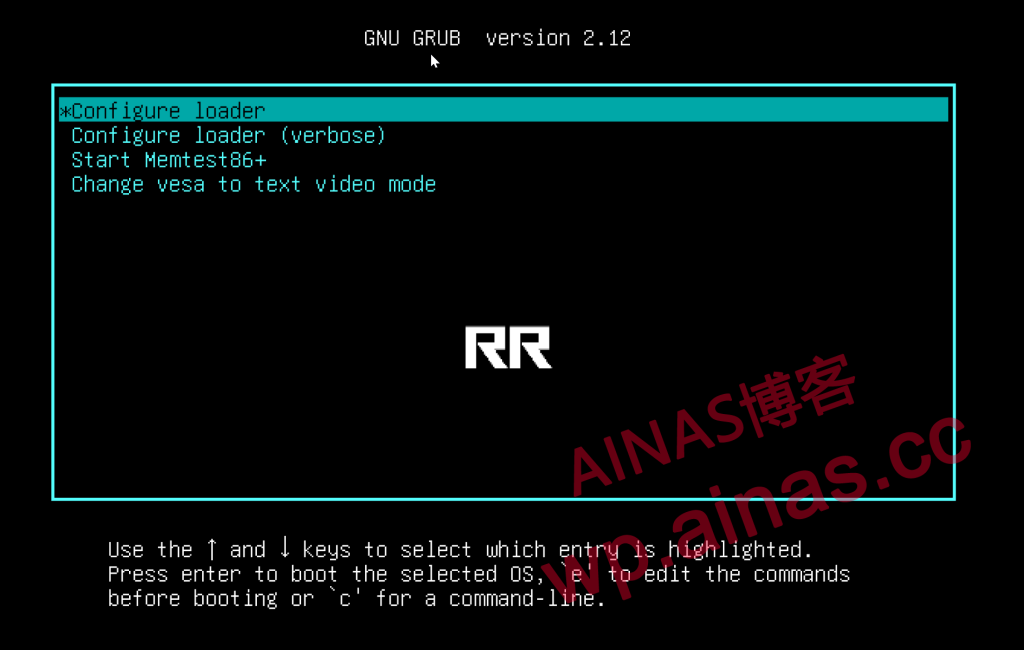
1. Insert the U disk into the computer, set the computer to boot from the U disk, and enter the first menu after startup.
2. Note that you need to connect the network cable before starting. The obtained IP address will be displayed on the screen, and the newly added IP address can also be seen in the router.
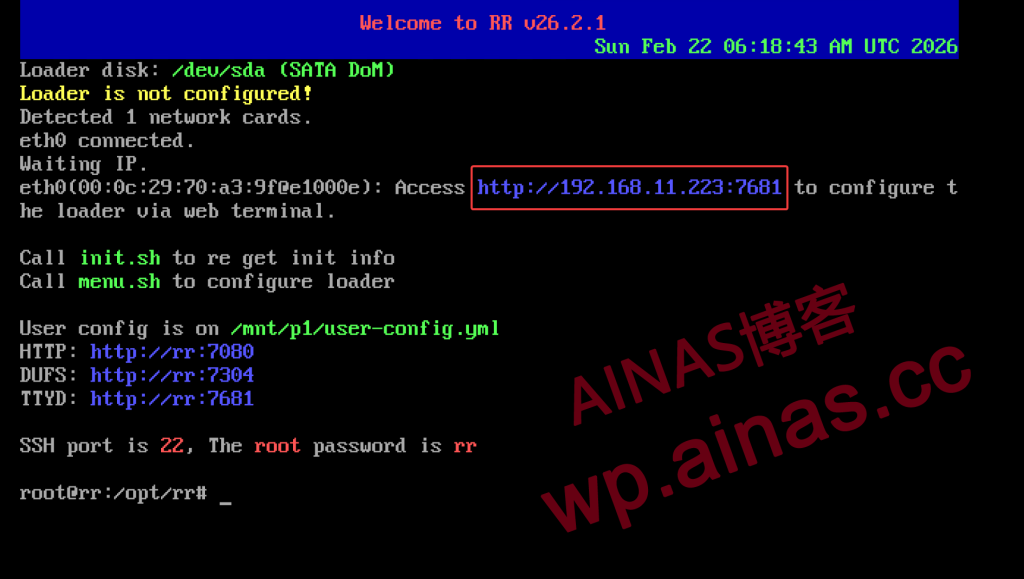
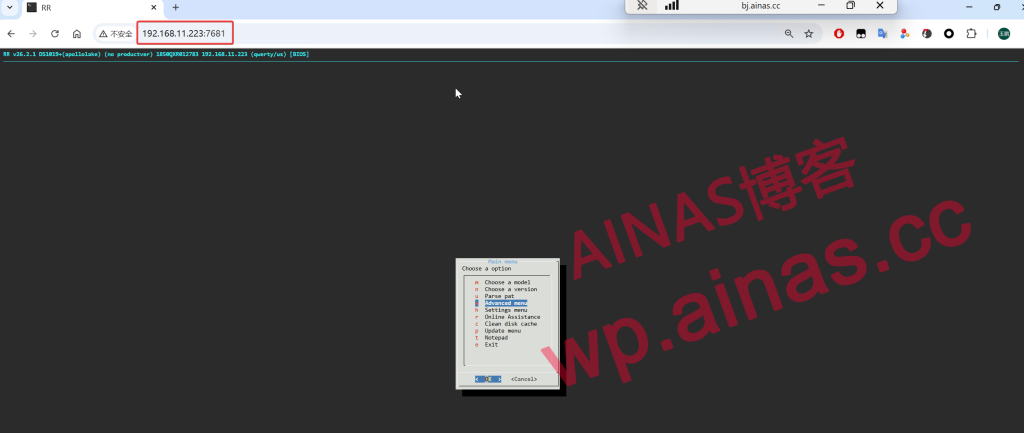
3. Enter the IP address just now into any computer browser on the LAN. Note that the port must be filled in correctly.
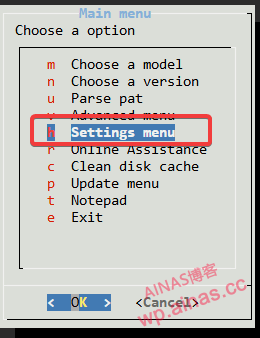
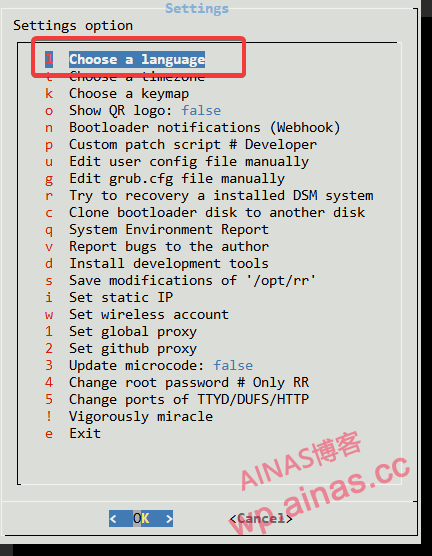
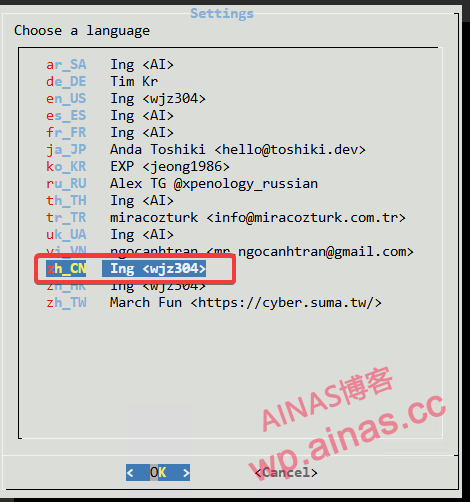
4. Select Settings menu-Choose a language-zh_CN and change the language to Simplified Chinese
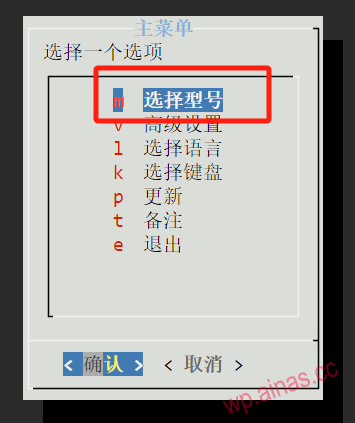
5. Return to the main menu and select “Select Model”
6. Select the Black Synology model you want to compile. I chose DS918+. Use the arrow keys to select and press the Enter key.

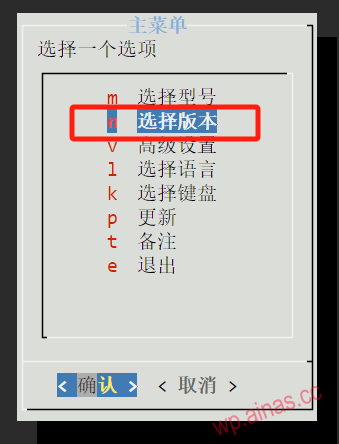
7. Press Enter at “Select Version”.
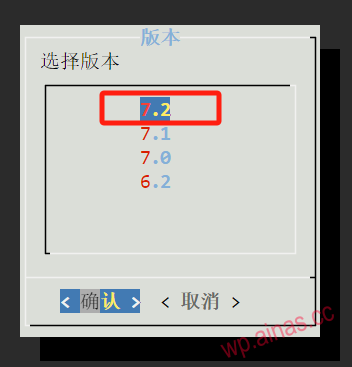
8. Select the version you want to compile Black Synology. I chose the latest version 7.2. Use the arrow keys to select and press the Enter key.
9. Click Confirm in the pop-up dialog box.
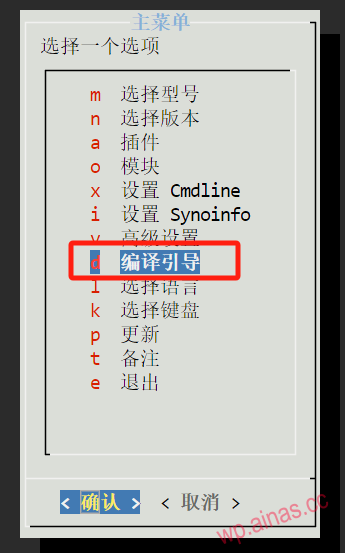
10. Select compile guide
11. When the compilation is completed, it will automatically jump back to the main menu.

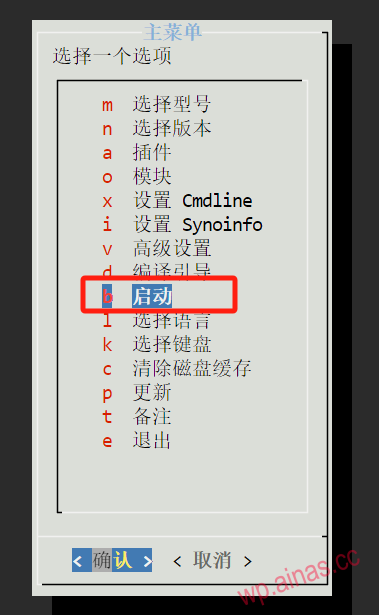
12. After the boot compilation is completed, the system will automatically jump back to this interface, and an additional line of menu “Start” will appear. Press Enter on this line of menu.
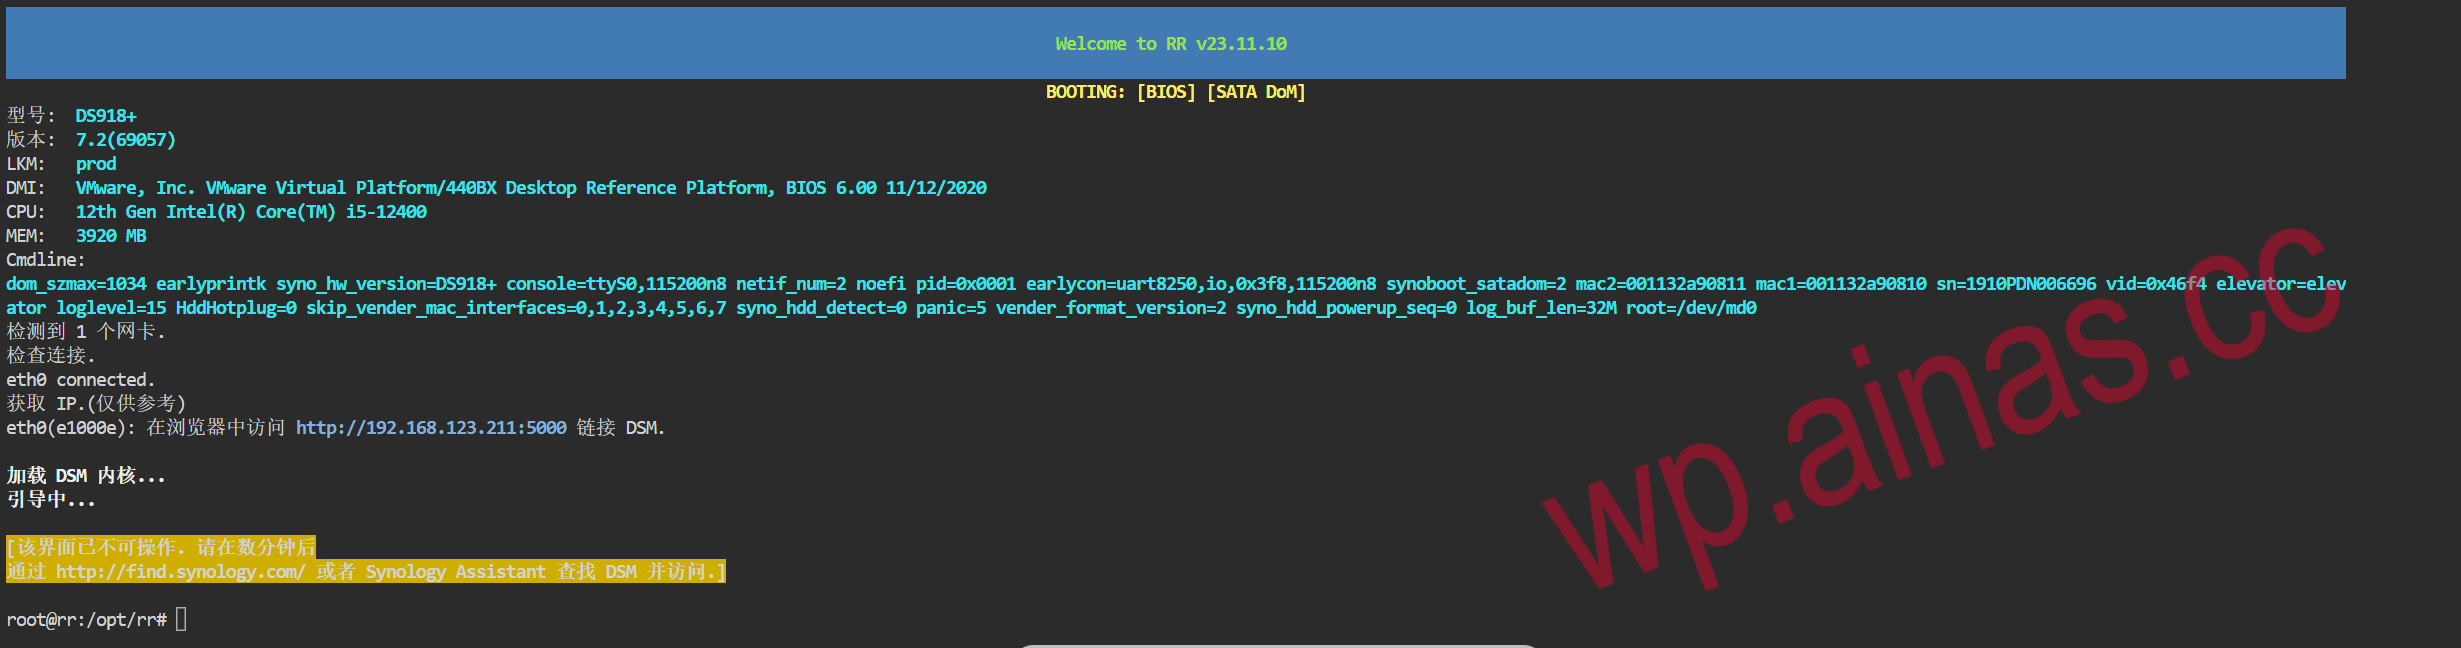
1. After selecting startup, the interface displayed after the compiled boot is as follows, which will display: system model, system version, pid, vid, sn, mac, etc.
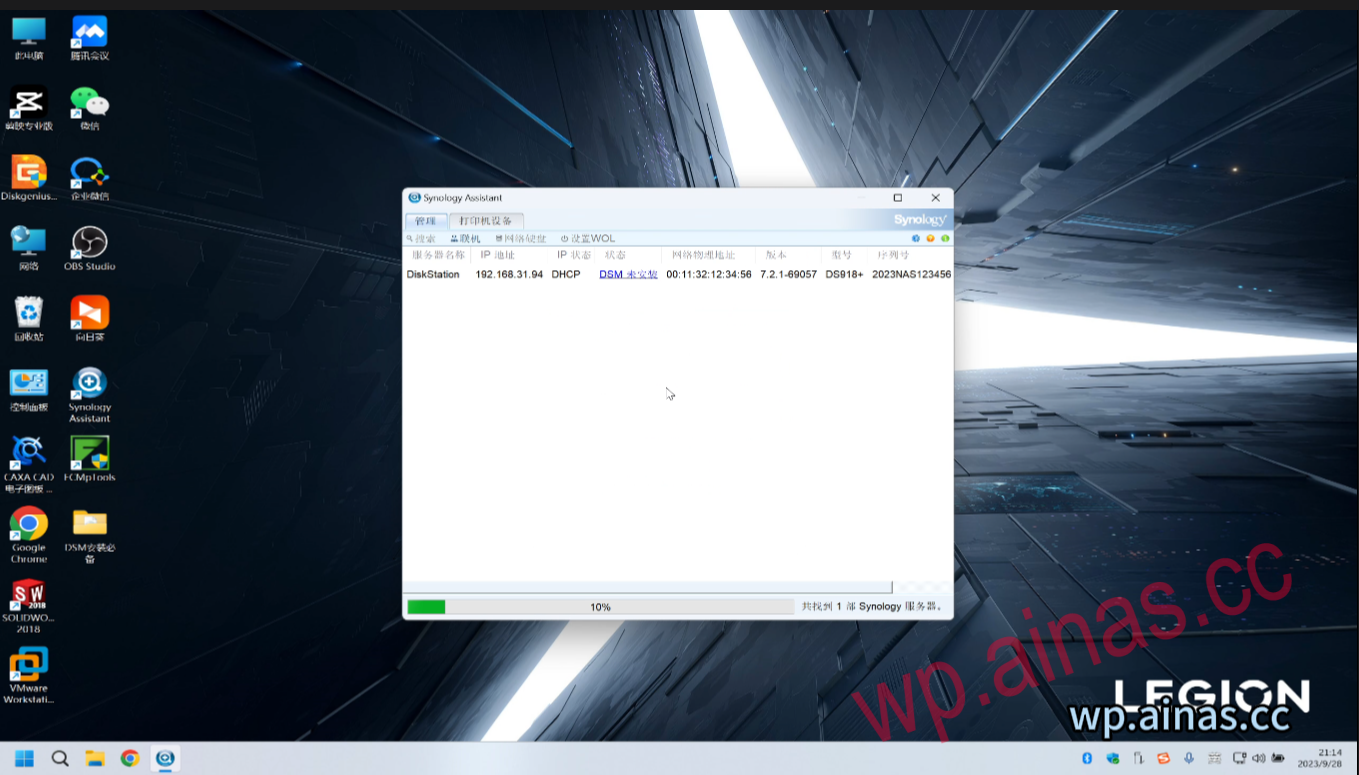
1. After about 2-3 minutes, use Synology Search Assistant to search for IP, or directly enter the IP address displayed on the Synology screen.
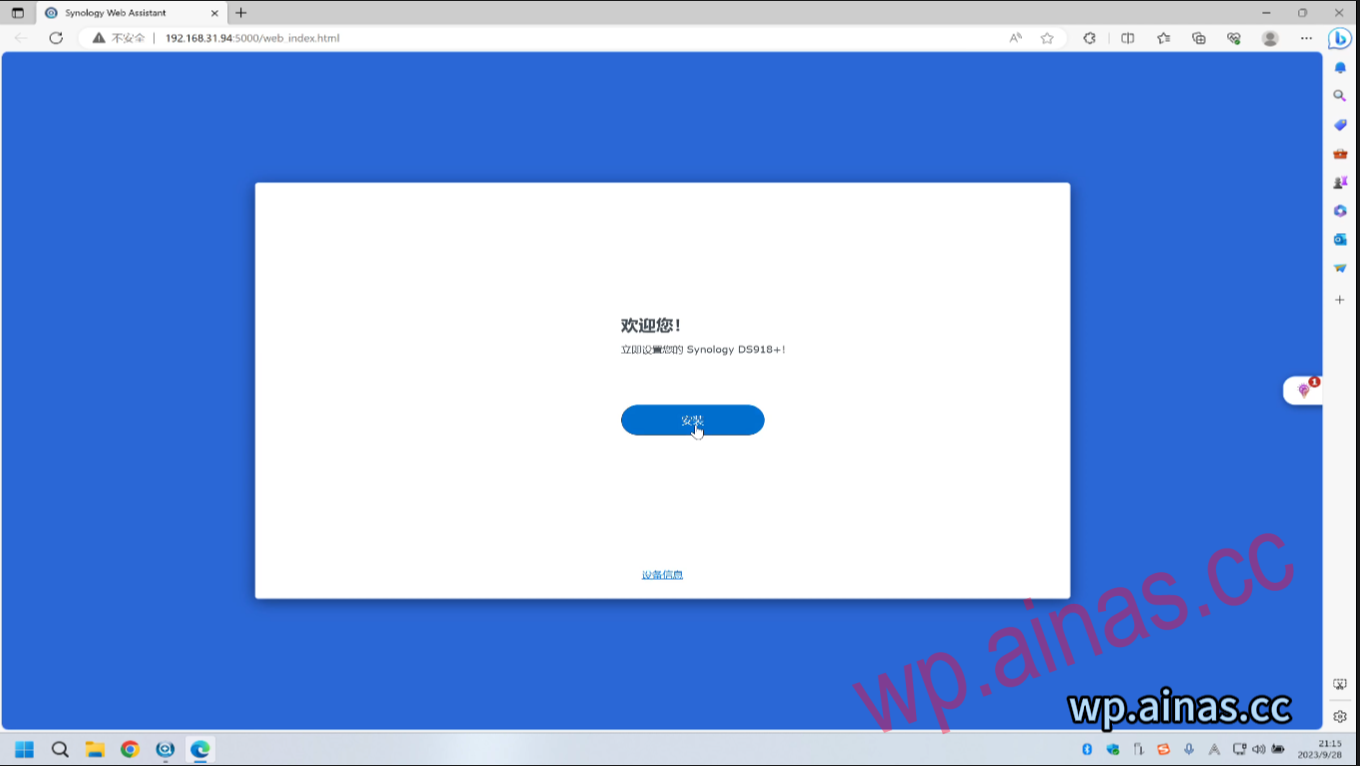
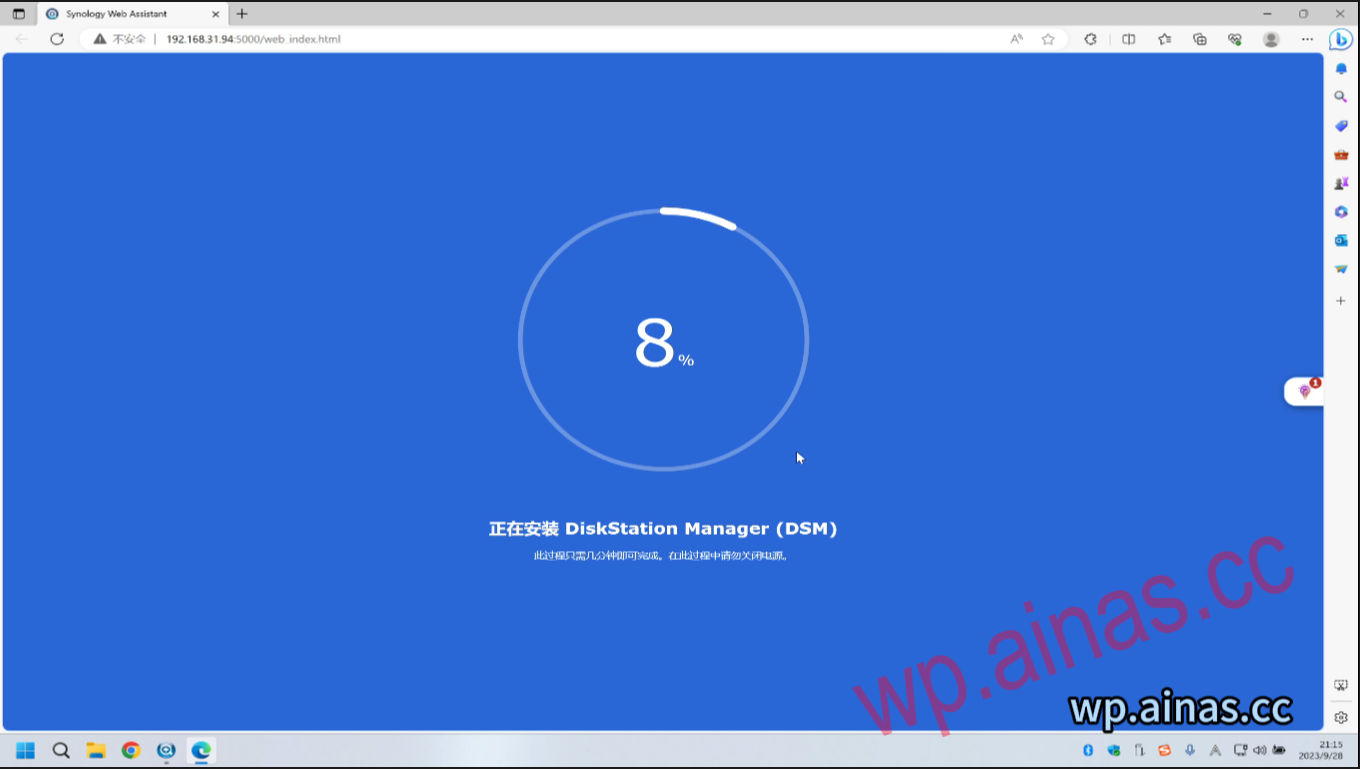
2. Enter the Synology installation interface, select Install, and follow the prompts to install.
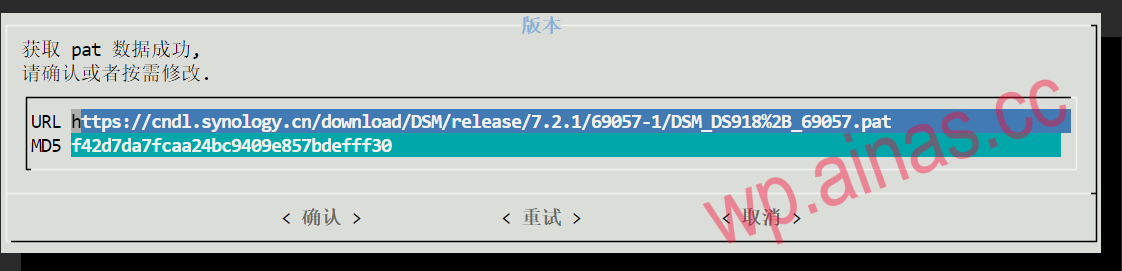
3. Choose to automatically download and install the new version of DSM, or you can upload it manuallyPAT installation file

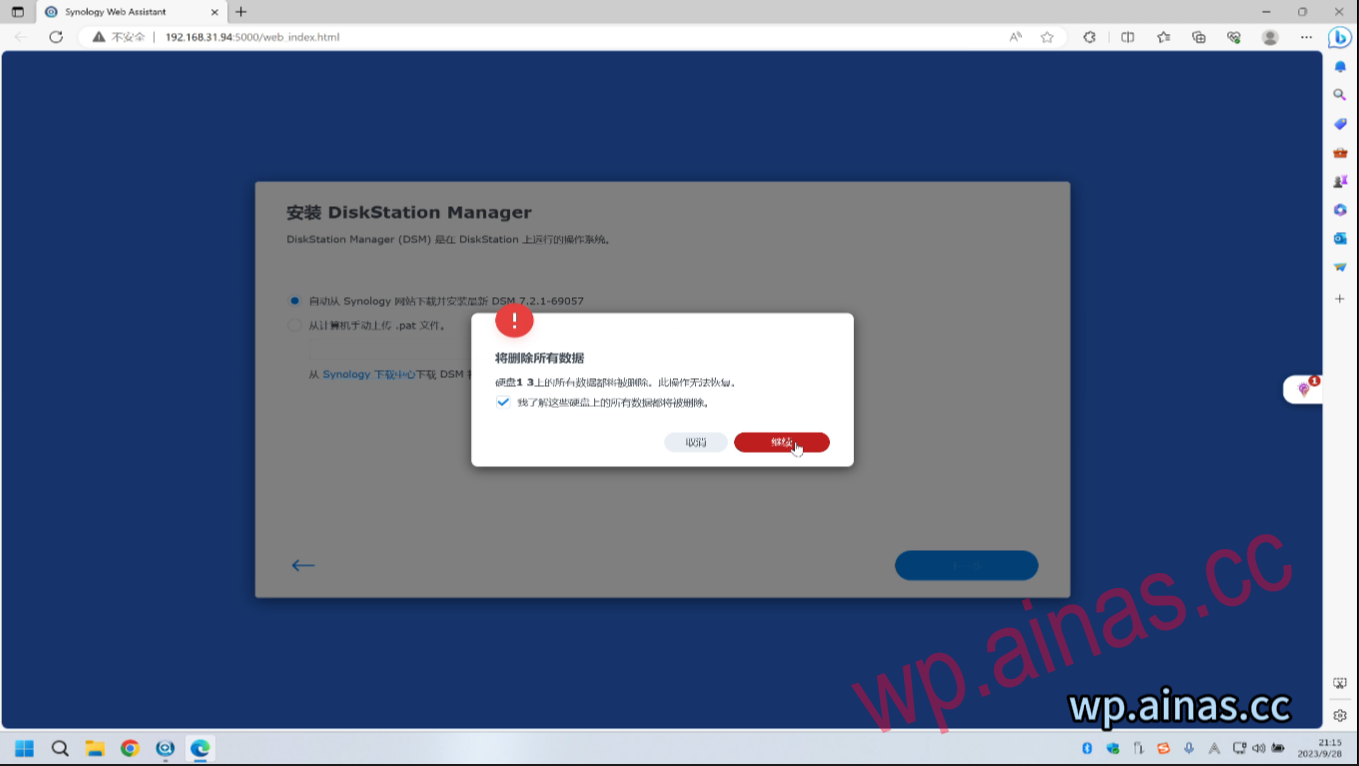
4. If it is a blank hard drive, you will be prompted to delete all data. Check the check box and click Delete.
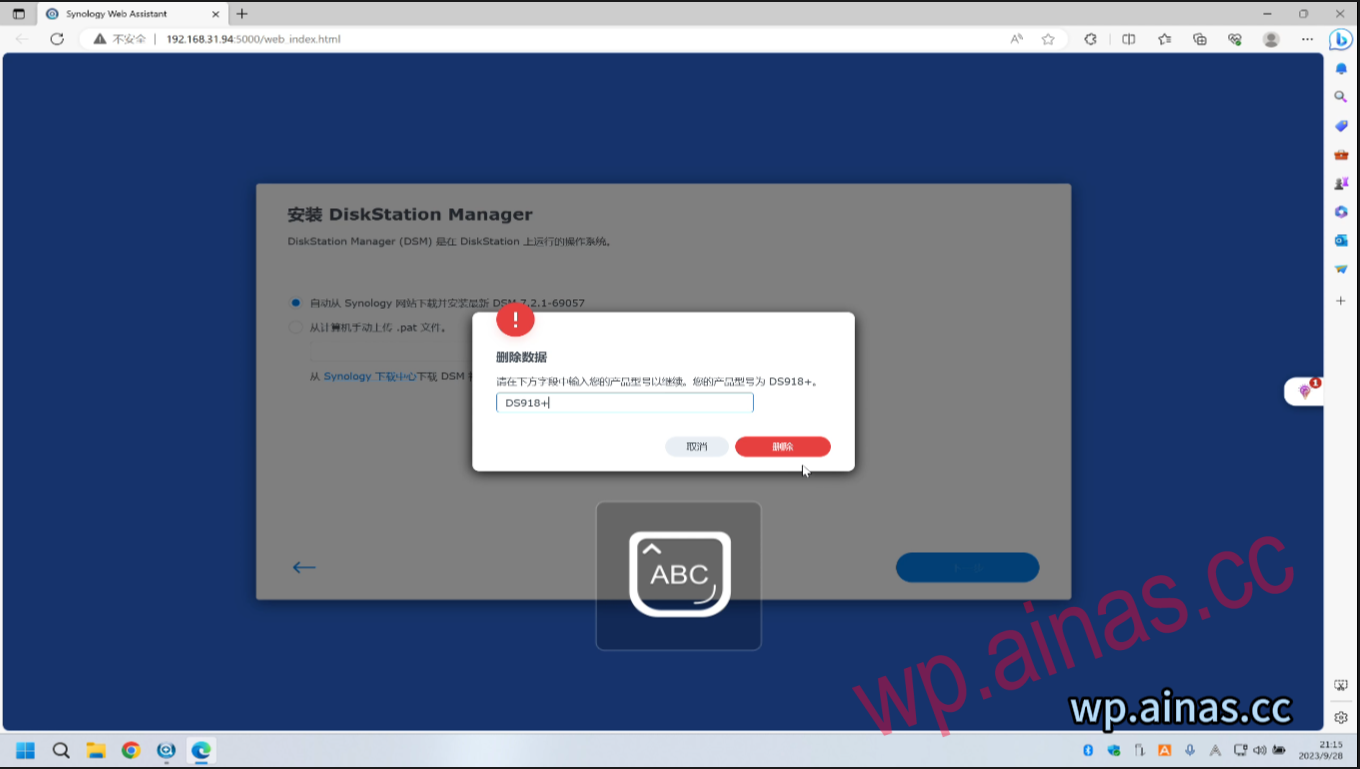
5. Enter the product model here. Mine is DS918+. After entering, click Delete.
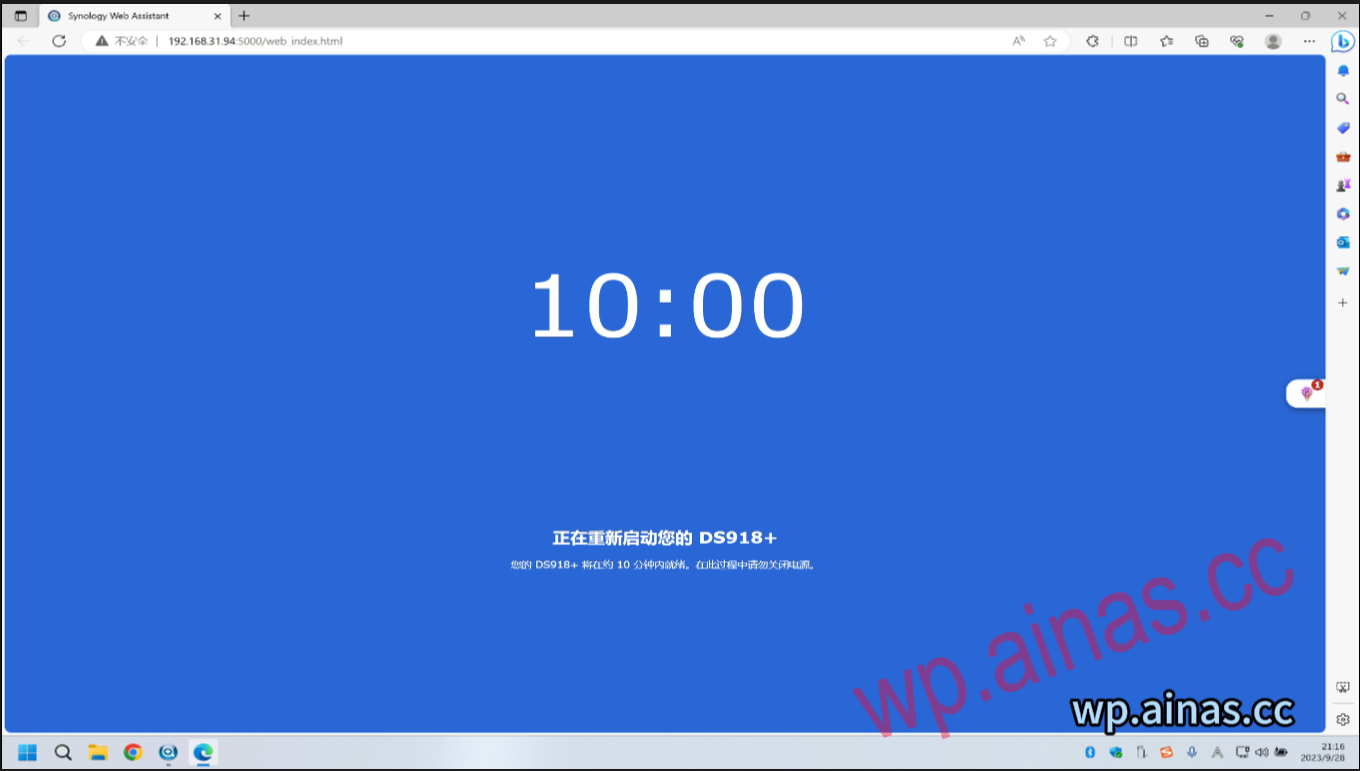
6. After clicking Delete, you will enter the Synology installation interface. After the installation is completed, Synology will automatically restart.
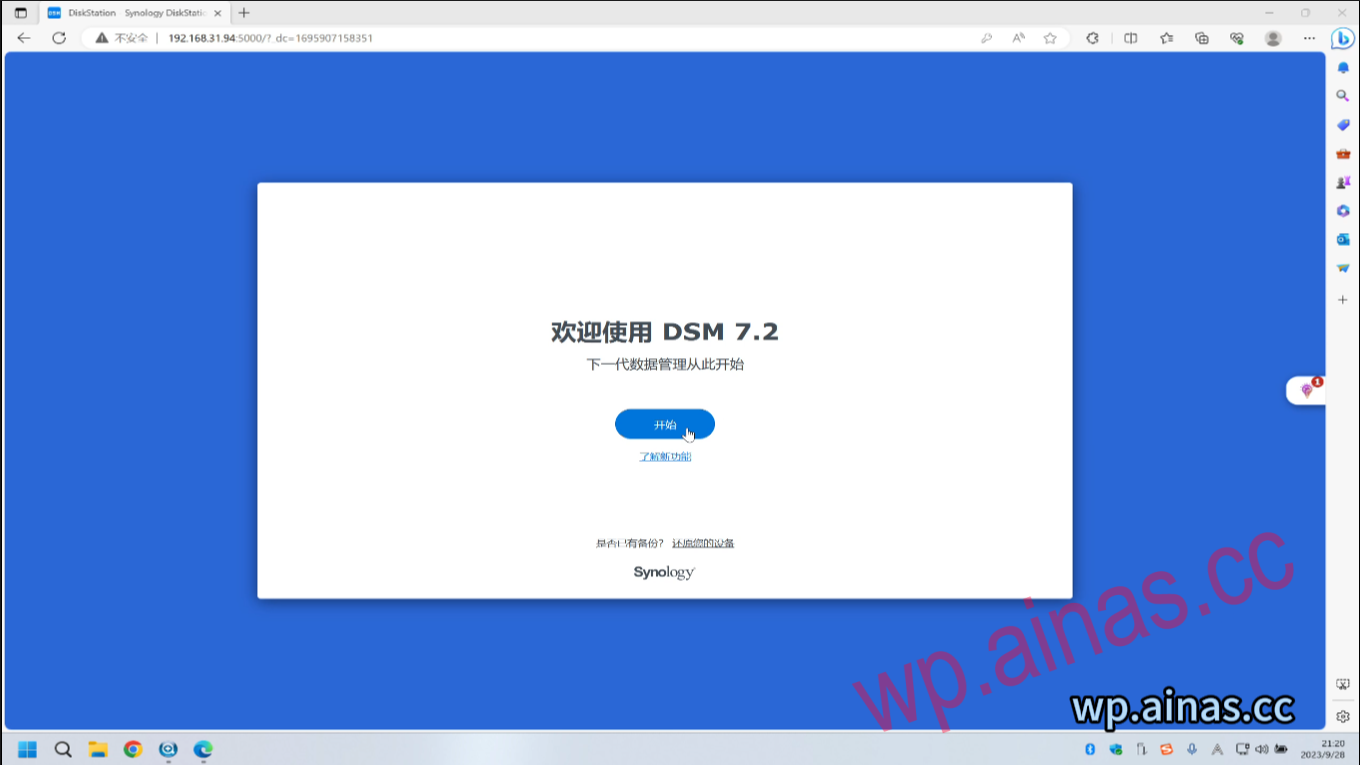
1. After restarting, it will take about 3-5 minutes. The specific time depends on the performance of Synology CPU. It will automatically enter the Synology account configuration interface. Click here to start.
2. Enter Synology’s server name, account number, and administrator password. Note that the server account requires a hard disk and does not support special symbols. The administrator account cannot use root or admin. The administrator password must be uppercase and lowercase, at least 8 characters, and cannot have duplicate parts with the administrator account.

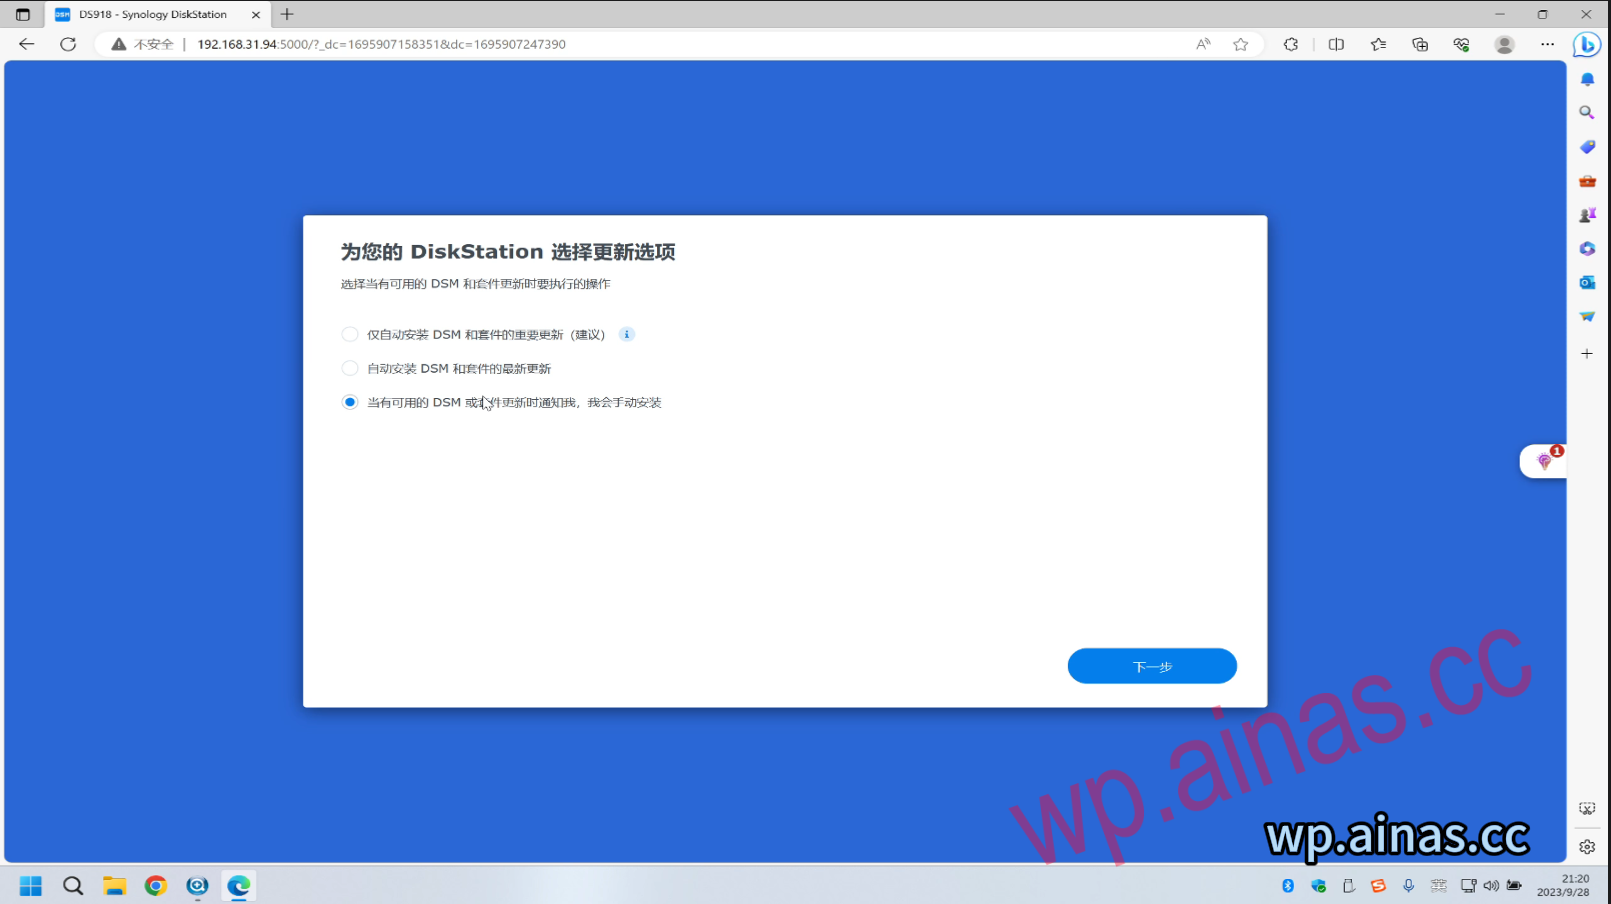
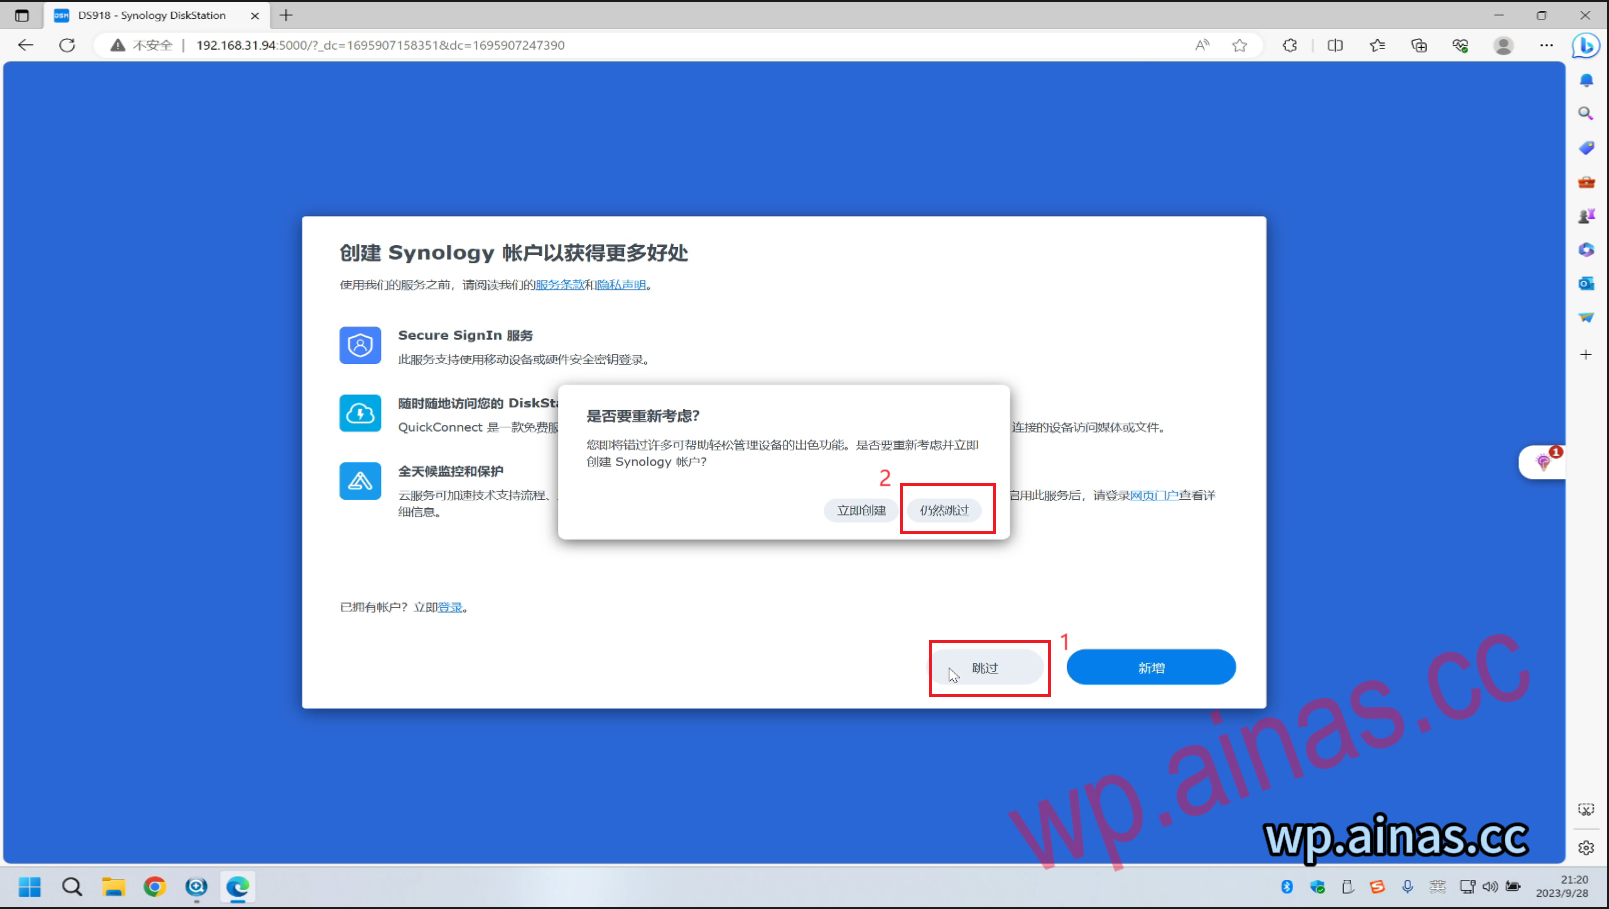
3. Select the third one and click Next
4. Skip – still skip
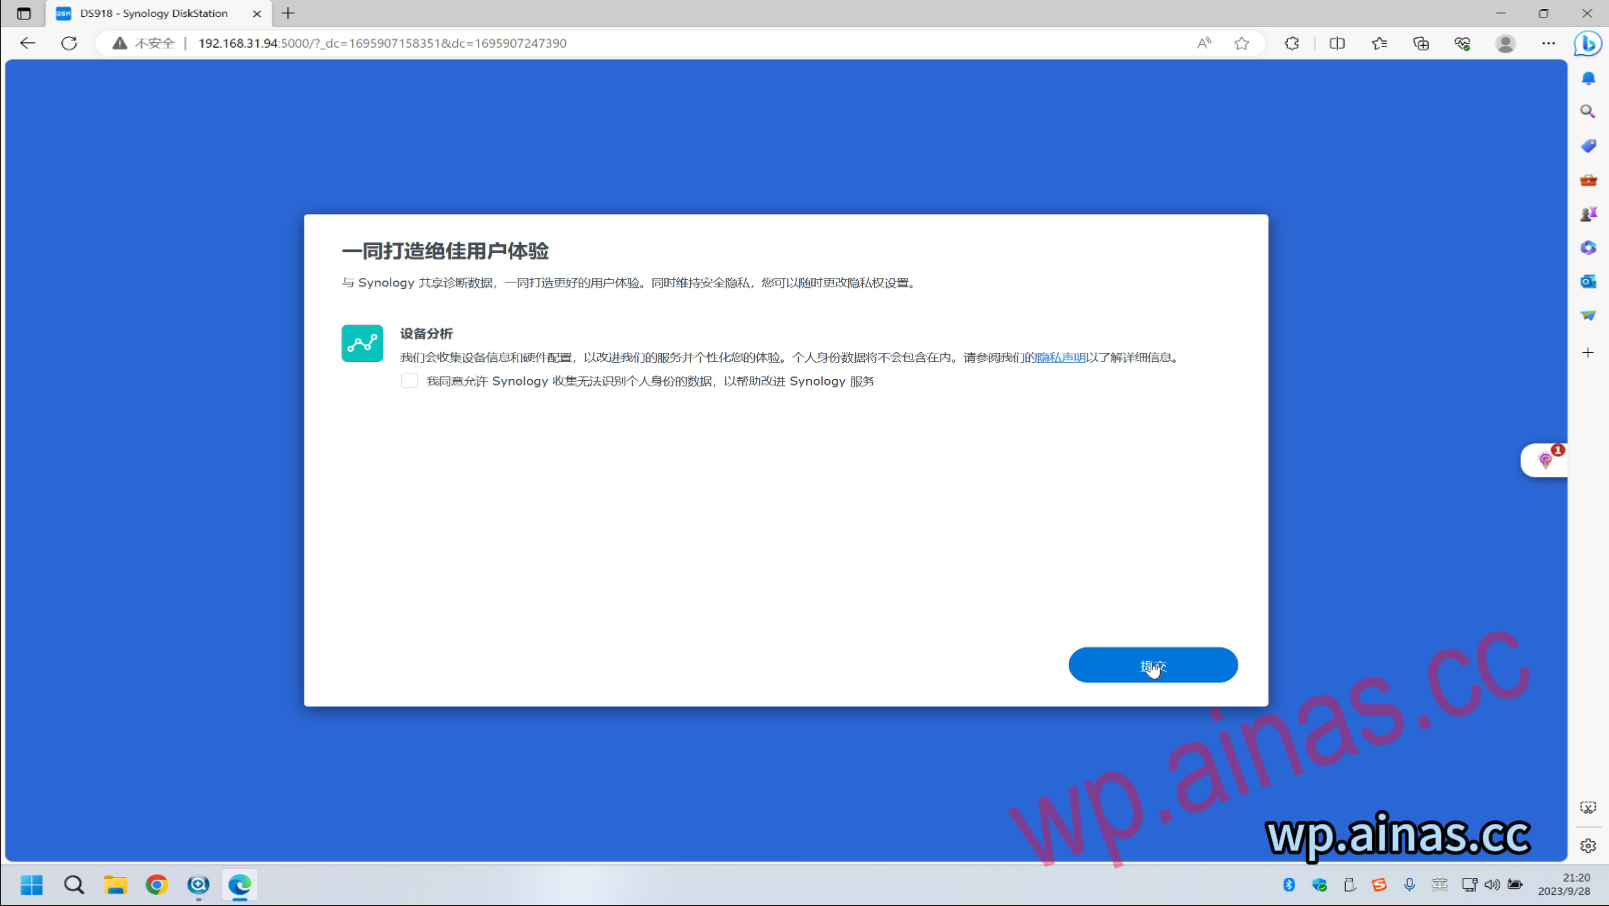
5. Click Submit
6. Operate according to your own needs. I click “No, thank you” here.
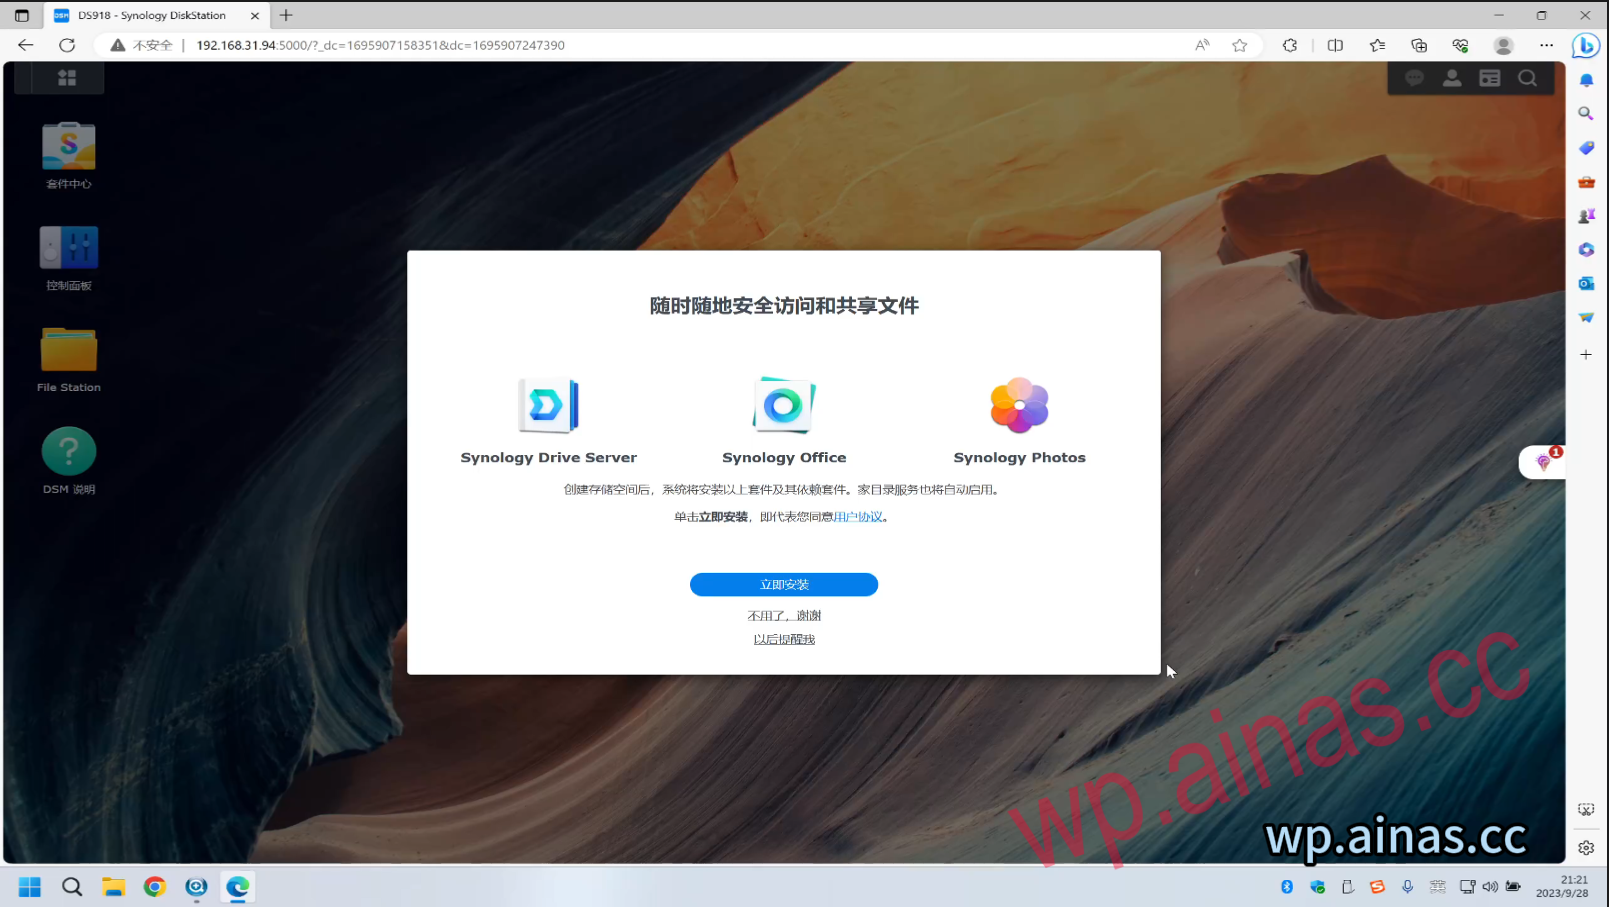
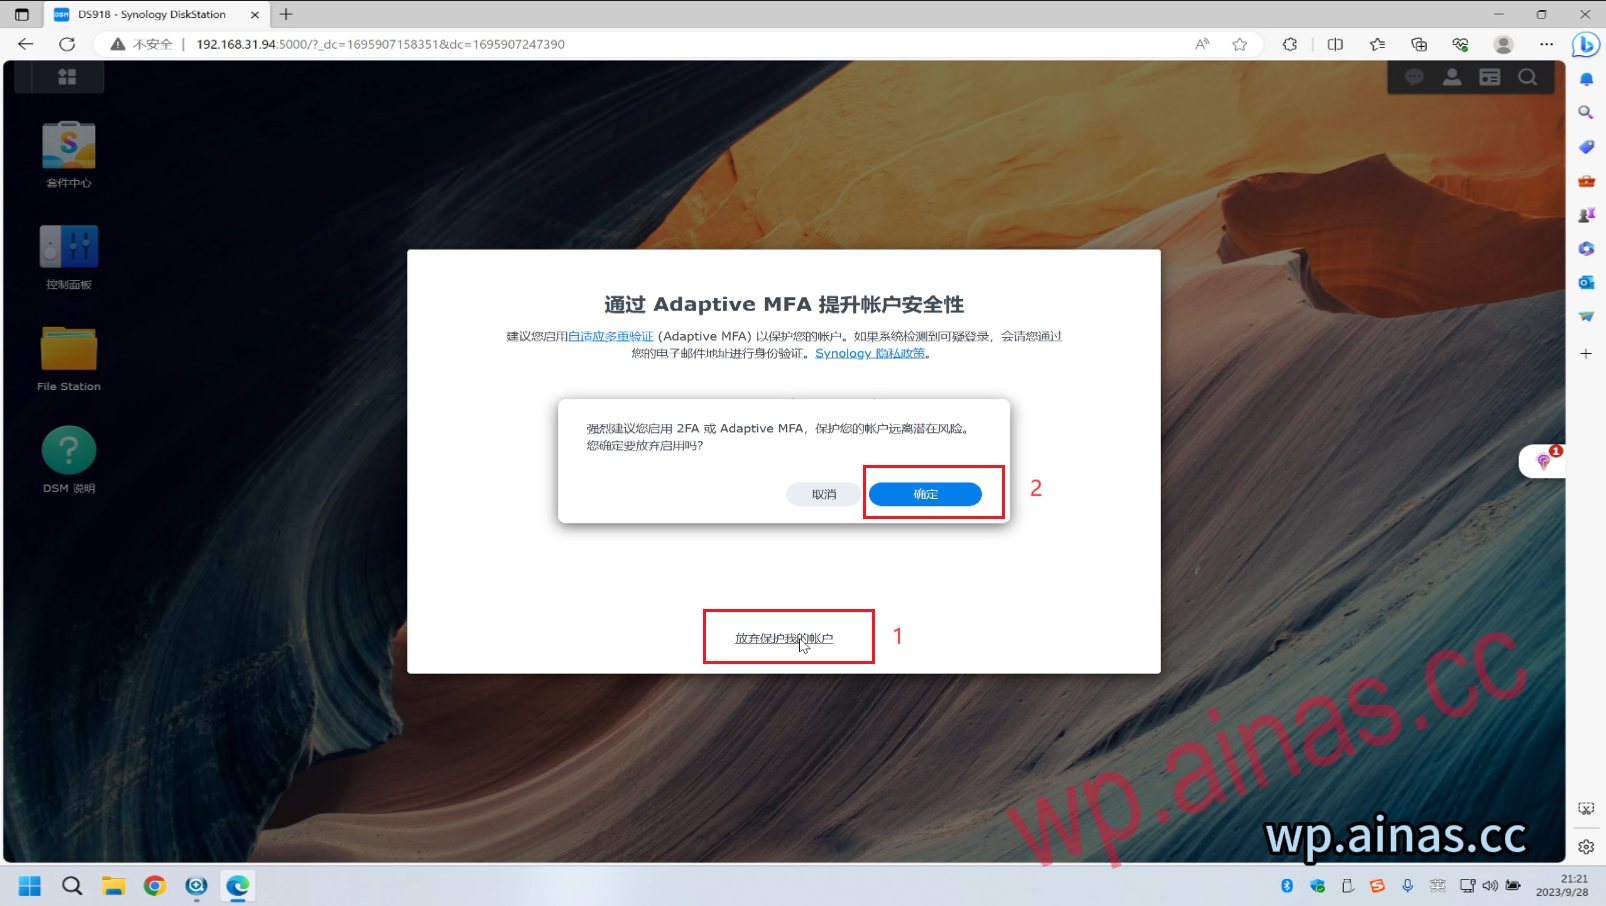
7. Click “No, thank you”
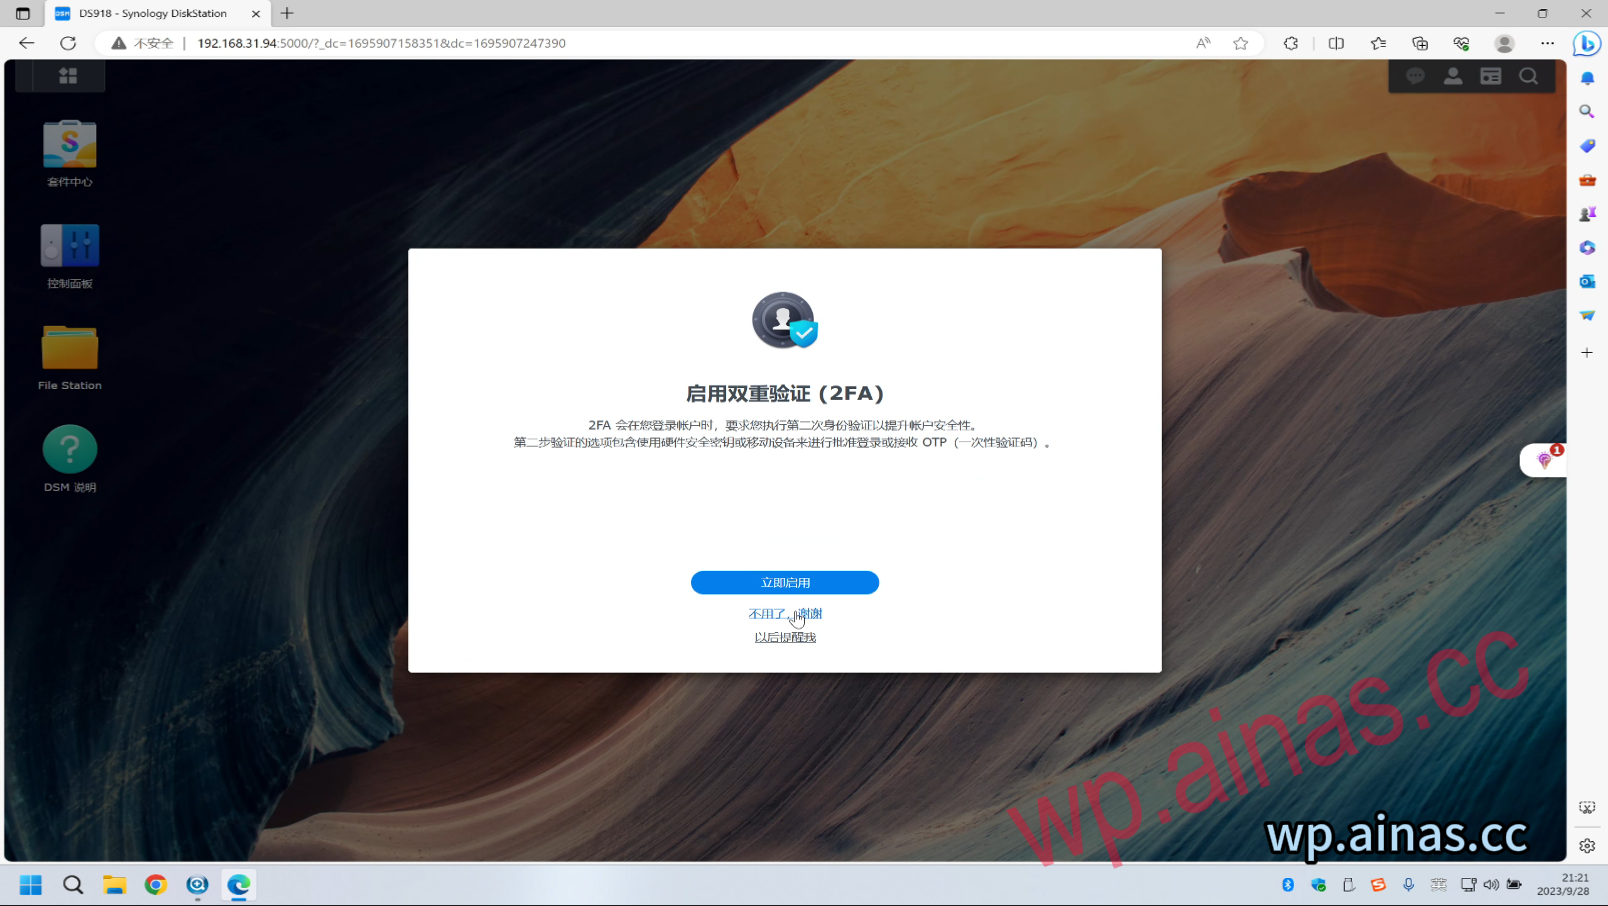
8. Click Give up protecting my account – OK
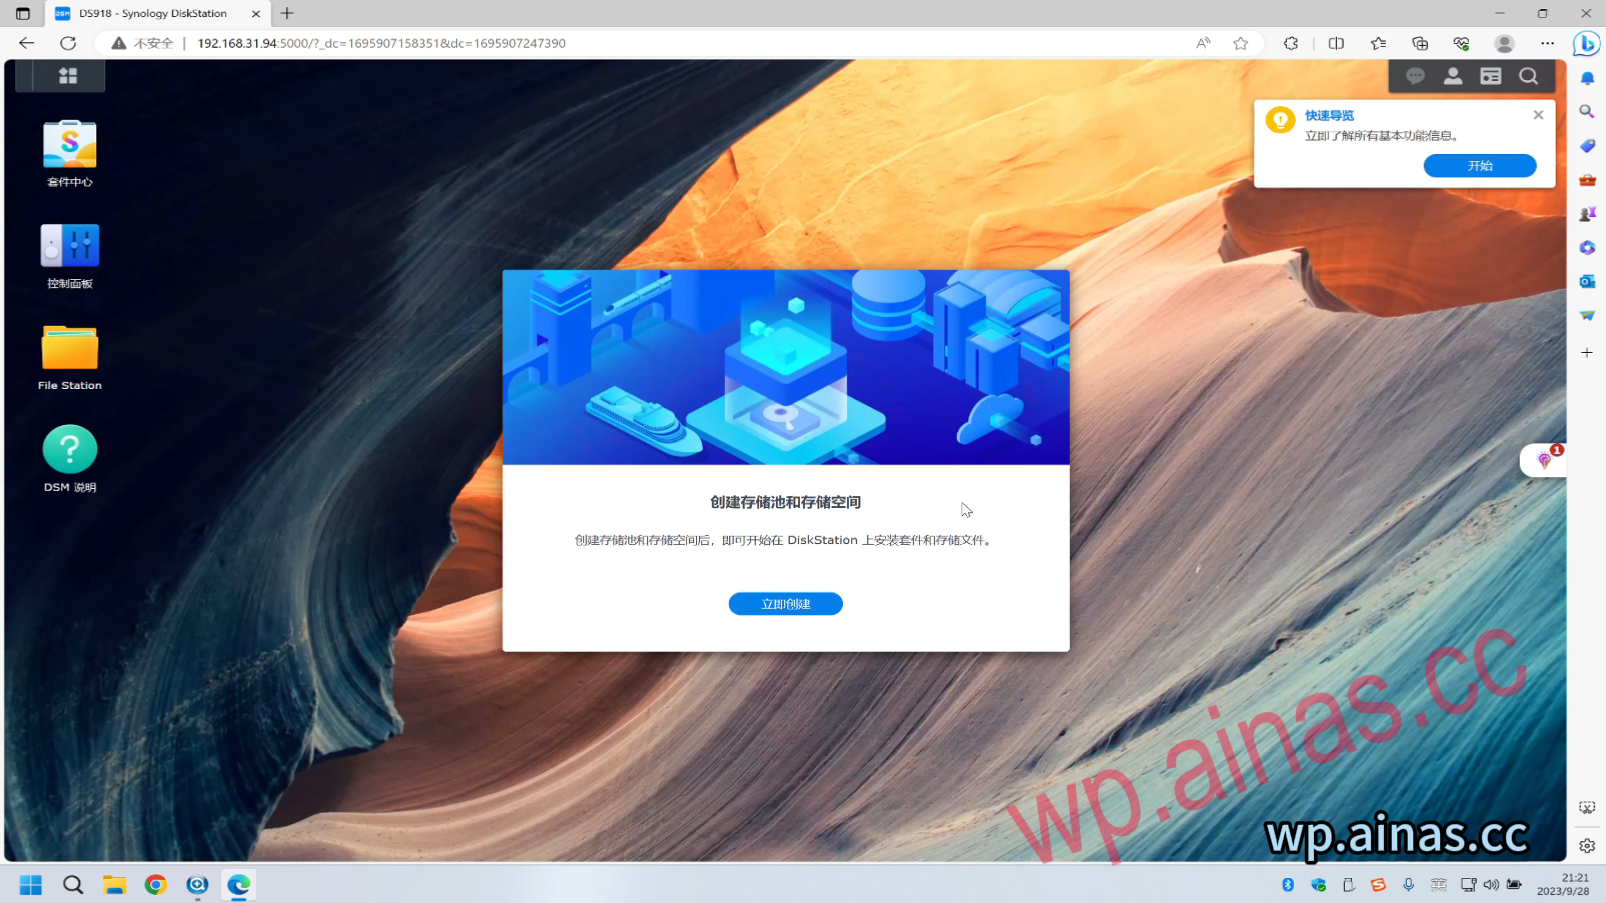
1. If the hard disk is empty, you will be prompted to create a storage pool and storage space. Click here to create it immediately.
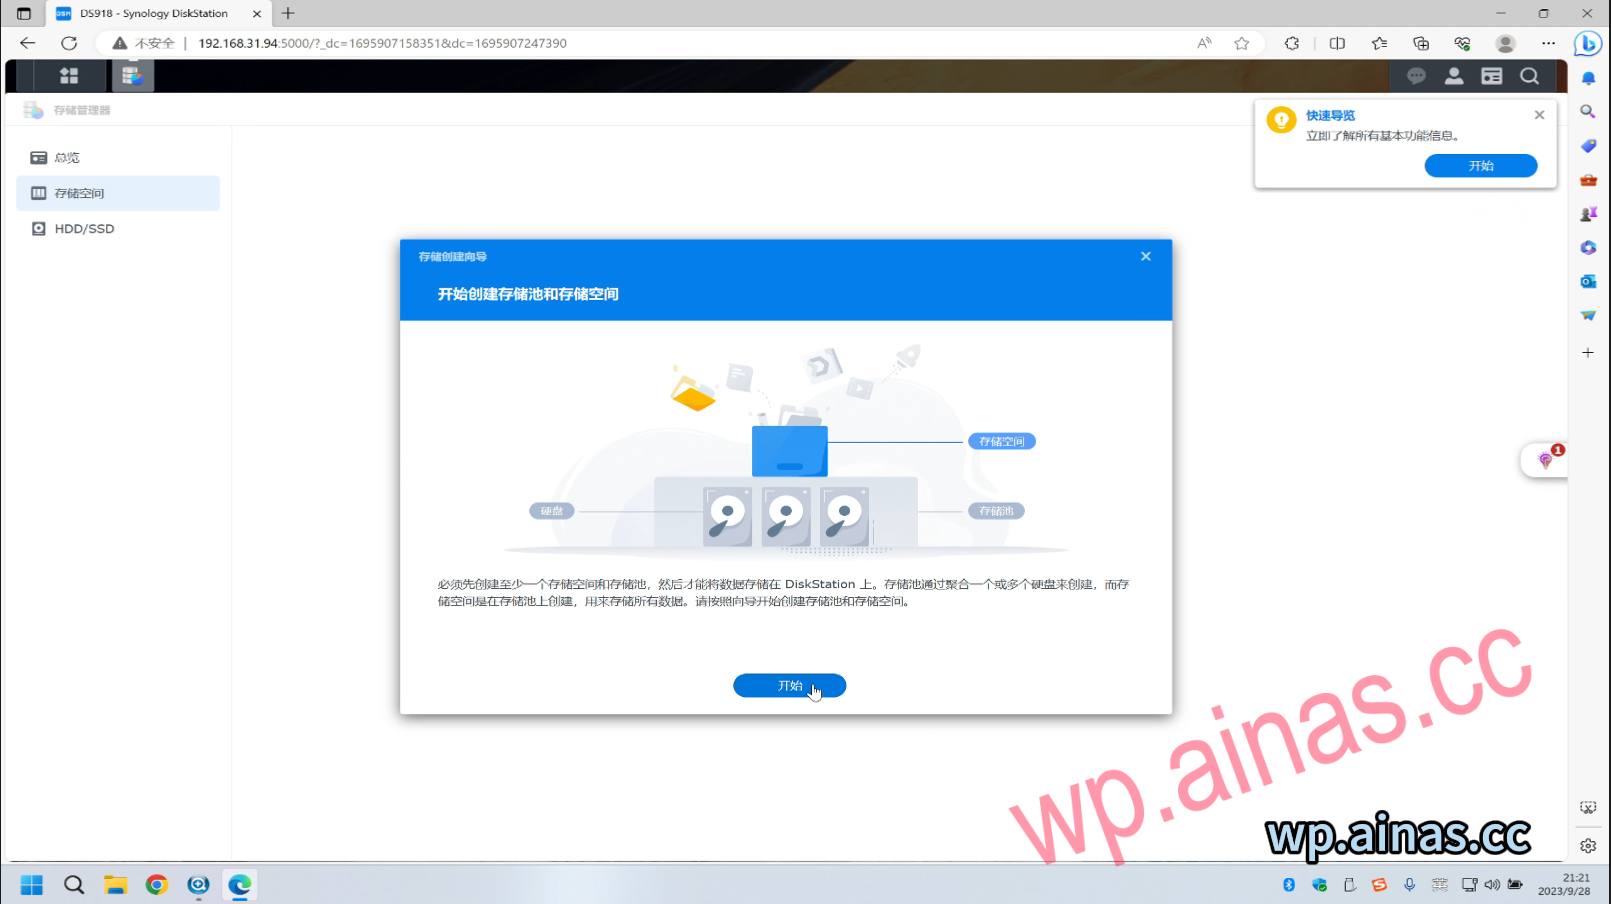
2. Click Start
3. Click Next and leave everything else as default.

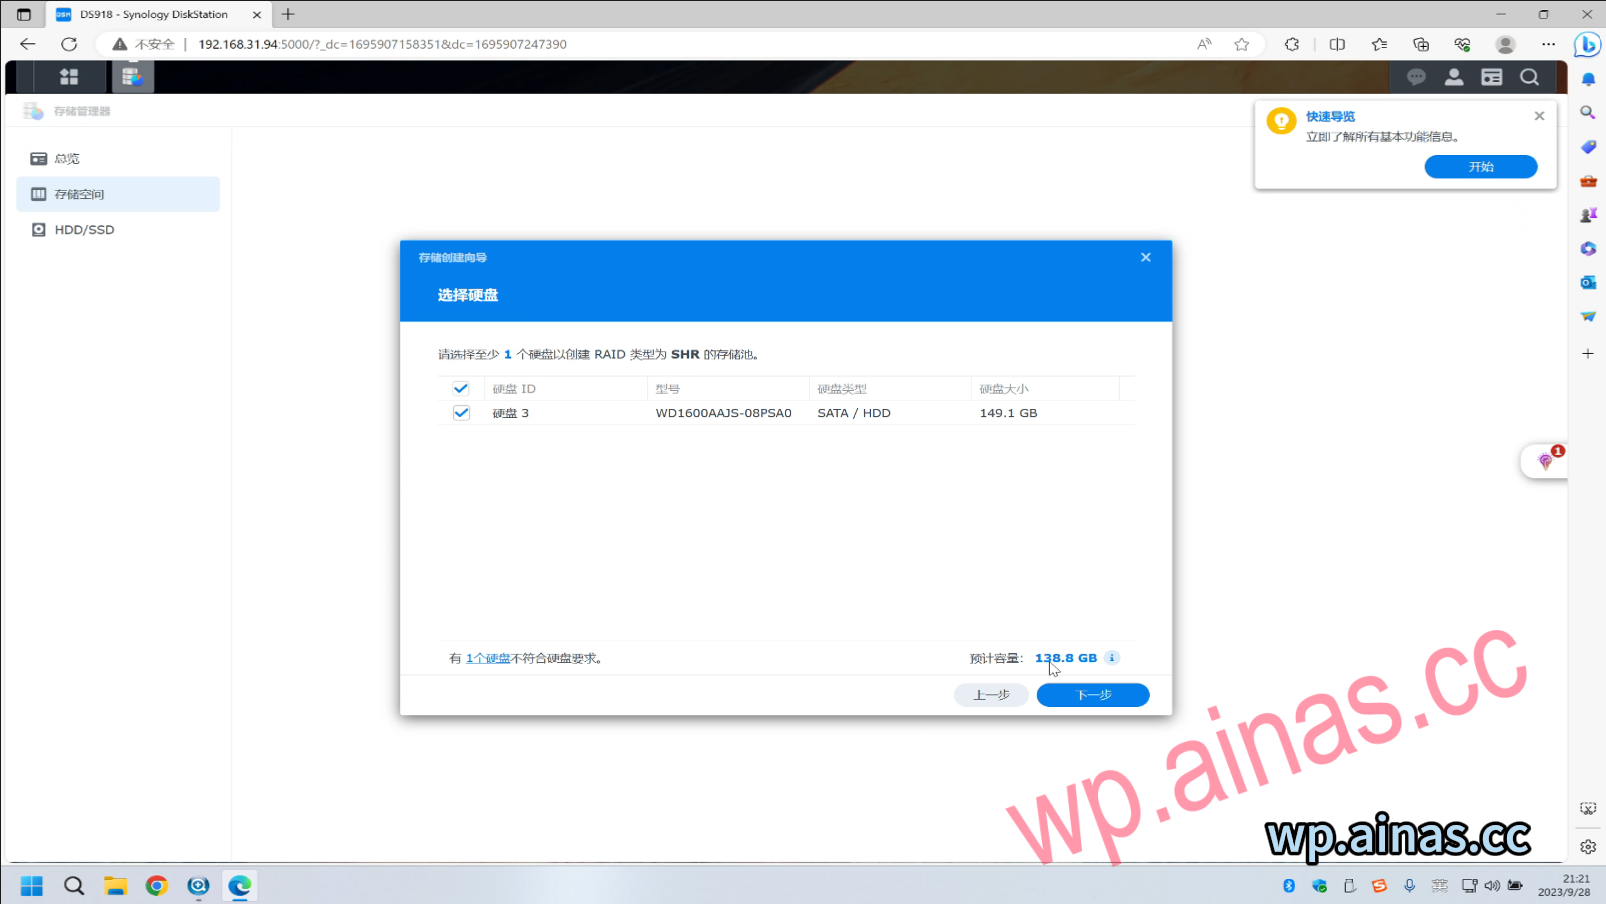
4. Select our hard drive and click Next
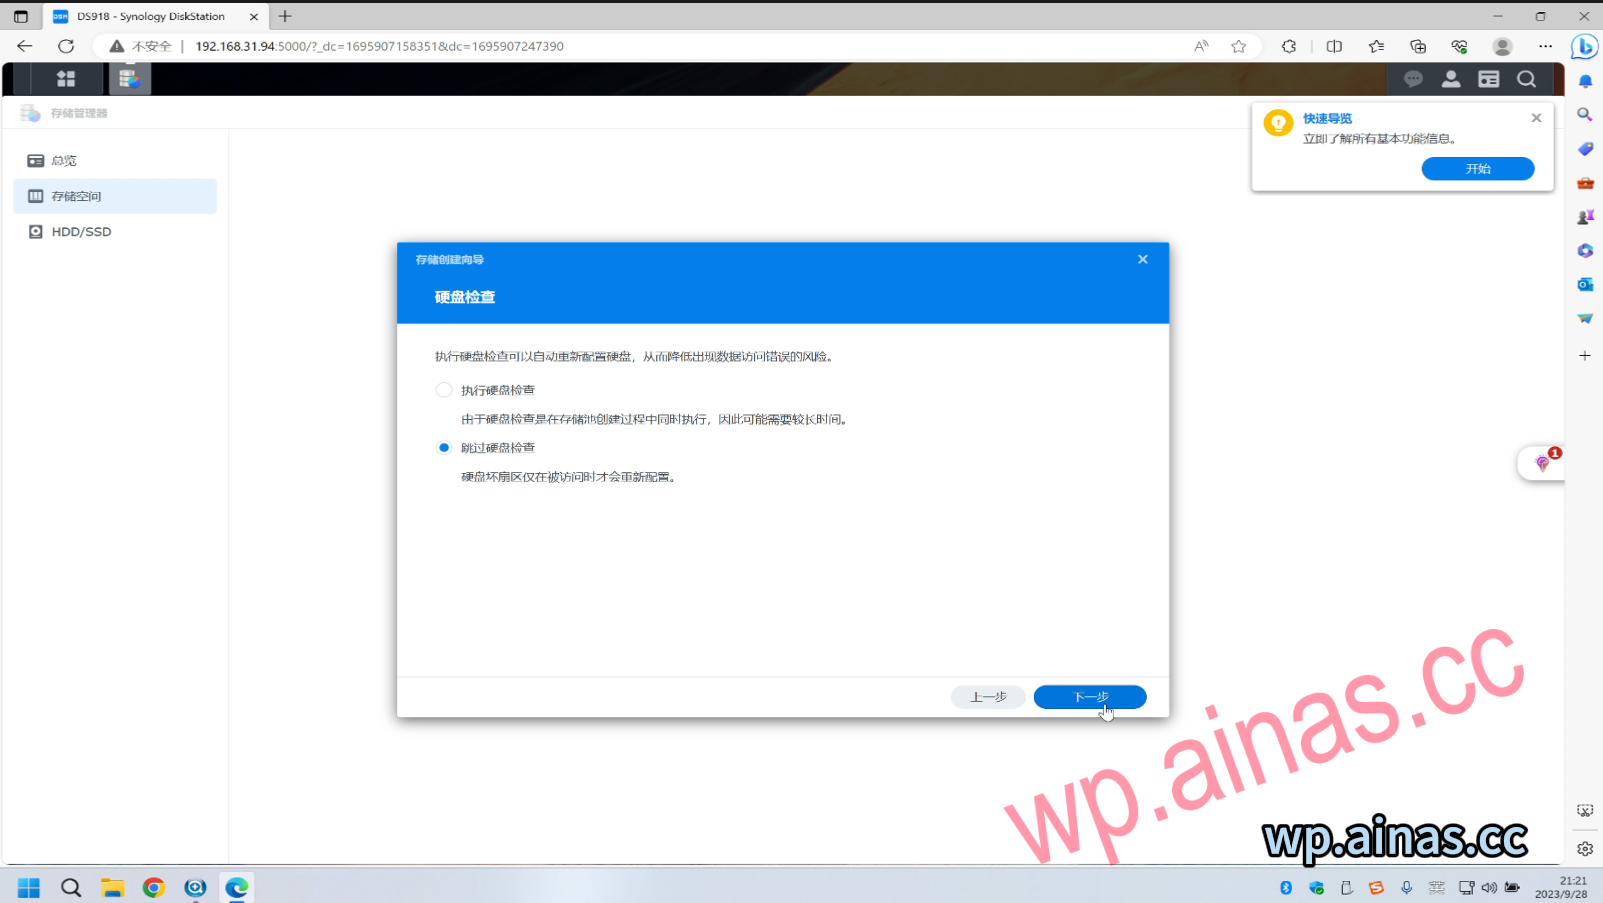
5. Skip disk check – next step
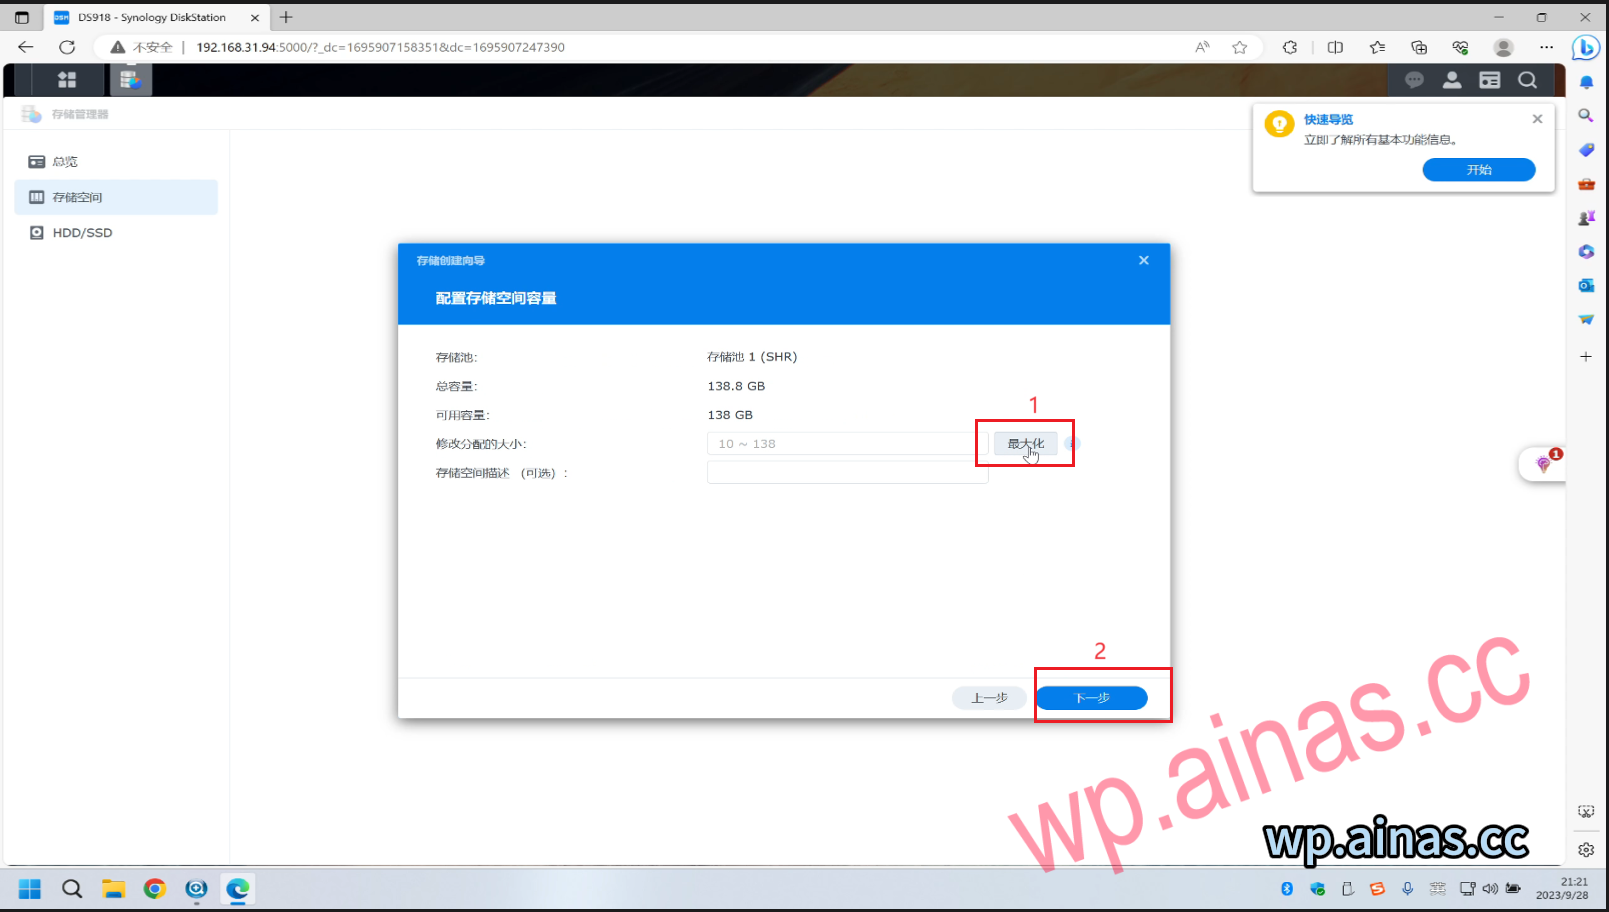
6. Select Maximize and then next step
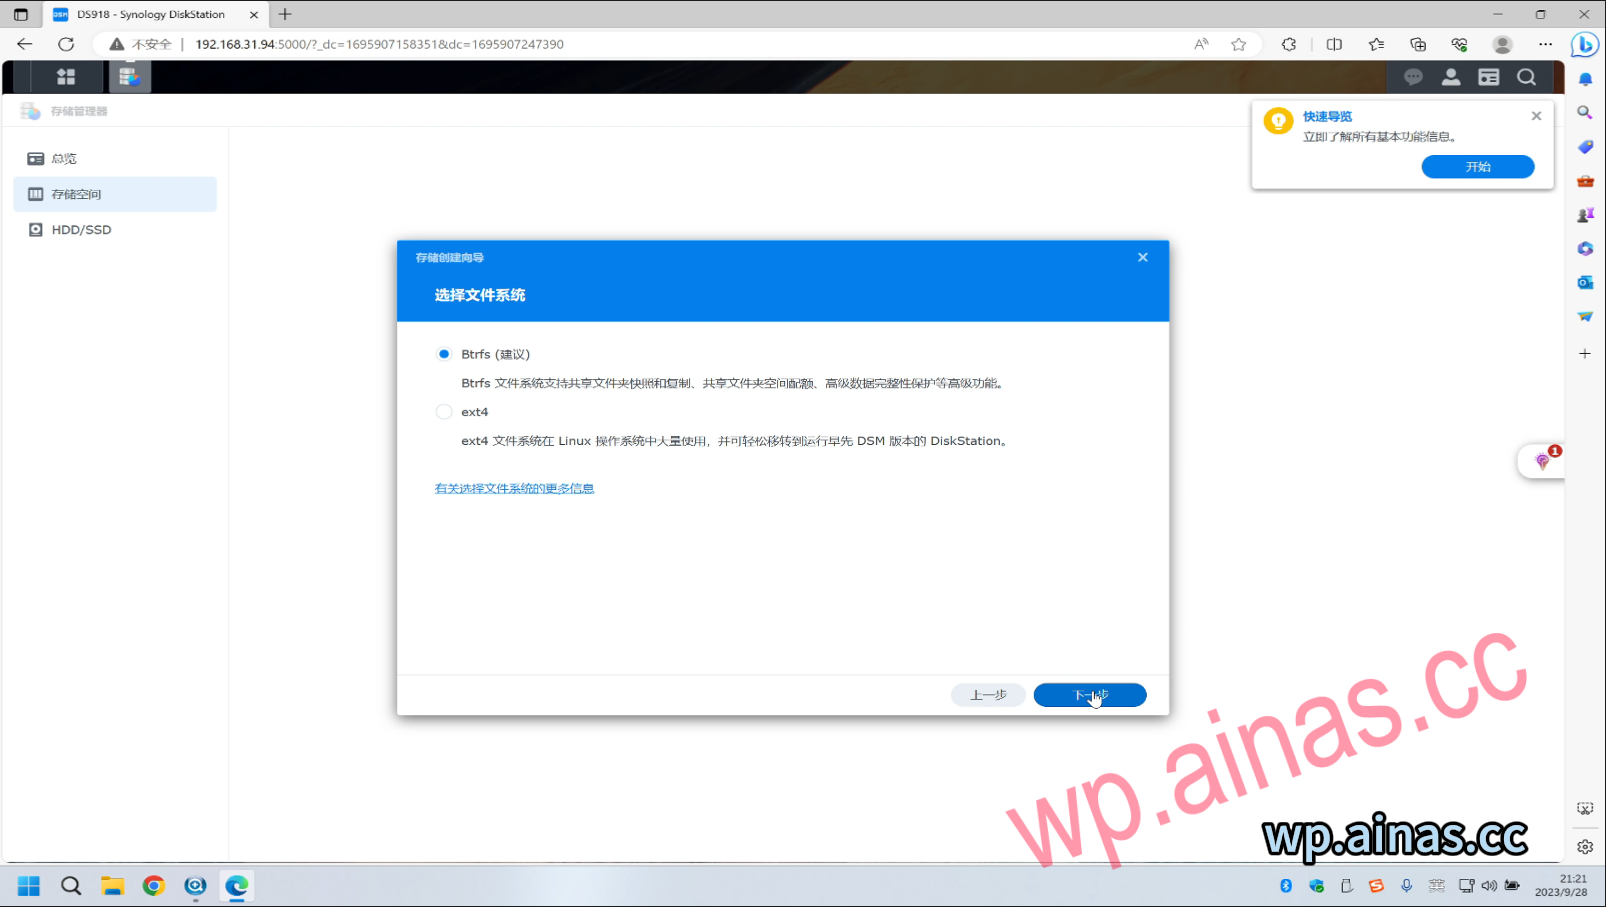
7. Leave it as default, click Next
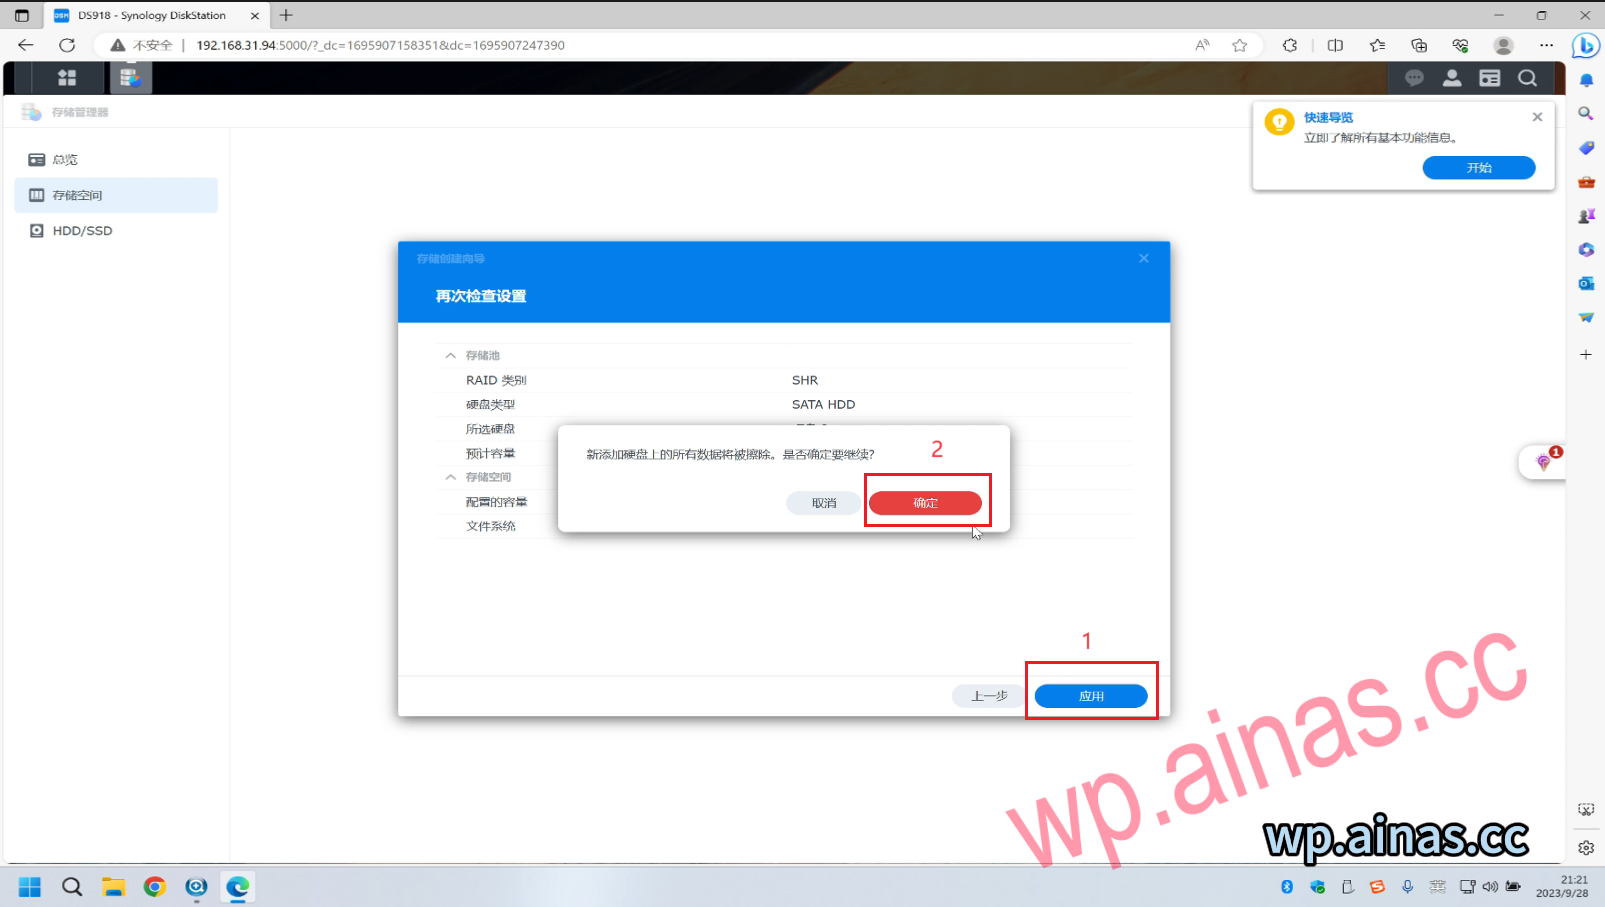
8. Click Apply-then OK
9. In this way, the storage space is created. If you need to transfer files over the LAN, you also need to enter the Control Panel – Shared Folder – New Shared Folder to transfer files within the LAN.