Our Location
304 North Cardinal St.
Dorchester Center, MA 02124

Since I bought a Synology NAS, I have been struggling with how to achieve quick access to the external network (Synology’s own QuickConnect can also achieve external network access, but the speed is too slow, even viewing photos requires turning in circles, and many functions cannot be used under QuickConnect). I have tried many tools such as peanut shells, but they are either too expensive or too cumbersome to configure, and the actual use experience is not good.
After using Zerotier for a period of time, I feel very good. It can be accessed from the outside without a real public IP. The initial configuration is simple, and it can be used continuously after the configuration is completed. It is fast and supports computers, mobile phones, and tablets. The key point is that it is free! free! free!
After the configuration is completed, you can achieve:
Let’s do it together, it’s very simple.
There is no Zerotier in the official package of Synology DSM7 version, so Zerotier needs to be installed in Docker.
Open Synology Docker, search for “zerotier” in the registry, select henrist/zerotier-one, right-click “Download this image”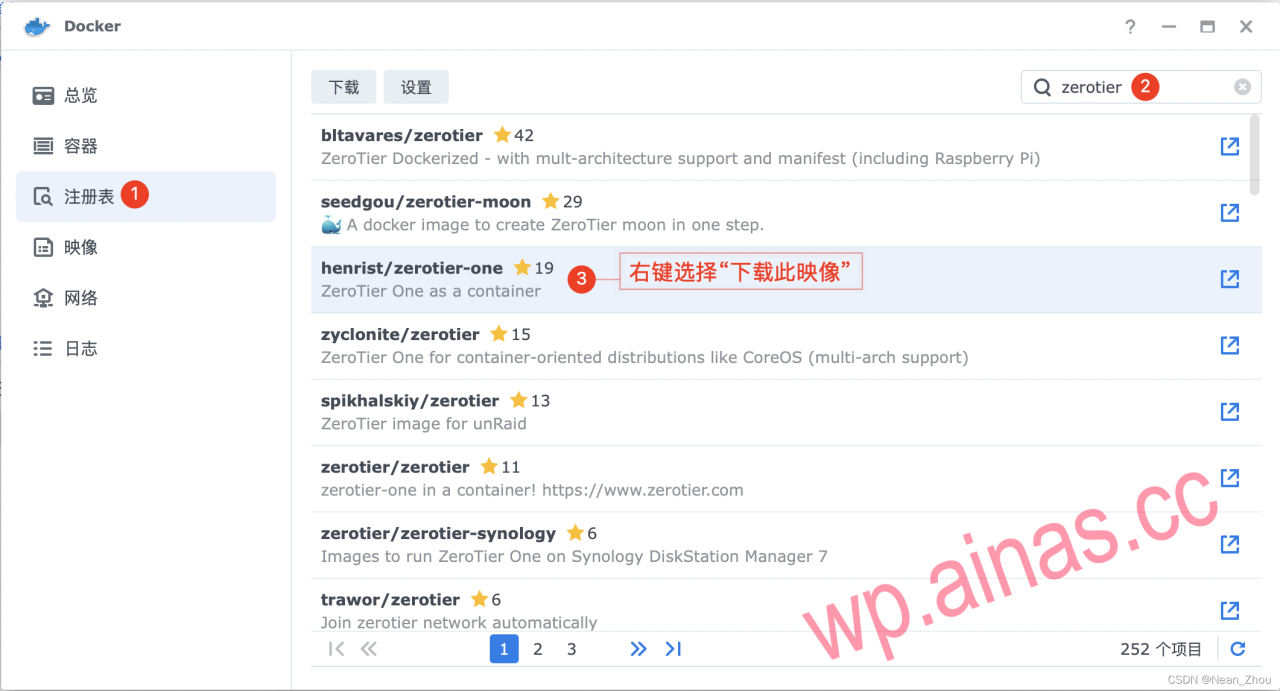
After the download is complete, double-click in “Image” to start henrist/zerotier-one.
In the general settings window, check“Execute container with high privileges”, then click“Advanced Settings”: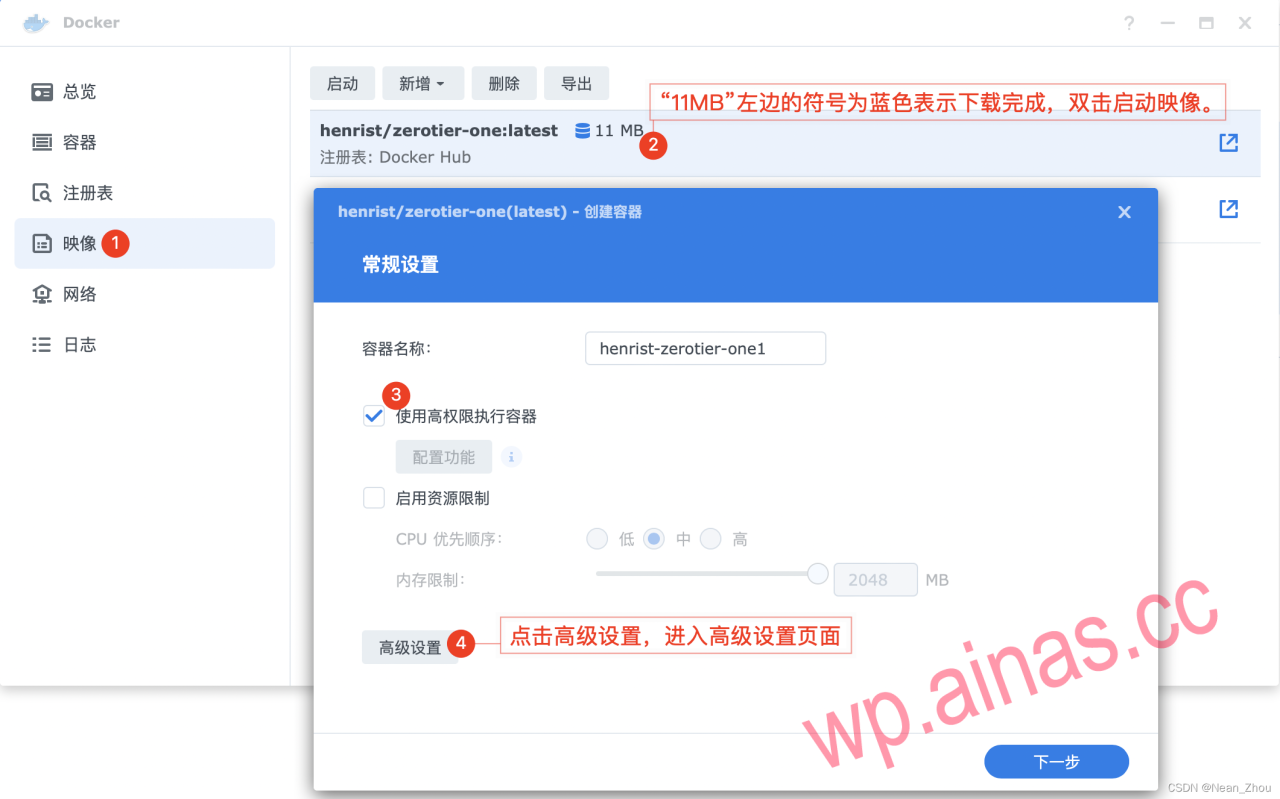
Advanced settings, only need to set three places:
(1) Advanced settings: Check “Start automatic restart”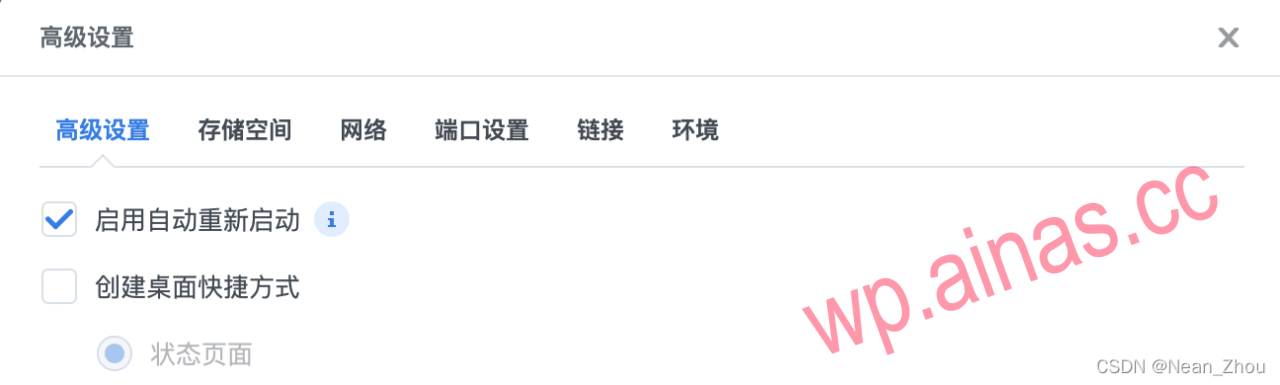
(2) Storage space: Set the folder to save software data. Click Add Folder, select the folder in Synology (here is docker/zerotier), and then fill in the “Mount Path”/var/lib/zerotier-one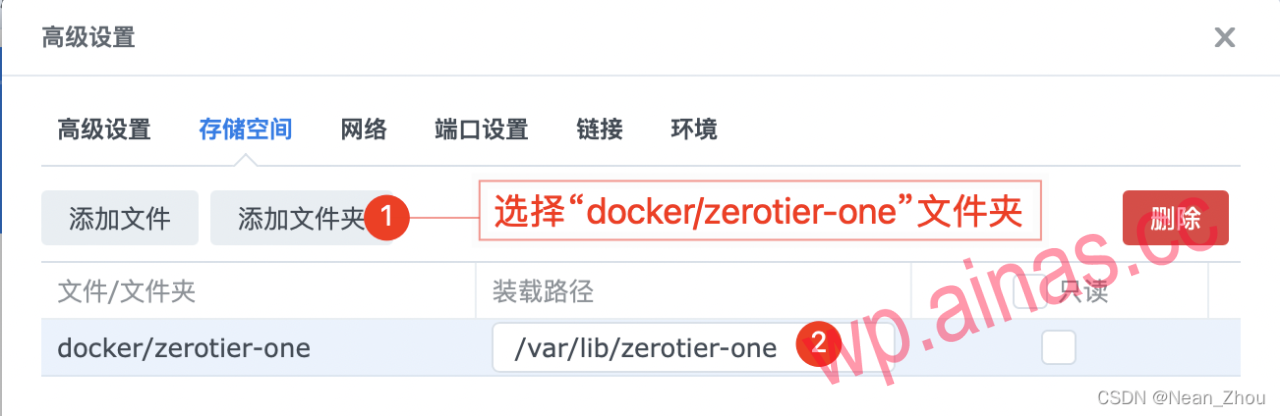
(3) Network: Check“Use the same network as Docker Host”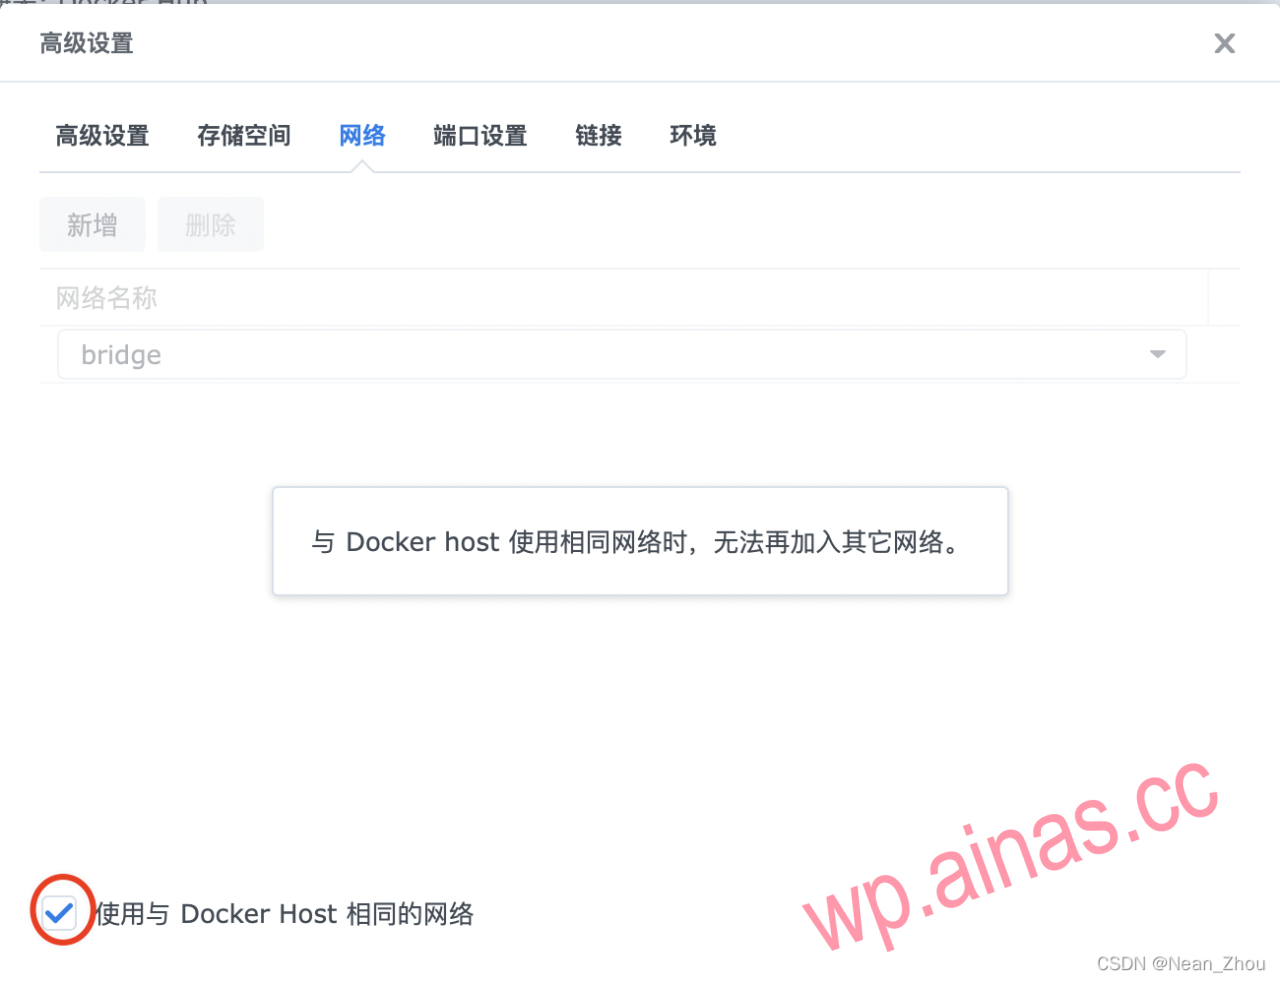
(4) Finally, click“application”, Zerotier is already running in the background.
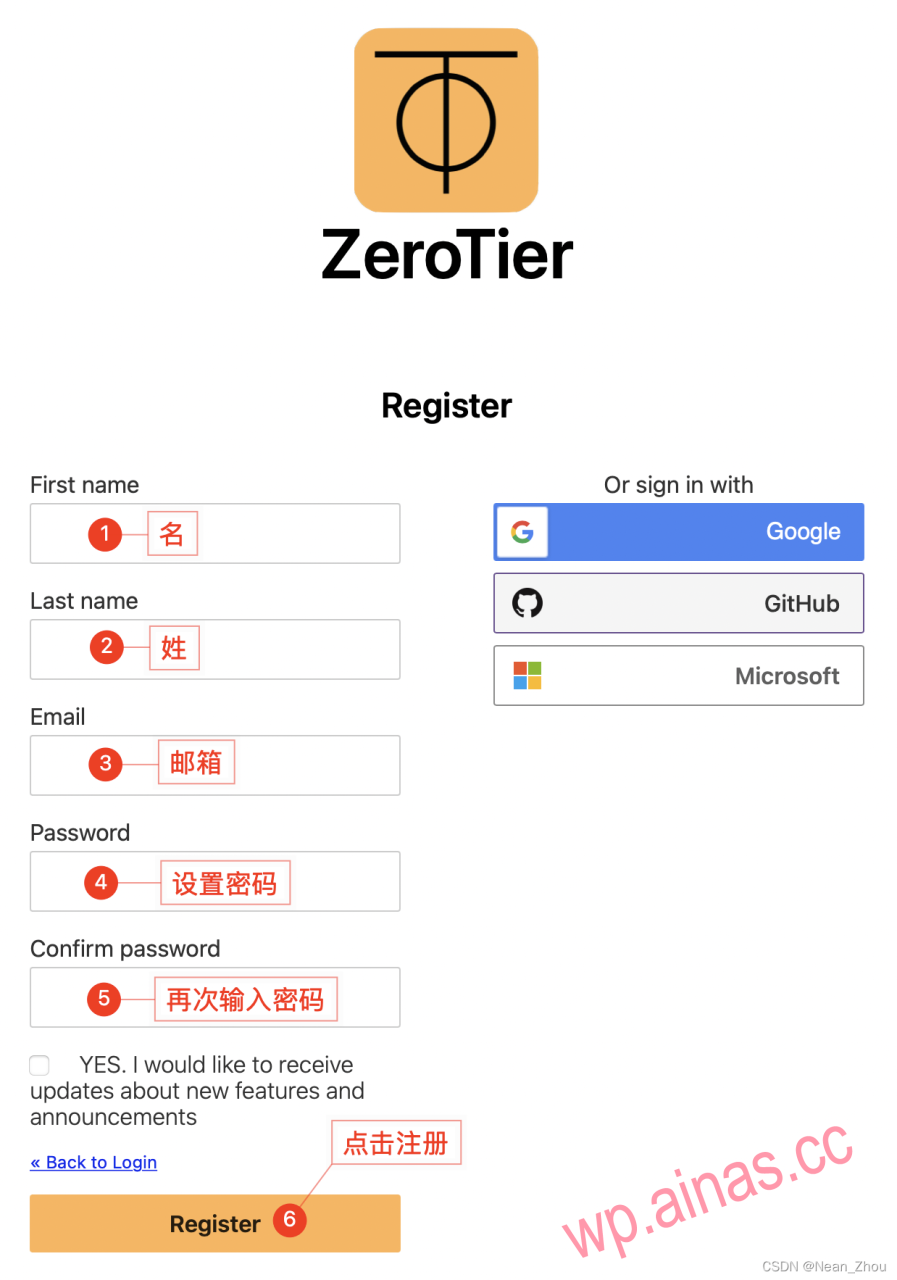
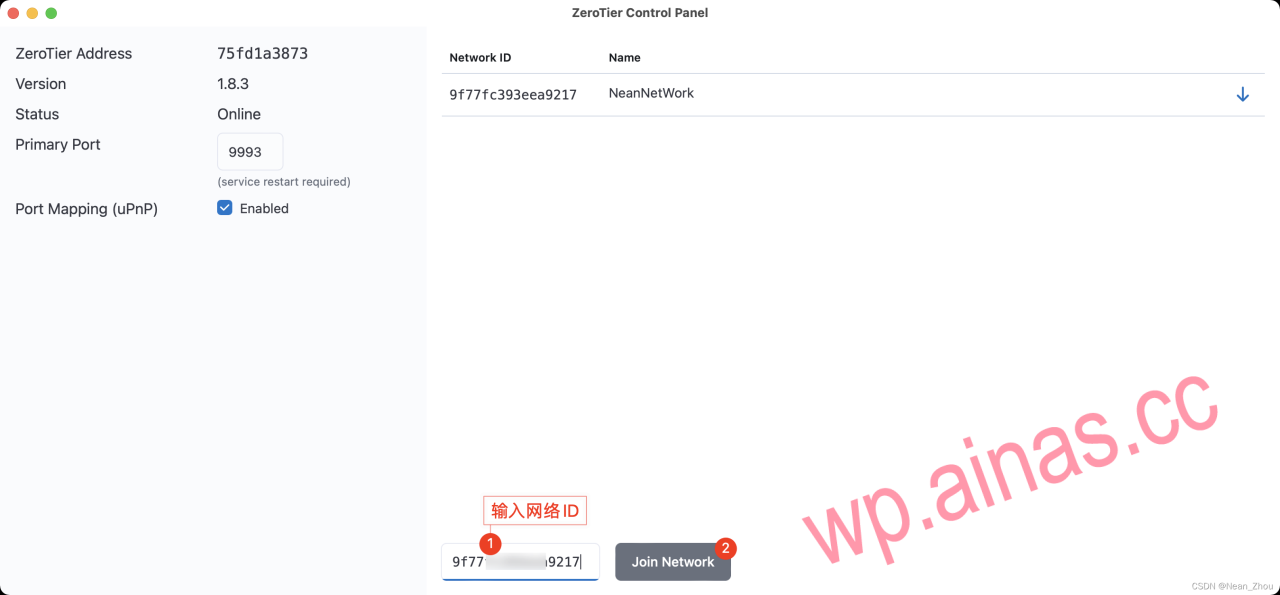
Open the Zerotier official website and click“Sign Up”Register an account. If you already have an account, you can click“Log in”Log in.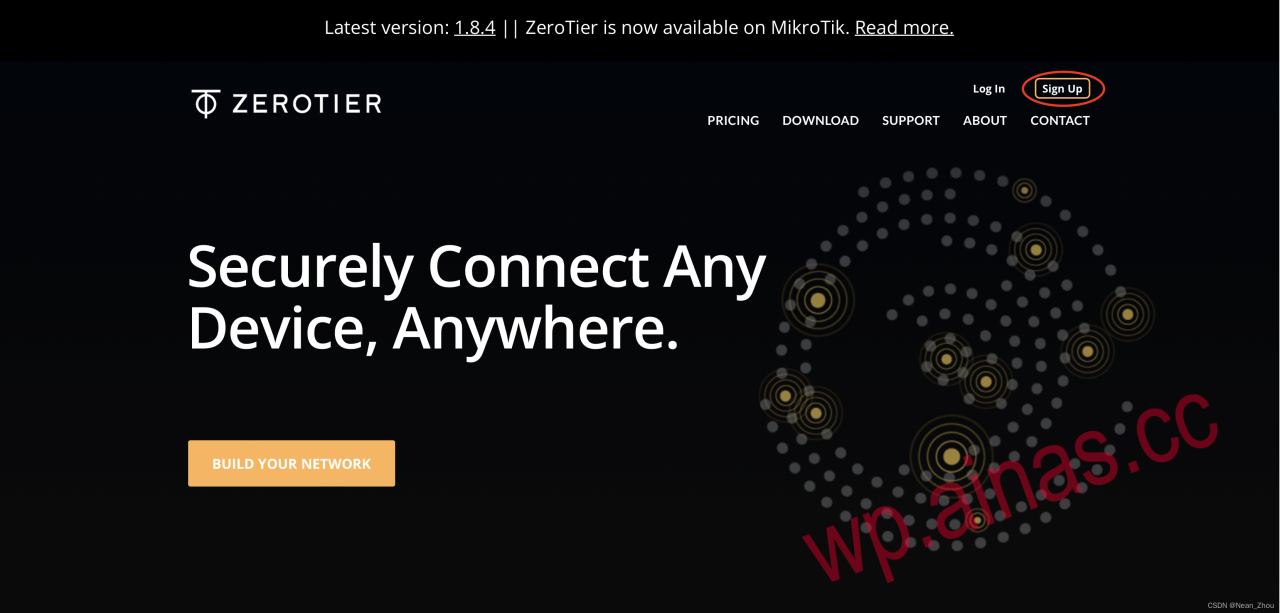
After successful registration or login, click“Create A Network”Create a network. Click on the created“Network ID”Enter the management interface.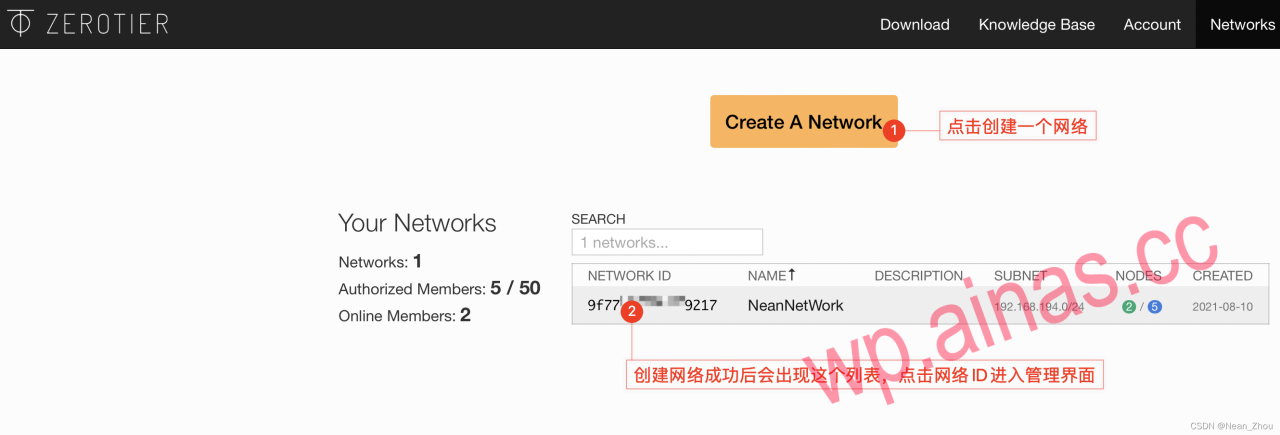
The basic settings are as shown in the figure: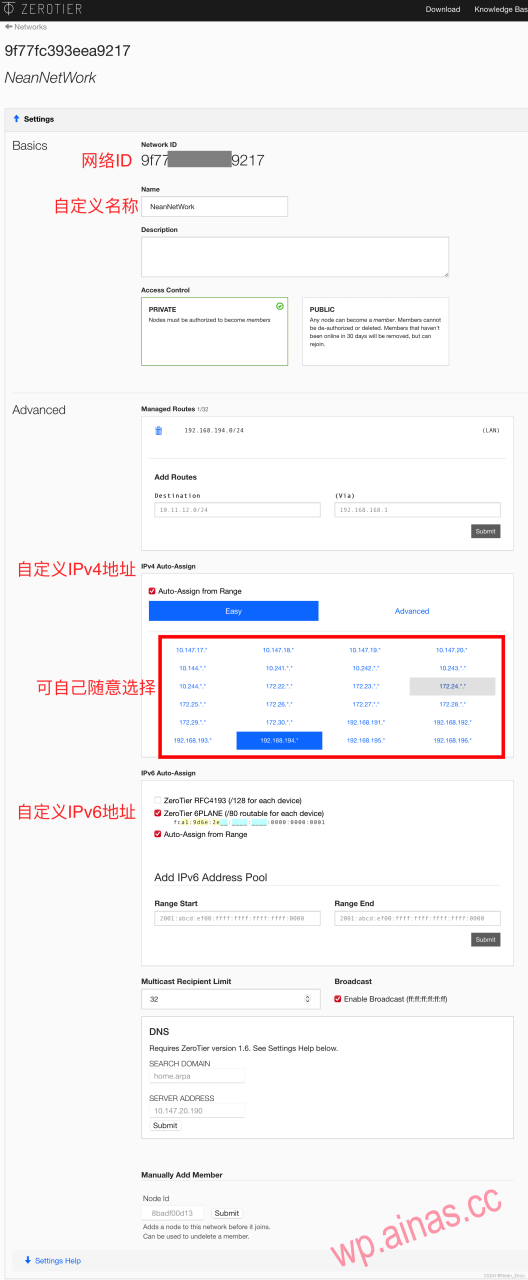
Once the settings are complete, there is no need to close the webpage for now, as you will need it later.
1. Open Synology “Docker” and selectcontainerDouble-click henrist/zerotier-one to open it.
choose“Terminal”,exist“New”Click in the small triangle next to“Start via command”,enterash, click OK.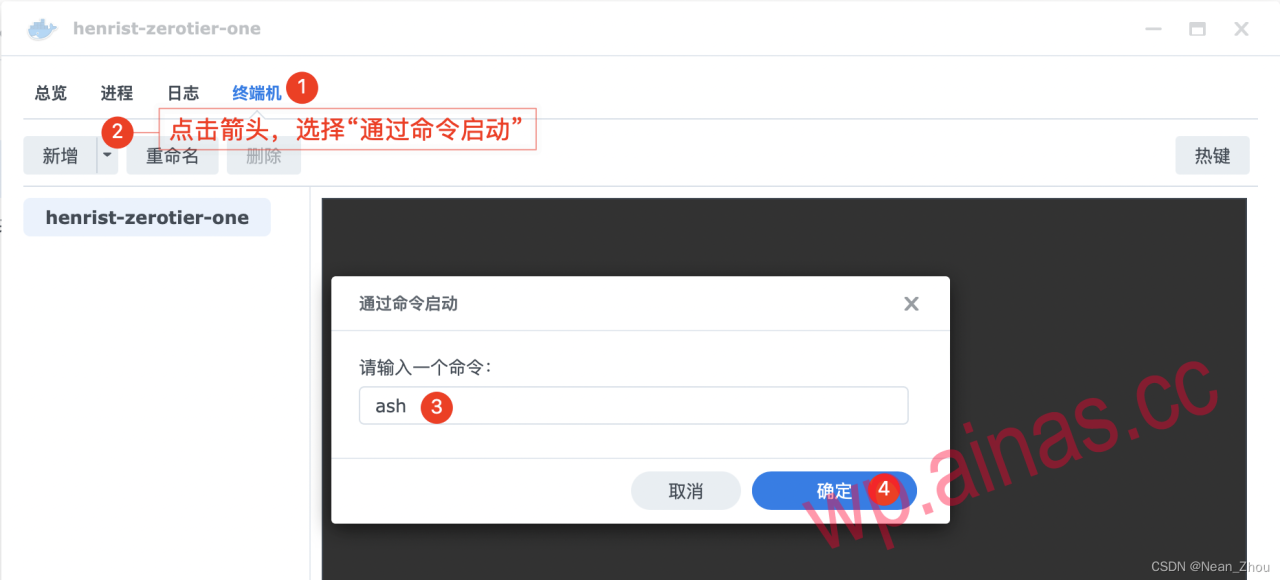
3. Click generated“ash”Command, enter in the black box on the right/ # zerotier-cli join network ID, and press Enter. 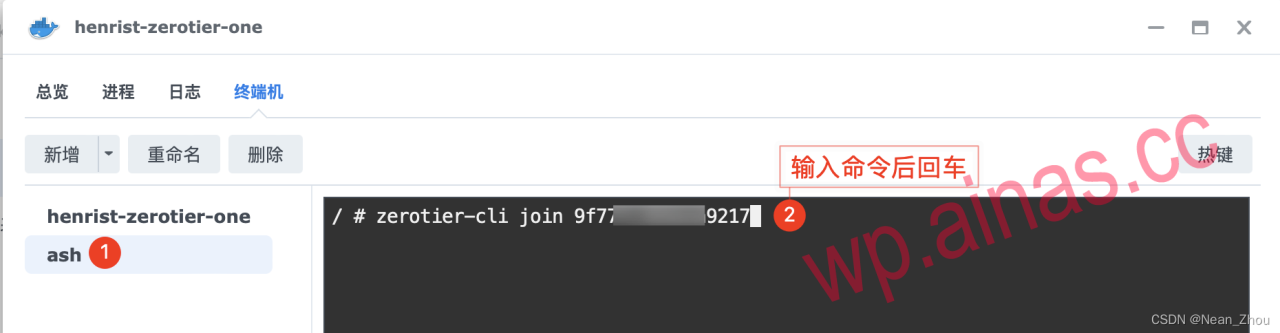
4. Appear200 join OKThe word indicates success.
The Zerotier Apple app does not support downloading with domestic accounts. You can find a free US account online and log in to the App Store to download and use it (free US Apple ID reference). After installation, just enter the network ID to join.
Open the Zerotier backend management website and scroll to the bottom of the page“Members”In one column, you can see the list of devices applying to join the network. Check in front of the device to agree to the device joining the network.
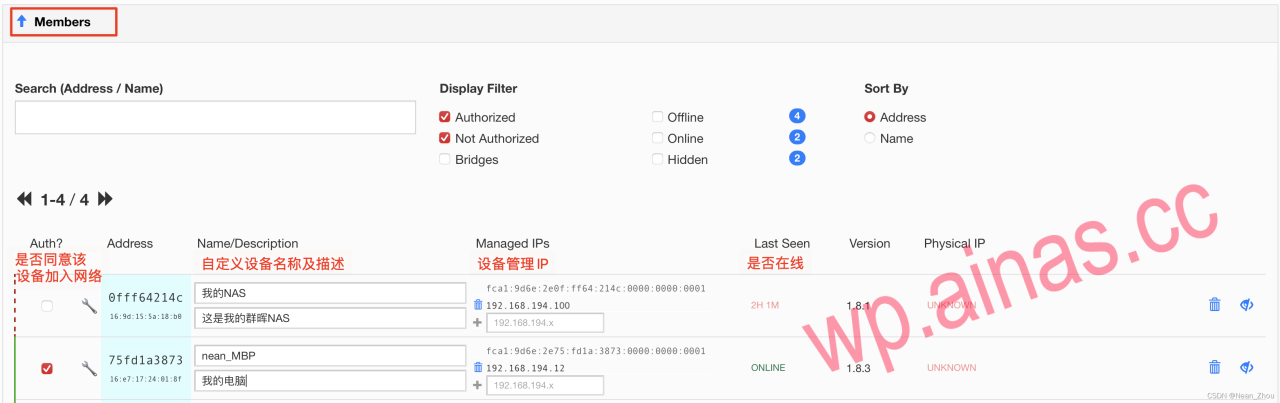
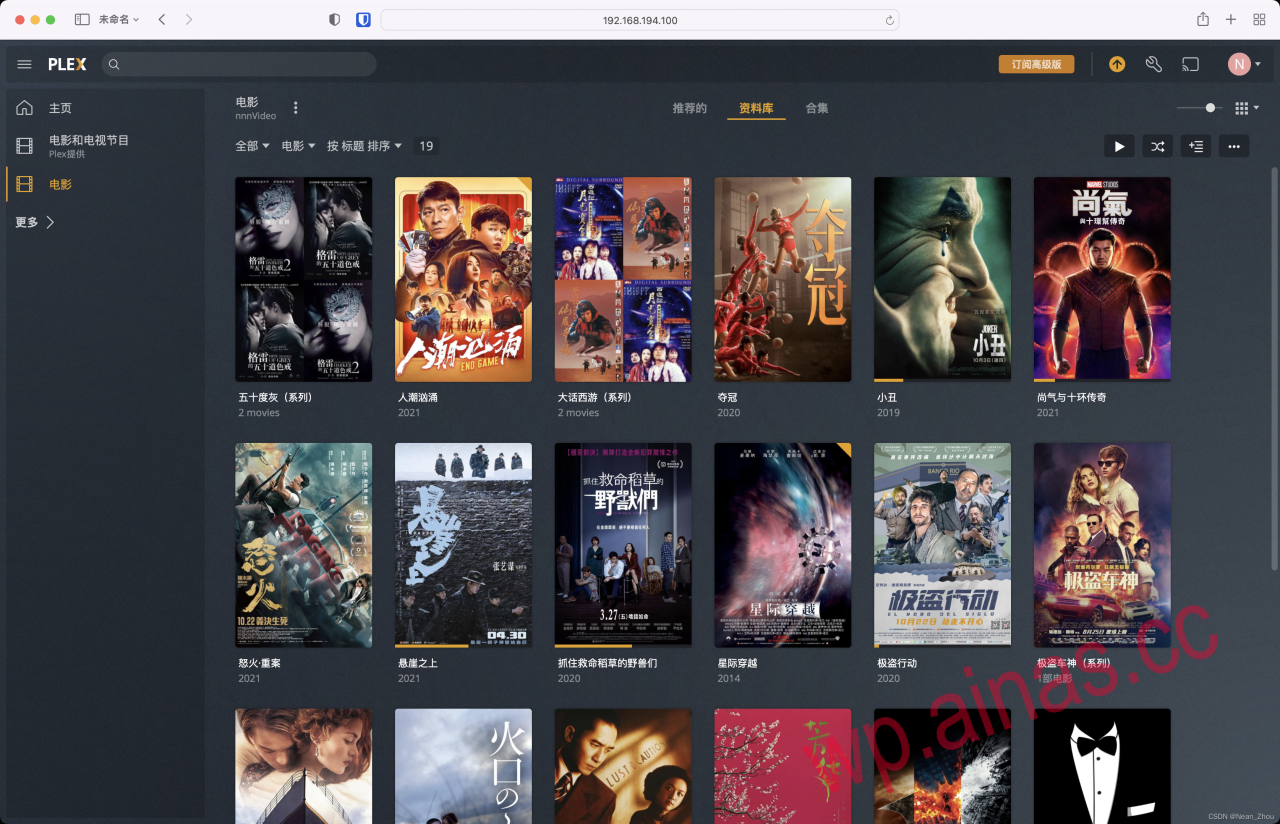
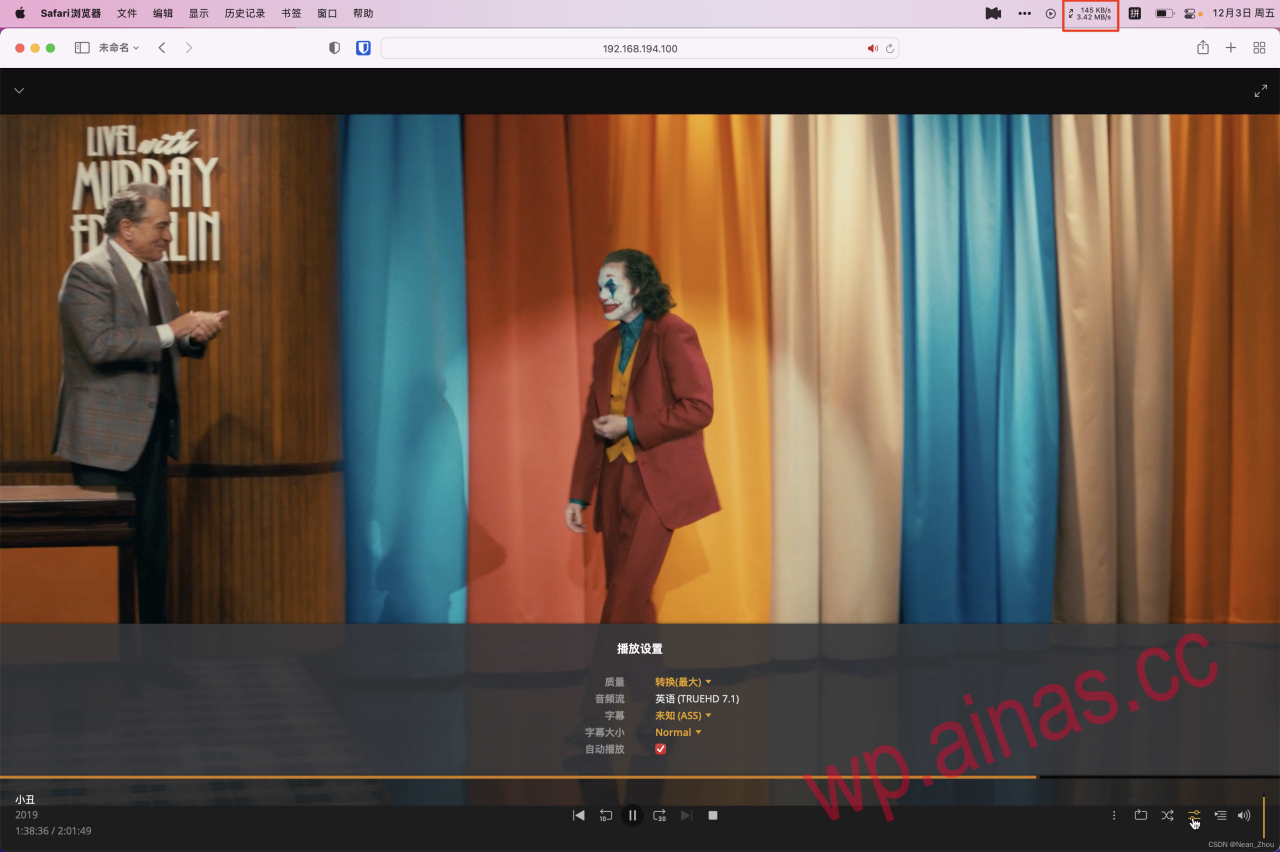
At this point, all configurations are successful. You can use theManaged IPsaddress to access the NAS.
For example, the address of my NAS shown in the picture is: 192.168.194.100, then enter 192.168.194.100:5000 in the computer browser bar to access it (5000 is the default port number of my NAS).
?You can also enjoy exploring the NAS on the Internet just like at home!