Our Location
304 North Cardinal St.
Dorchester Center, MA 02124


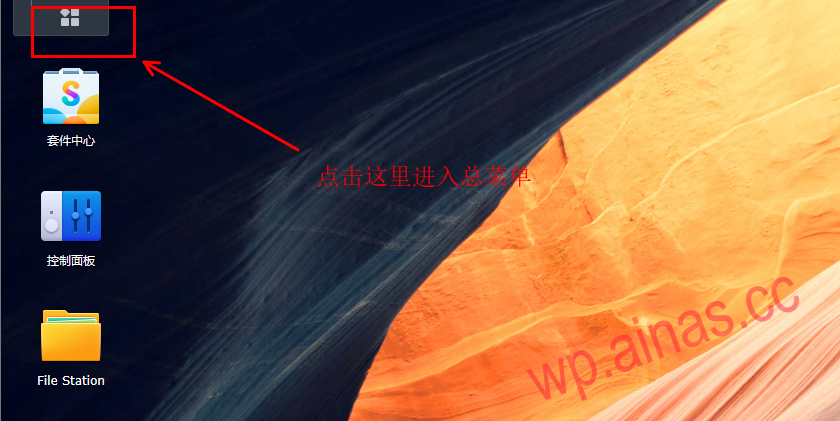
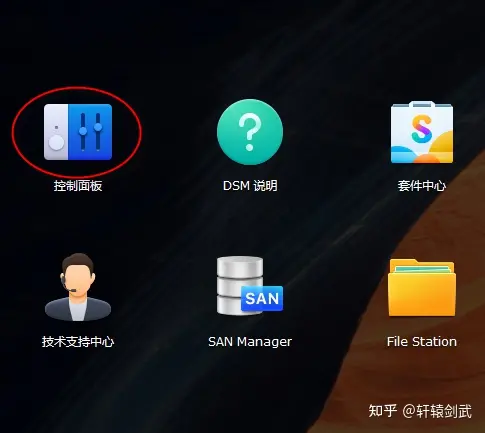
1. After entering the account password, enter the Synology backend and click the start icon in the upper left corner.
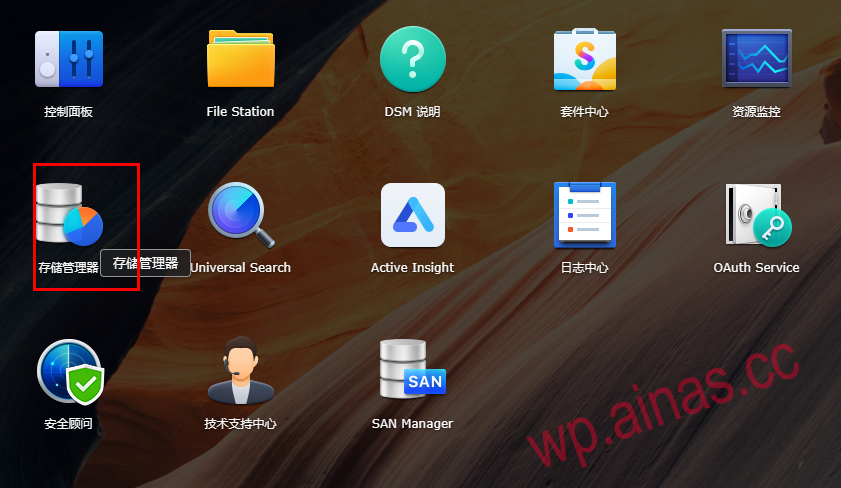
2. Click Disk Manager to enter Disk Management
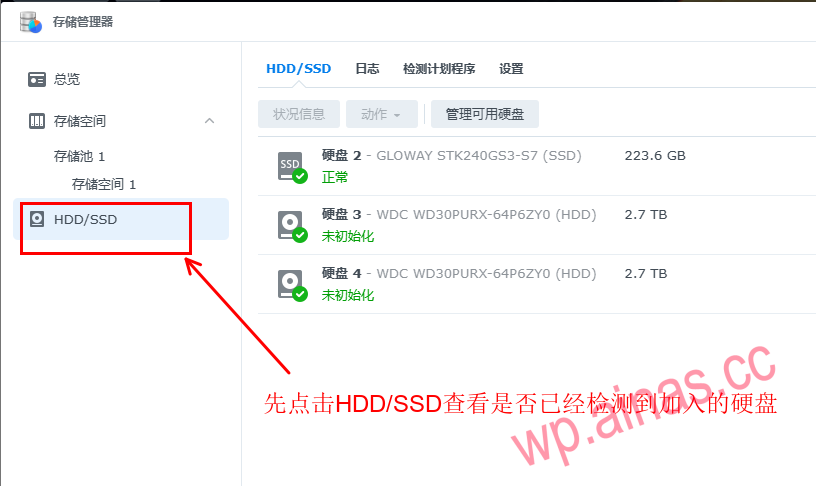
3. After opening Disk Manager, click HDD/SSD on the left to check whether the newly added hard disk is detected.
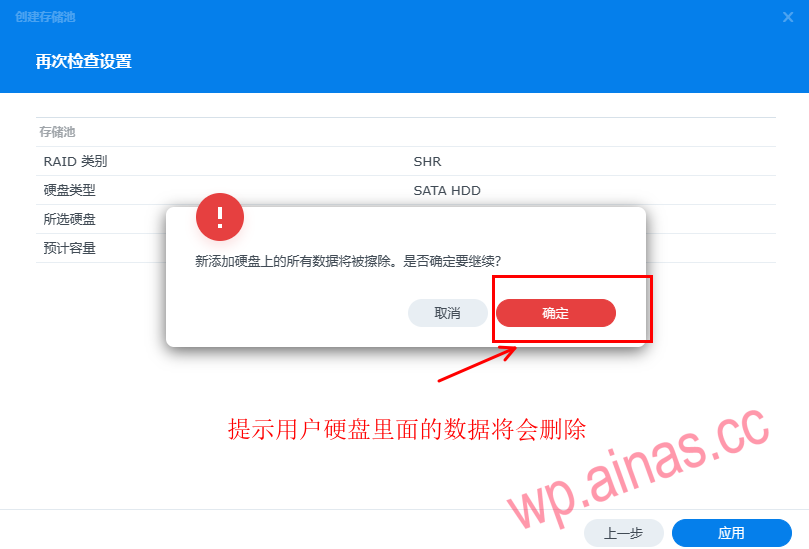
4. If the hard disk is detected, click the storage space menu to enter the configuration hard disk, first create a storage pool, and then create a storage space
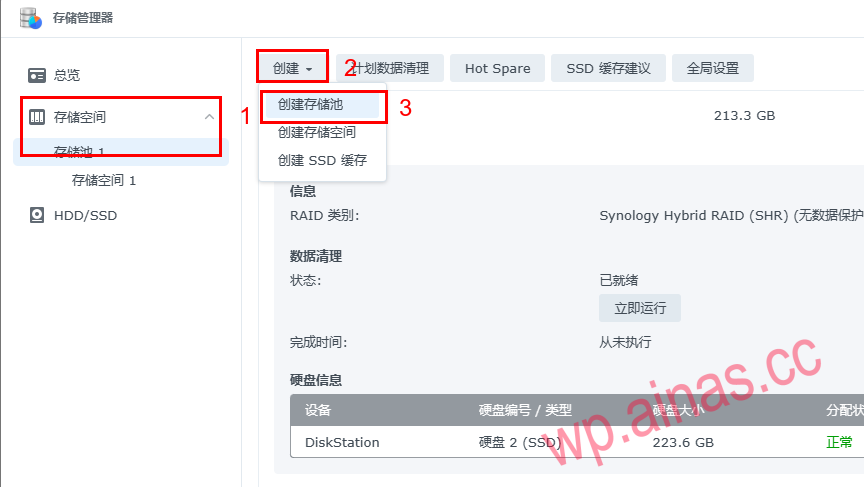
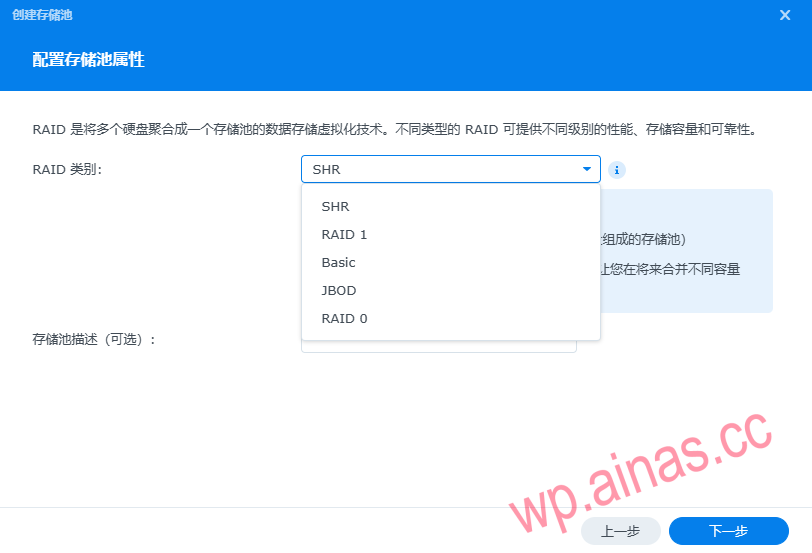
5. Select NAS array mode
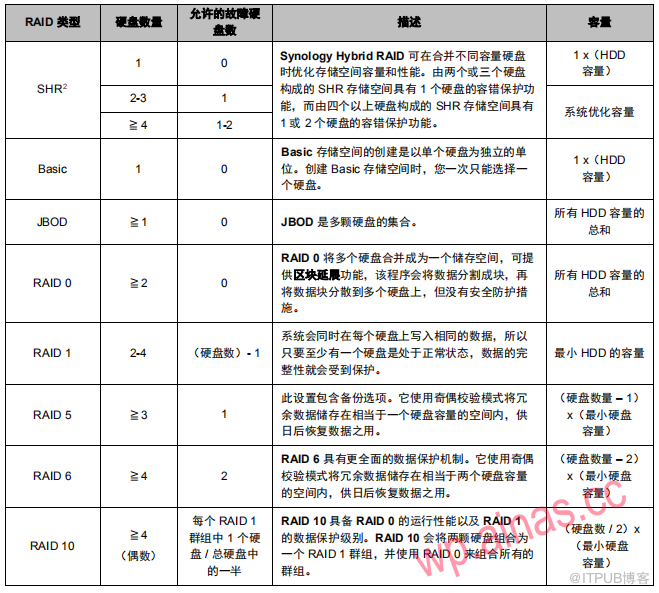
RAID type :Depending on the model and the number of hard drives installed, the following RAID types can be implemented when creating a custom storage pool.
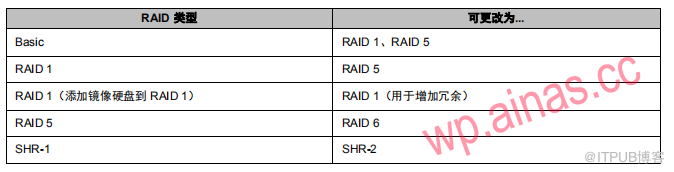
Change RAID type
The RAID type of an existing storage pool can be changed without losing existing data, allowing you to manage storage capacity easily and efficiently. For example, you can create a RAID 1 storage space on your Synology NAS and change it to RAID 5 if you install more hard drives later.
Supported RAID types
Here’s how the RAID type can be changed.
6. According to your own needs, whether you need to test the quality of the hard disk will take a long time and depends on the size of the hard disk.


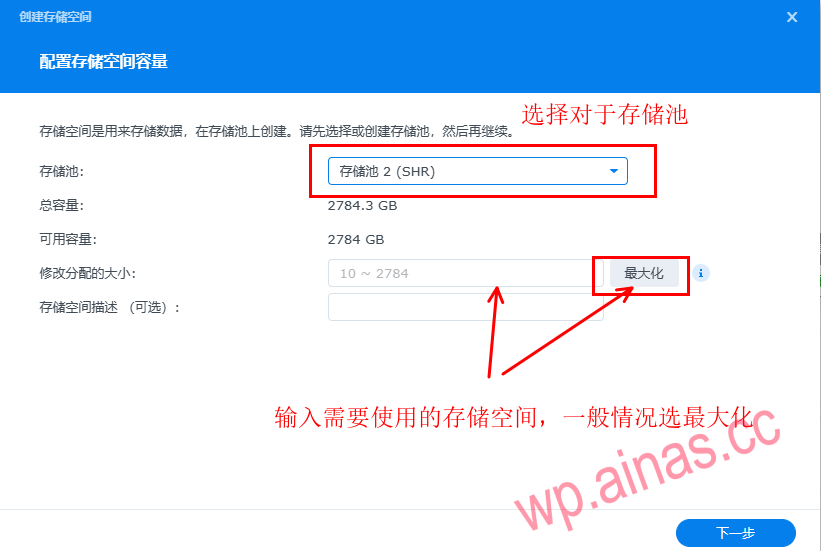
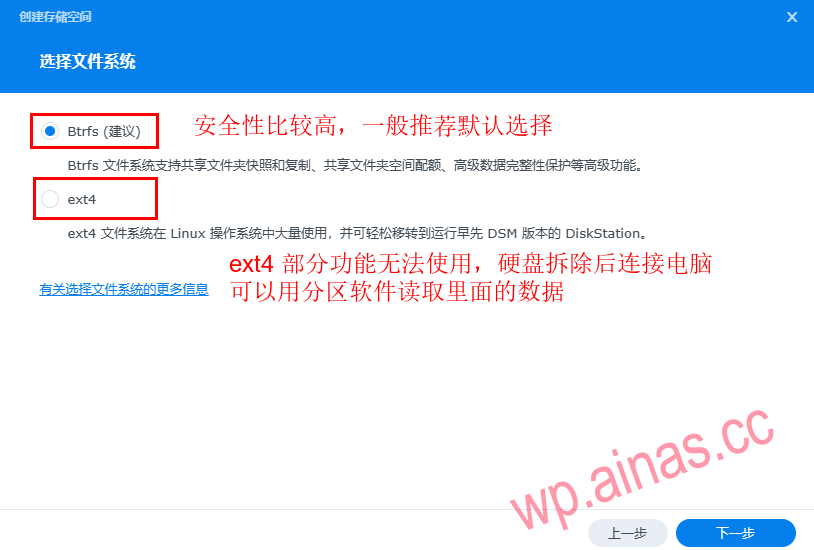
8. At this point, the NAS storage pool and storage space have been established.
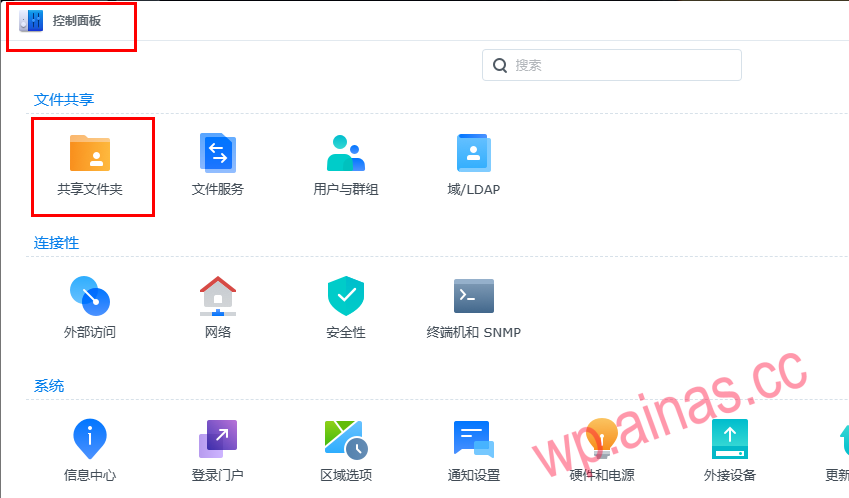
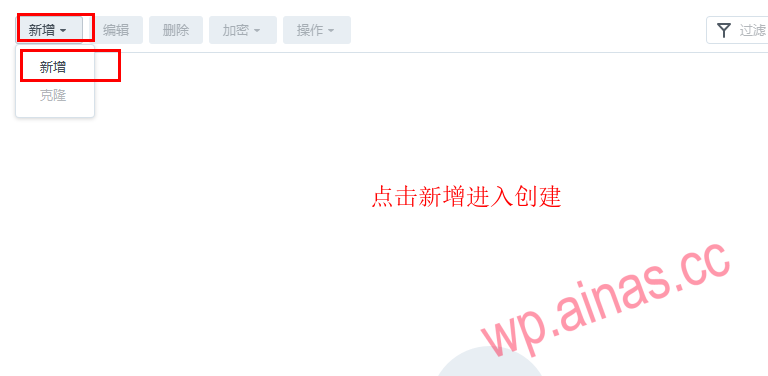
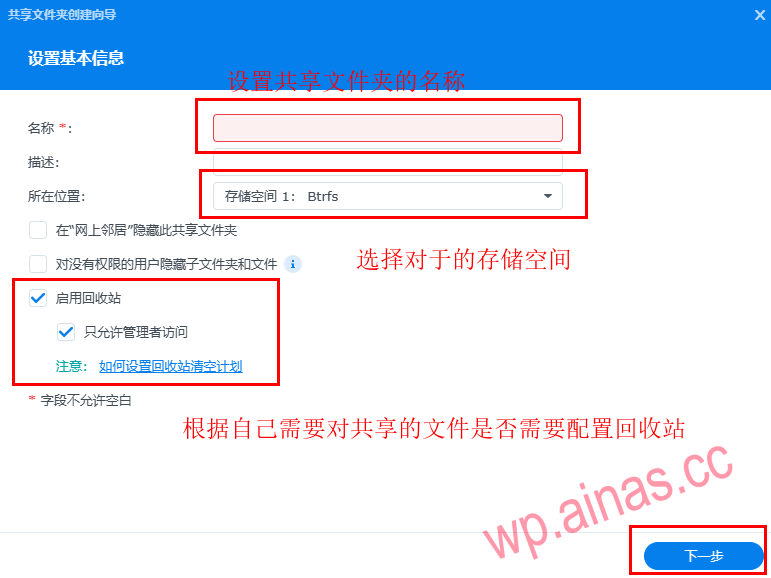
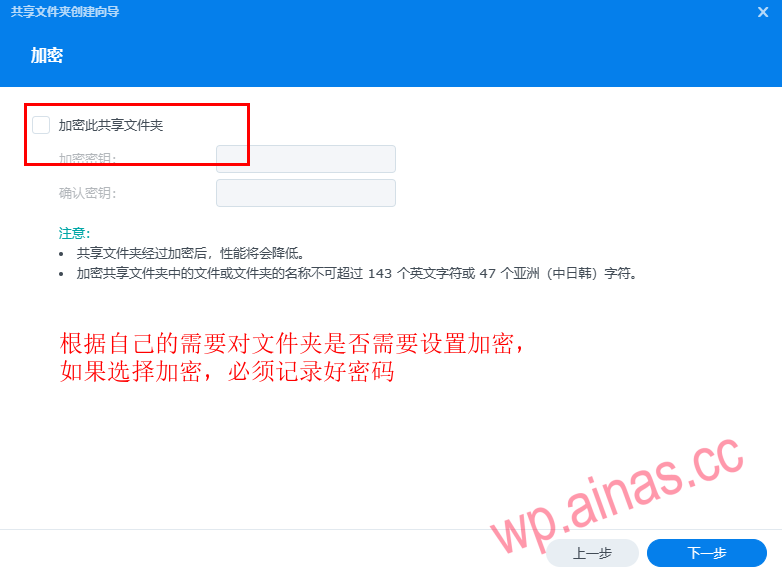
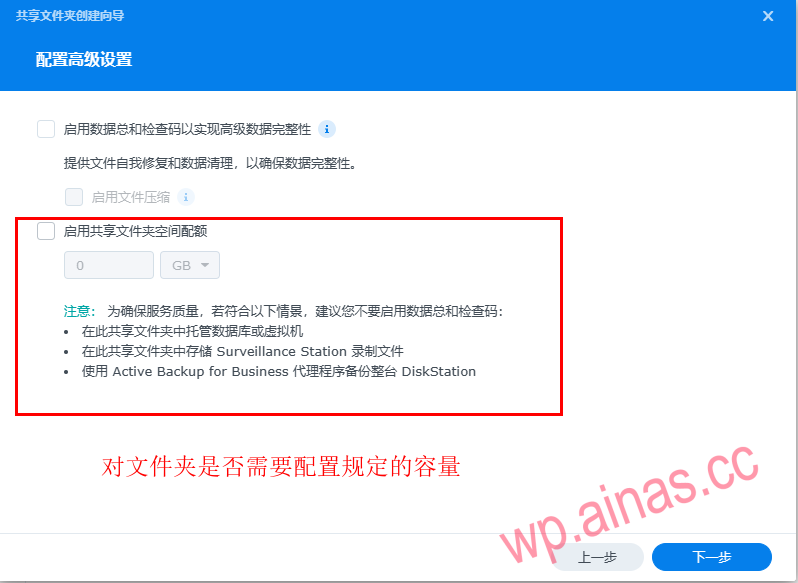
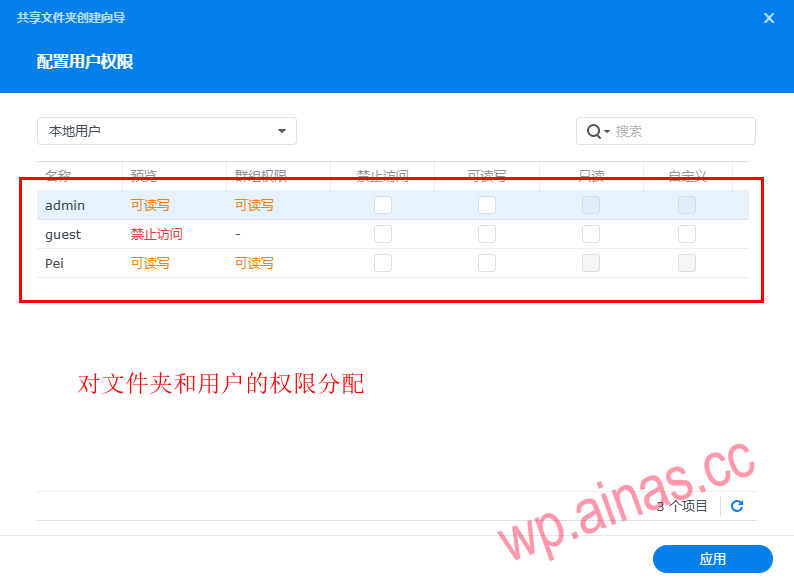
Click to enter the Control Panel and click Shared Folders
Click to add
A. Open the network on the desktop (or Network Places) and see the corresponding device name (the device name can be modified by yourself)
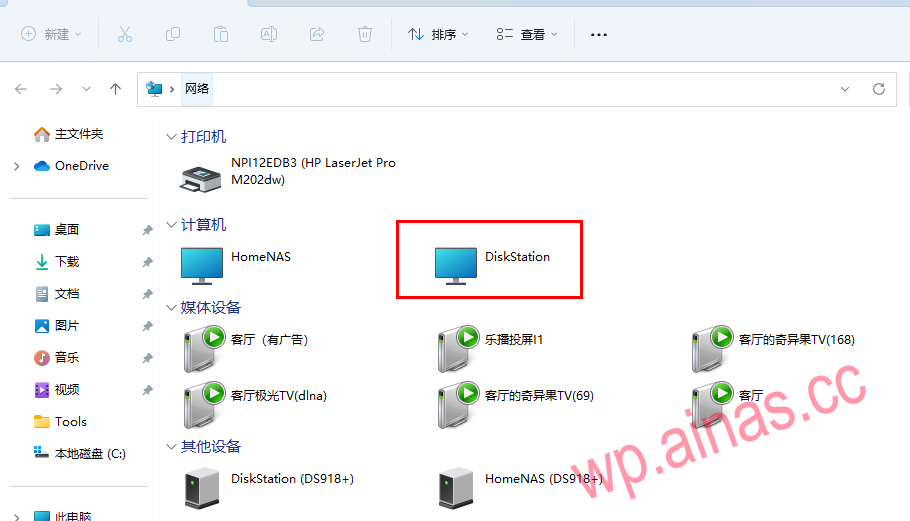
Double-click to open the NAS device and enter the corresponding account password.
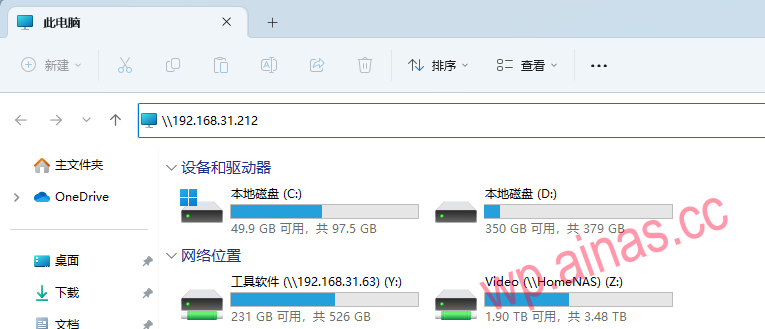
B. Access via ip address
Open my computer and enter \\ip address in the address: ip (IP searched through Synology Assistant), for example, mine is \\192.168.31.212
(remember, it’s a backslash)
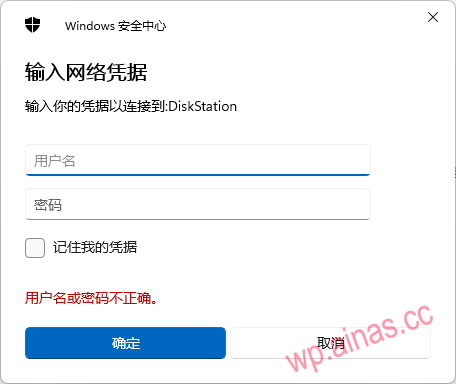
Prompt to enter account password
C. Access via device name
Open my computer and enter the ip address in the address box: diskstation (name of the device)
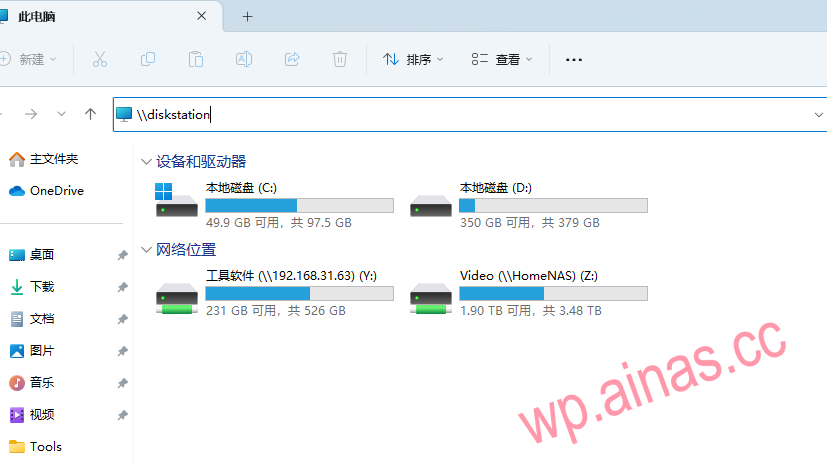
Prompt to enter account password
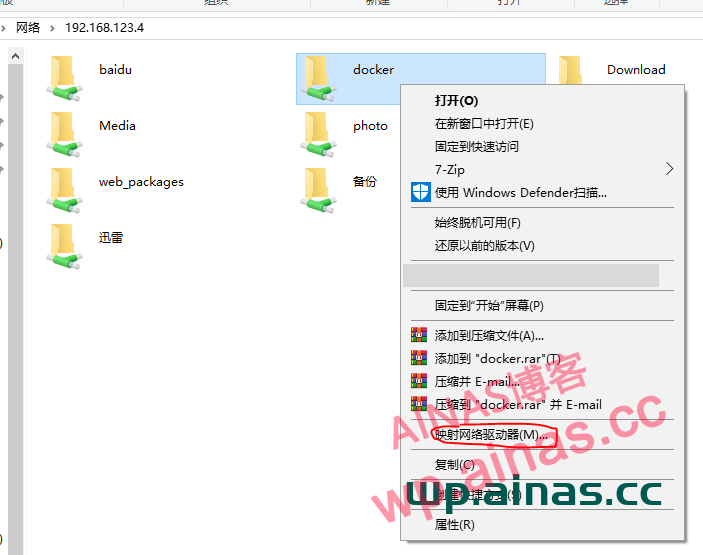
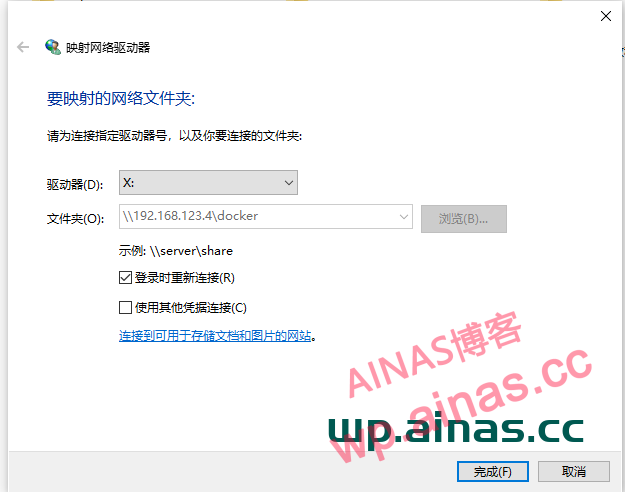
After entering, you can see all shared folders, right-click and select Map Network Drive to map the folder to the local
After setting up the share, Windows cannot access the shared directory through SMB. The following error occurs:
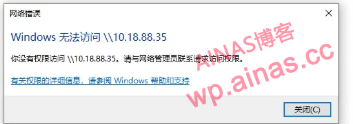
Or it may appear that the username and password are correct, but the password is wrong.
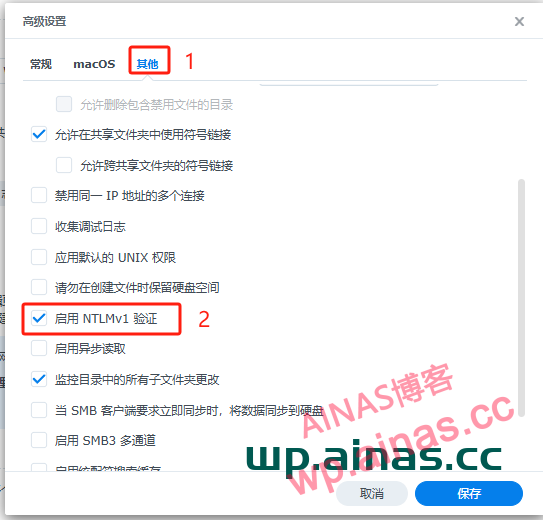
1. Log in to the NAS management page via the web and find the control panel.

2. In Advanced Settings-General, change the minimum SMB protocol to SMB1
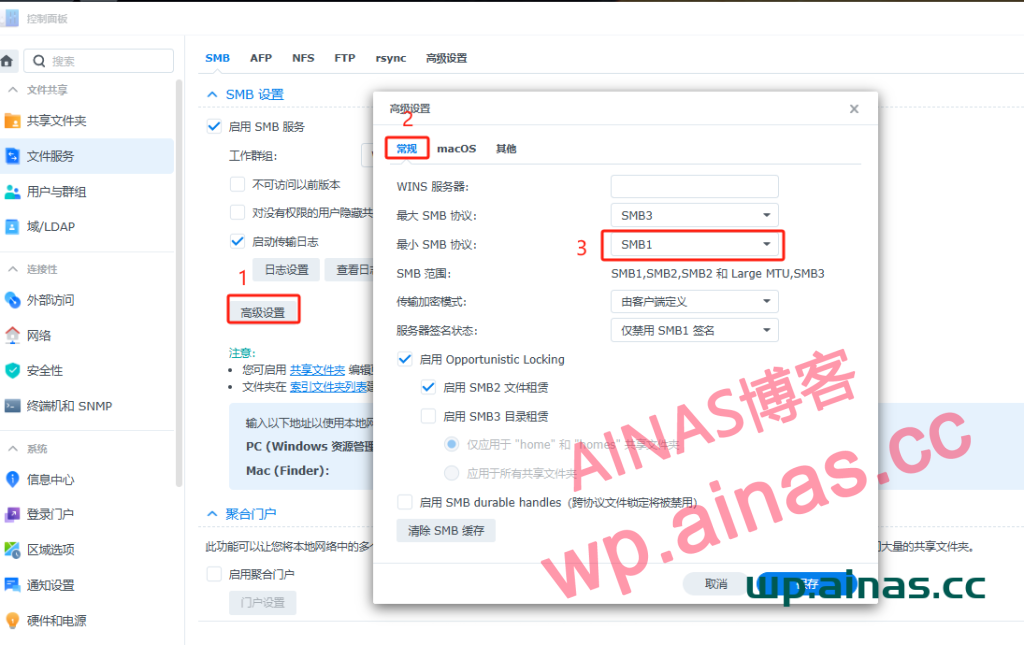
3. In Advanced Settings-Others, check “Enable NTLMv1 Authentication” and you can access it through SMB using Windows.