Our Location
304 North Cardinal St.
Dorchester Center, MA 02124

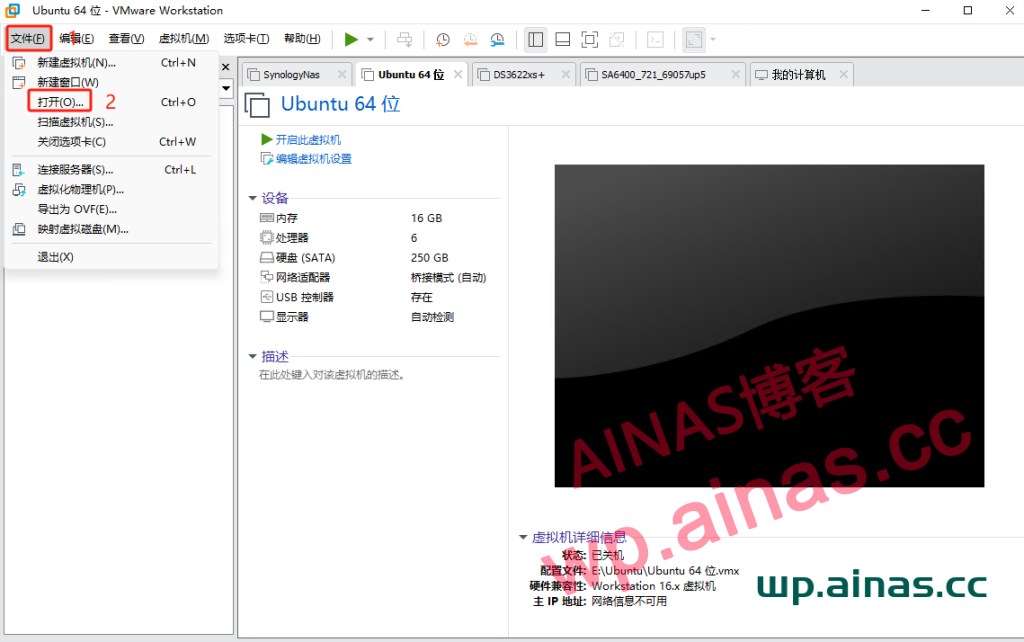
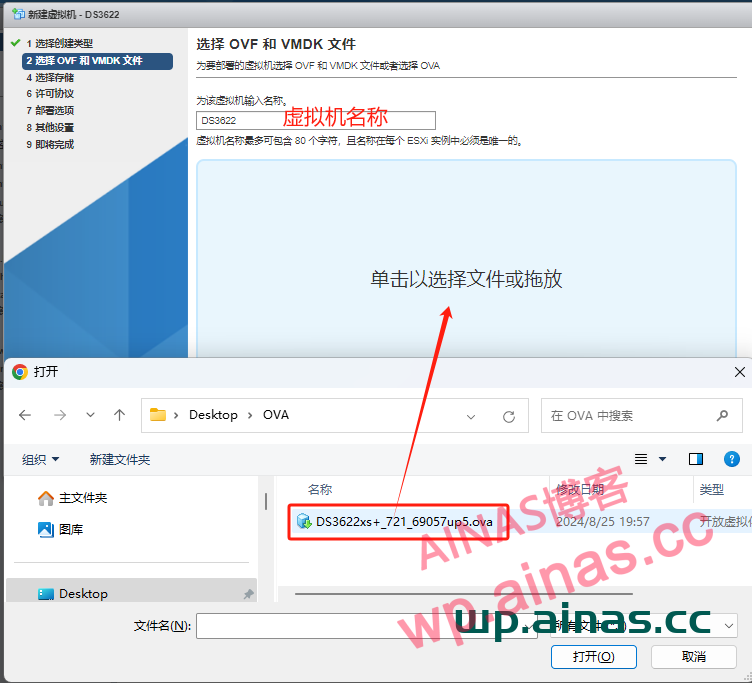
1. Open the vmware application and select File-Open

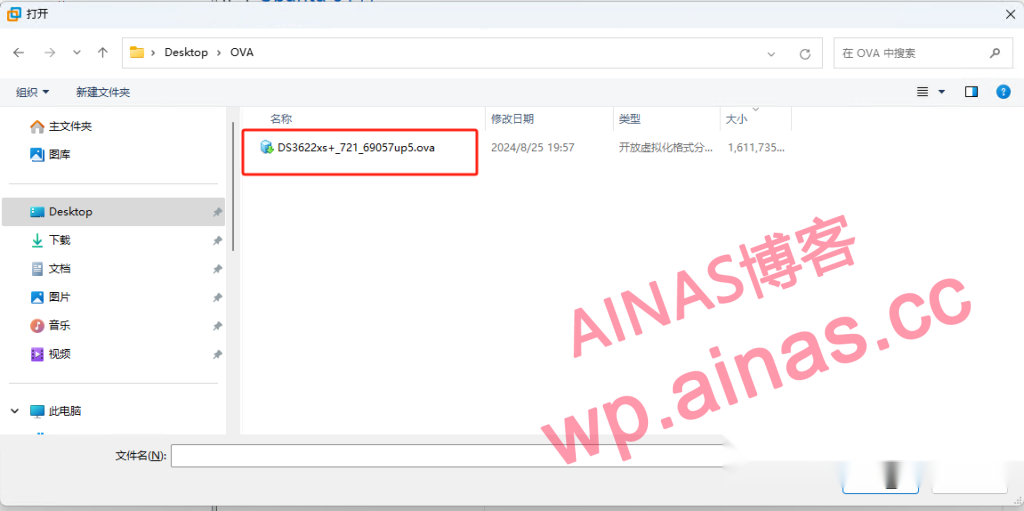
2. Select the downloaded import package file and select Open
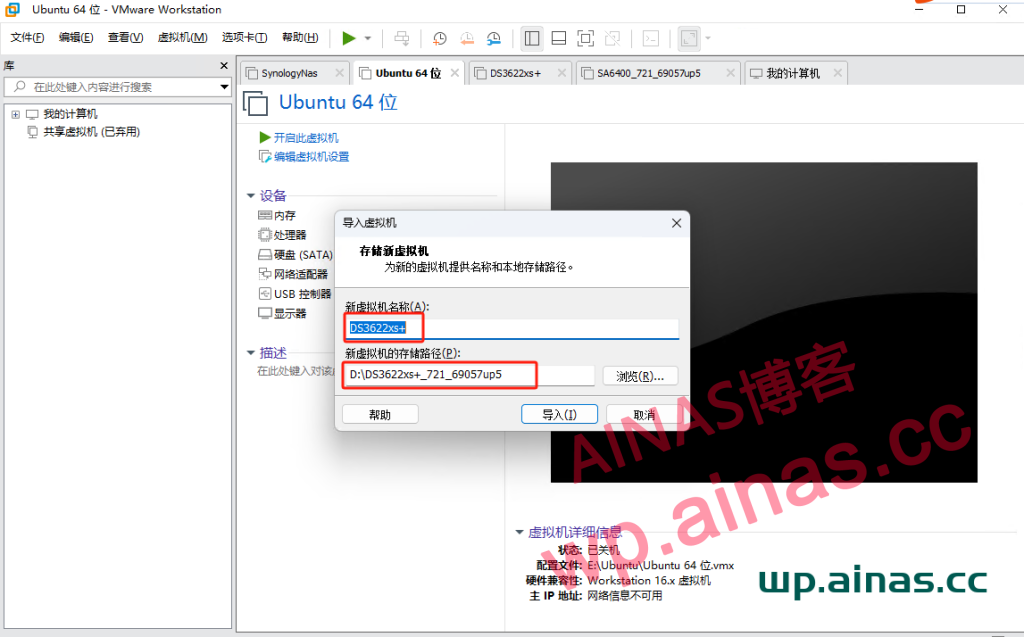
3. Change the virtual machine name and storage path, then select Import and wait for the import to complete.
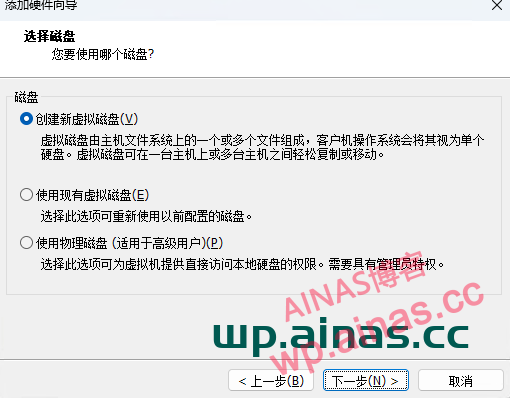
4. After the import is completed, select the newly imported virtual machine, click Edit Virtual Machine Settings, then select Add-Hard Disk, and then click Next

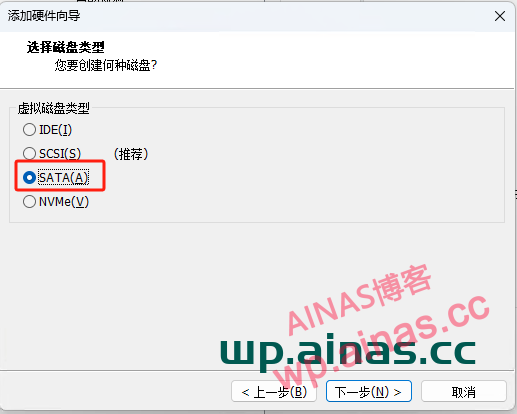
5. Select sata mode
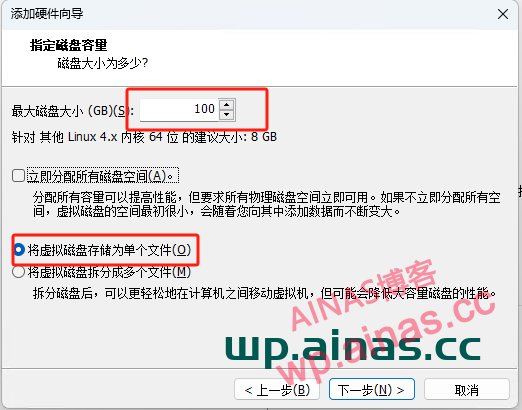
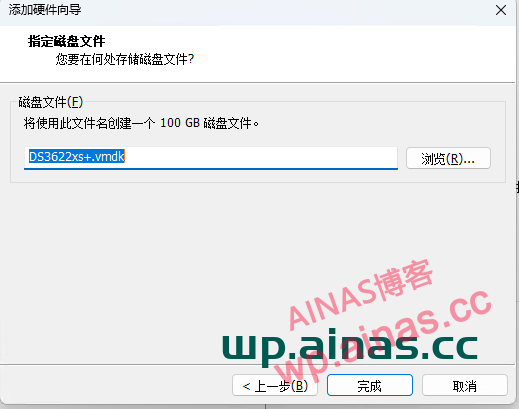
6. Select New Virtual Disk, then select the appropriate capacity, Next, and click Finish.
7. After the addition is completed, choose to turn on this virtual machine.
1. Log in to the ESXi host and click Create/Register Virtual Machine
2. Select Deploy virtual machine from OVF or OVA file
3. Drag the file into the blue box and create a name for the virtual machine
4. Select storage space
5. Select the corresponding virtual network card, click Next and wait for the virtual machine file to be uploaded.

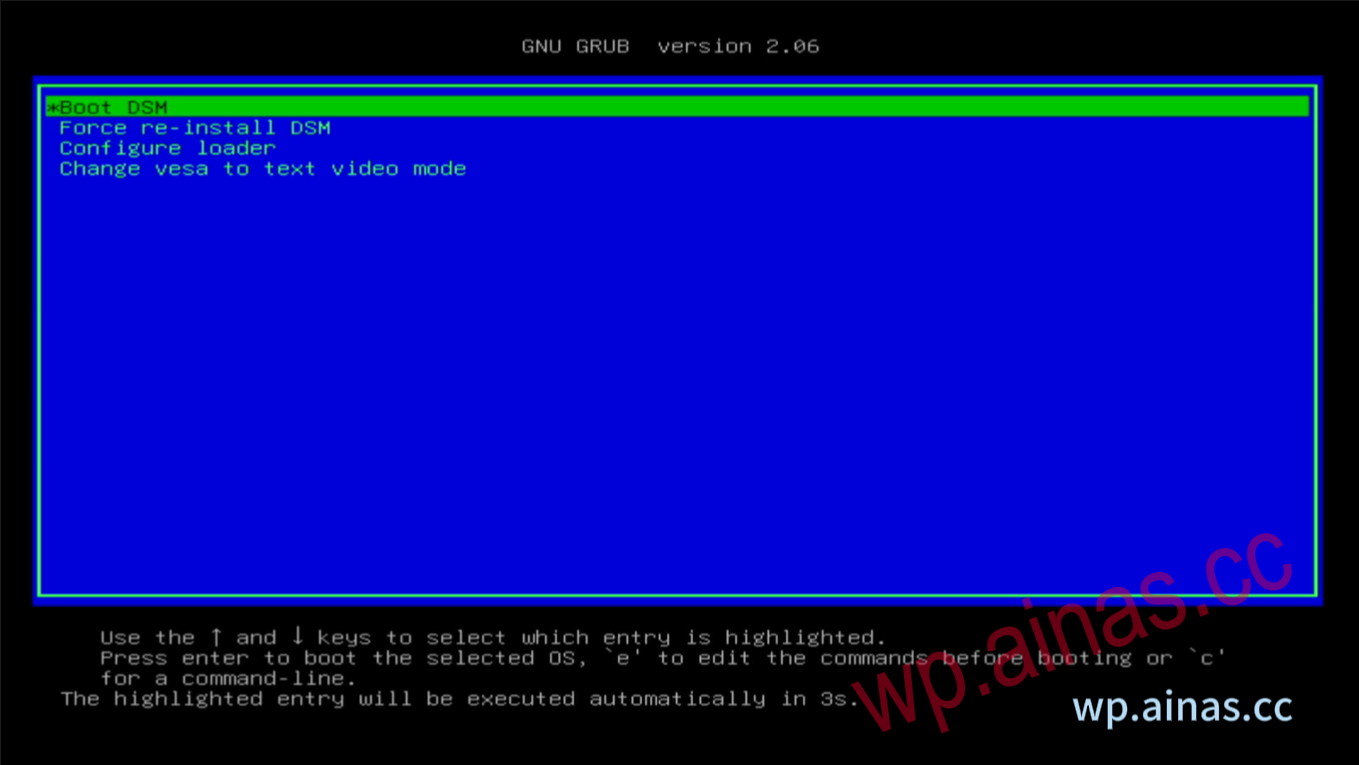
1. Start the virtual machine. The first option is selected by default and it will start automatically.
2. After the startup is completed, an IP address will be displayed.
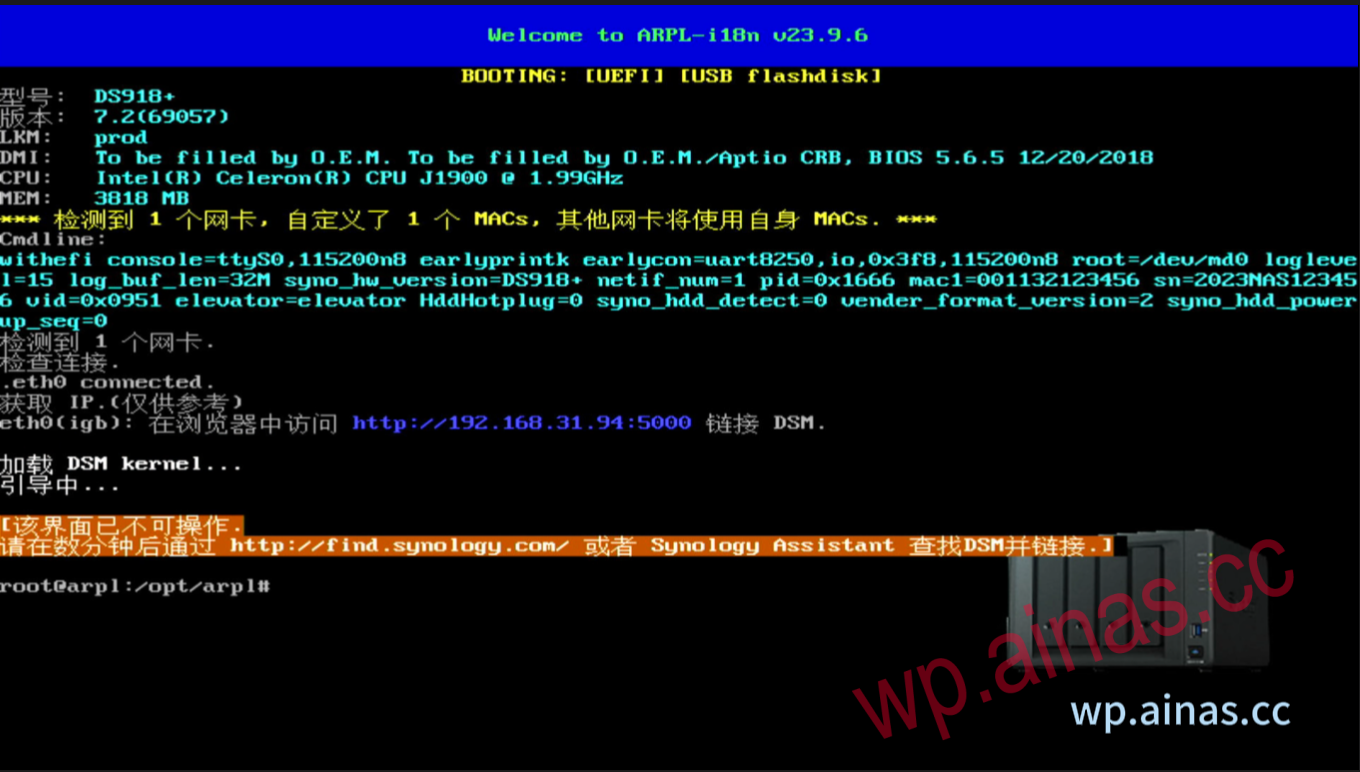
1. The background IP (backend address) that Black Synology starts by default is dynamically assigned (IP is assigned through the router). Black Synology usually takes 5-10 minutes to start, and it takes about 5-10 minutes to boot. You can check the device IP in two ways.
You can download Synology Assistant from the official website, or click here to download:Synology Assistant
Open Synology Assistant: (Generally, opening the software will automatically search for IP)
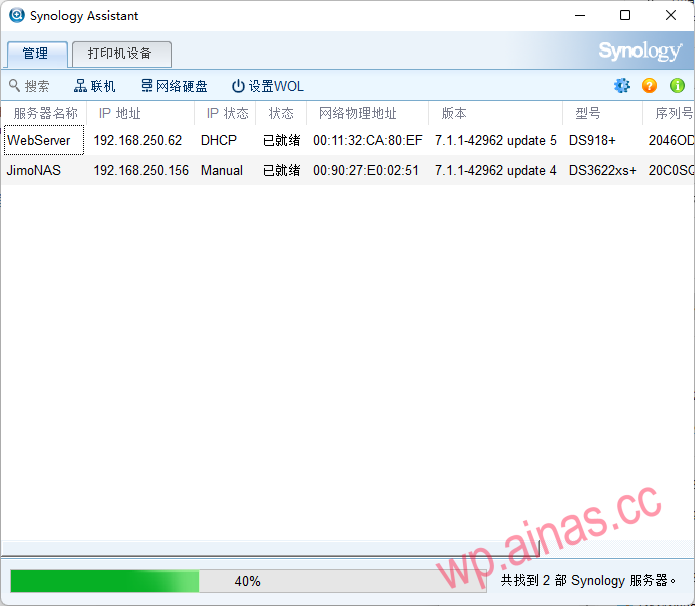
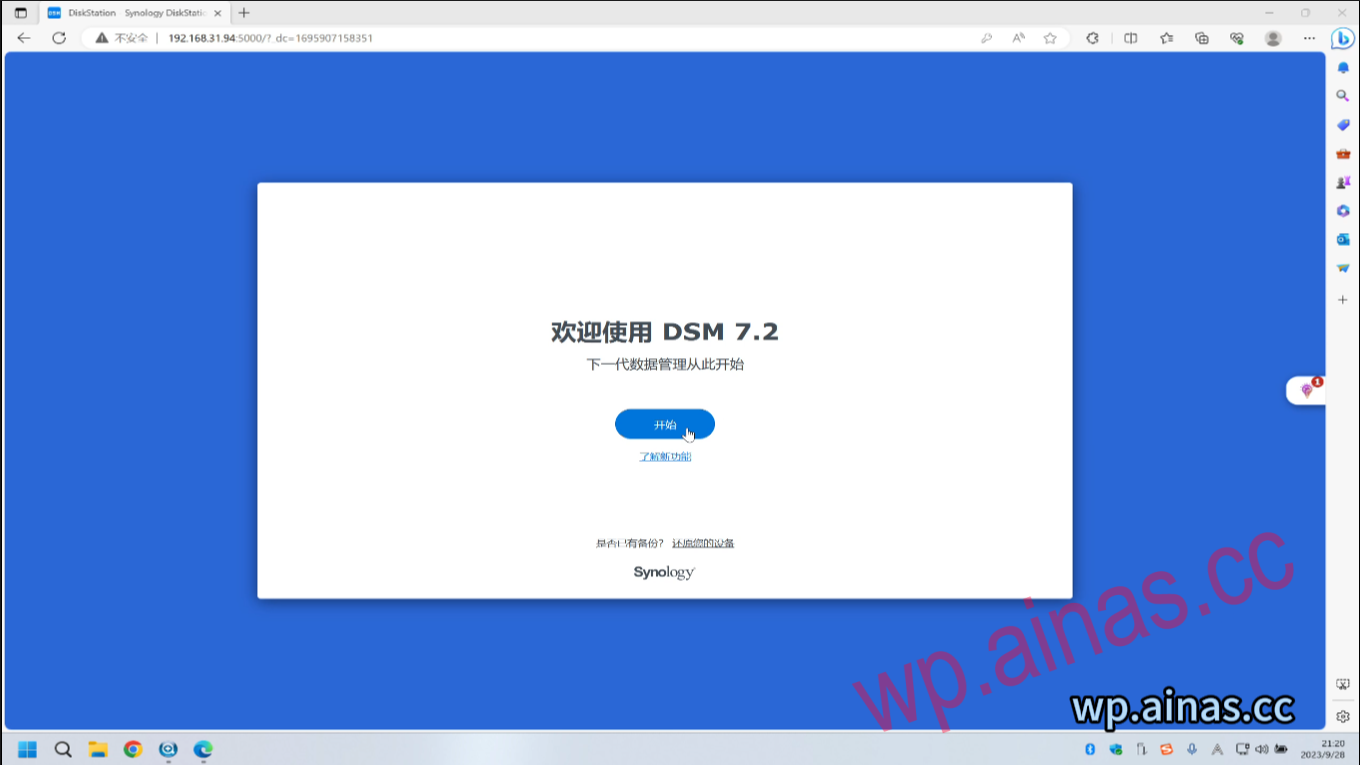
After selecting the device, click Connect above, and the web page will automatically open to enter the background, or you can open your own browser and enter the searched IP address.
2. Enter Synology’s server name, account number, and administrator password. Note that the server account requires a hard disk and does not support special symbols. The administrator account cannot use root or admin. The administrator password must be uppercase and lowercase, at least 8 characters, and cannot have duplicate parts with the administrator account.

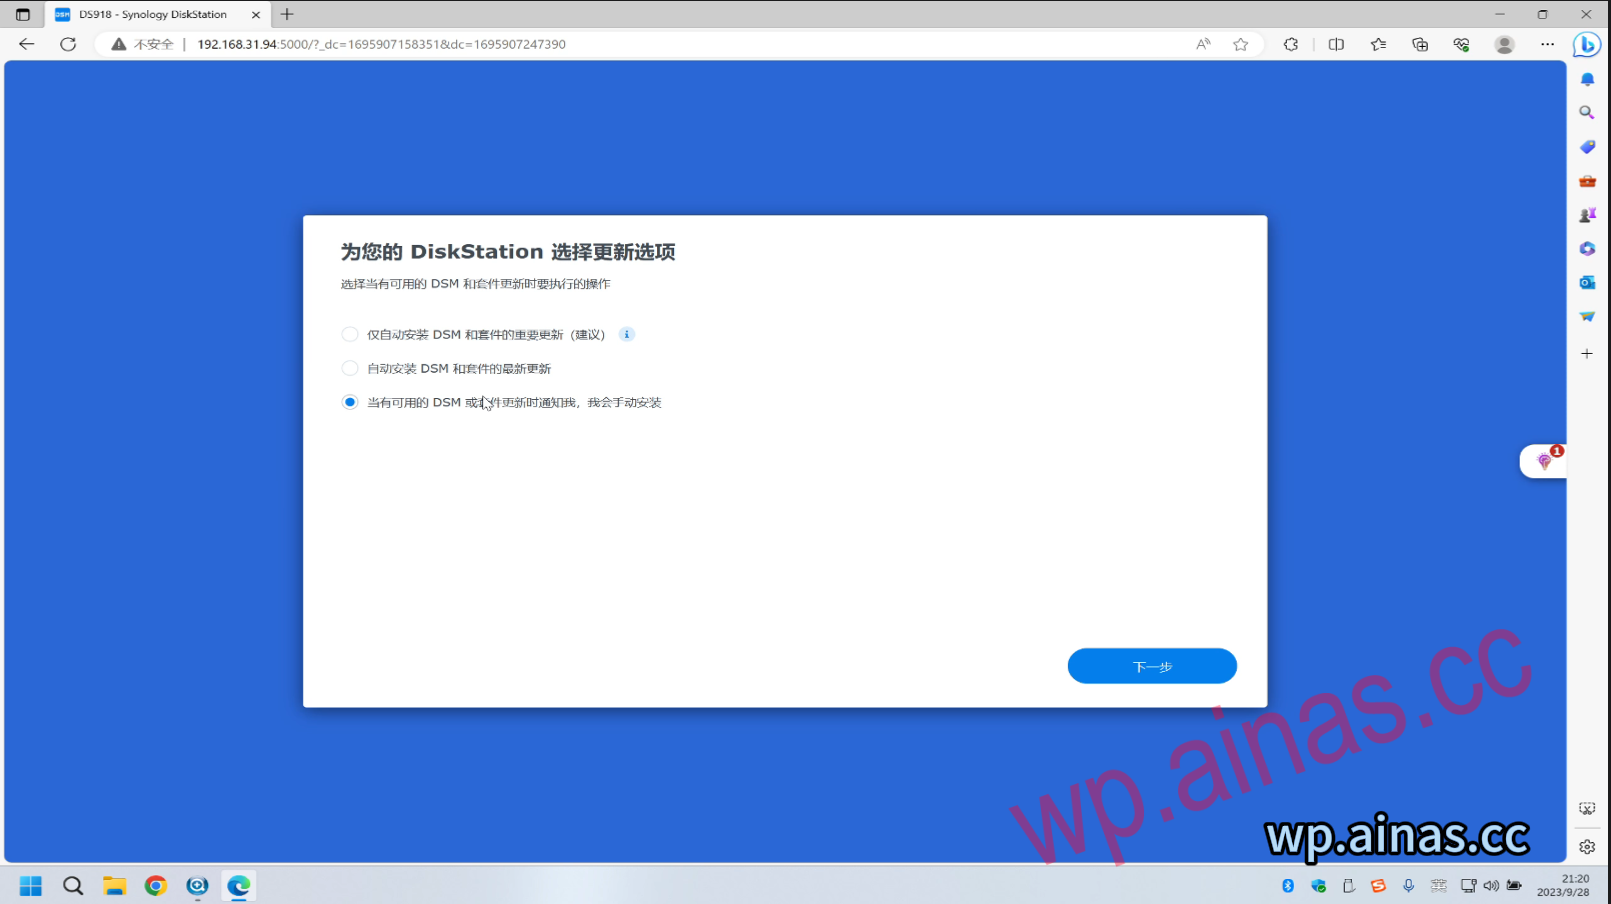
3. Select the third one and click Next
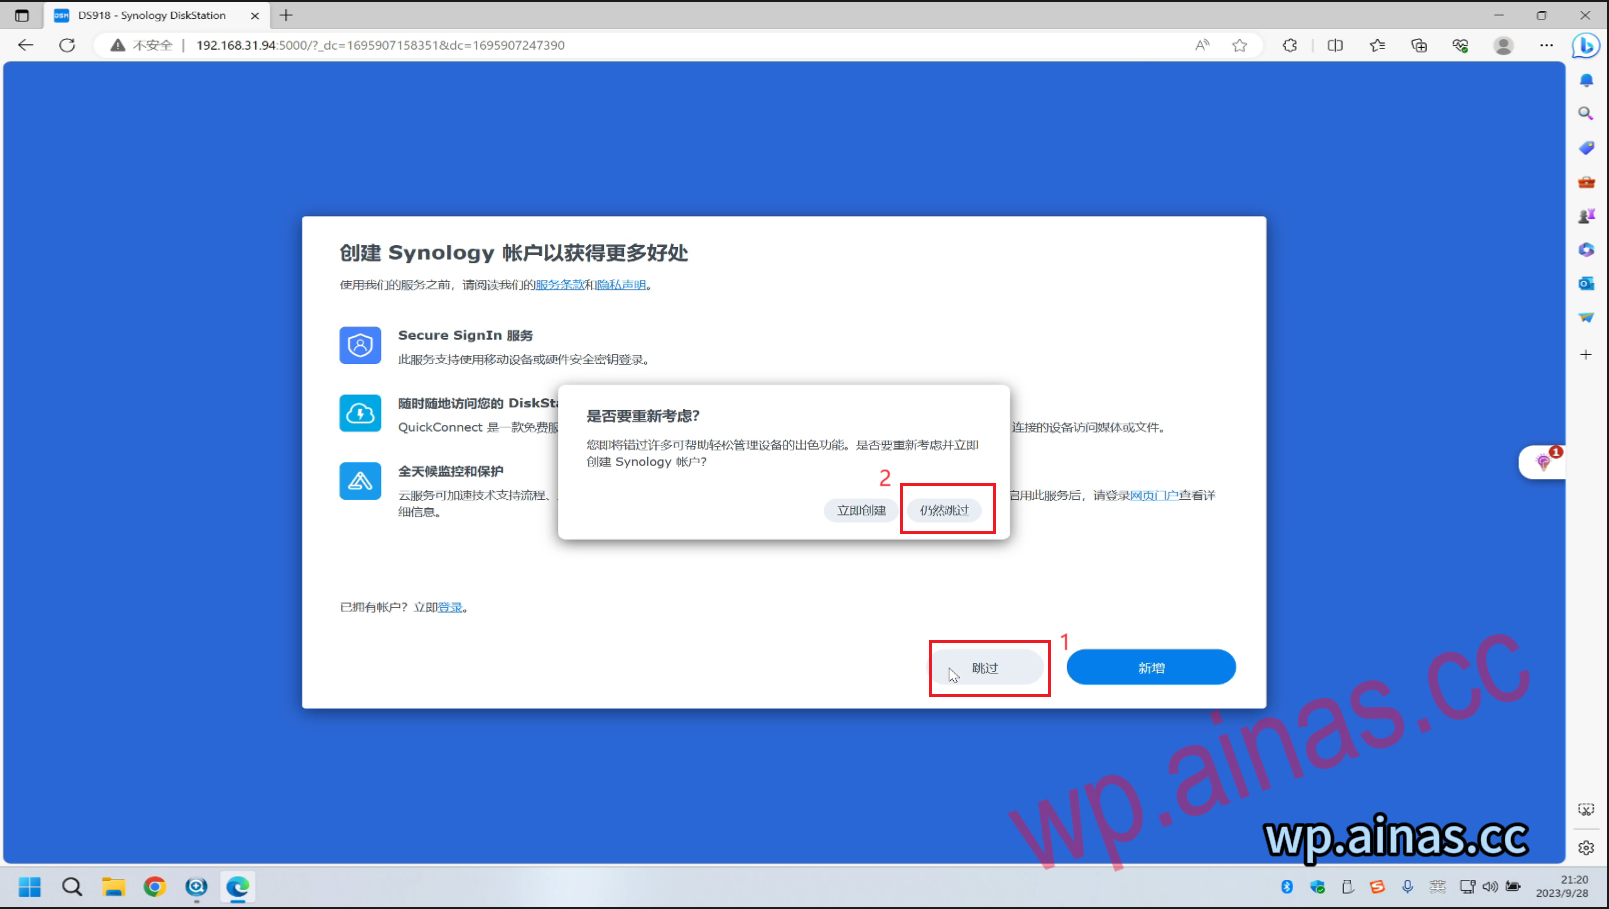
4. Skip – still skip
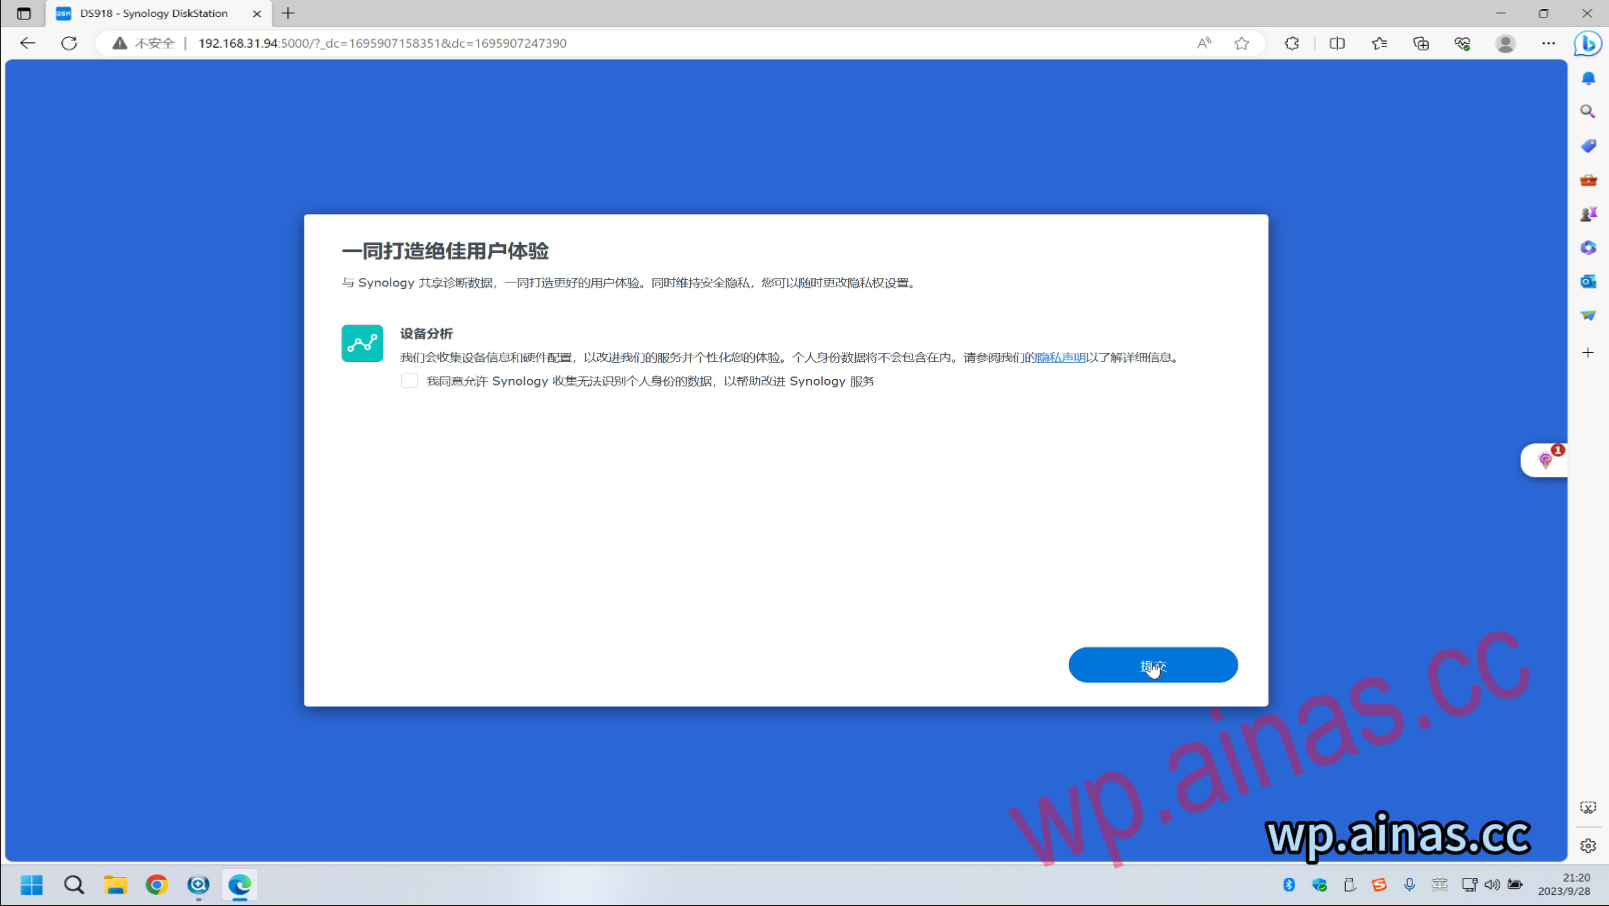
5. Click Submit
6. Operate according to your own needs. I click “No, thank you” here.
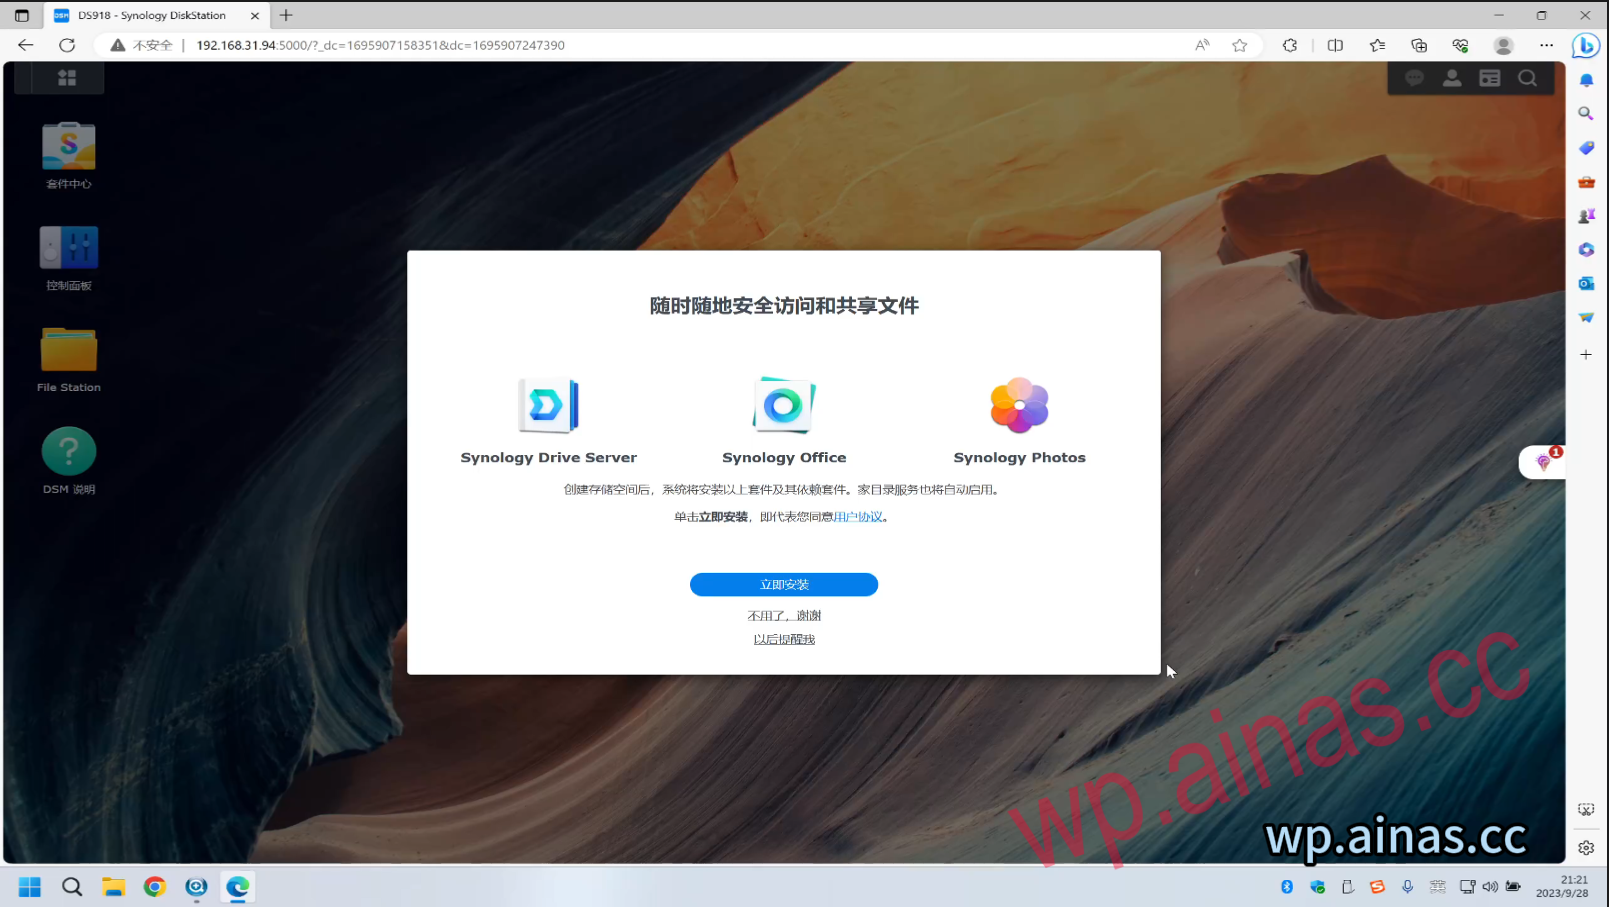
7. Click “No, thank you”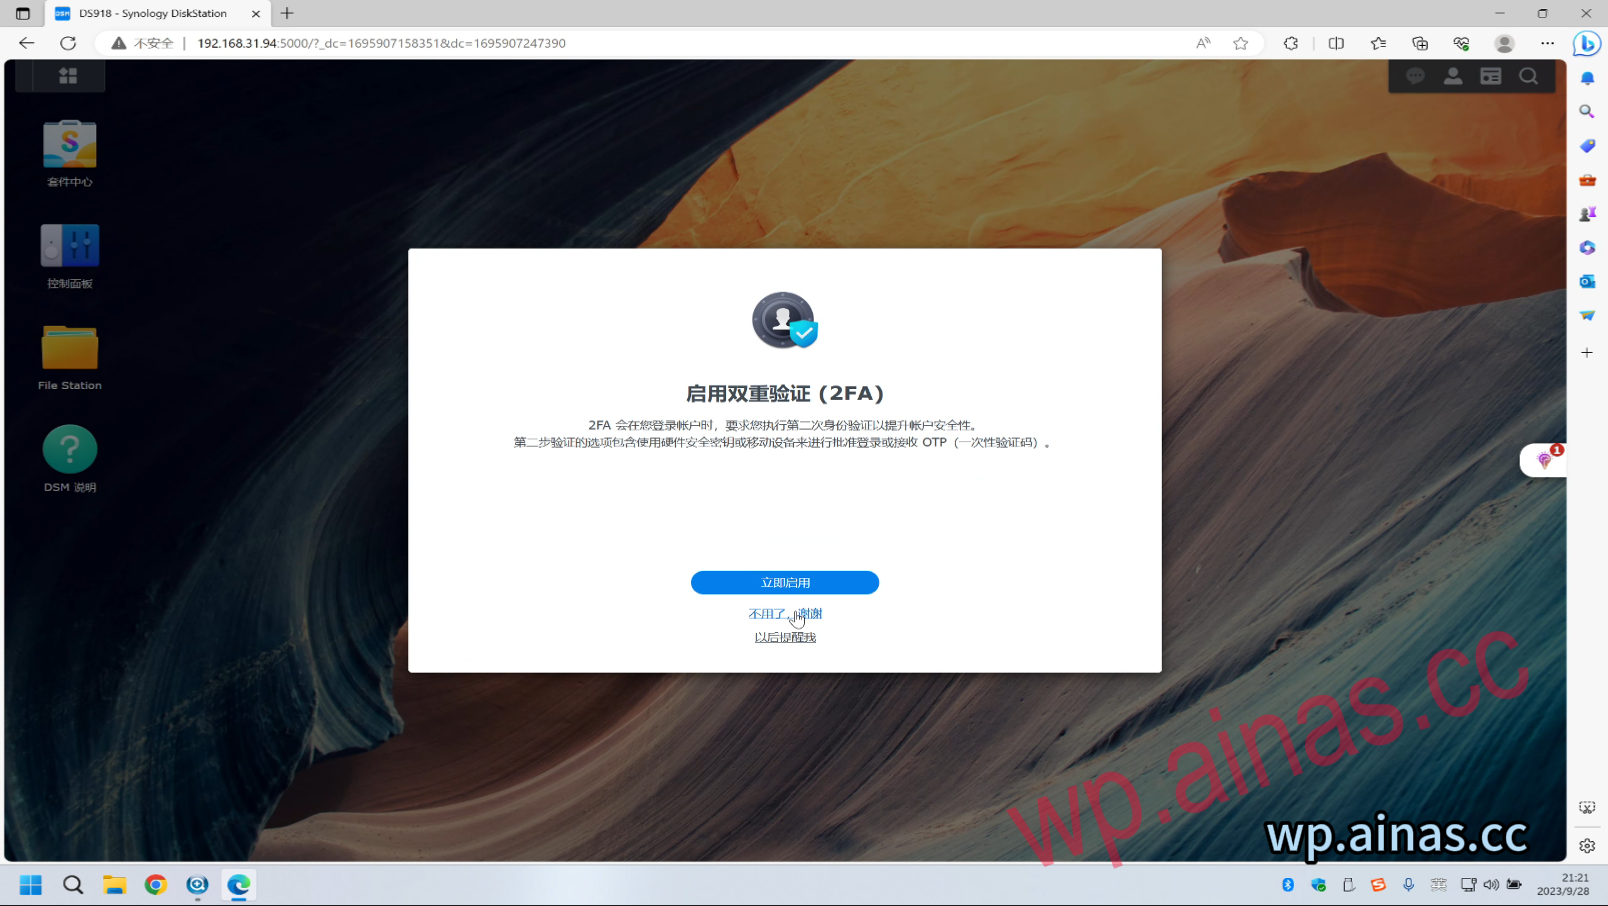
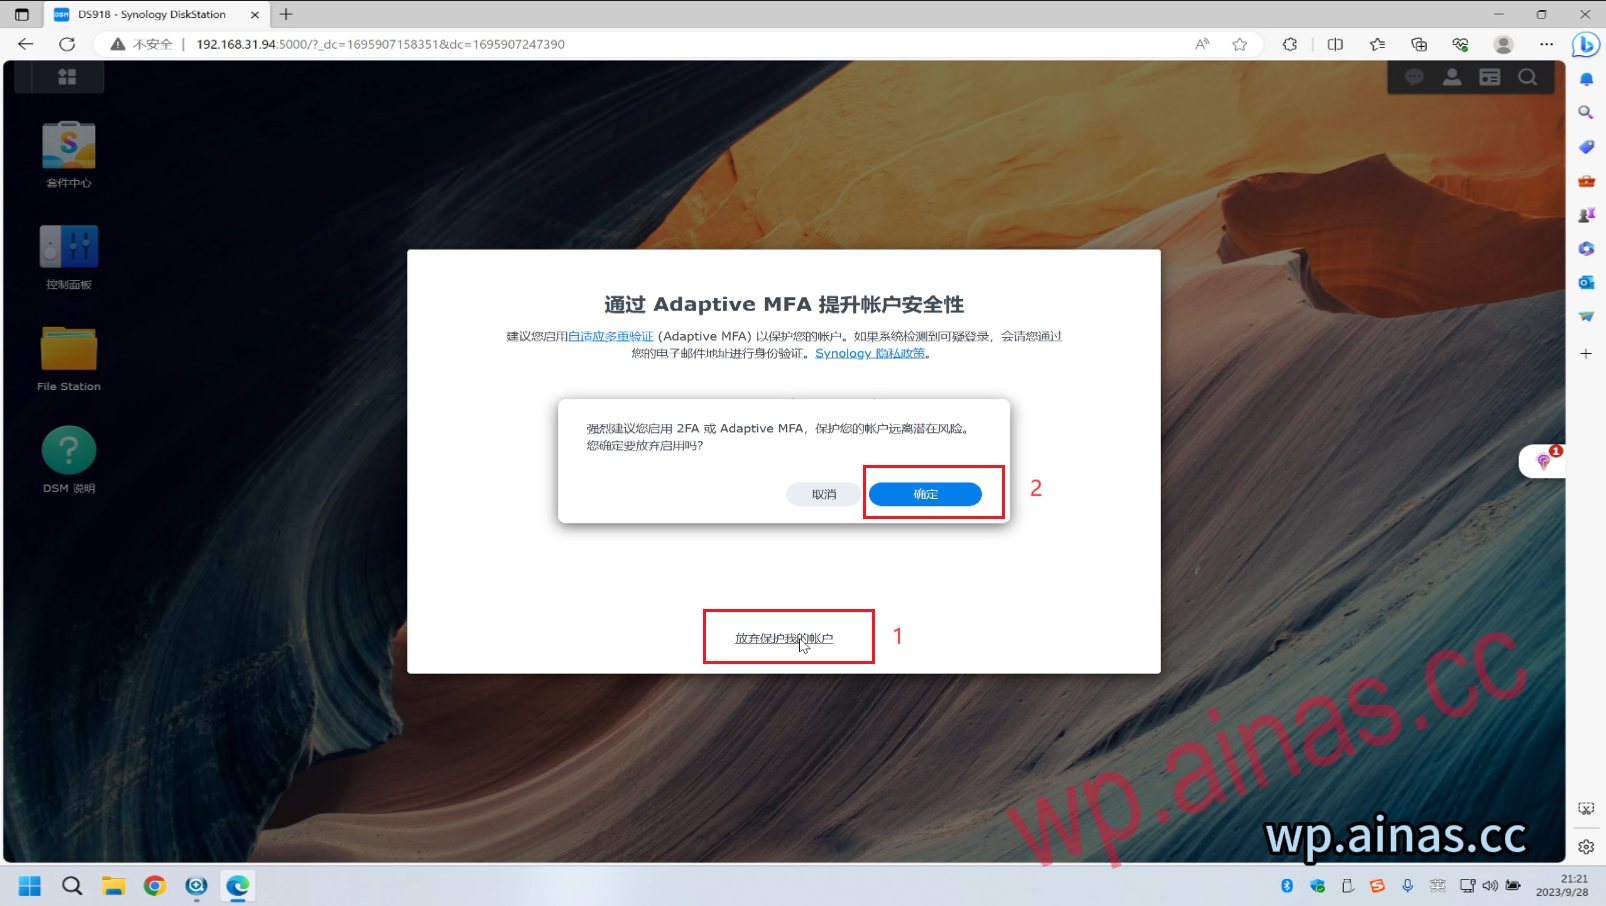
8. Click Give up protecting my account – OK
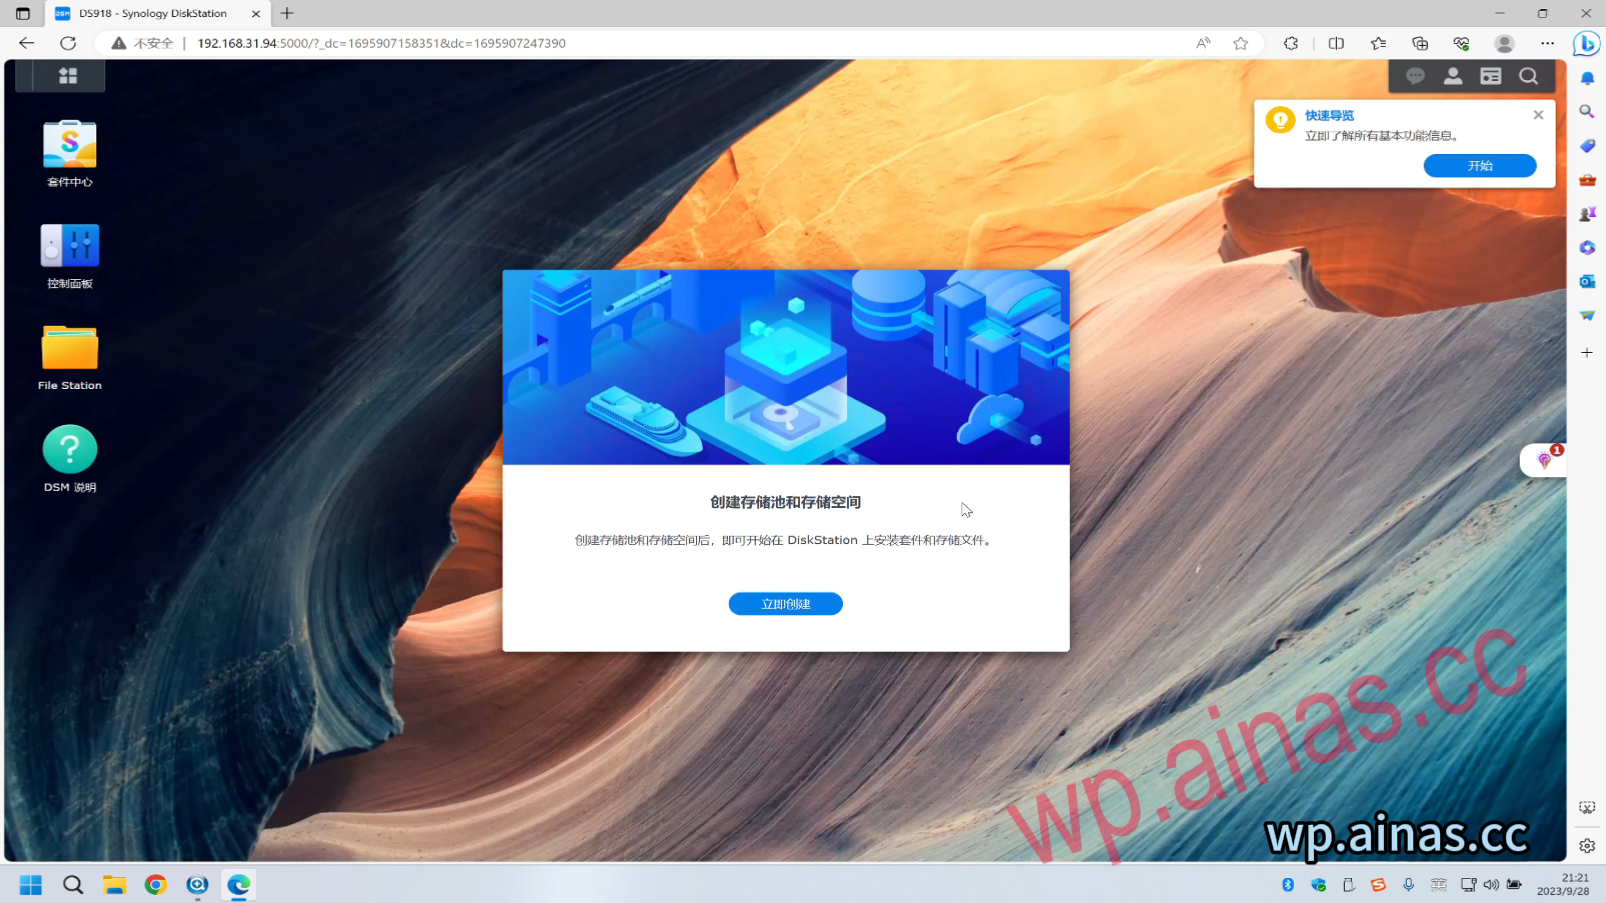
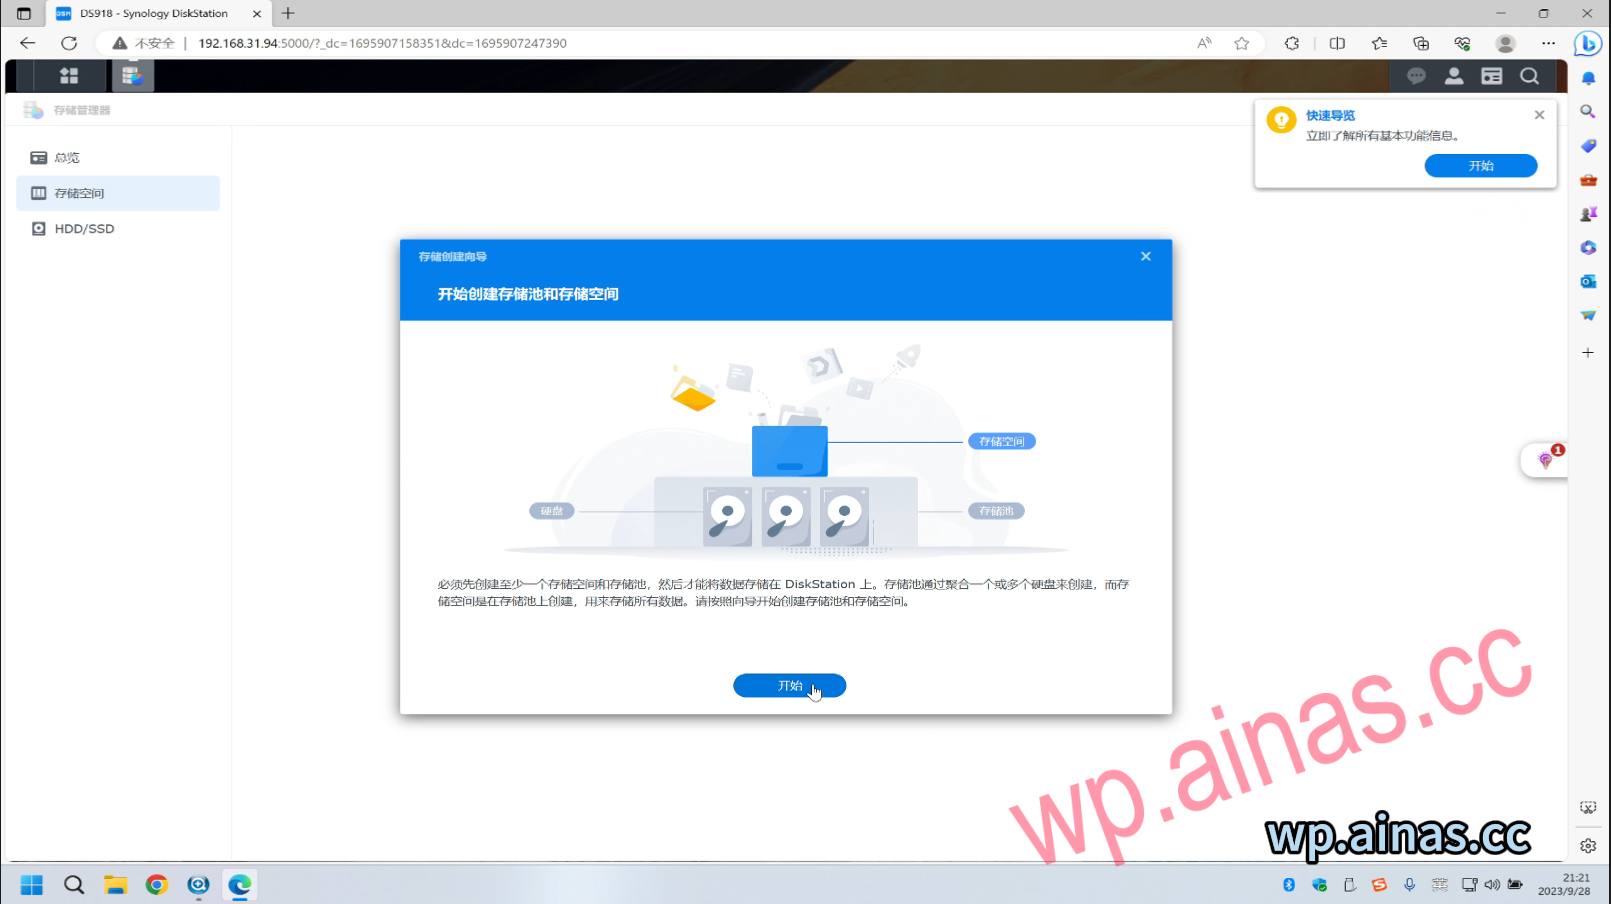
1. If the hard disk is empty, you will be prompted to create a storage pool and storage space. Click here to create it immediately.
2. Click Start
3. Click Next and leave everything else as default.

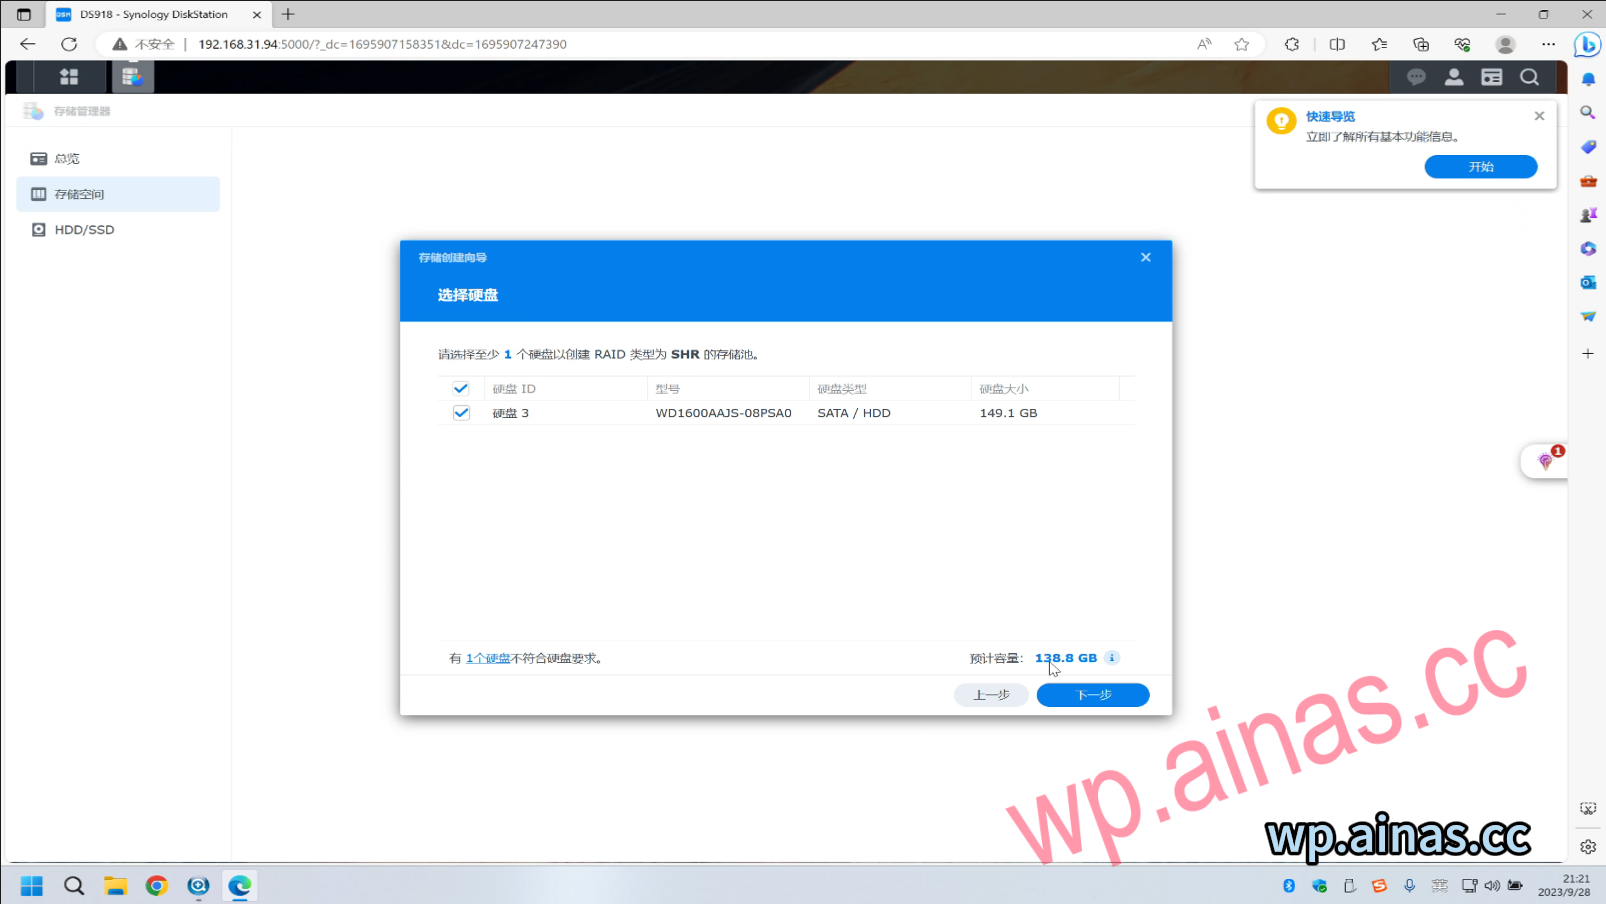
4. Select our hard drive and click Next
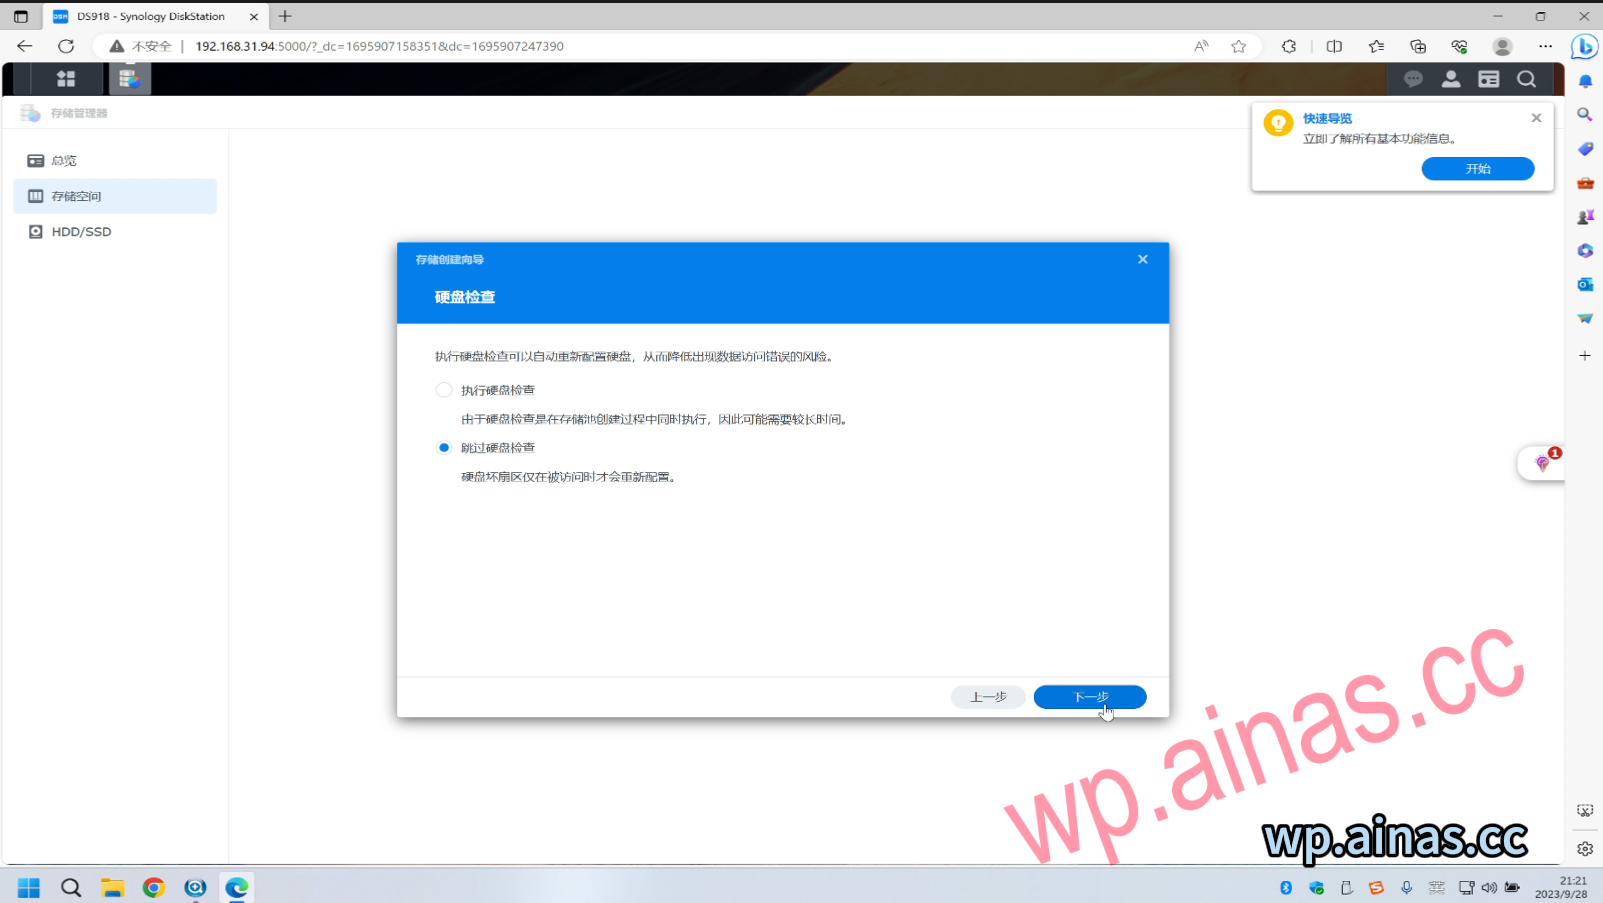
5. Skip disk check – next step
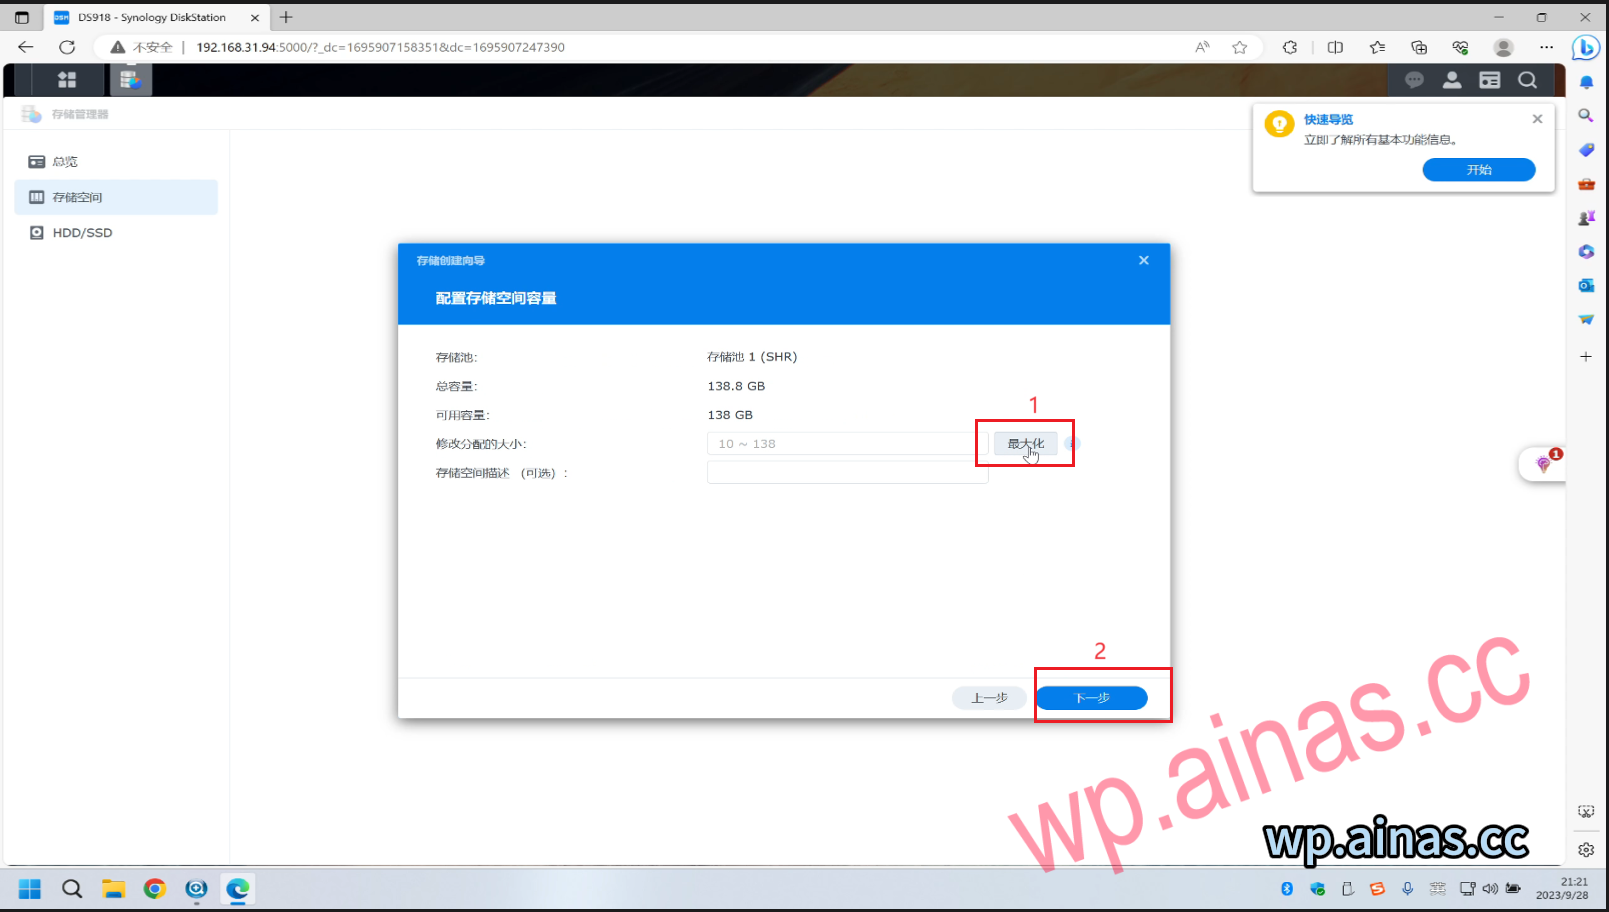
6. Select Maximize and then next step
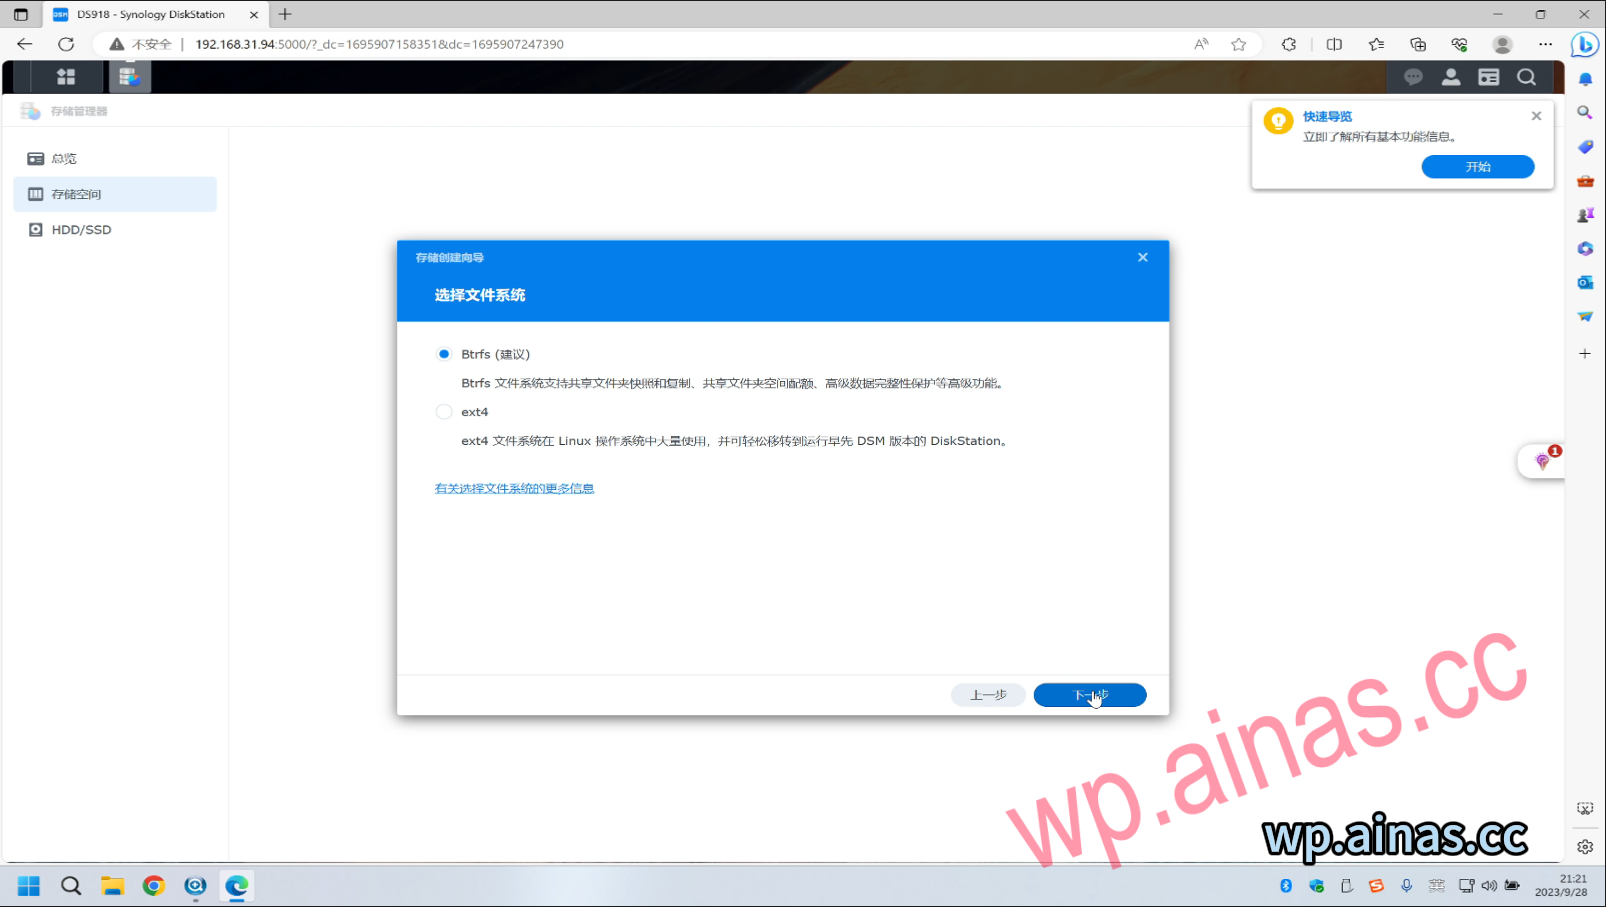
7. Leave it as default, click Next
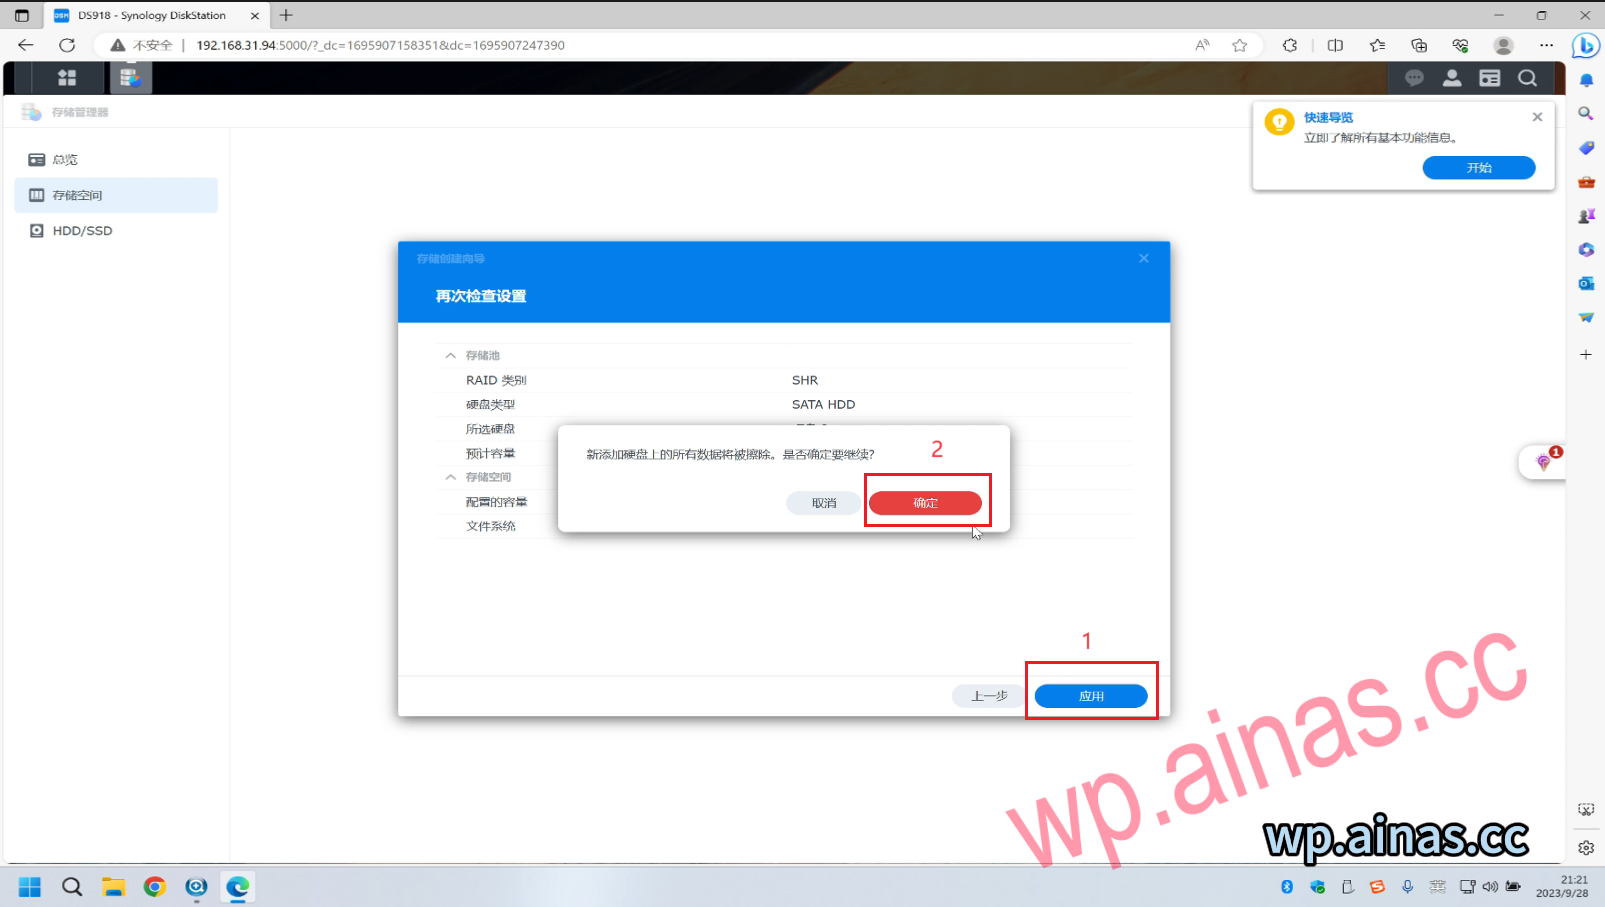
8. Click Apply-then OK
9. In this way, the storage space is created. If you need to transfer files over the LAN, you also need to enter the Control Panel – Shared Folder – New Shared Folder to transfer files within the LAN.