Our Location
304 North Cardinal St.
Dorchester Center, MA 02124


1. Prepare a U disk, preferably larger than 2G, with better quality. It needs to be plugged into the NAS for continuous use. It is recommended to choose a professional-grade hard drive to avoid being unable to start or causing system damage due to damage to the U disk.Here we recommend a professional-grade MLC boot disk with a three-year warranty and a lifespan 10,000 times that of an ordinary U disk:Purchase address
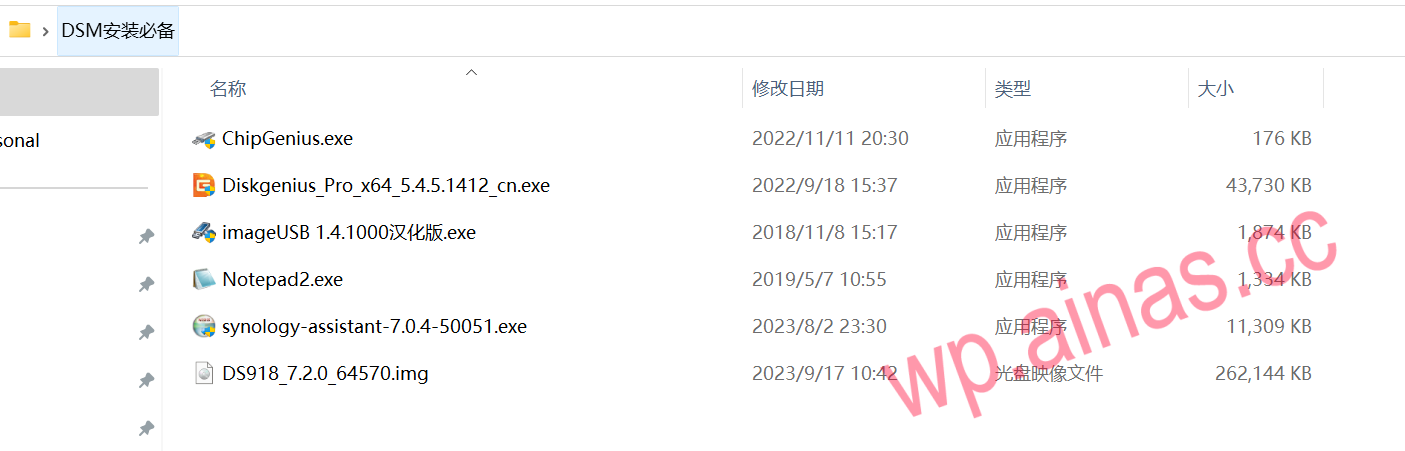
2.For boot files and installation packages, please go to the download center to download the corresponding model version.
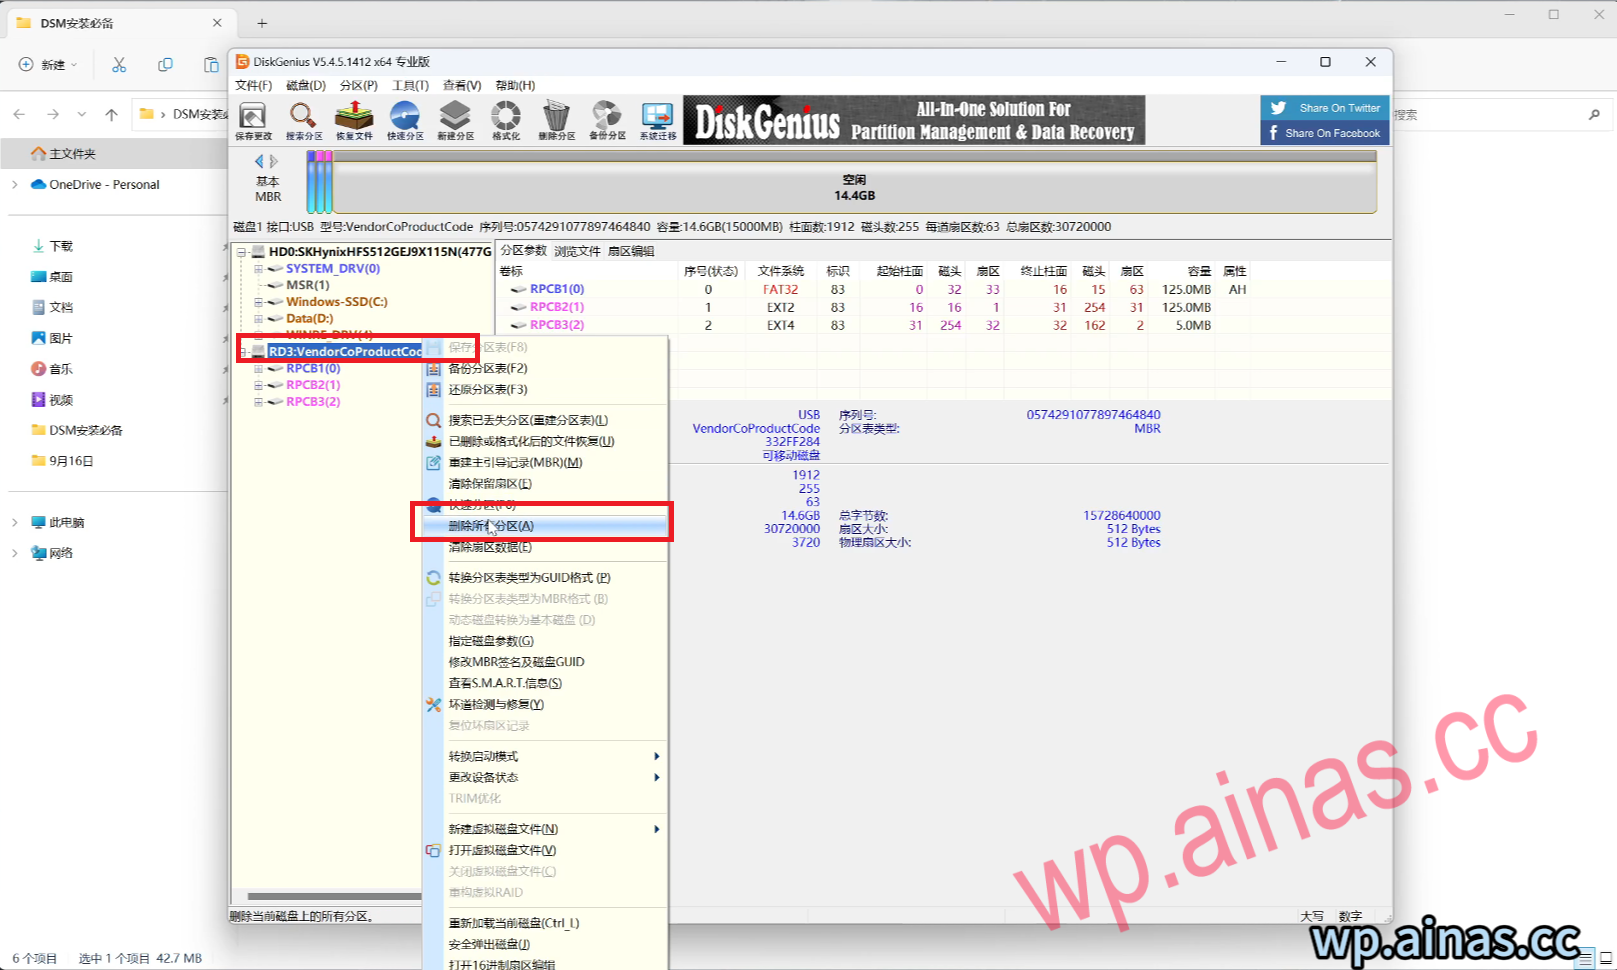
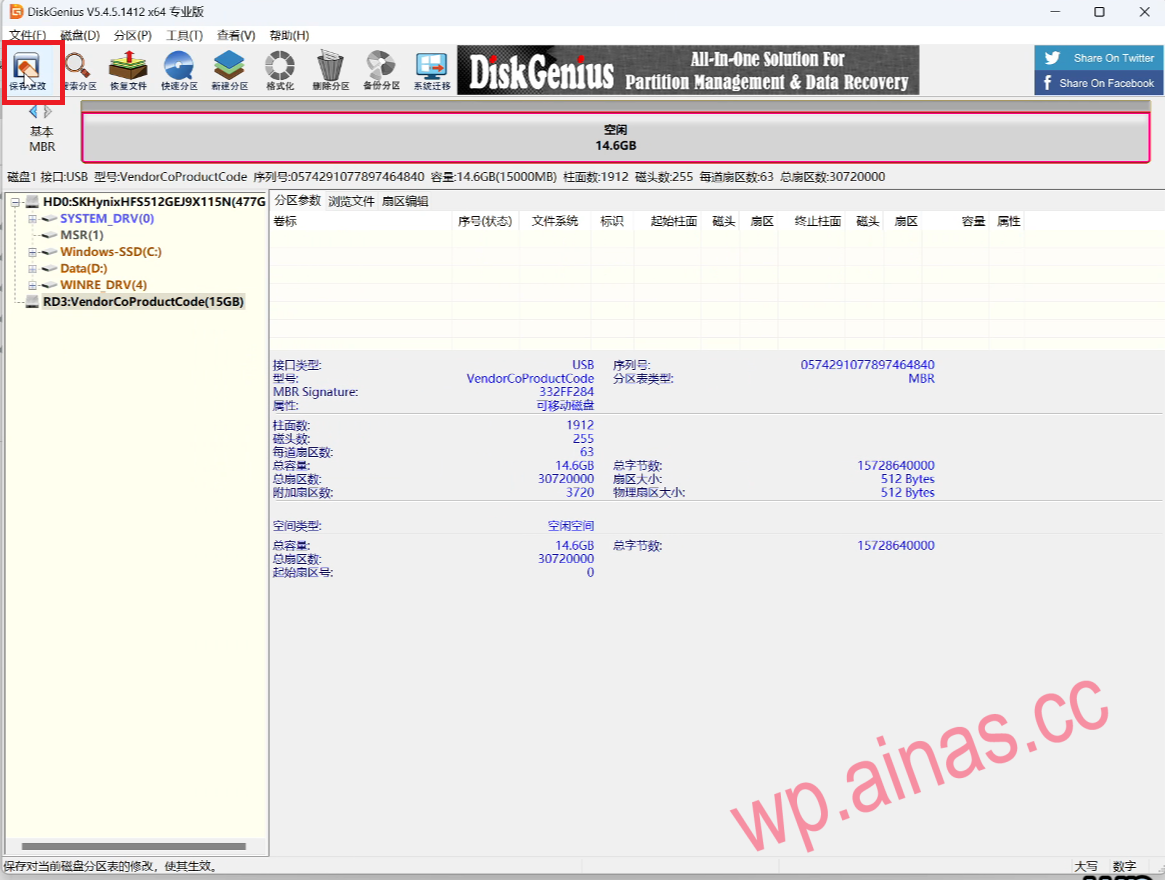
3. Run Diskgenius, select the prepared USB disk, right-click, delete all partitions, and save changes in the upper left corner.
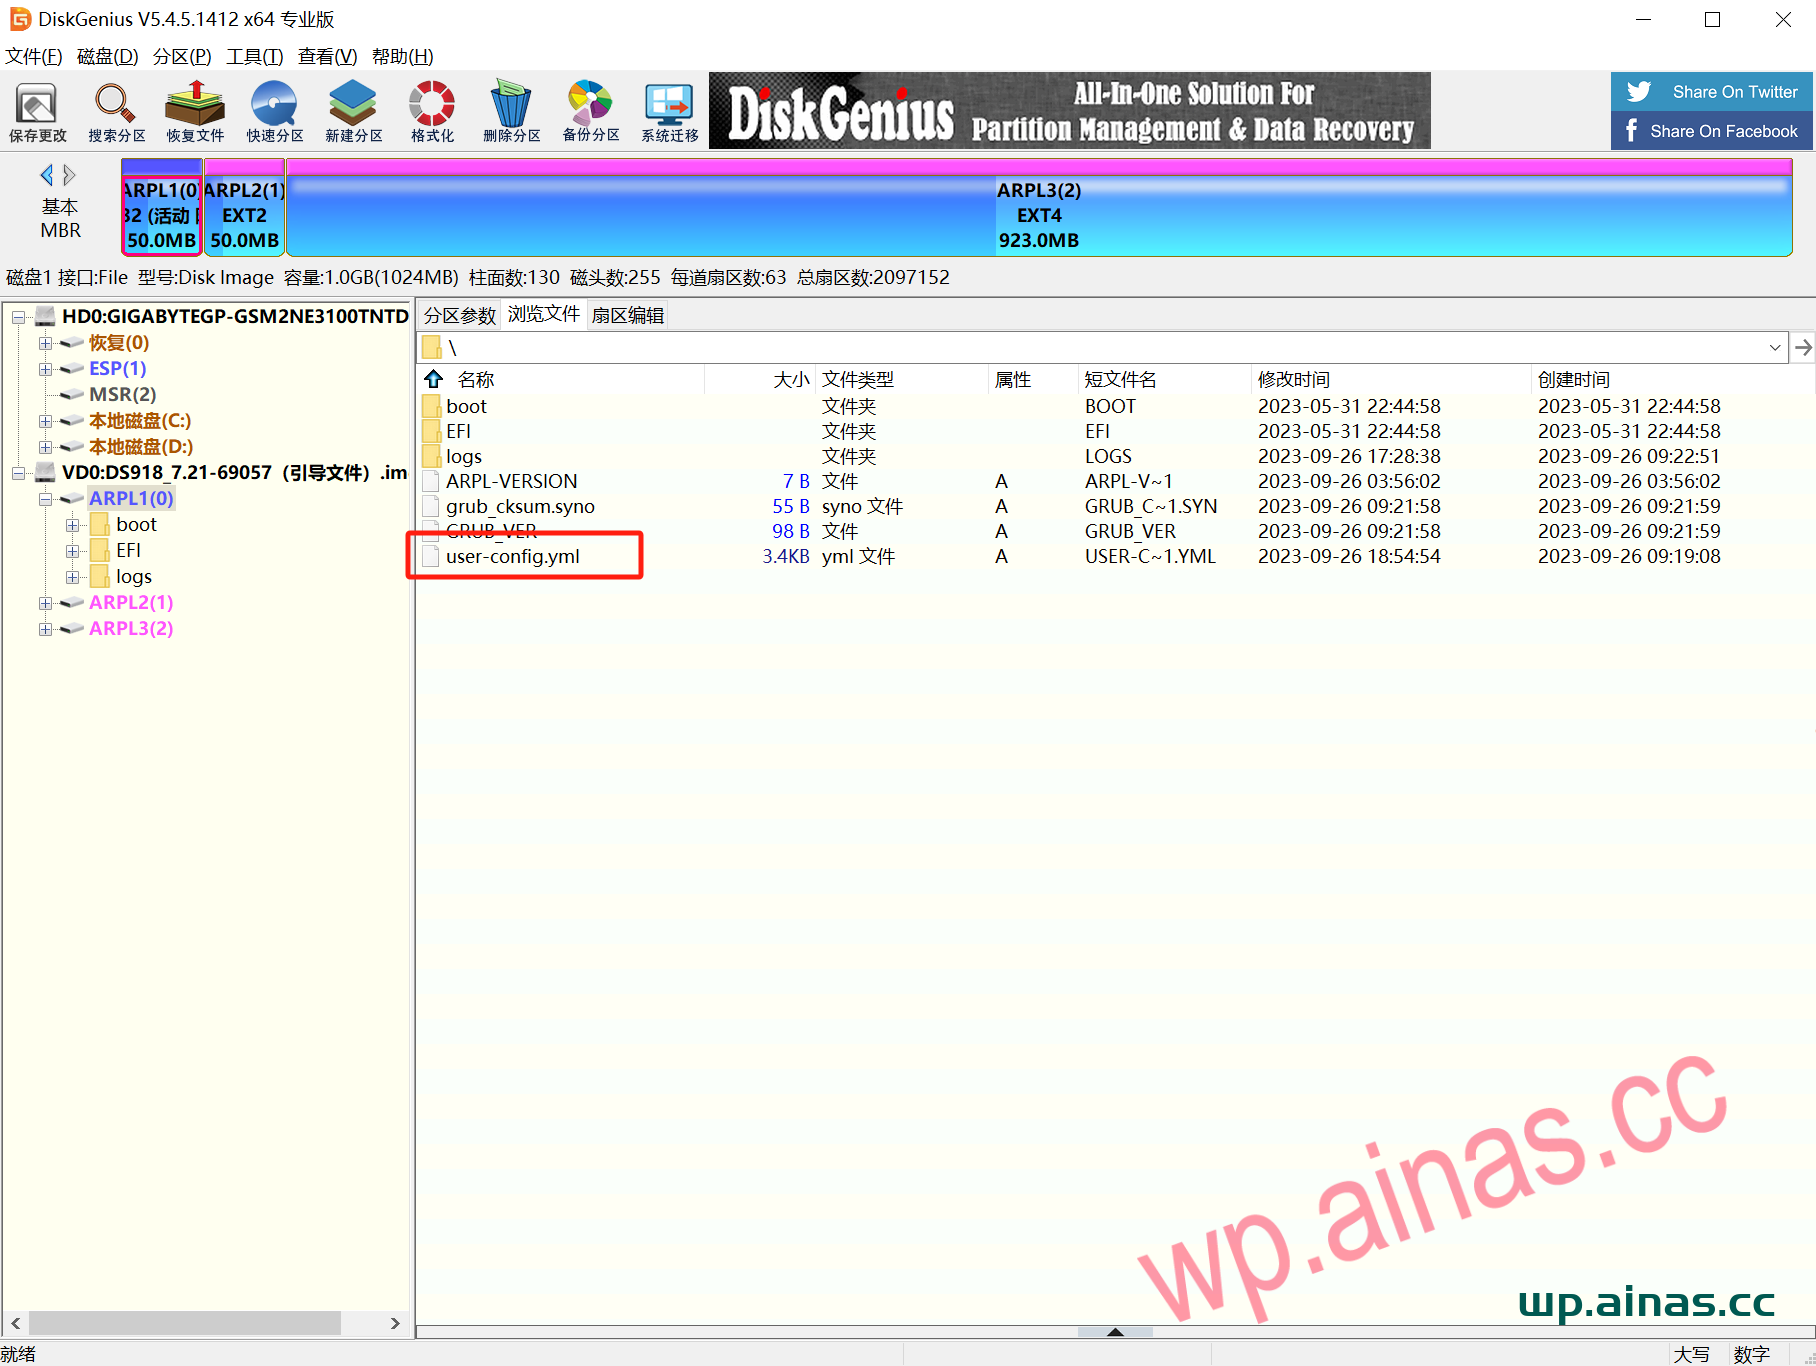
4. Select the disk – open the virtual disk file, and then select the corresponding img boot file

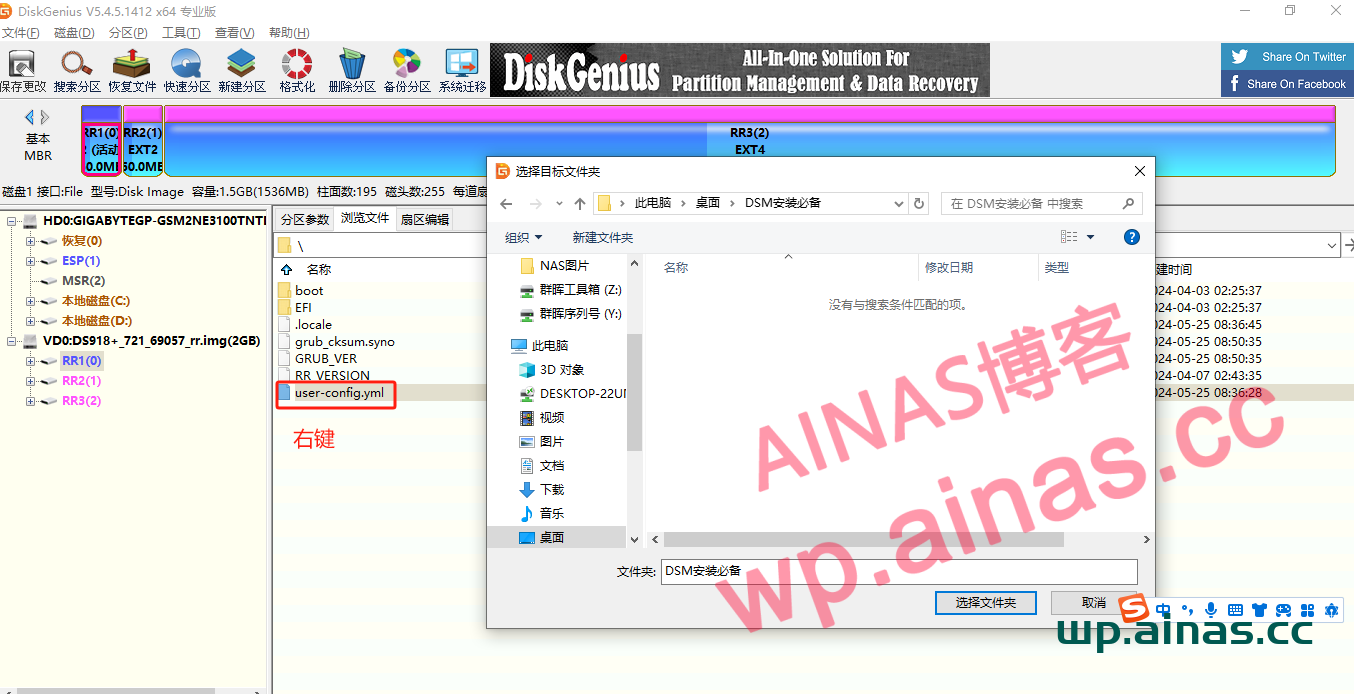
5. Select user-config.yml, the first partition of the boot file, right-click and select copy to the specified folder.
6. willCopy the configuration file to the necessary folder for DSM installation.
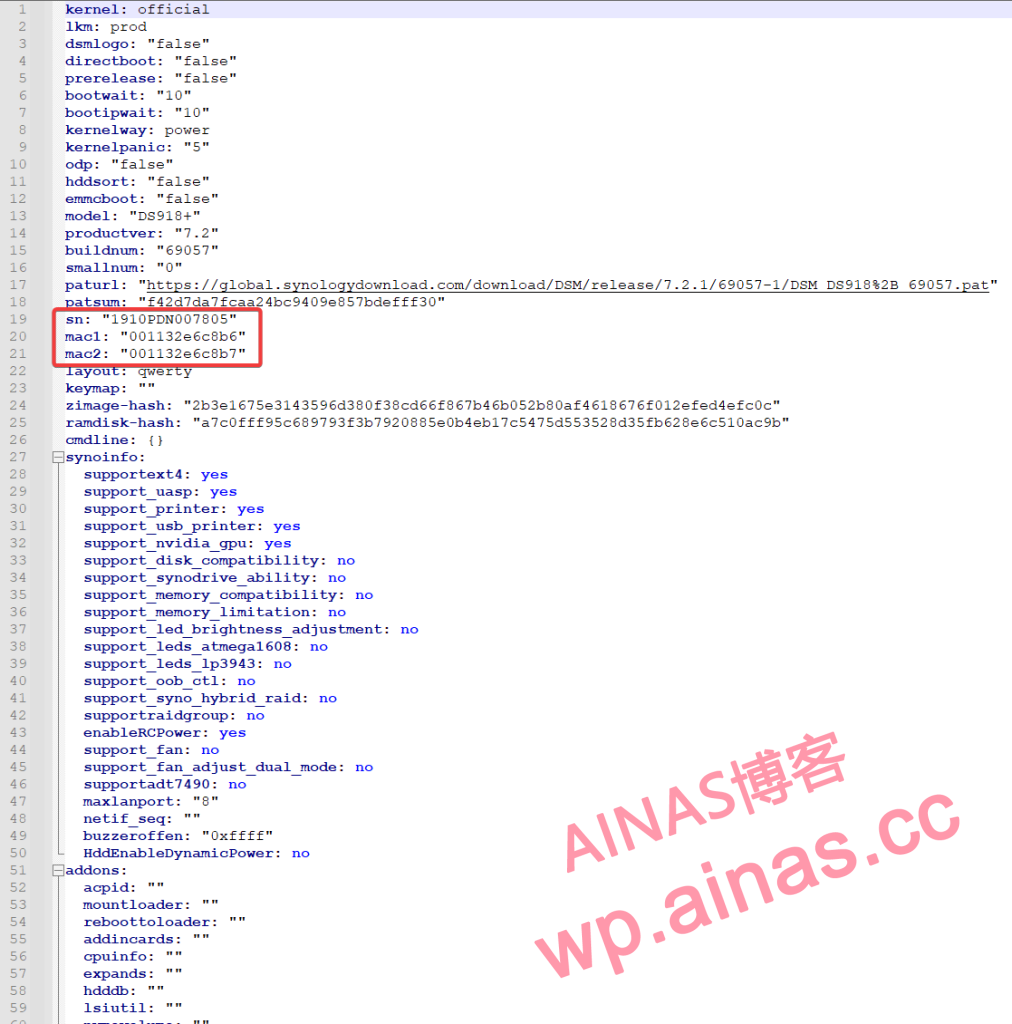
7. Use the notpad2 text editor to open the user-config.yml file, modify the corresponding sn mac1 mac2, save and exit after the modification is completed.(
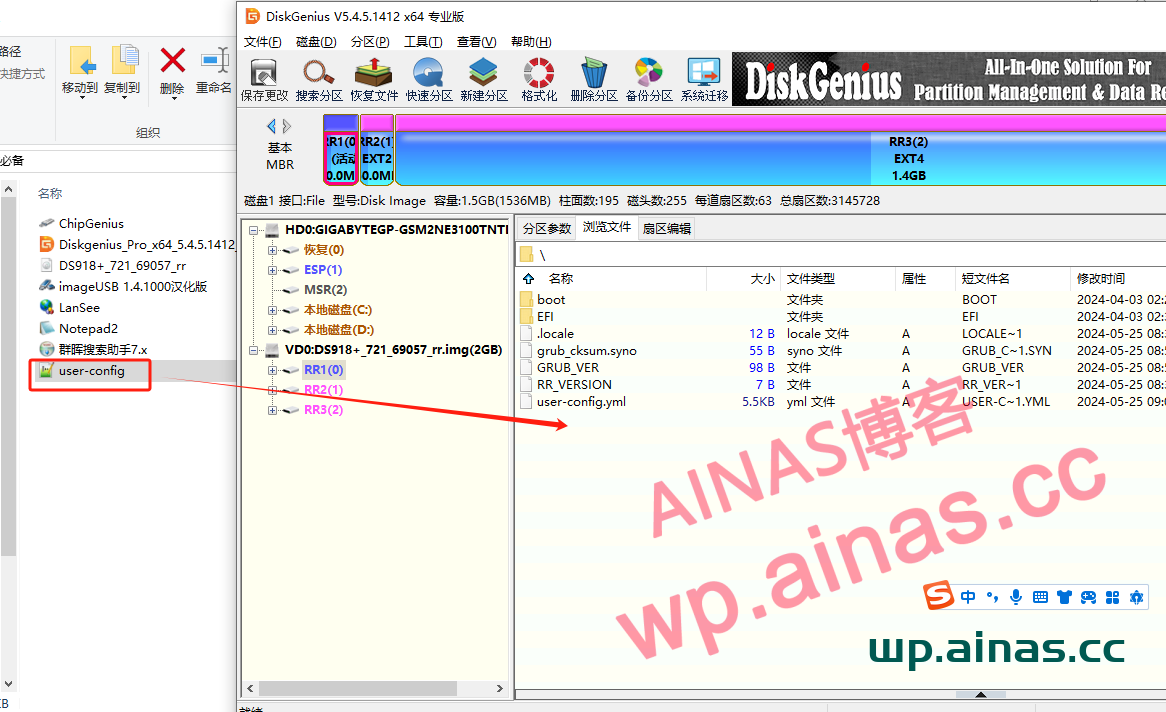
8. Switch to the DiskGenius you just opened, drag the modified user-config.yml into the first partition of the img file, replace the current file, and exit the partition software (
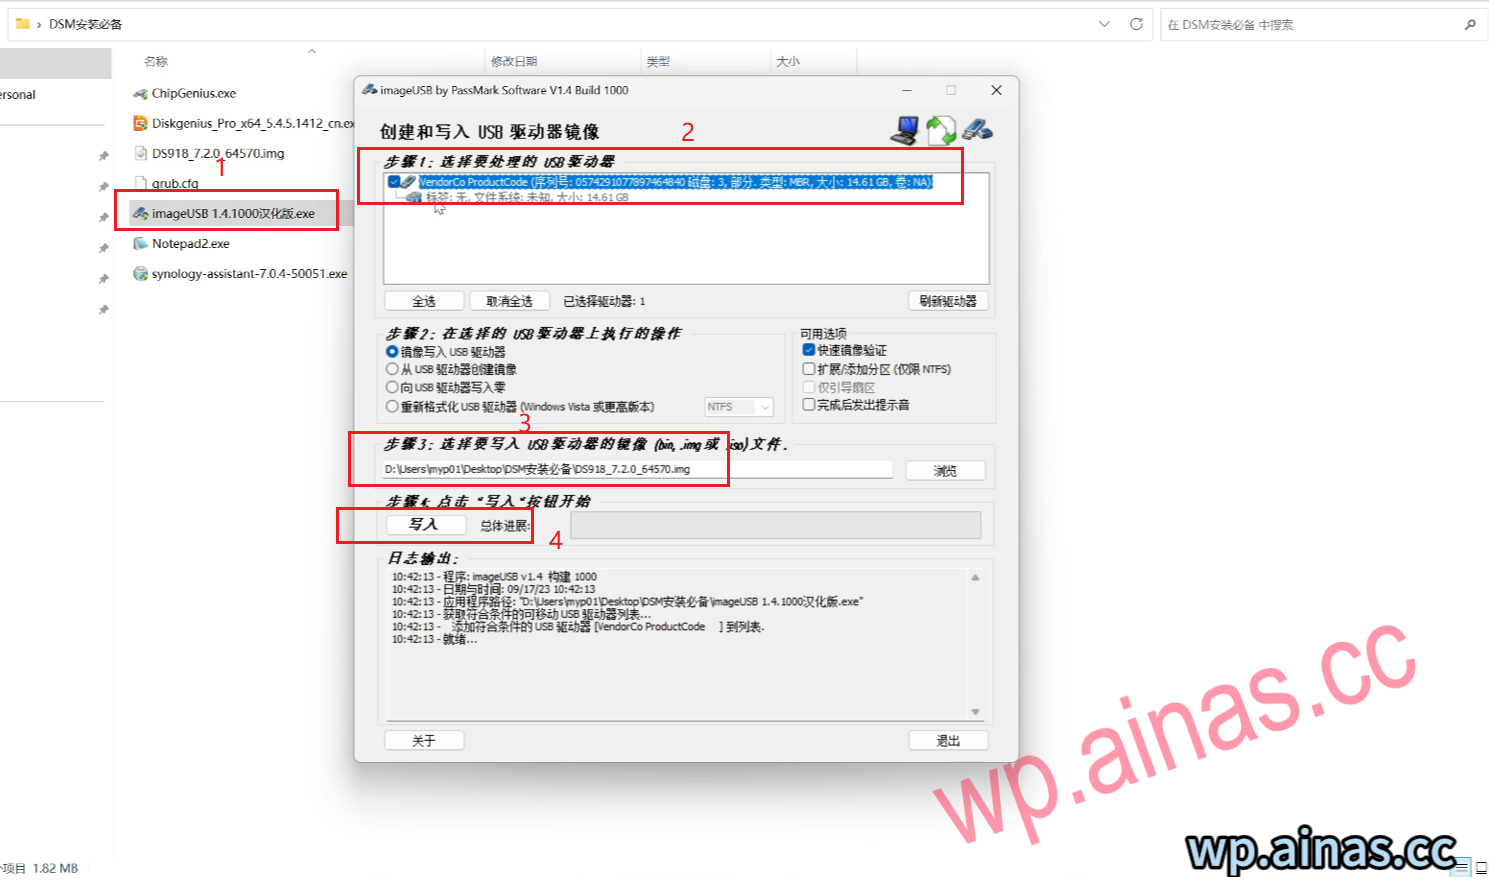
9. Run the imageUSB disk writing tool, select our U disk, and then select the image file. Click Write.
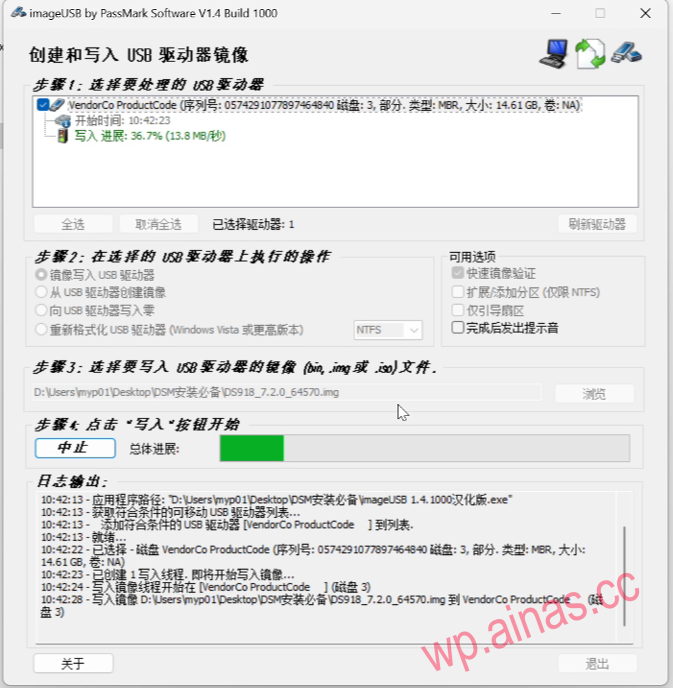
10. When the disk writing is completed, click “OK” in the pop-up window and close the disk writing software.

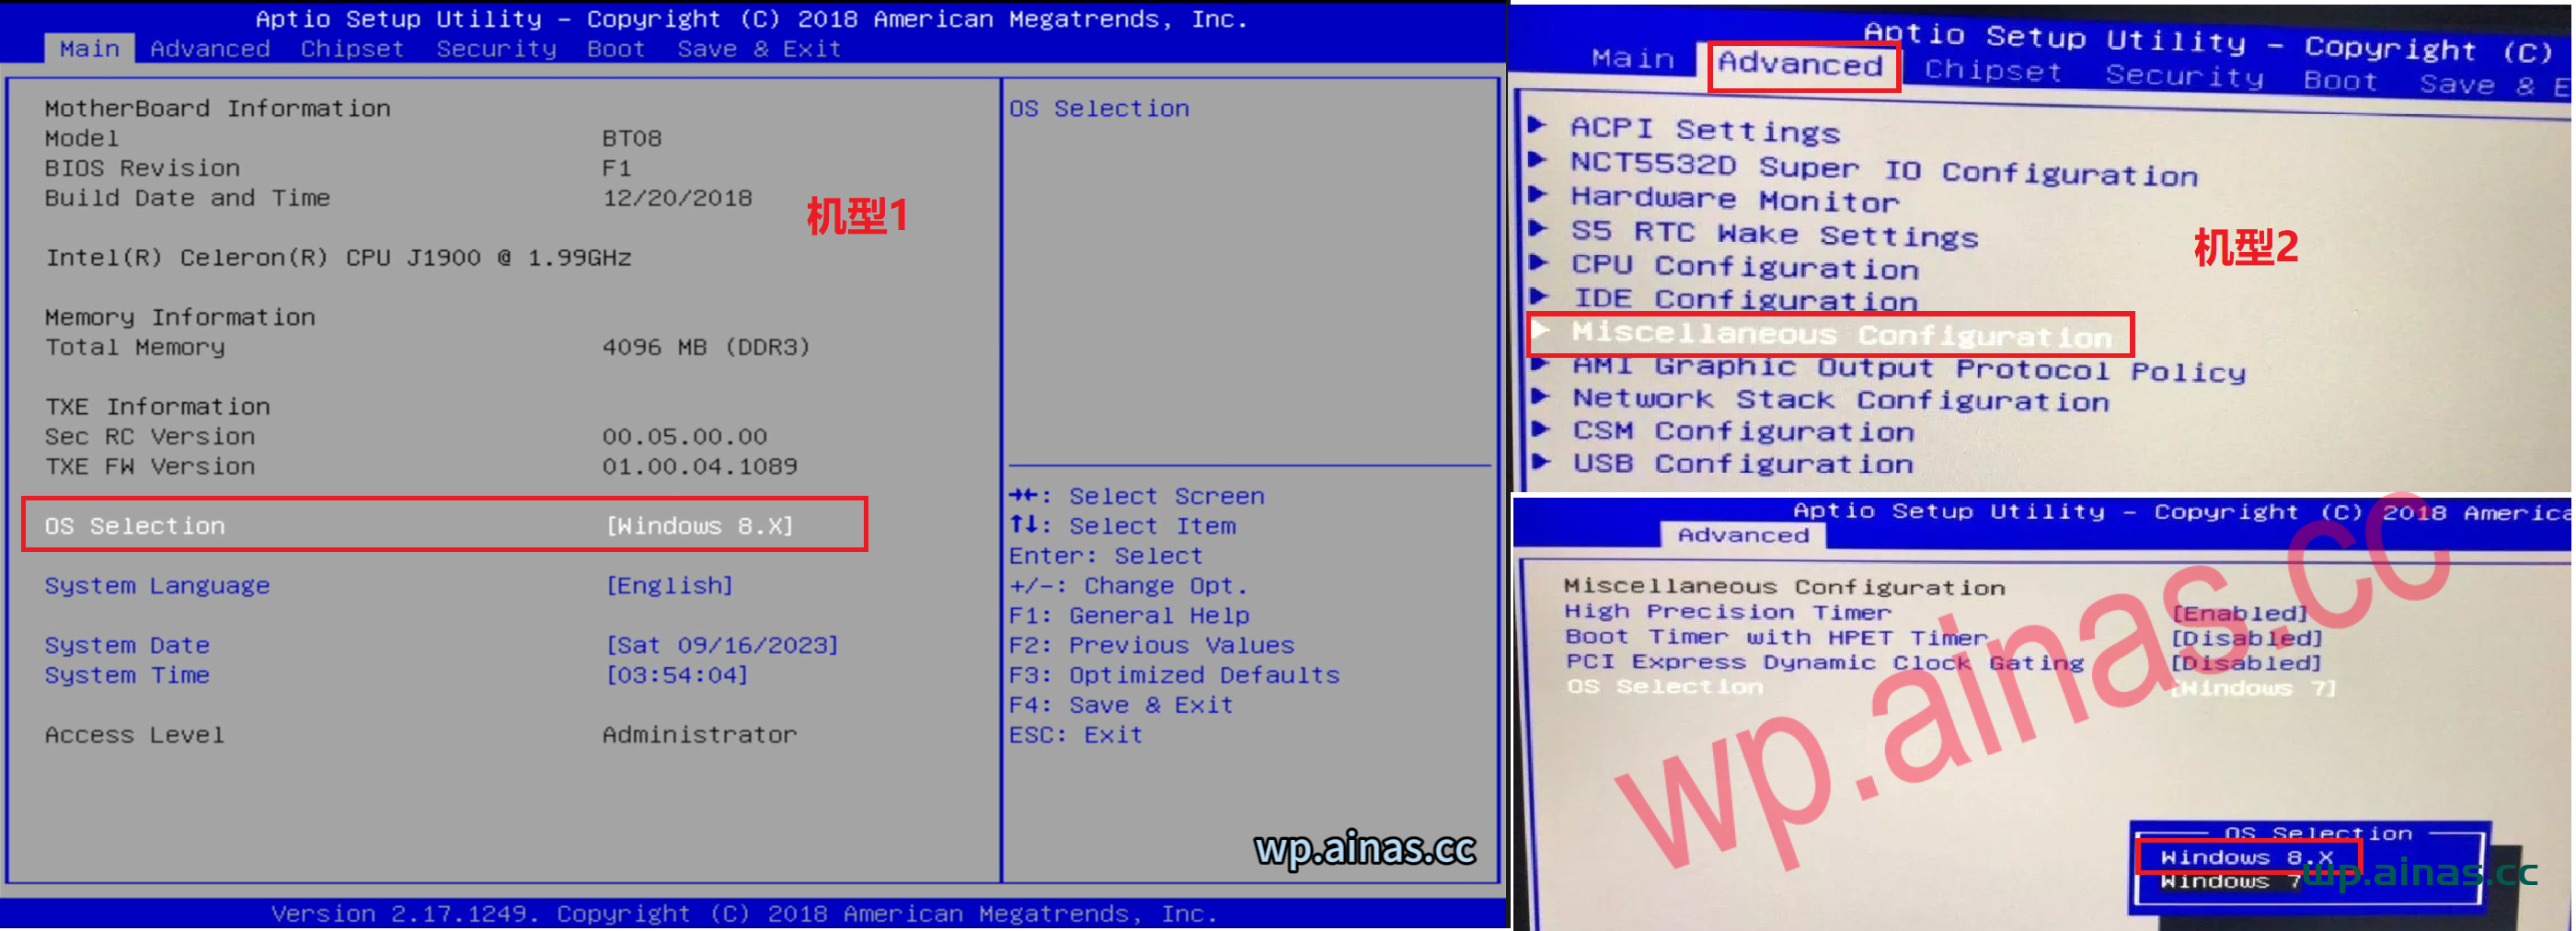
1. Change the OS selection to windows 8.x (only for j1900 models, other models do not need to be changed)
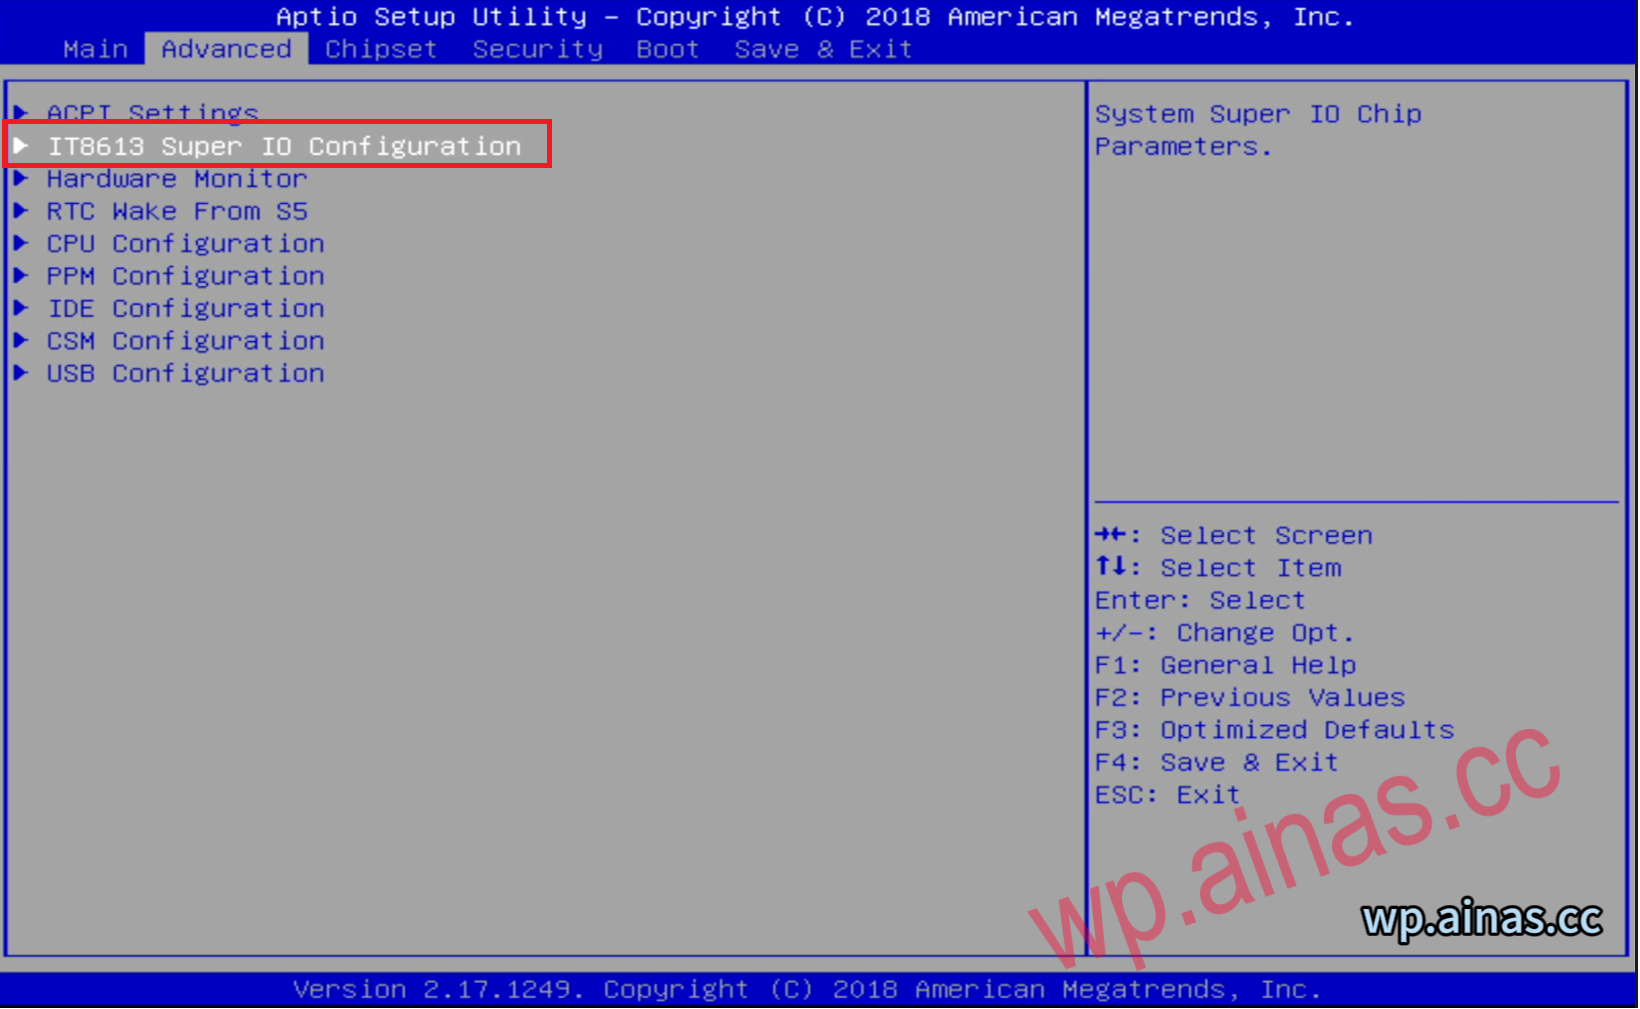
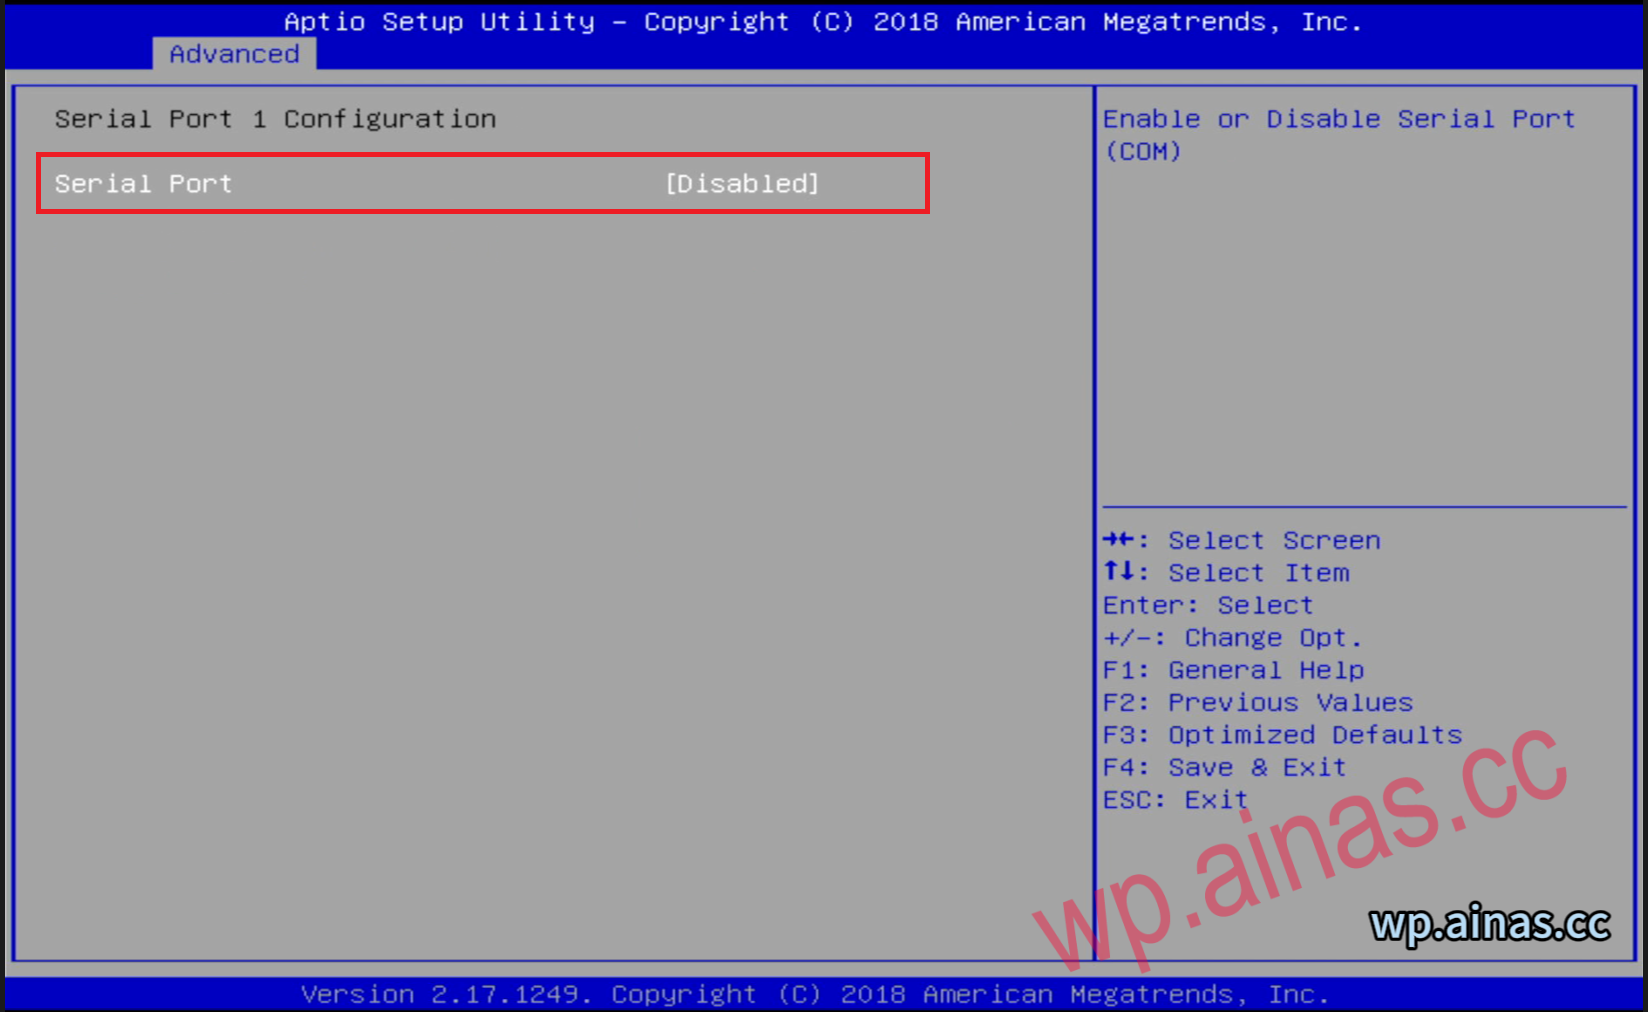
2. Turn off serial port 1 in the second item of advance(Only for j1900 model, other models don’t need to change)
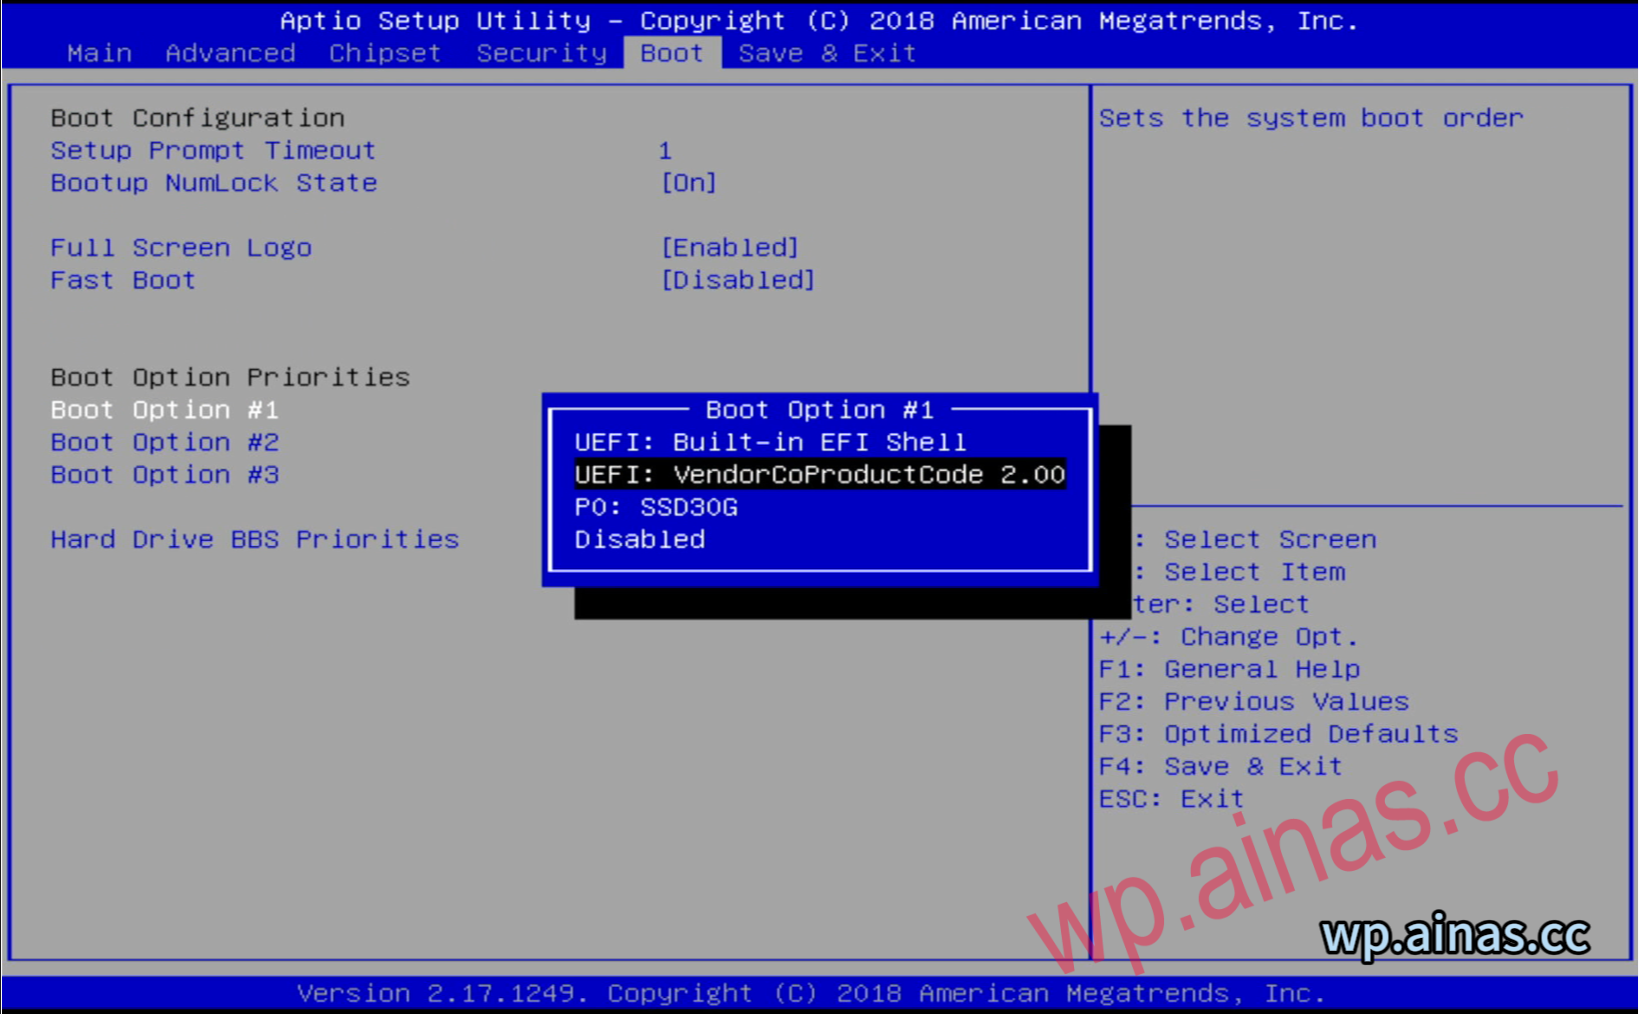
3. Select the boot option, press Enter at Boot Option #1, select our USB flash drive, press Enter, F4 to save the changes, and the system will automatically restart.
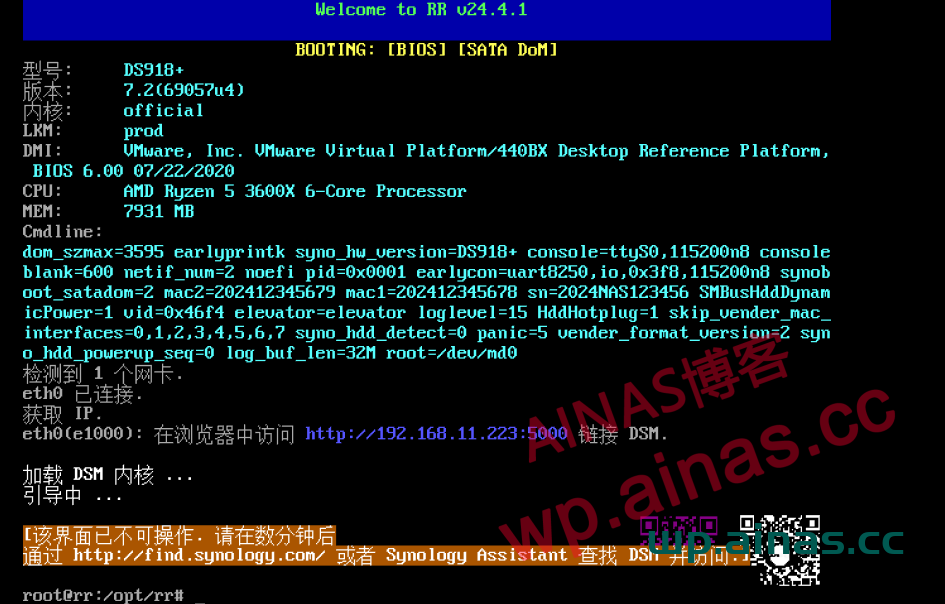
1. After restarting, you will enter the U disk boot interface. The boot program will automatically configure the software and hardware. After the configuration is completed, it will automatically restart.

2. After the screen displays these contents, it stops here. This is the normal startup interface of DSM7.X boot. Do not think that the system is stuck.
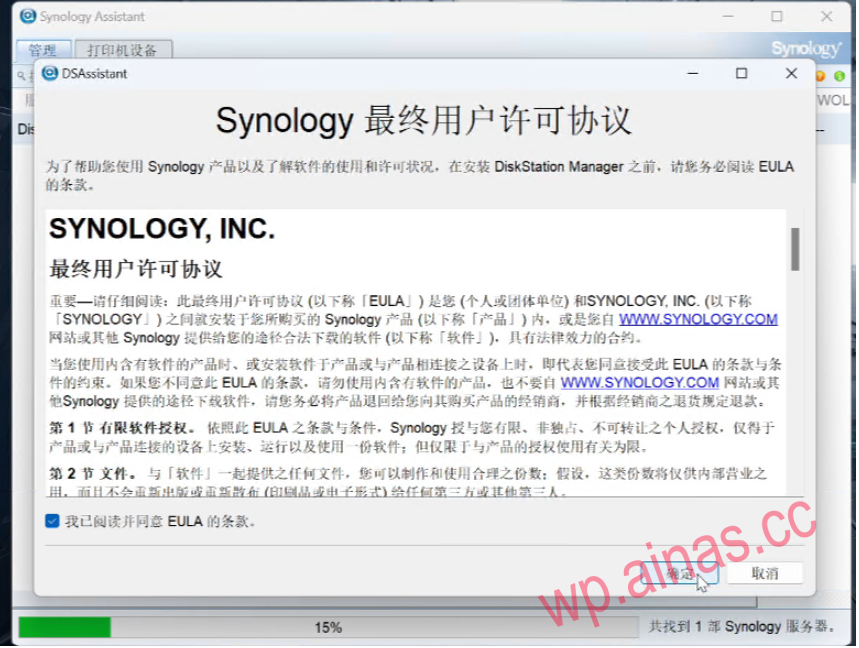
3. Go back to the Windows computer, install Synology Assistant, and run Synology Assistant. After booting the NAS to the USB disk for about 3-5 minutes, click Search, and you will see the IP address of Synology displayed (the computer needs to be connected to the same router as the NAS, and all firewall software must be turned off on the computer). If your hard drive is not the one being used by Synology, the status at this time will show that DSM is not installed.

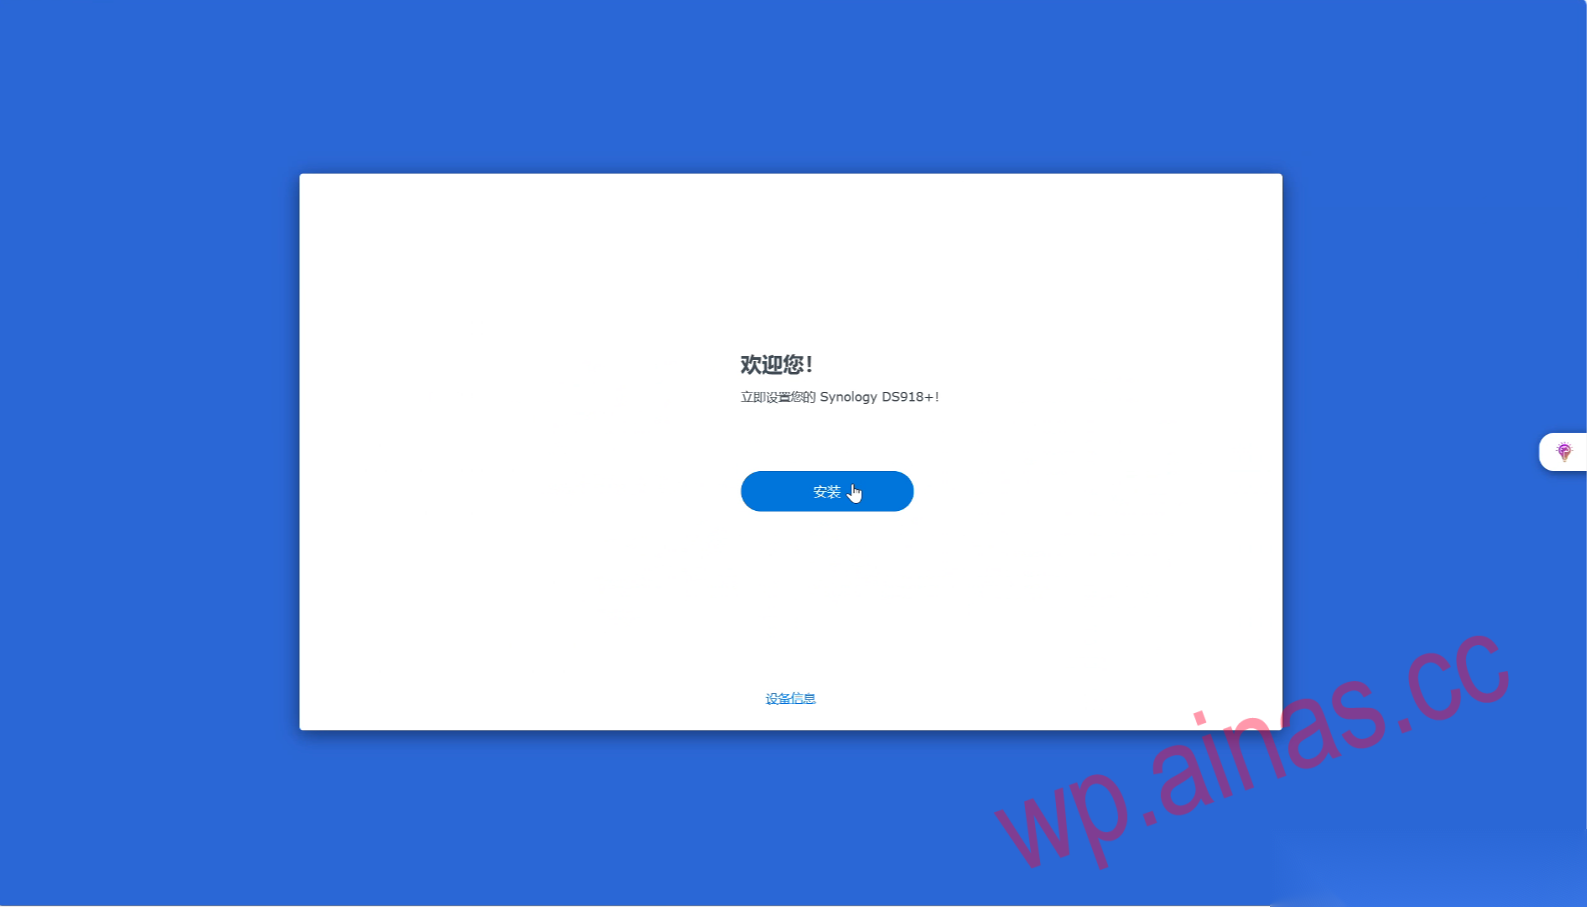
4. Click to search for this address and double-click to enter.Check the lower left corner to confirm.
5. In the pop-up browser, click “Install”.
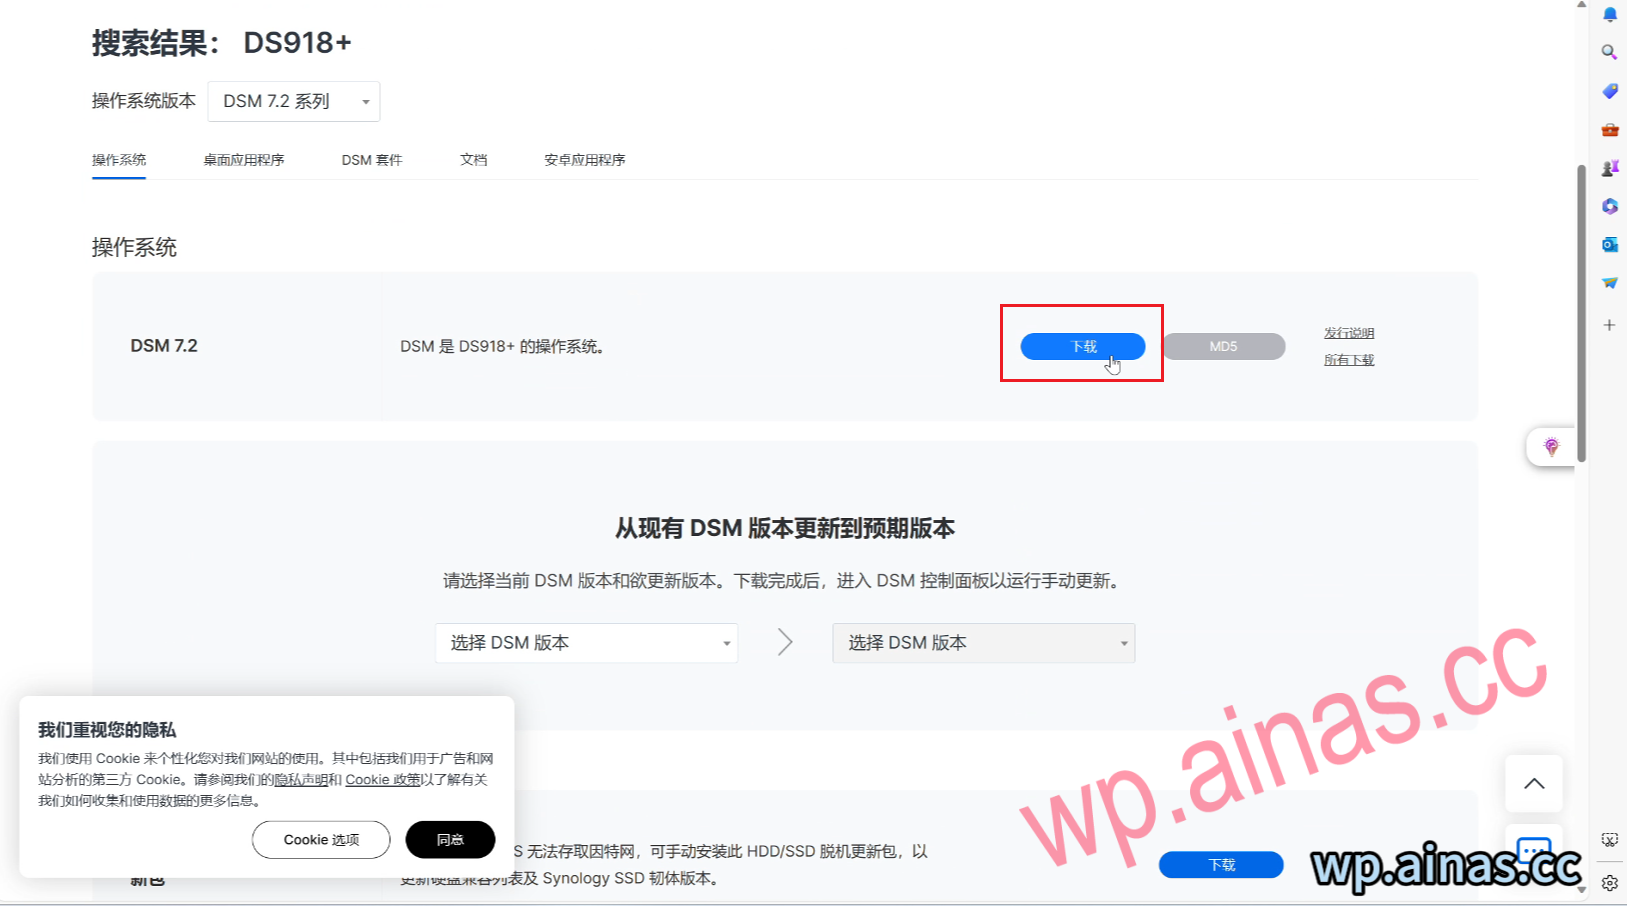
6. Click the link below and choose to download the latest version from the official website.
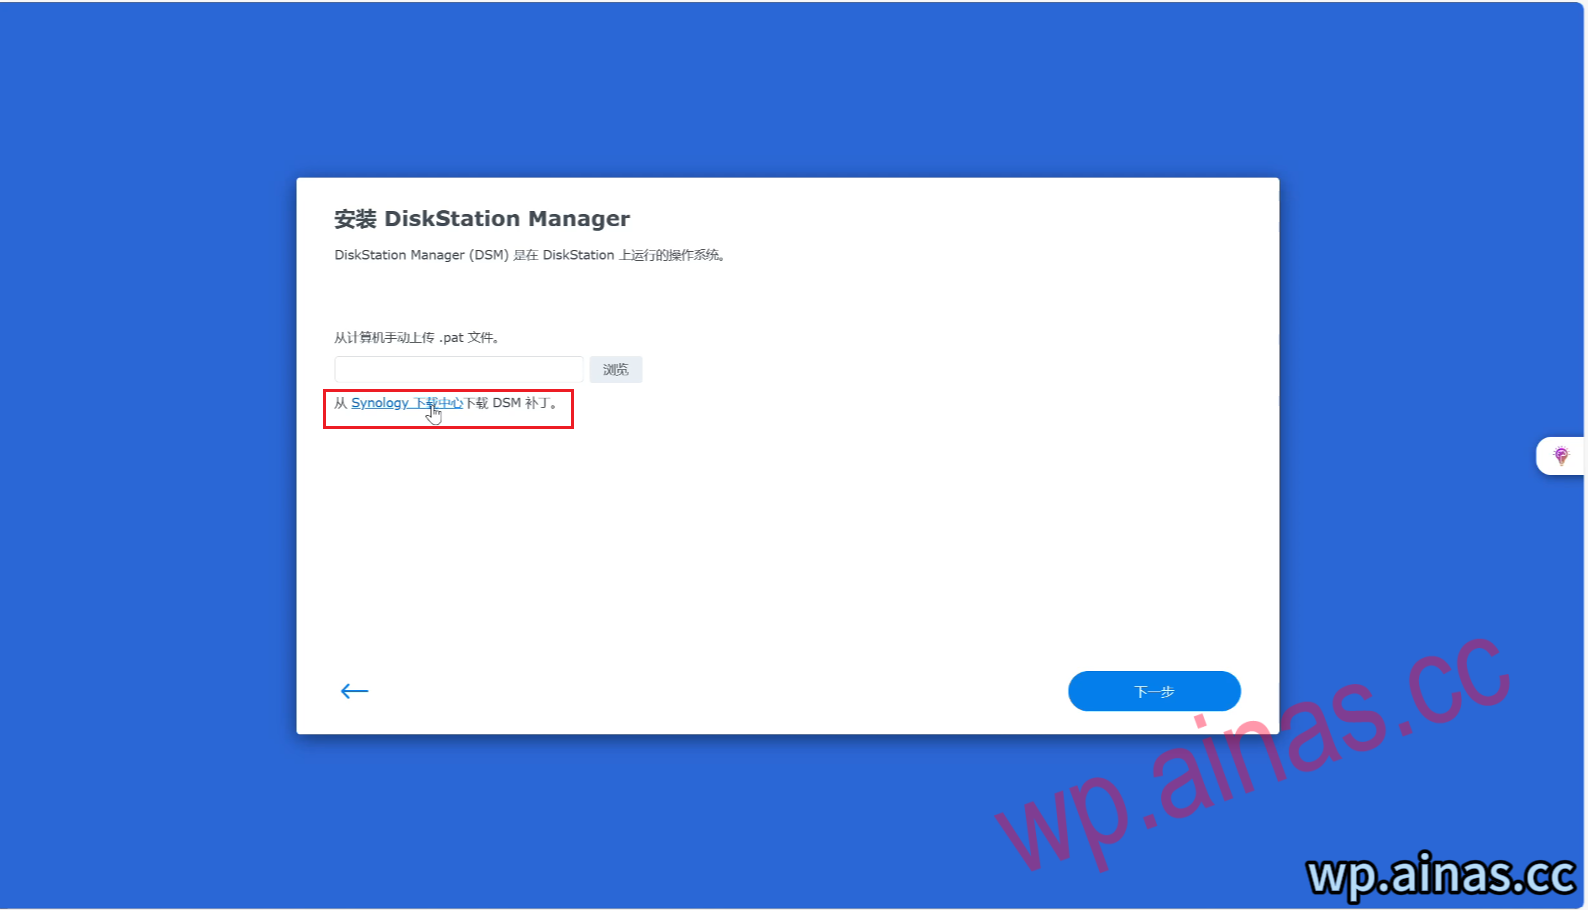
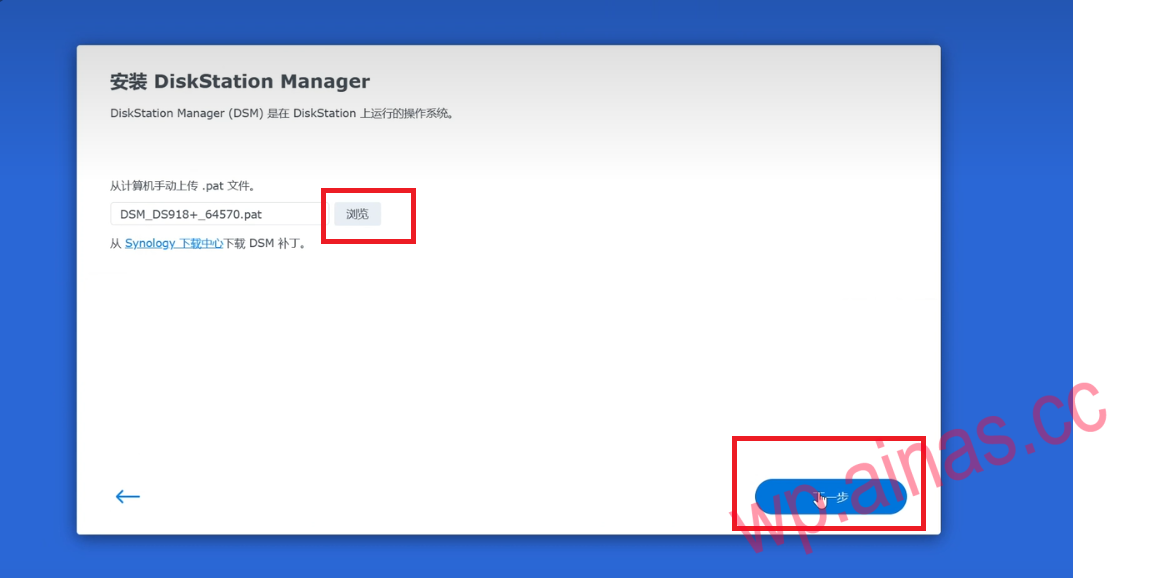
7. Browse and select the downloaded pat file and click Next.
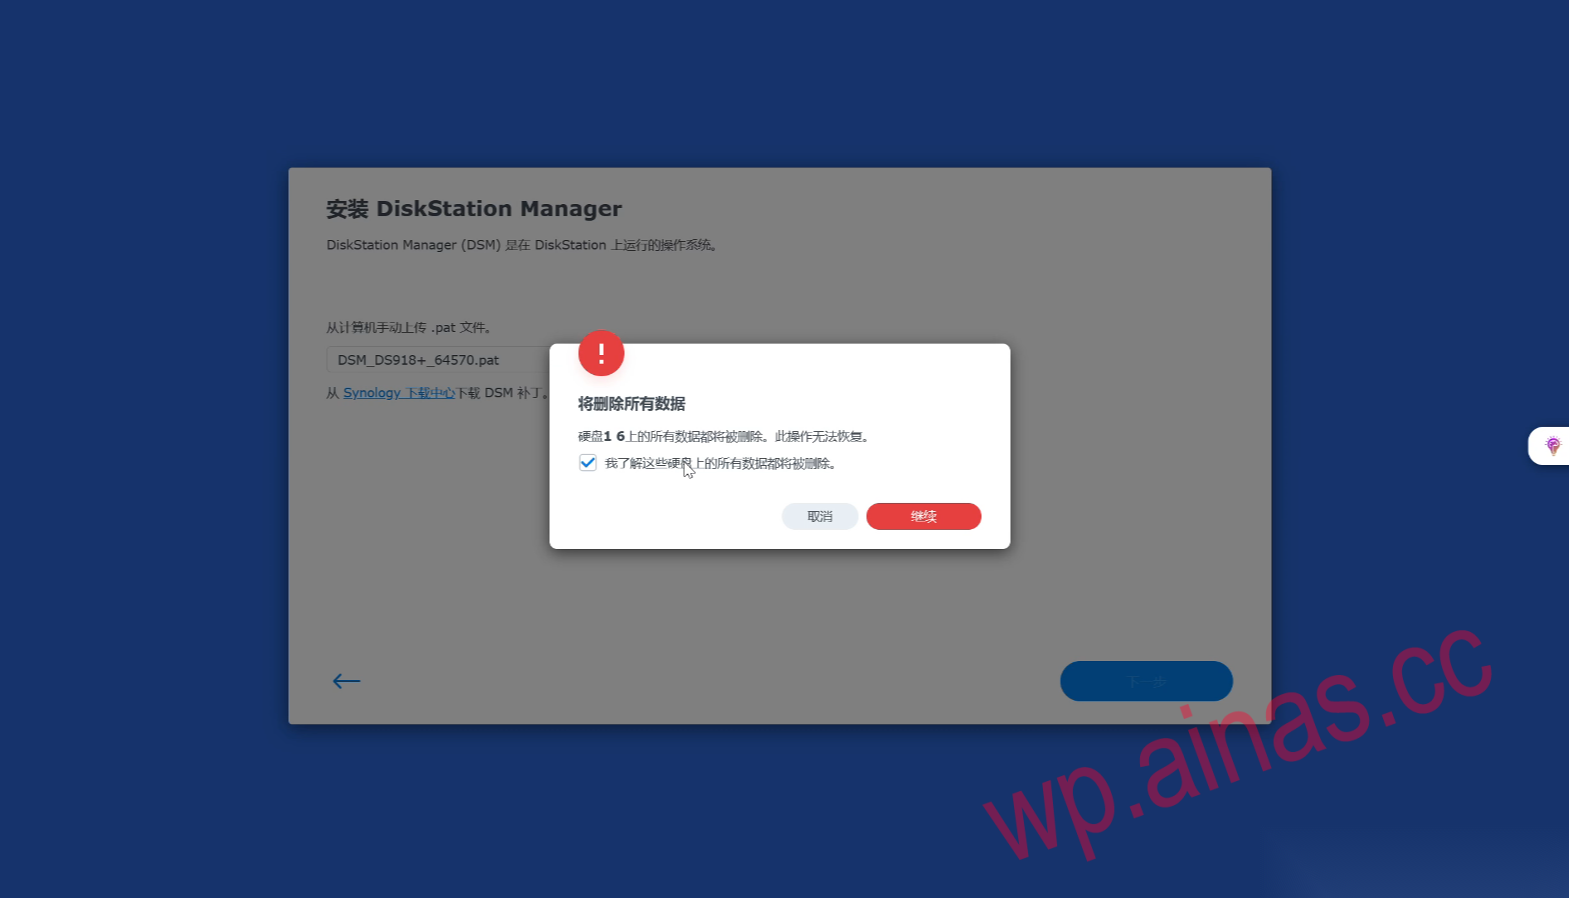
8. The system prompts that hard disk 1 will be deleted, check the box and continue.
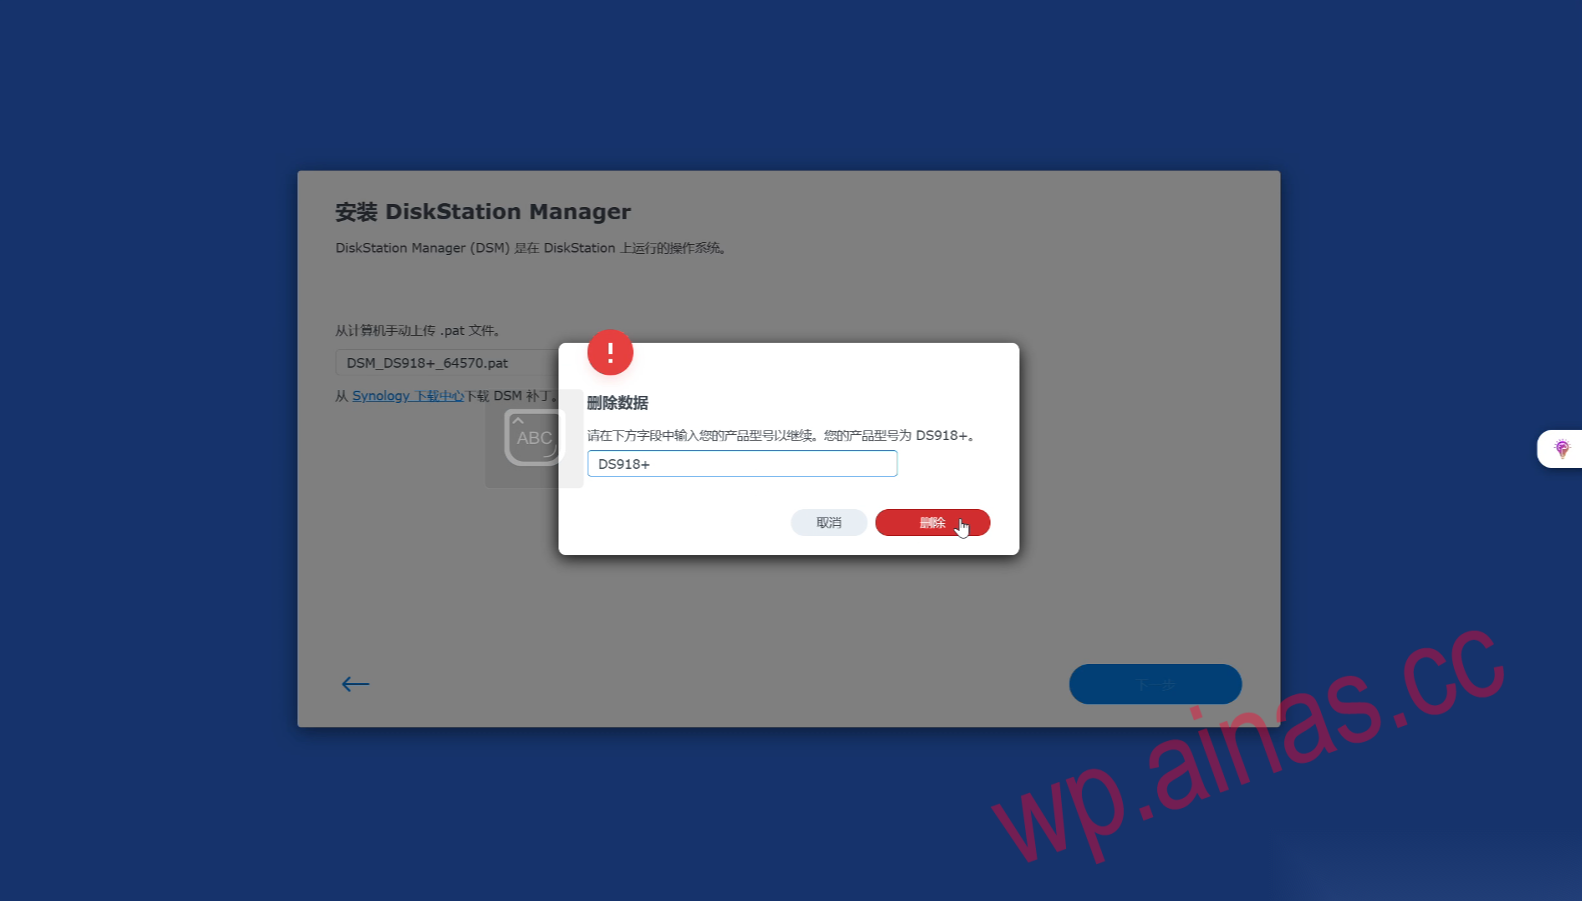
9. Enter Synology’s model number “DS918+” here and click Delete
10. Start the installation.
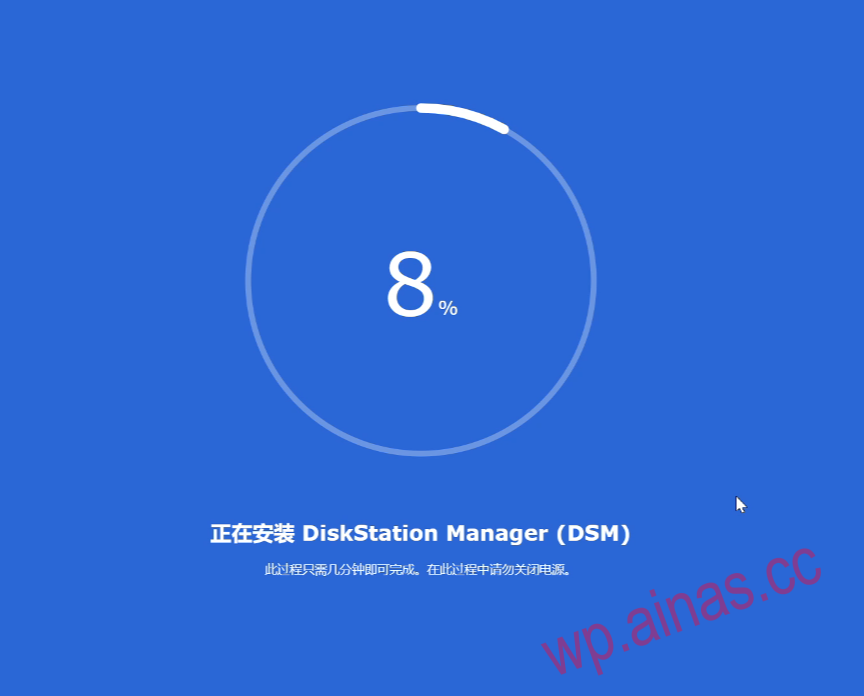
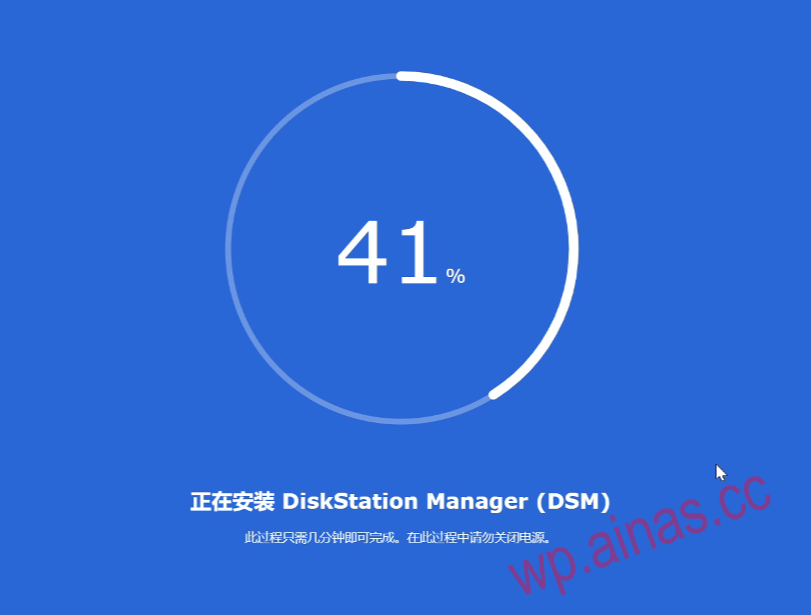
11. Very smooth, no lag at 40%.
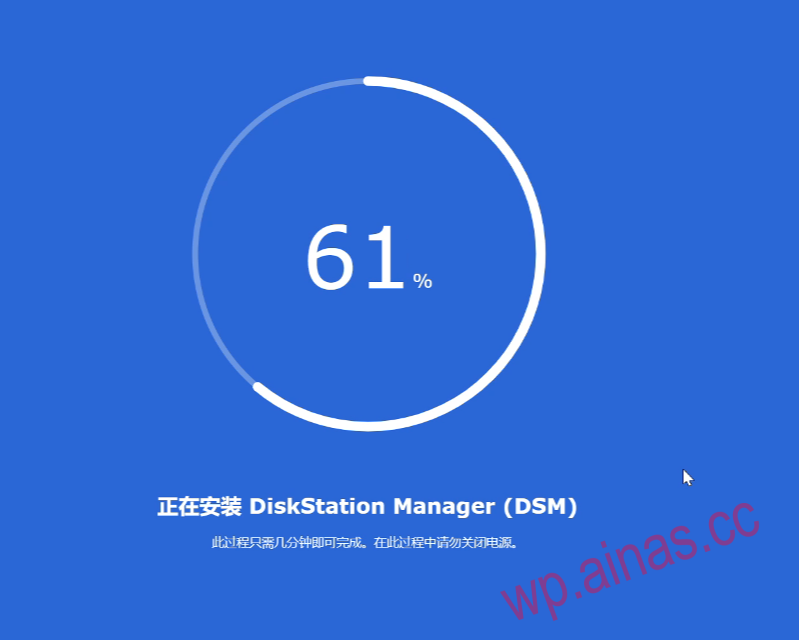
12. It’s not stuck at 55% either.
13. After the installation is completed, the restart starts, and a 10-minute countdown is displayed (the actual waiting time for restart depends on the hardware configuration, it may be 1 minute if the configuration is good, and 5 minutes if the configuration is poor).

14. After the restart is completed, you will enter the system and the installation of built-in packages will begin.
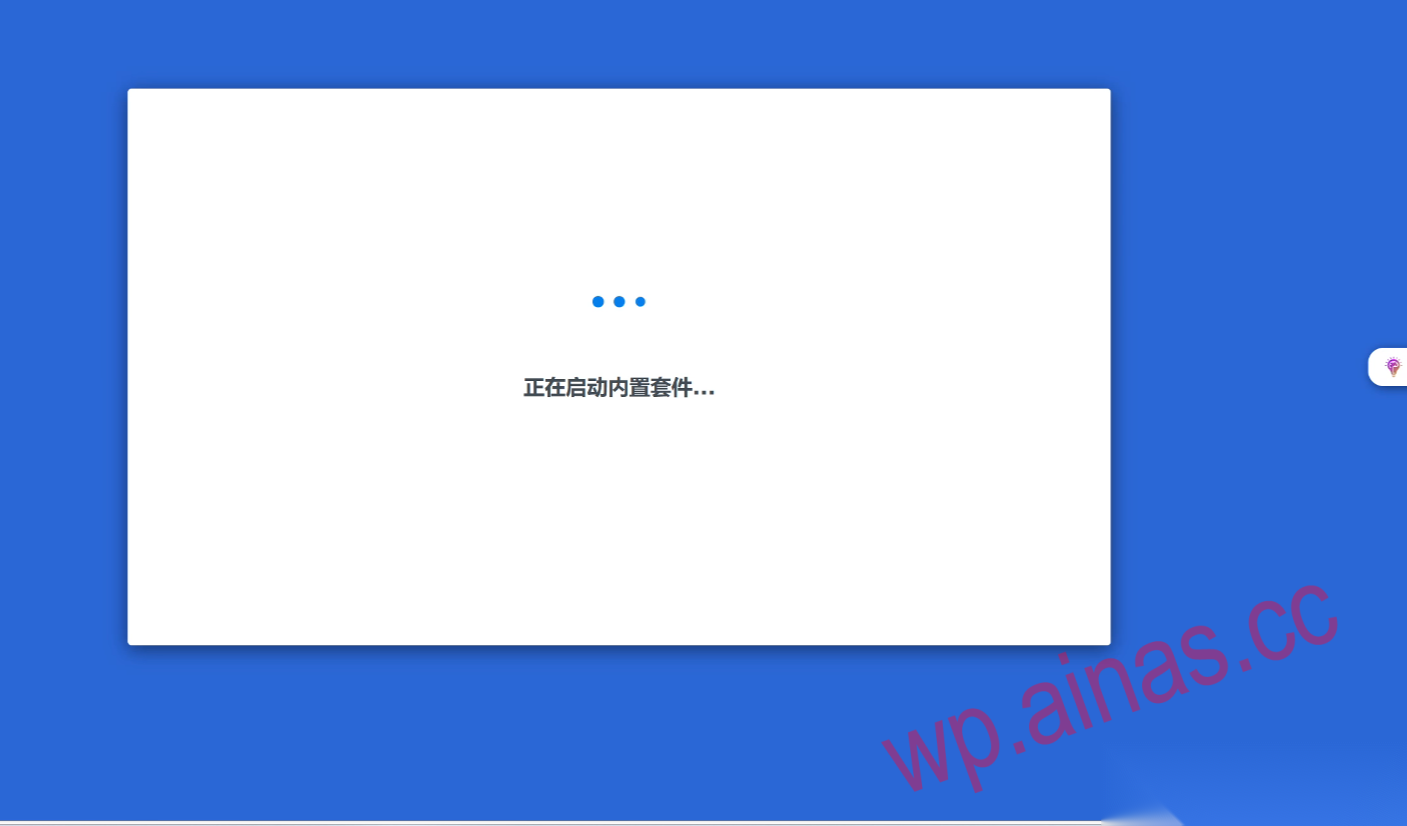
15. Wait patiently.
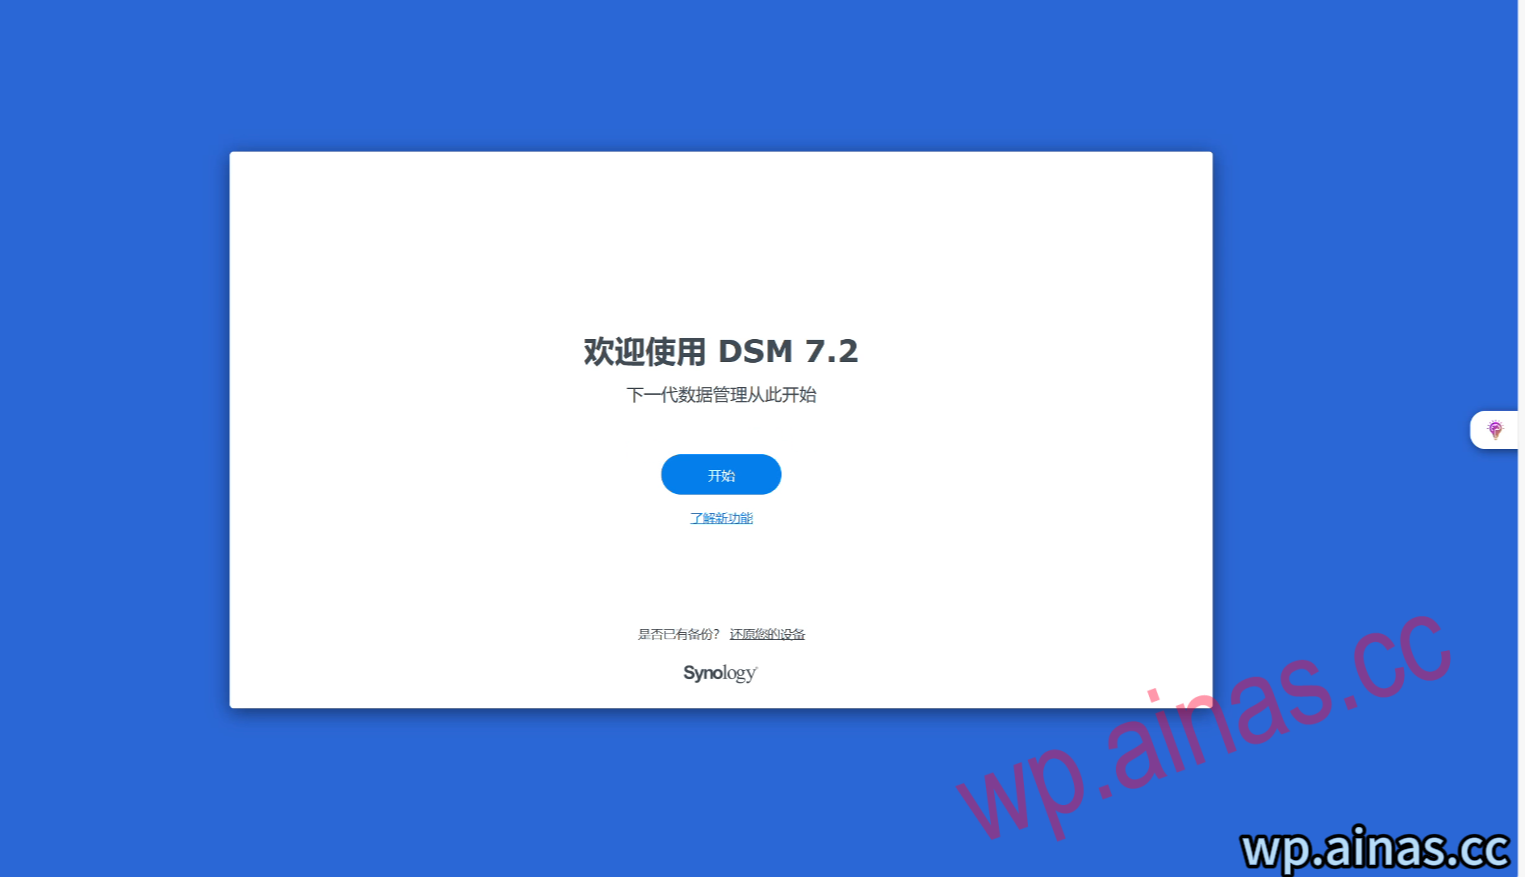
In this way, the entire system is installed.