Our Location
304 North Cardinal St.
Dorchester Center, MA 02124

If you have N hard drives and a USB flash drive, the normal method is to use the USB flash drive as a boot and the system is installed on each hard drive. A two-in-one system allocates a portion of space on one of the hard drives for booting, leaving the rest unchanged. The main difference is that the USB flash drive is omitted, which is especially suitable for machines like Snail Star that come with a built-in SSD. If you flash the 2-in-1 system, you can still enter the system even if all the hard drives are unplugged. Currently, it can support msata/sata/nvme interface solid state drives as a two-in-one system. By changing the underlying code to support pure nvme solid-state Synology, Synology has realized functions that Bai Synology does not have. First release on the entire network.
1. Synology 2-in-1 toolkit:Download address
2. Synology 2-in-1 boot file:Purchase address
Video tutorial
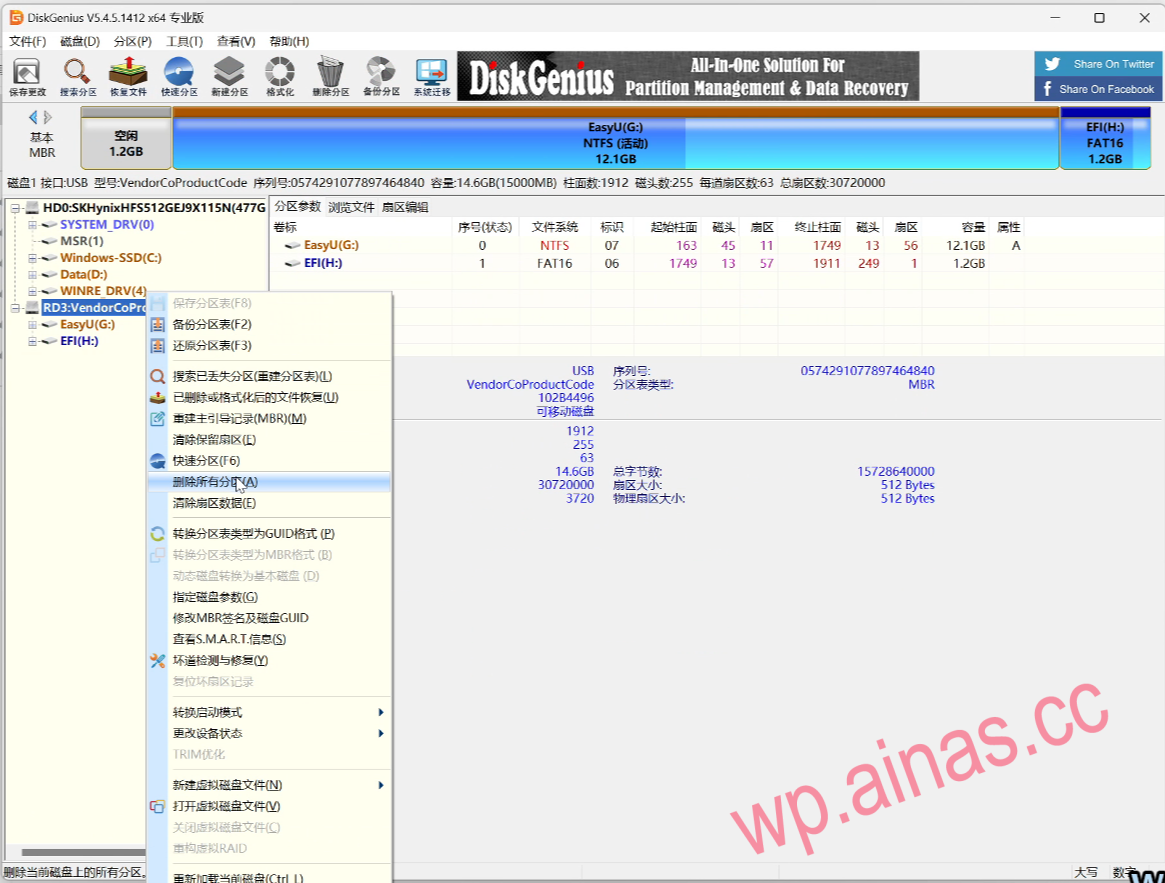
1. Use DiskGenius to right-click the USB flash drive, select delete all partitions, and then create a new partition.

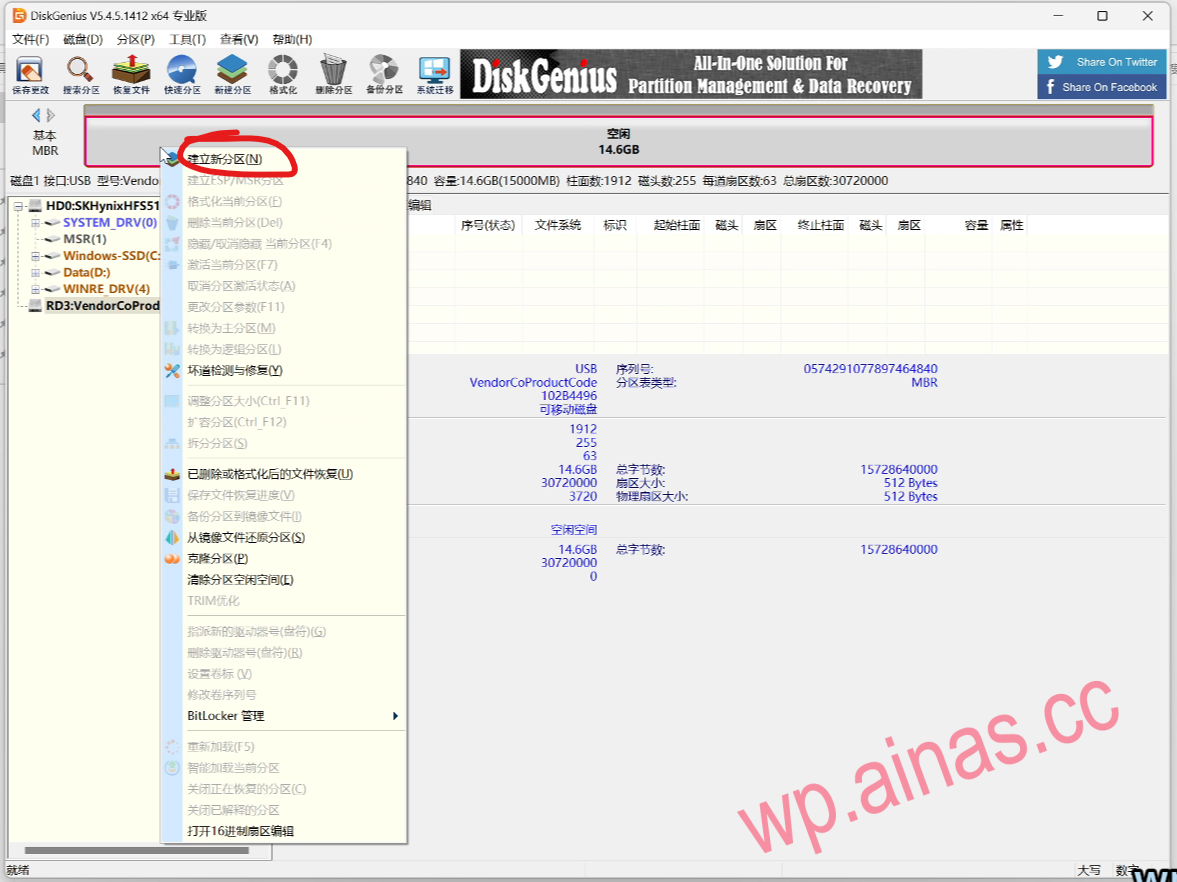
2. After confirming that everything is correct, click “Yes” and click “Save Changes” in the upper left corner.
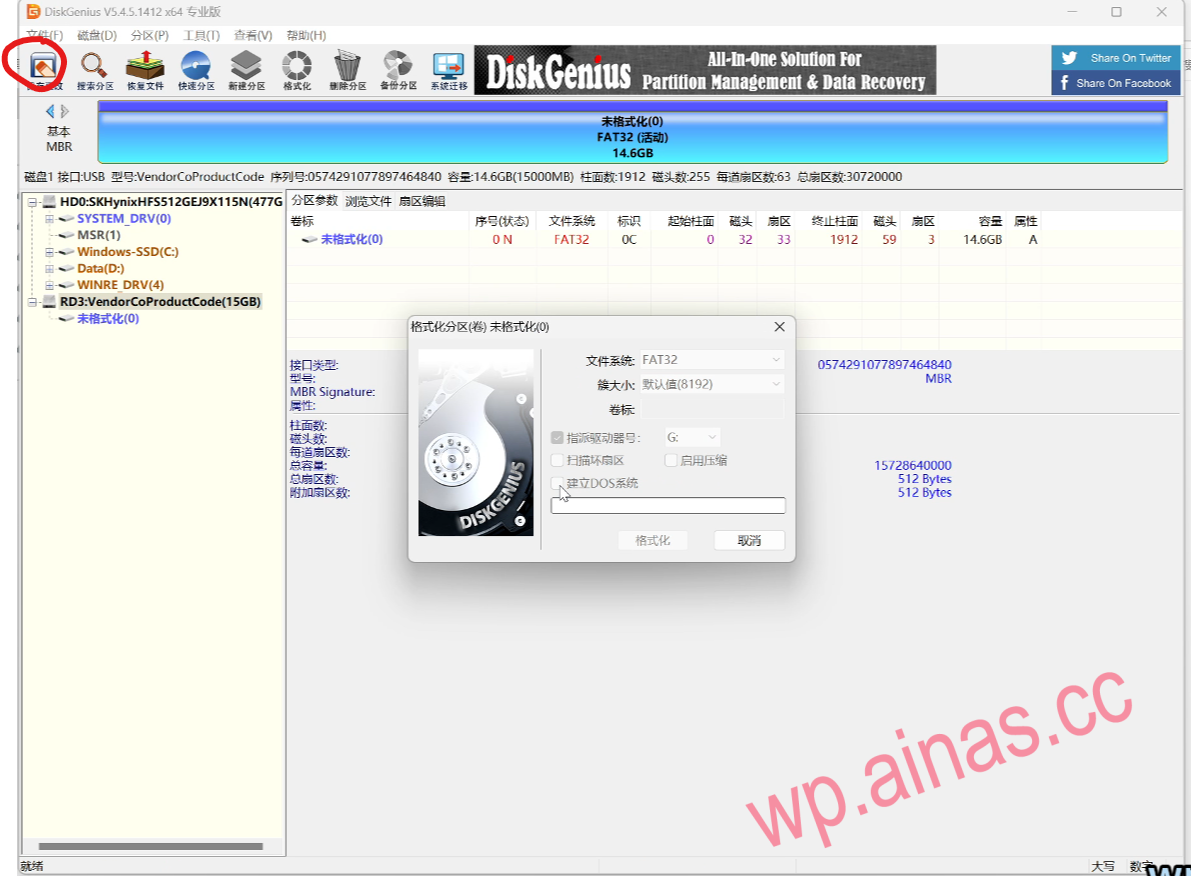
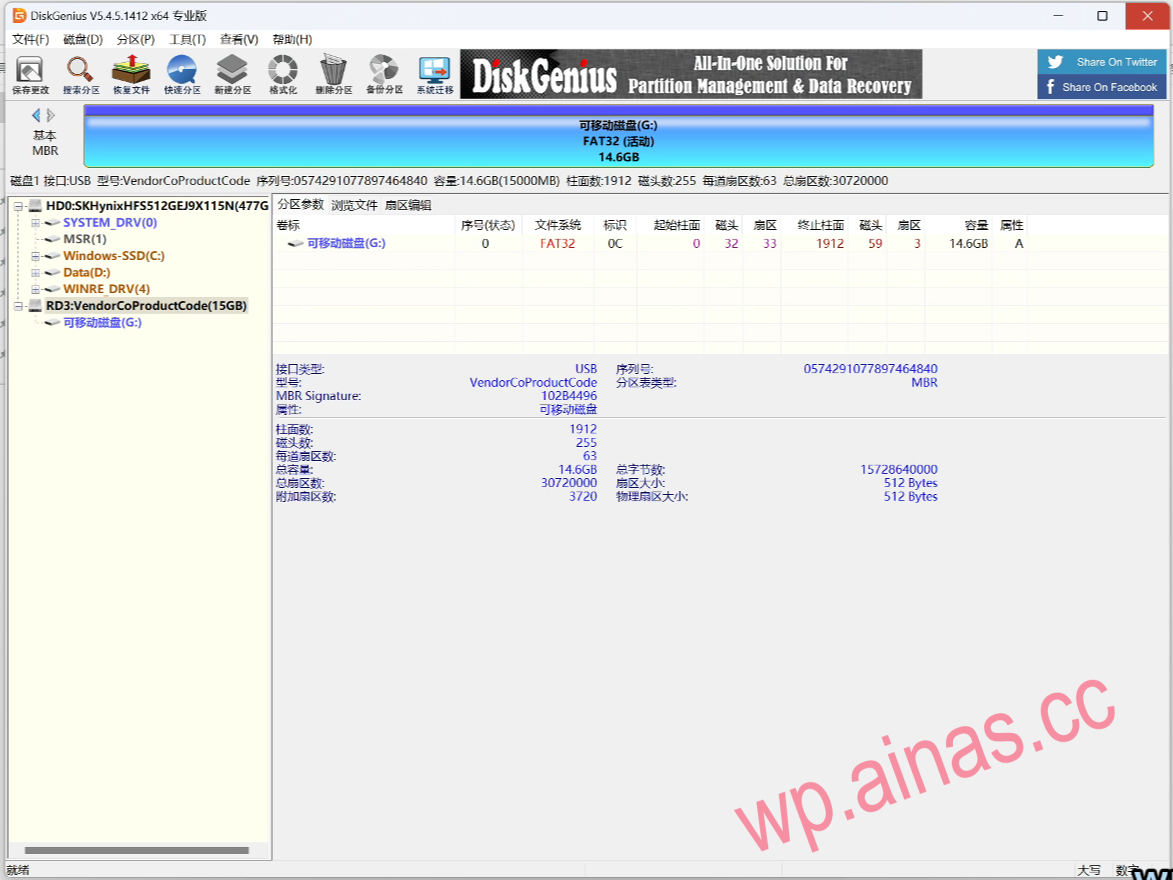
3. After formatting is completed, the normal capacity size of the USB flash drive and the format type of the partition are displayed;
4. Open the EasyU_3.7 folder and open the Youqitong PE production tool

5. Select the U disk we prepared and click “New Production”
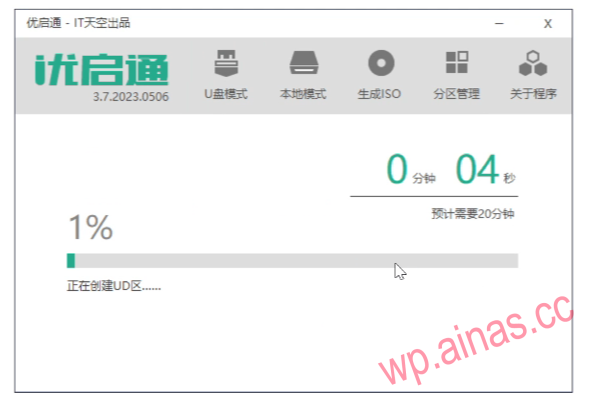
6. Wait for the prompt “The operation has been completed” and click “OK”;
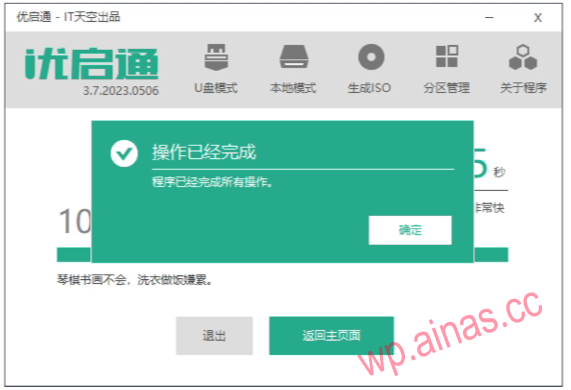
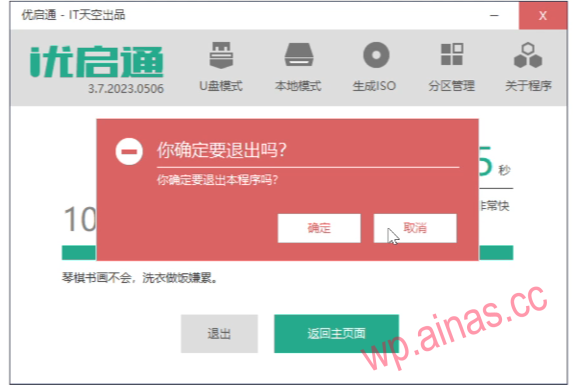
7. Click “Exit”
8. Confirm to exit
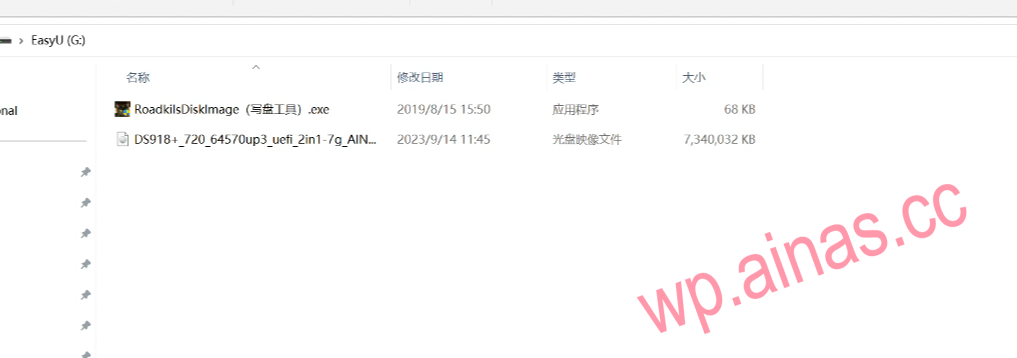
9. Copy the boot tool Roadkil’s DiskImg and the boot file or two-in-one file to the USB drive that has just created the PE system;
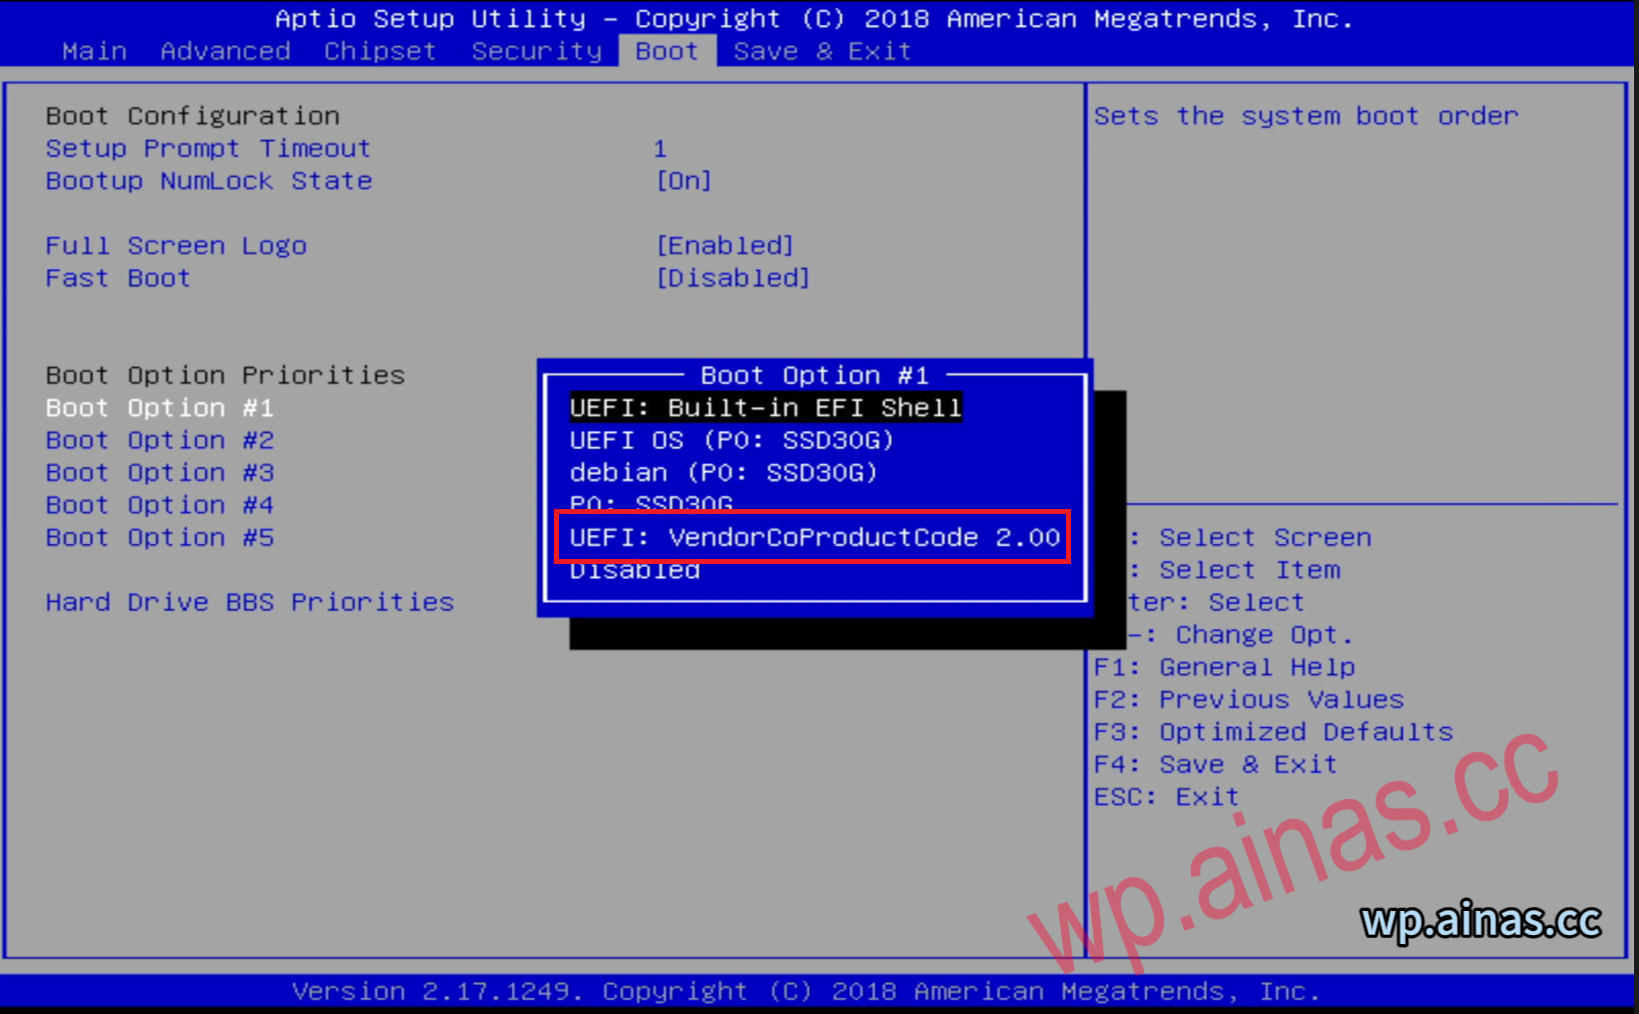
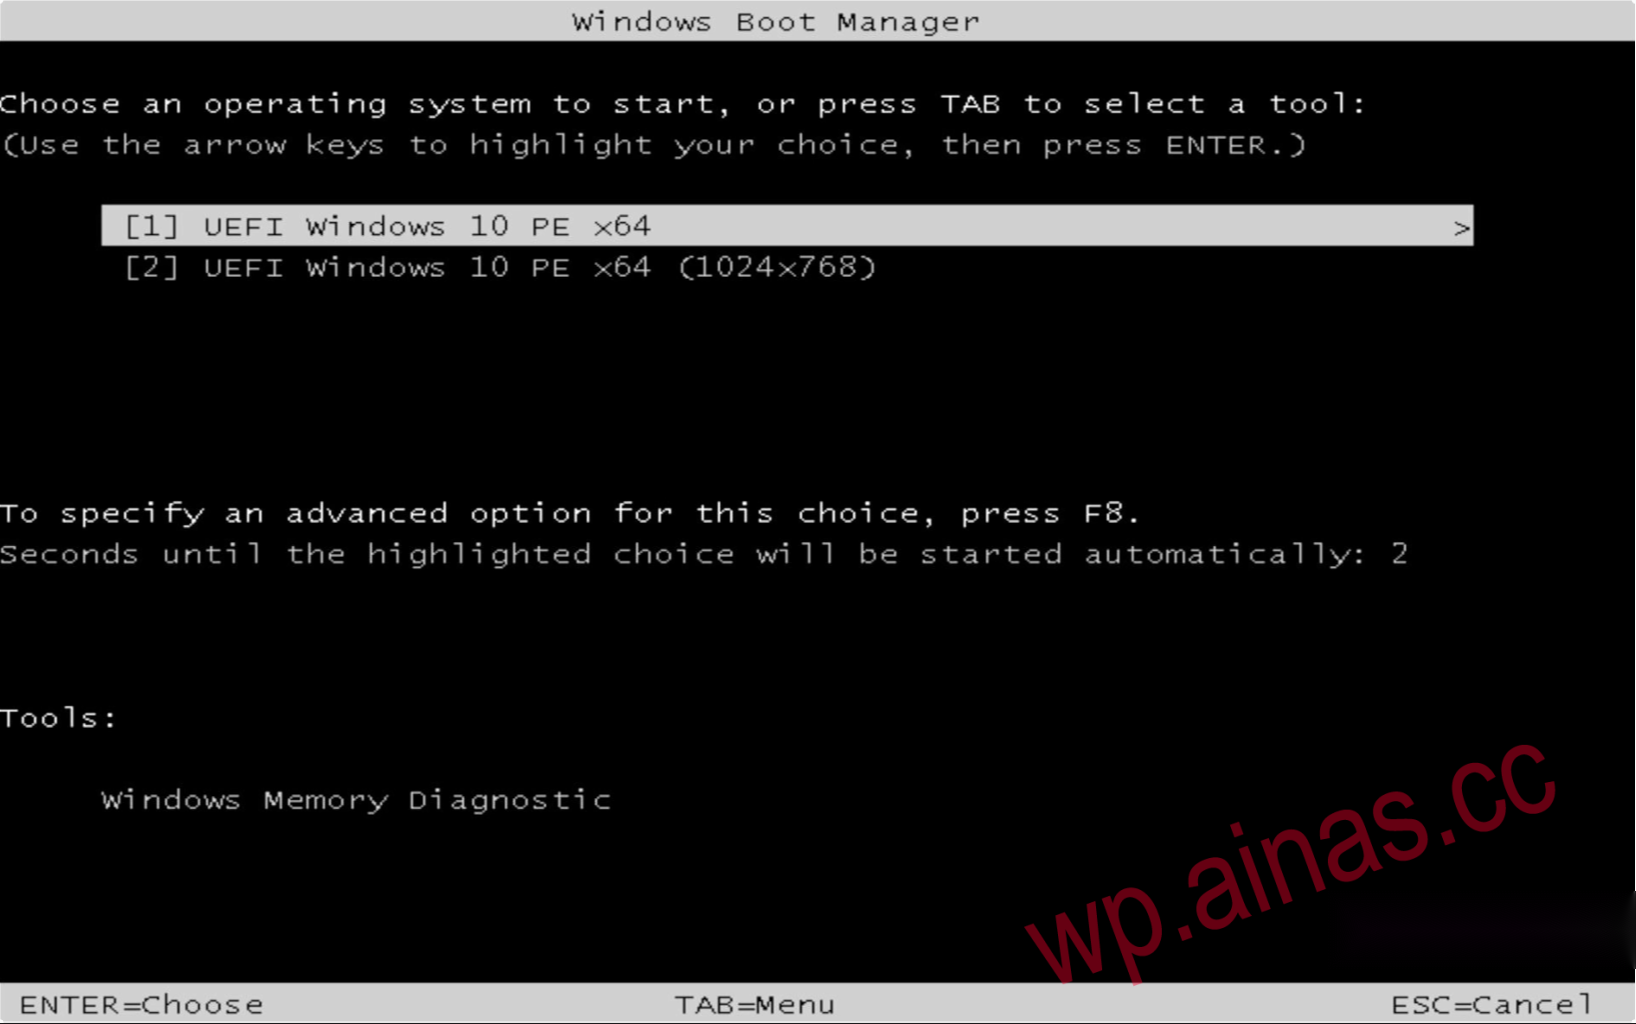
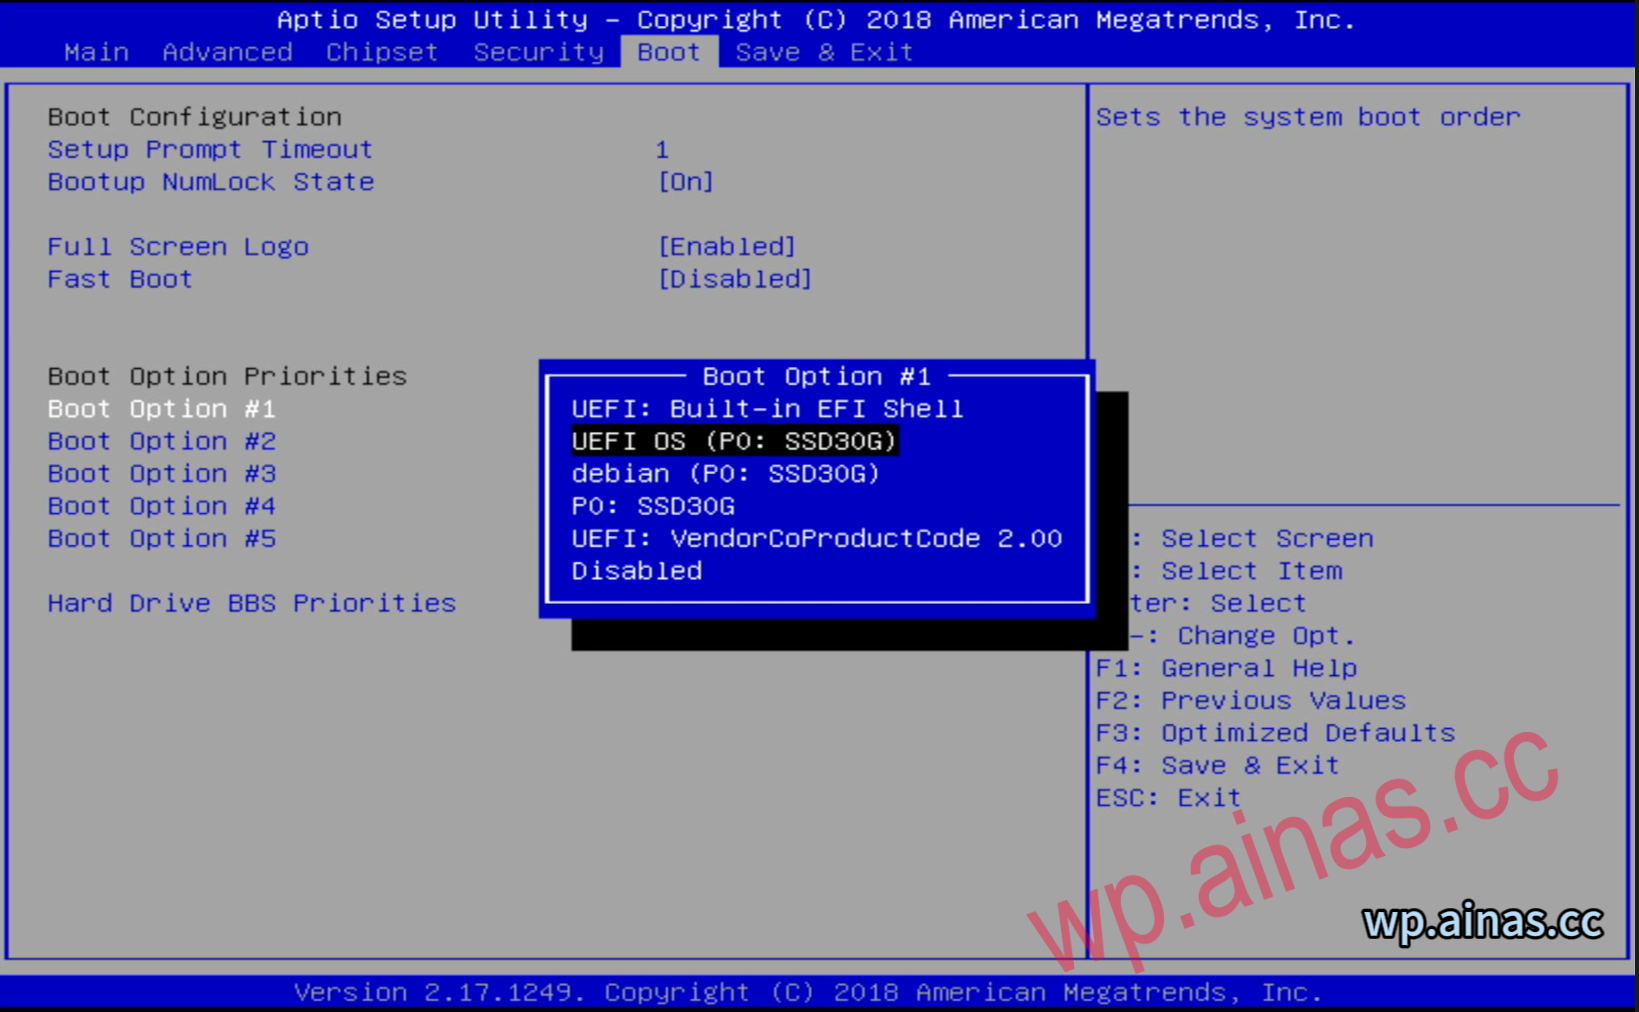
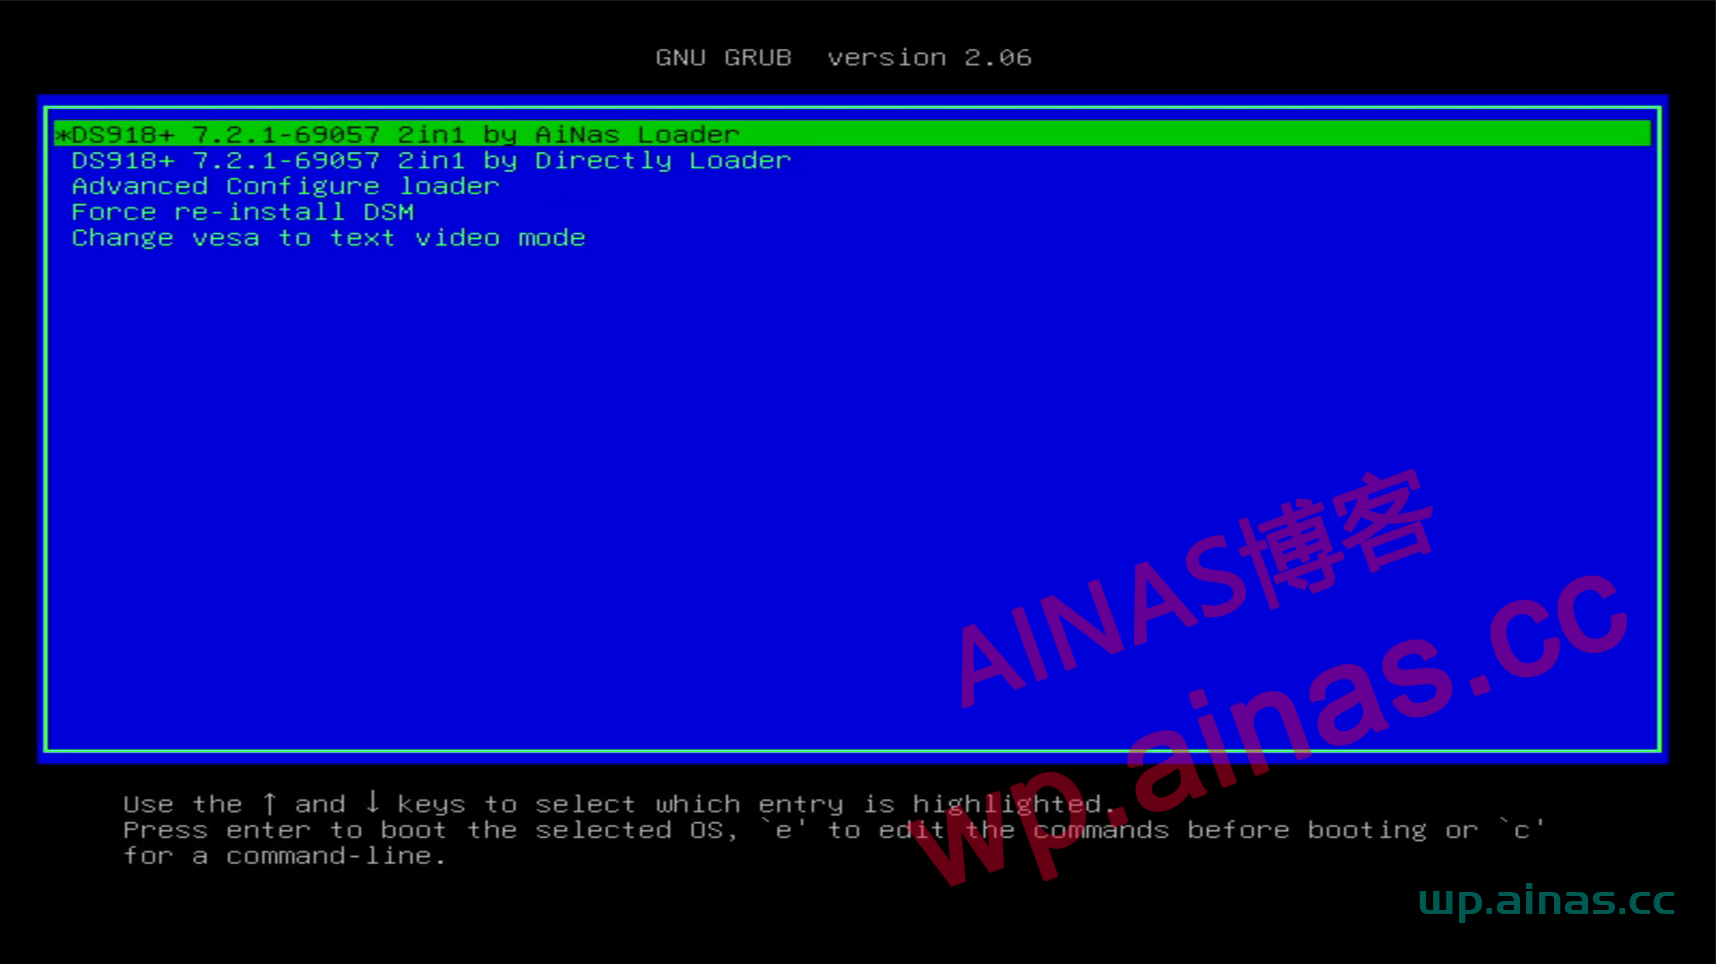
3. Select the boot option, press Enter at Boot option #1, select our USB flash drive, and press F4 to save and exit.
1. After restarting, it will automatically enter the PE system, which is the default
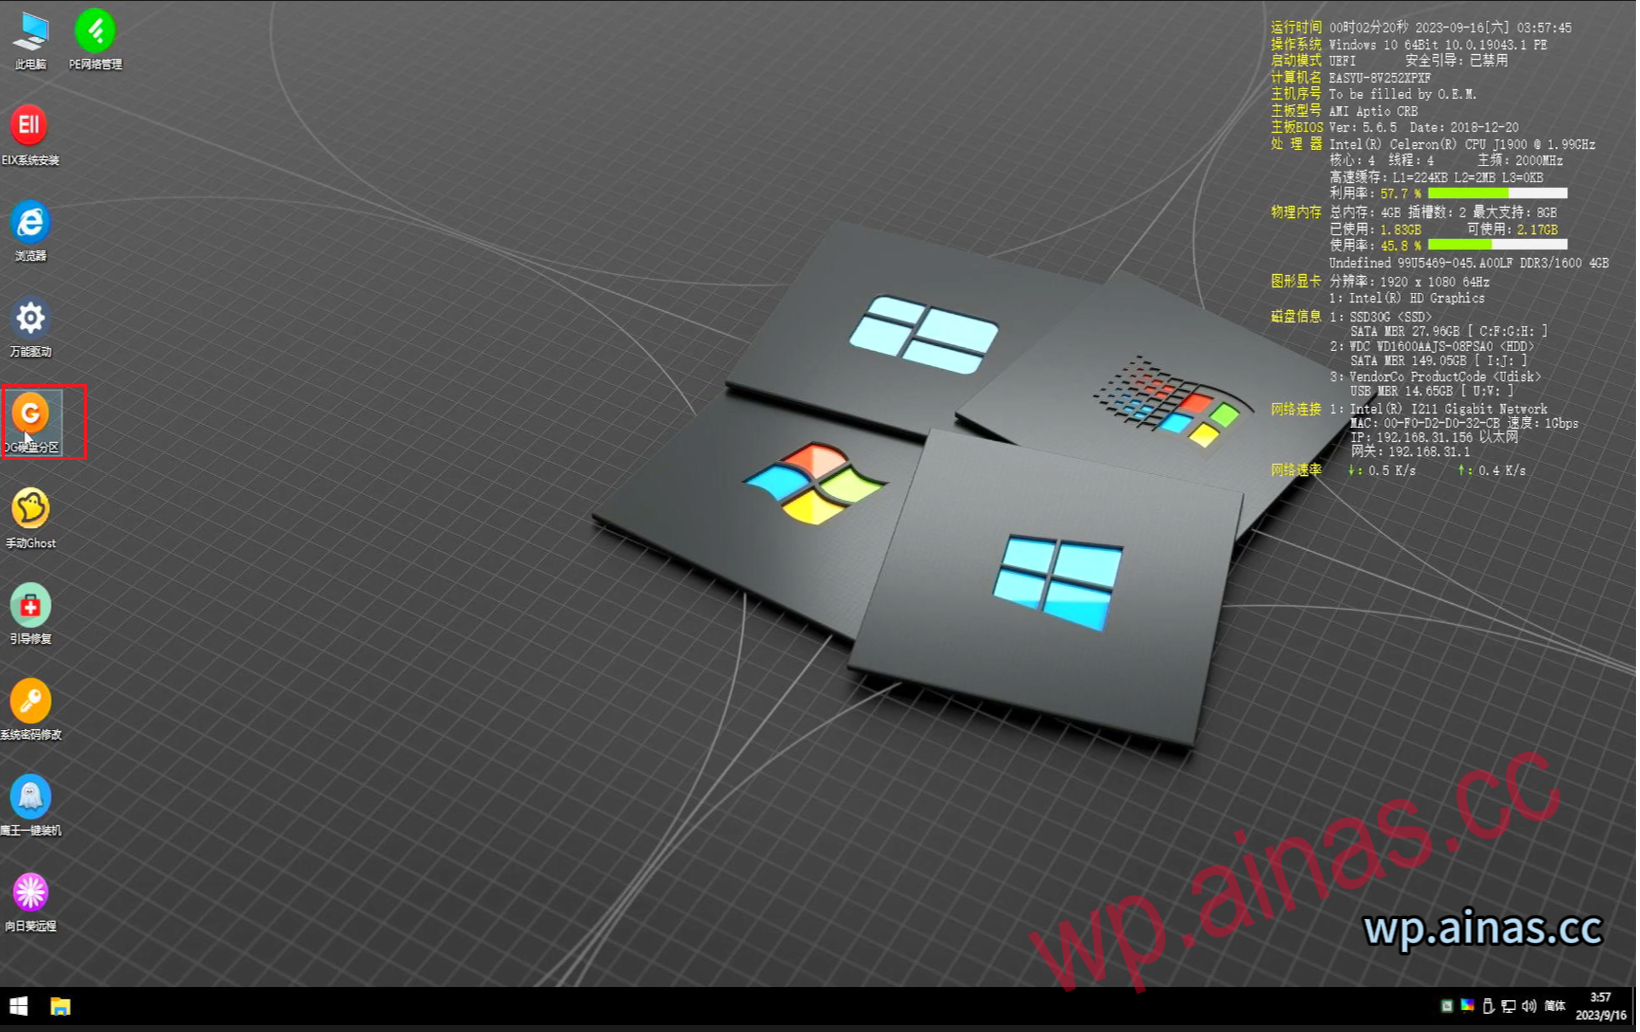
2. Wait for the desktop to display as follows, open the DG hard disk partition tool
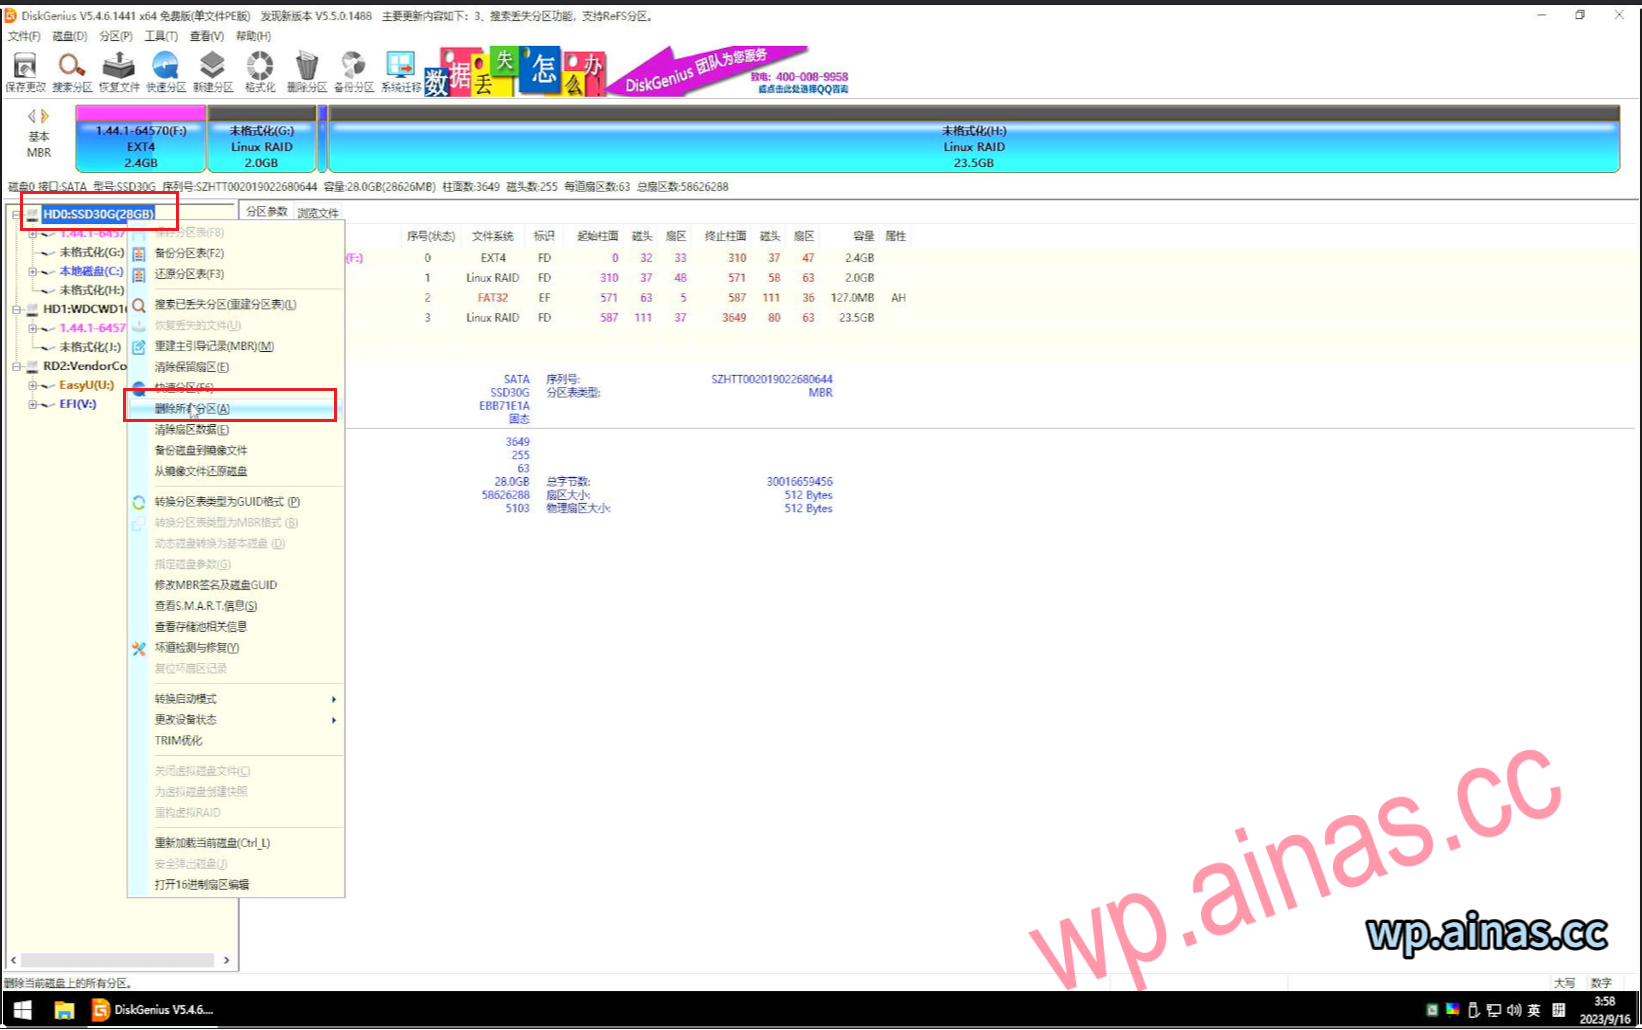
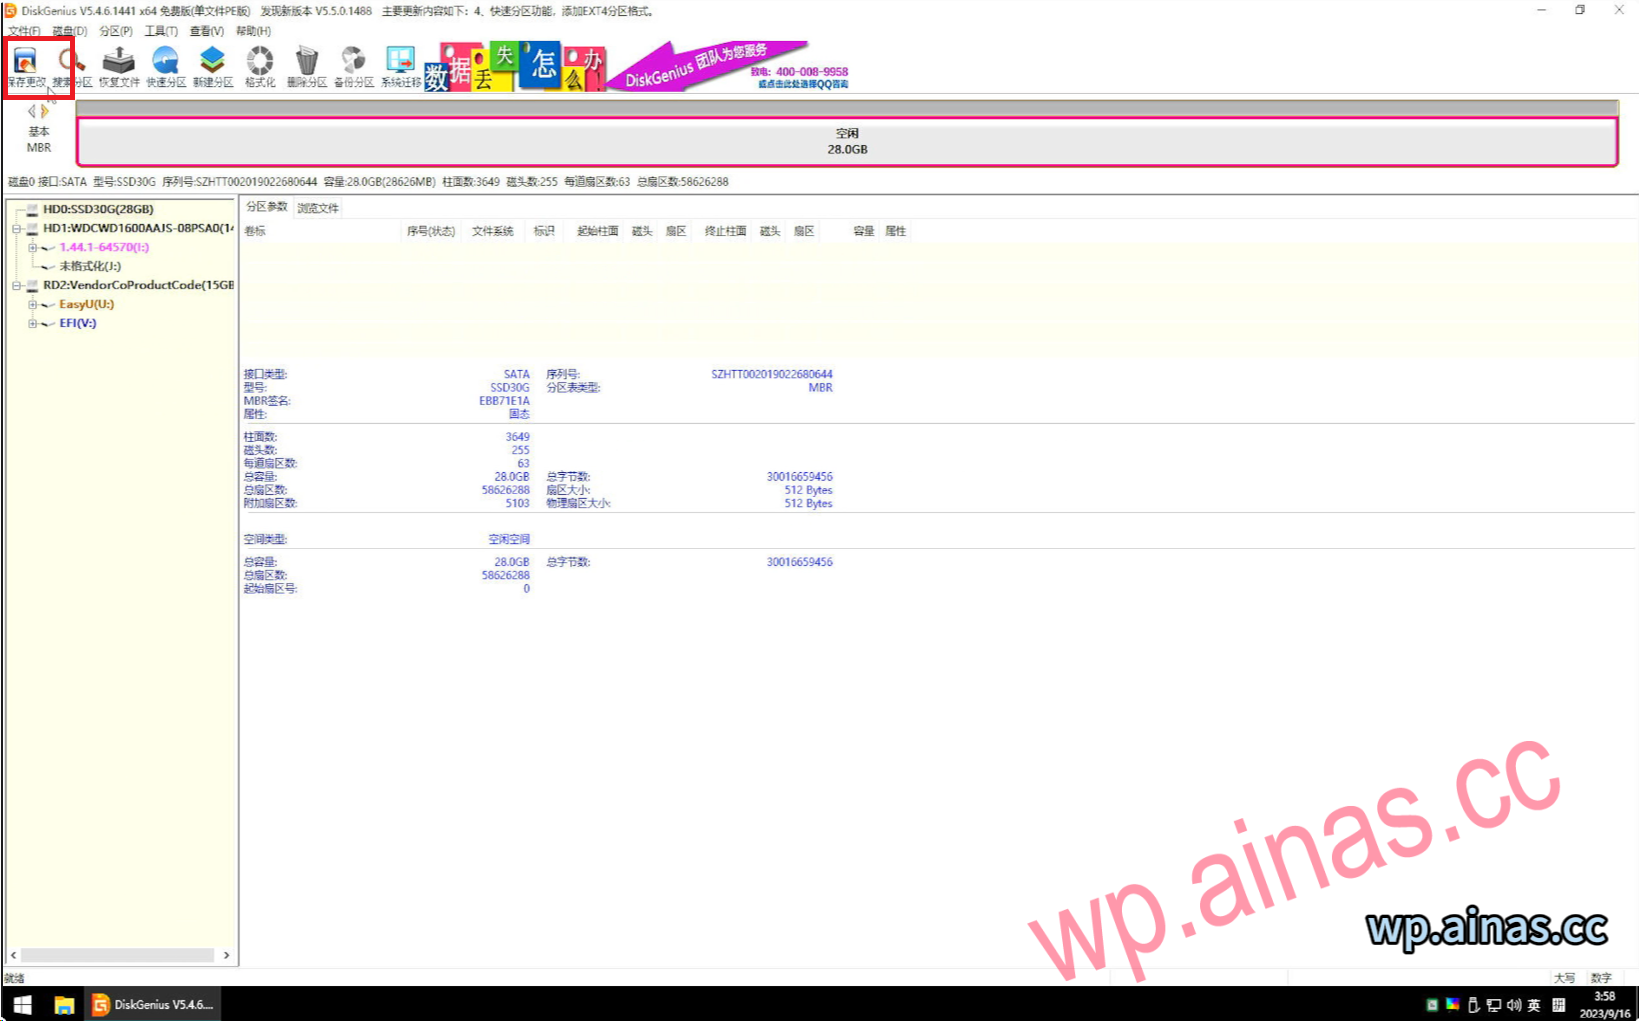
3. Select the SSD, choose to delete all partitions, save changes in the upper left corner, and remember not to create new partitions. (Before flashing the boot file, please confirm that the SSD partition has no partition. If there is a partition, disk writing will fail.😉
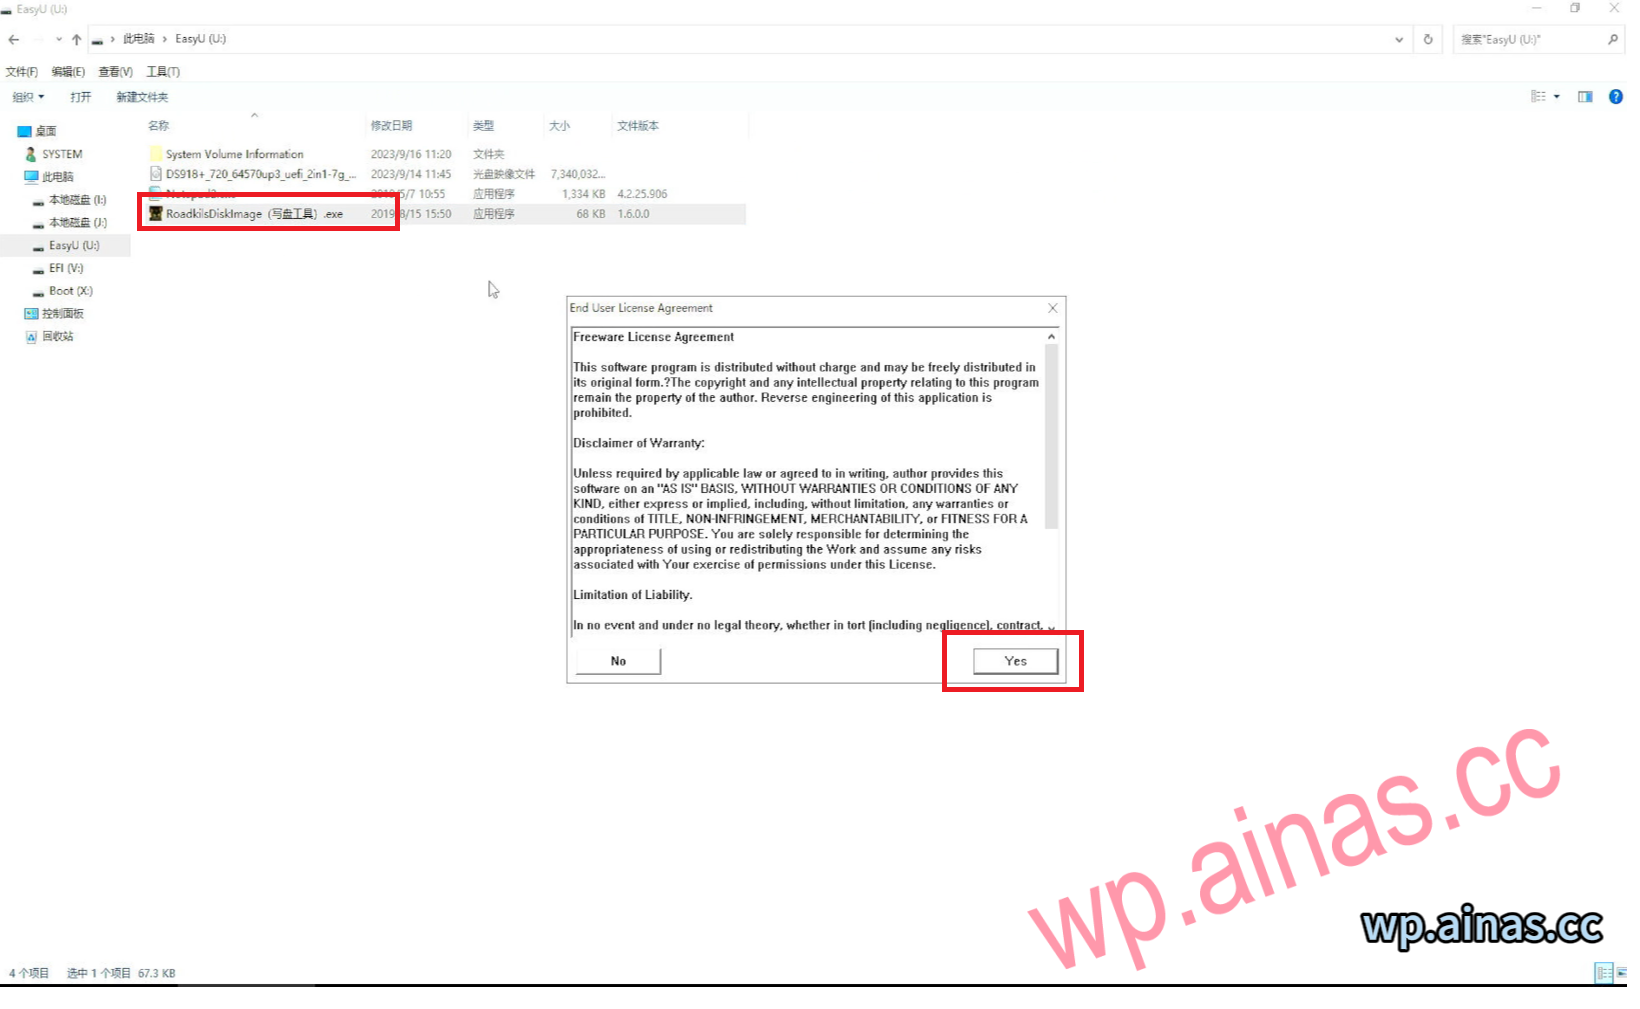
4. Select our U disk and open the disk writing software
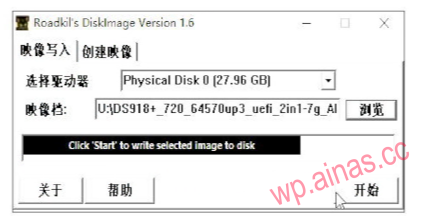
5. Find Roadkil’s DiskImg, double-click to open and run;
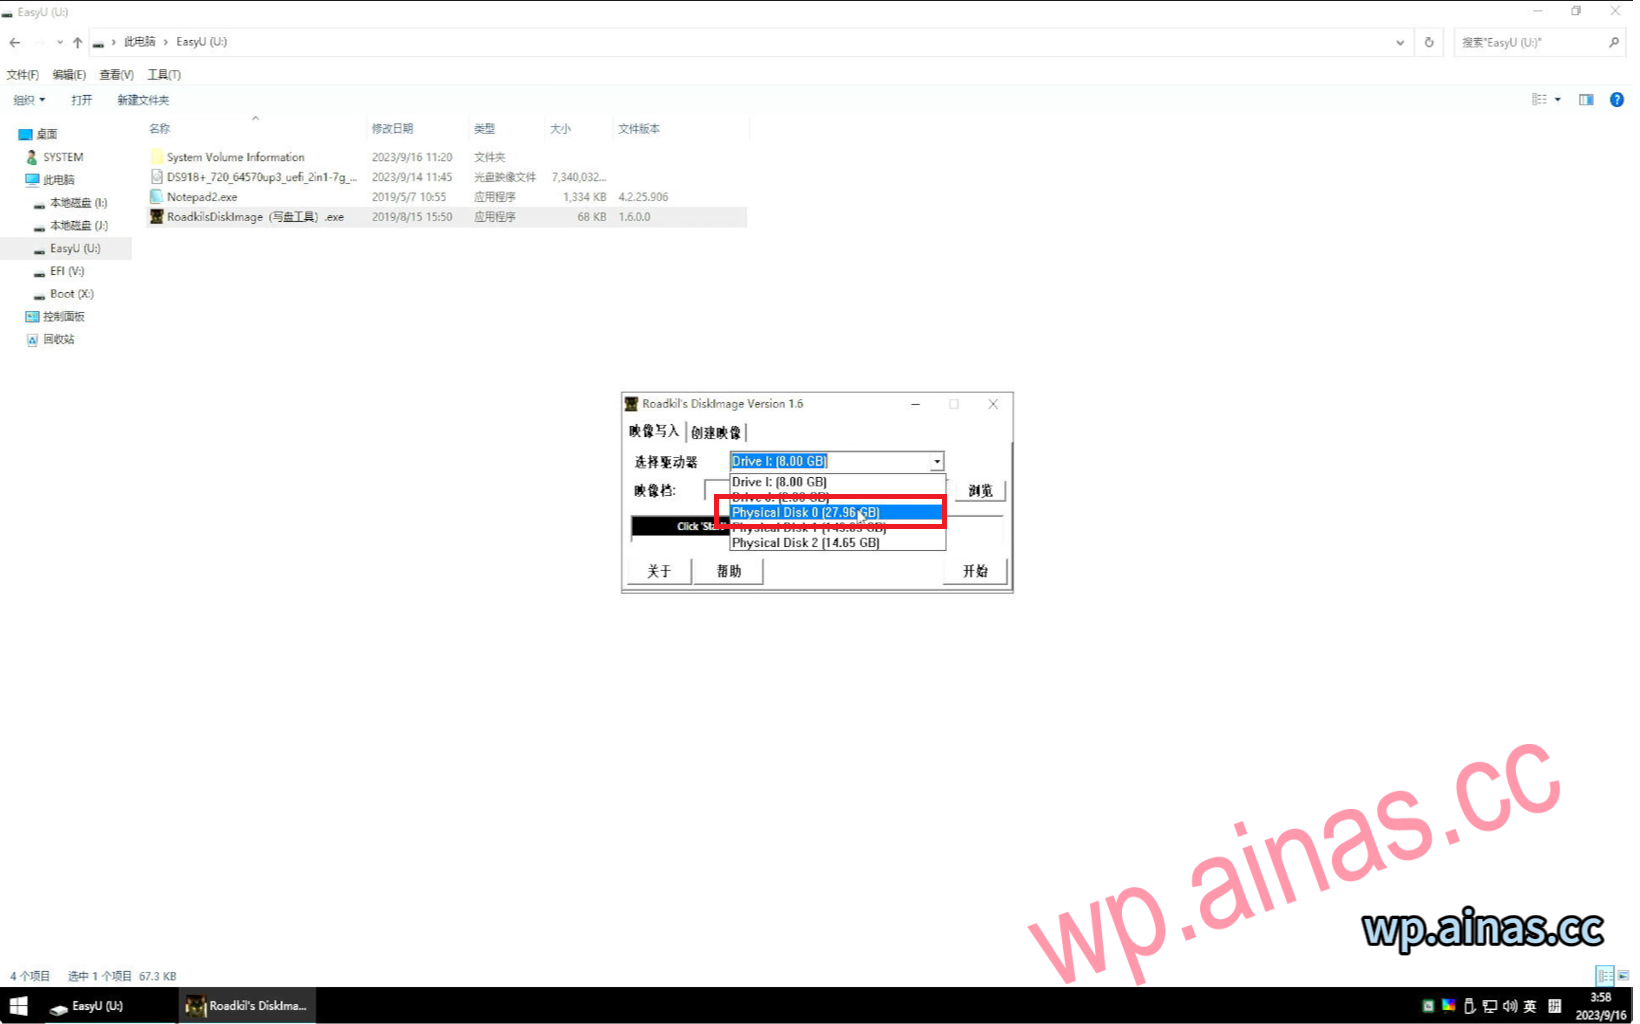
6. Select the SSD hard drive that starts with physical. Mine is 32G and is physical 0.
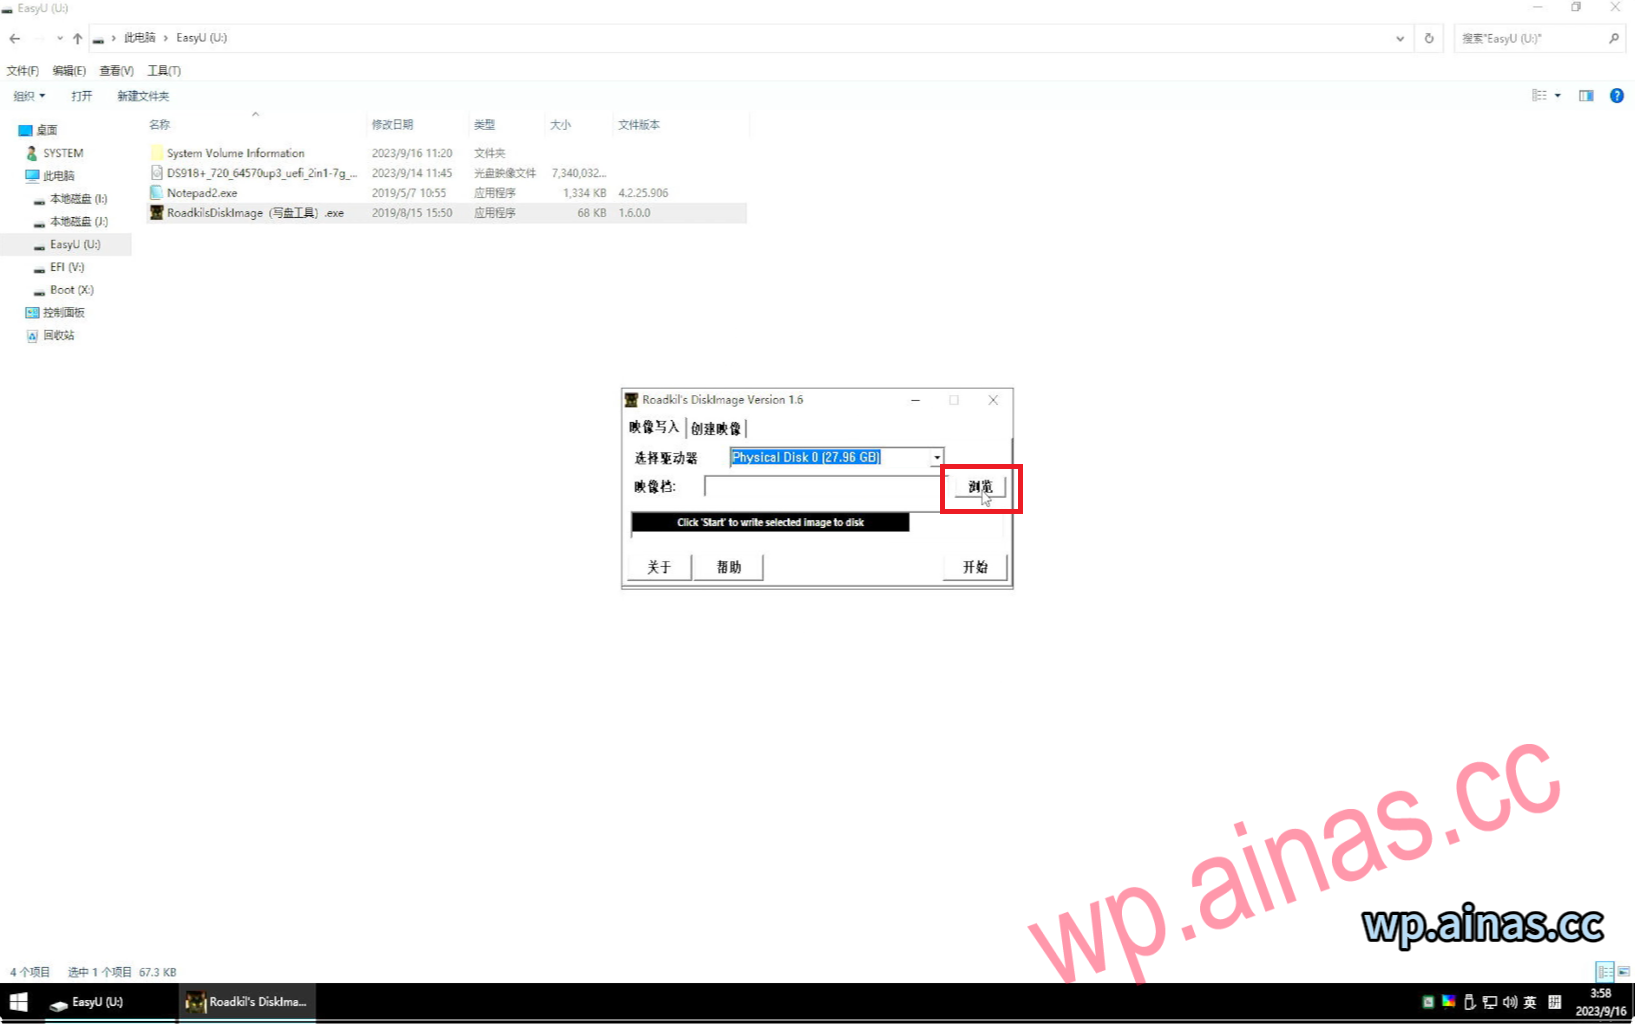
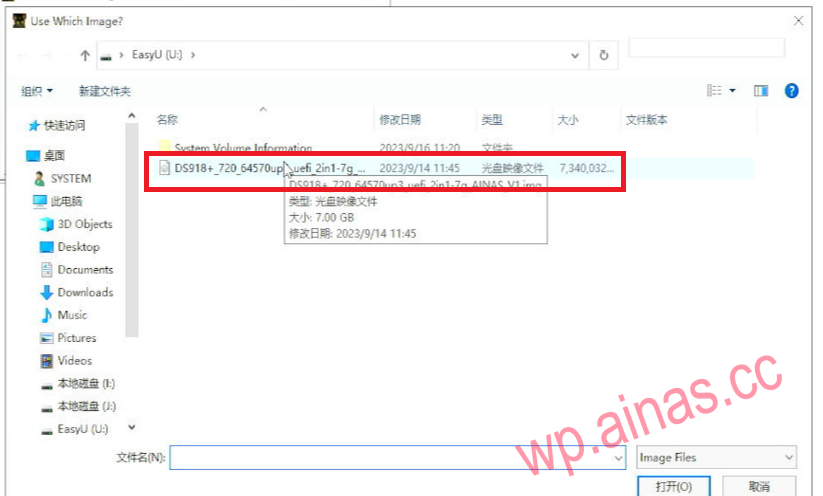
7. Click Browse, find the 2-in-1 system file, and select Open
8. Click “Start” after confirming that everything is correct;
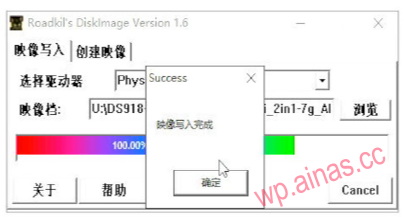
9. Click “Yes” to start writing;

10. Wait for the prompt “Image writing completed” to appear, click “OK”, remove the U disk, click the lower left menu to restart, re-enter the BIOS settings to boot from the SSD, and then you can continue to install the Synology system;
1. Restart the bios, select the BOOT option, press Enter at BOOT option #1, select the second option, which is our SSD, then press Enter, F4 to save the changes, and the system will automatically restart.
2. Default to the first option
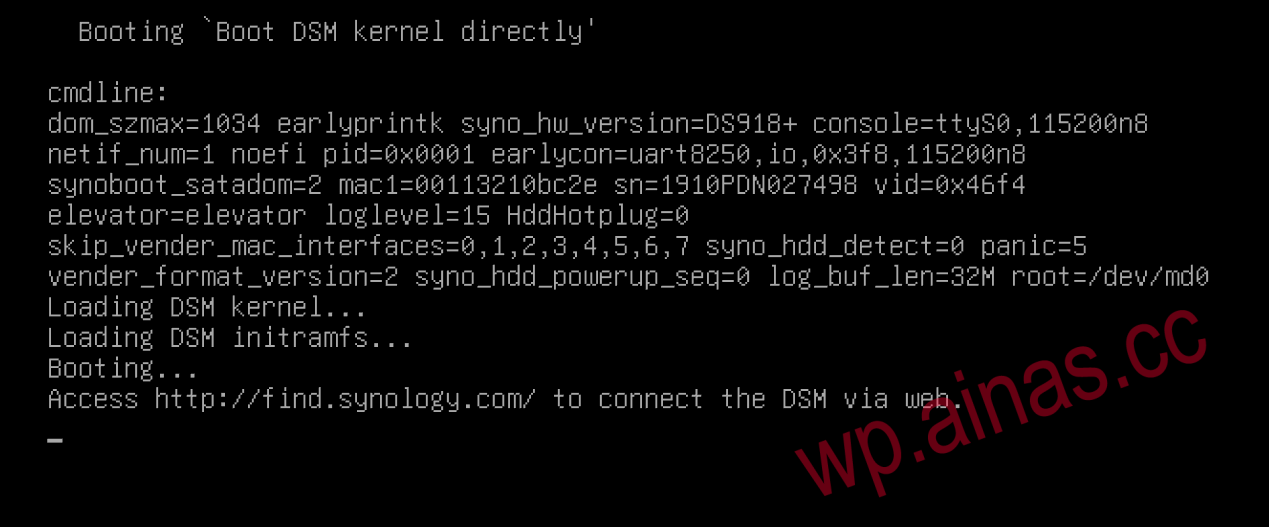
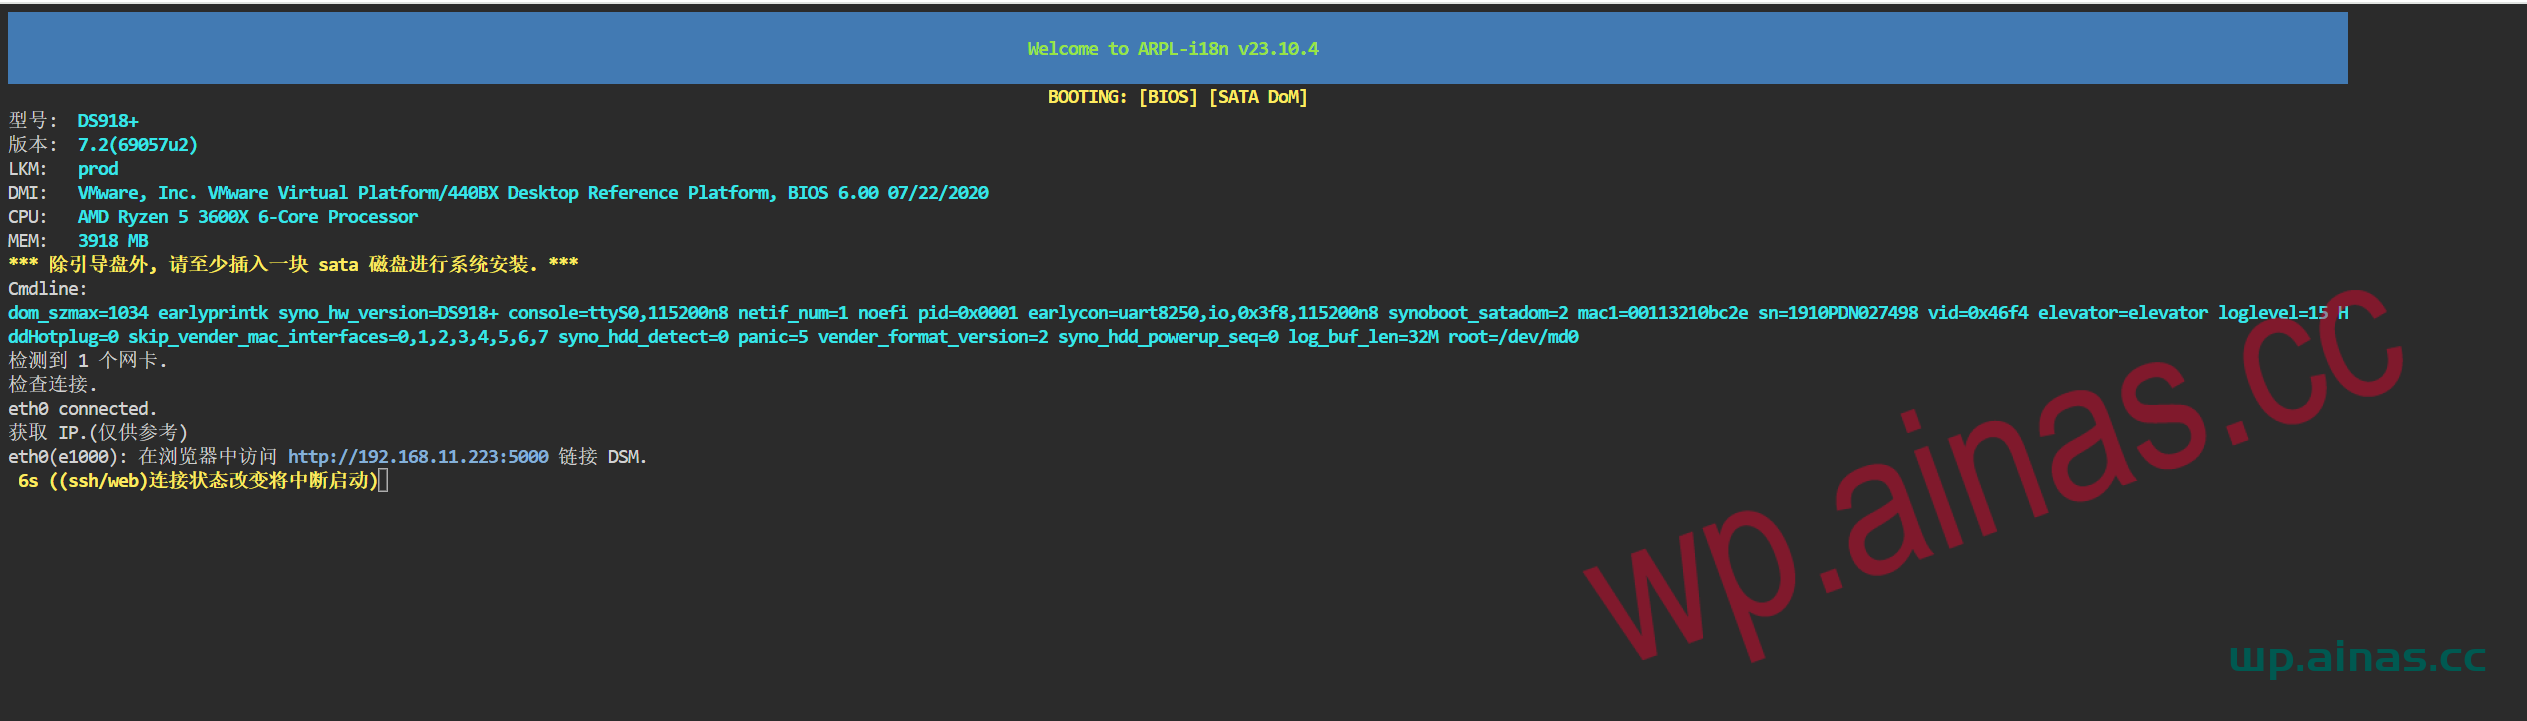
3. Entering this interface indicates that the startup has been successful.
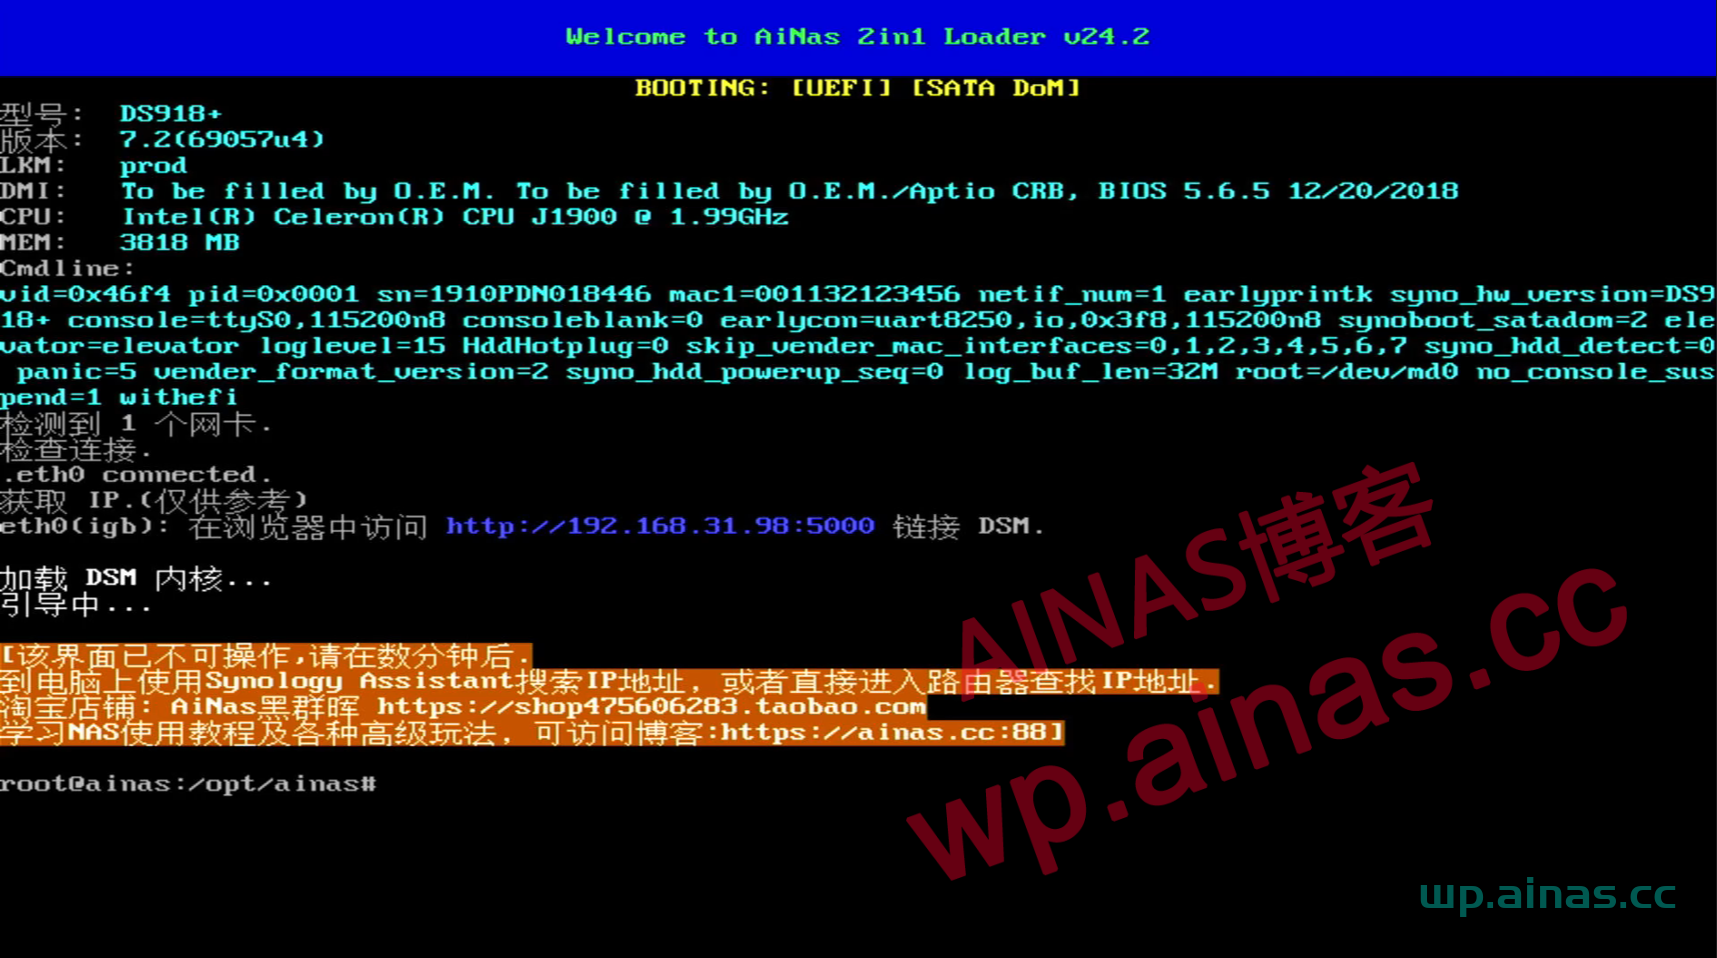
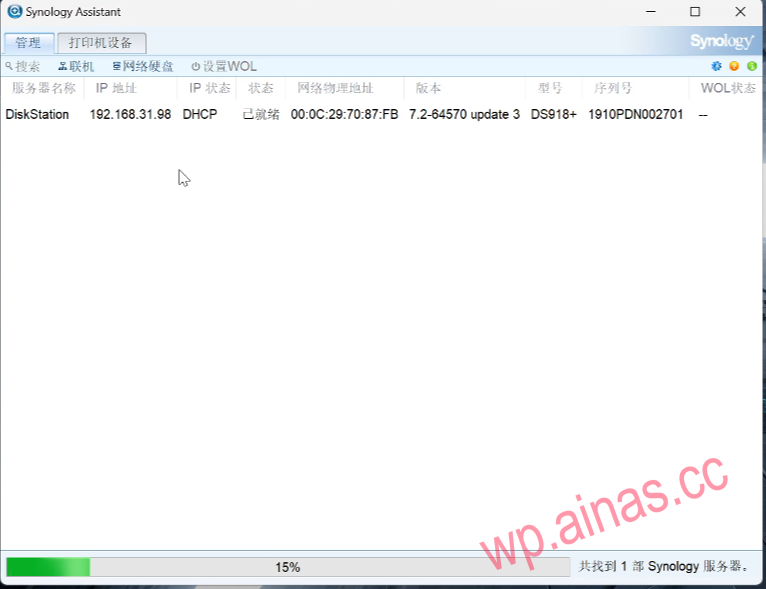
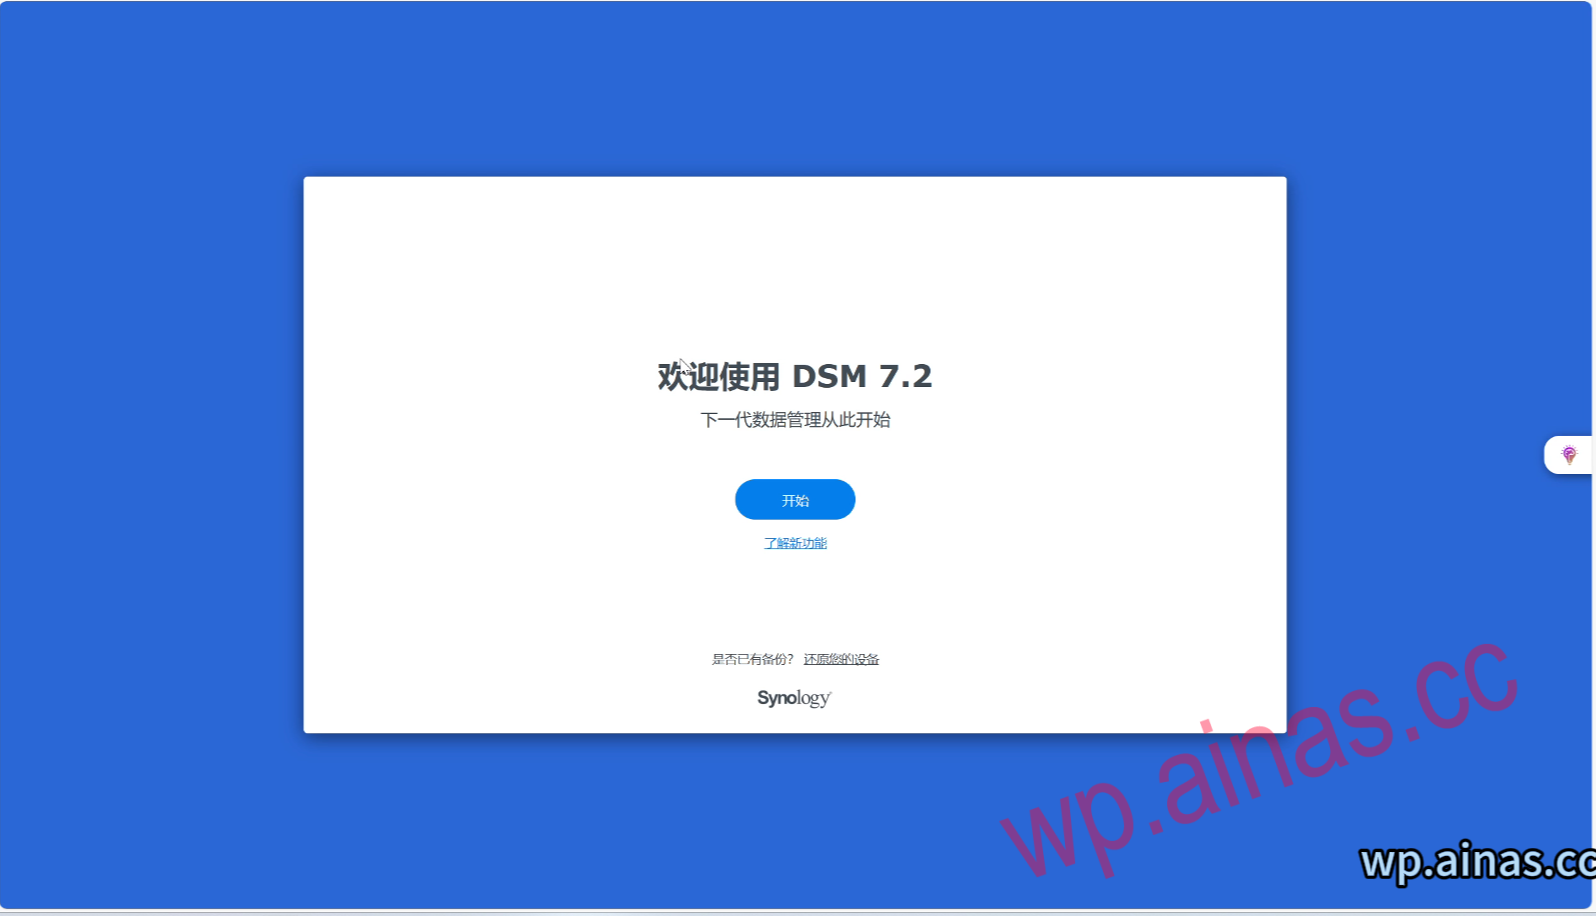
1. Restart, wait 3-5 minutes, use a computer in the LAN (same network segment), search to find Synology’s IP, double-click to enter the setting interface. You can also enter Synology’s IP address directly into the browser. Mine is 192.168.31.98:5000.
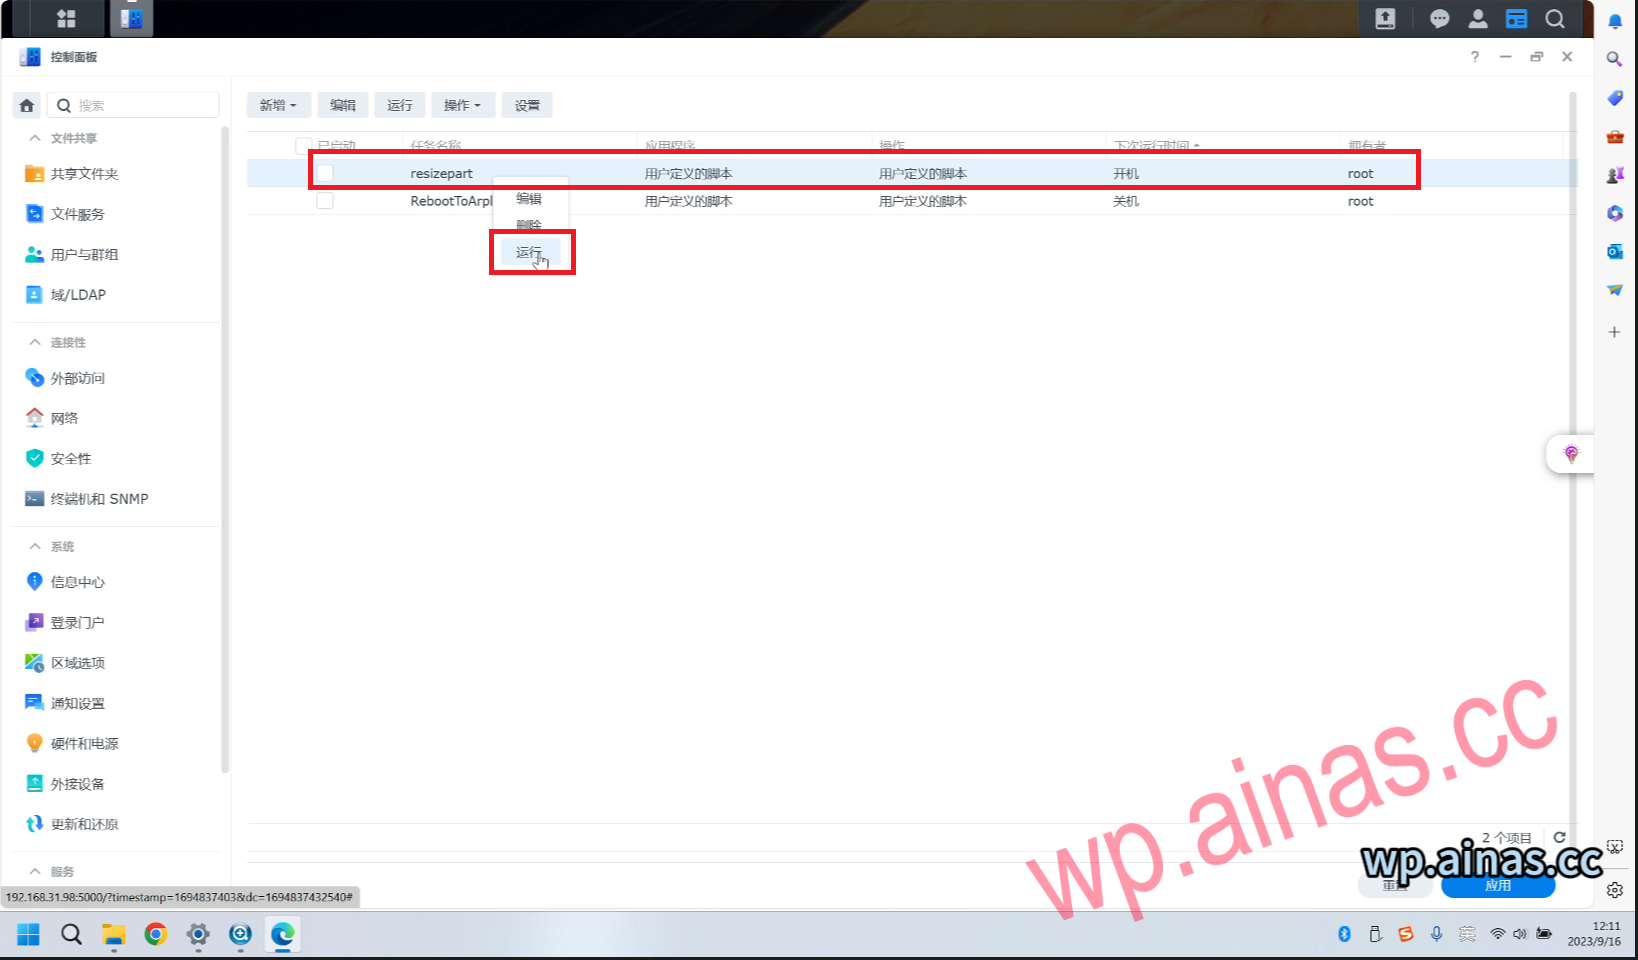
1. Select Control Panel – Task Scheduler

2. Select resizepart, right-click and select run.
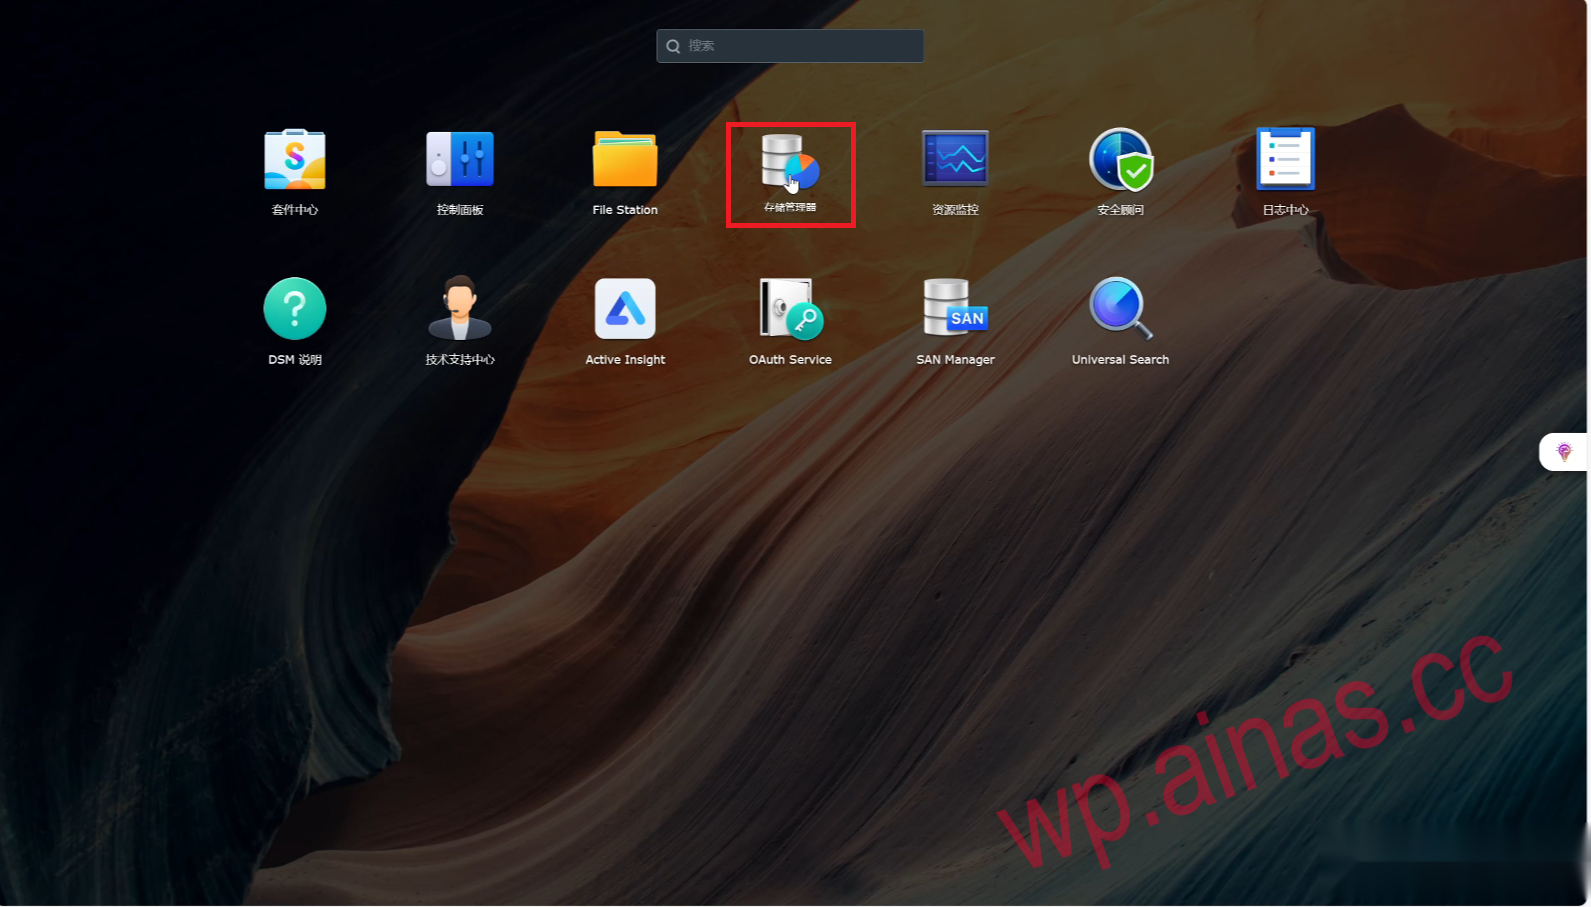
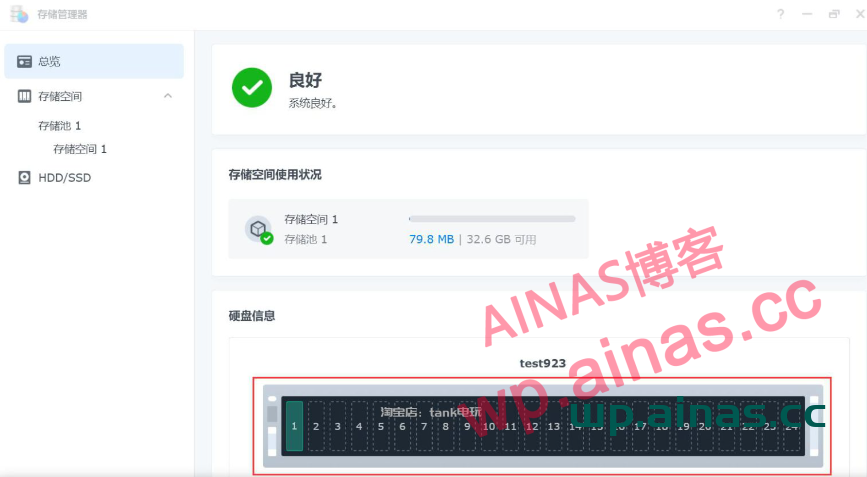
3. Select storage manager
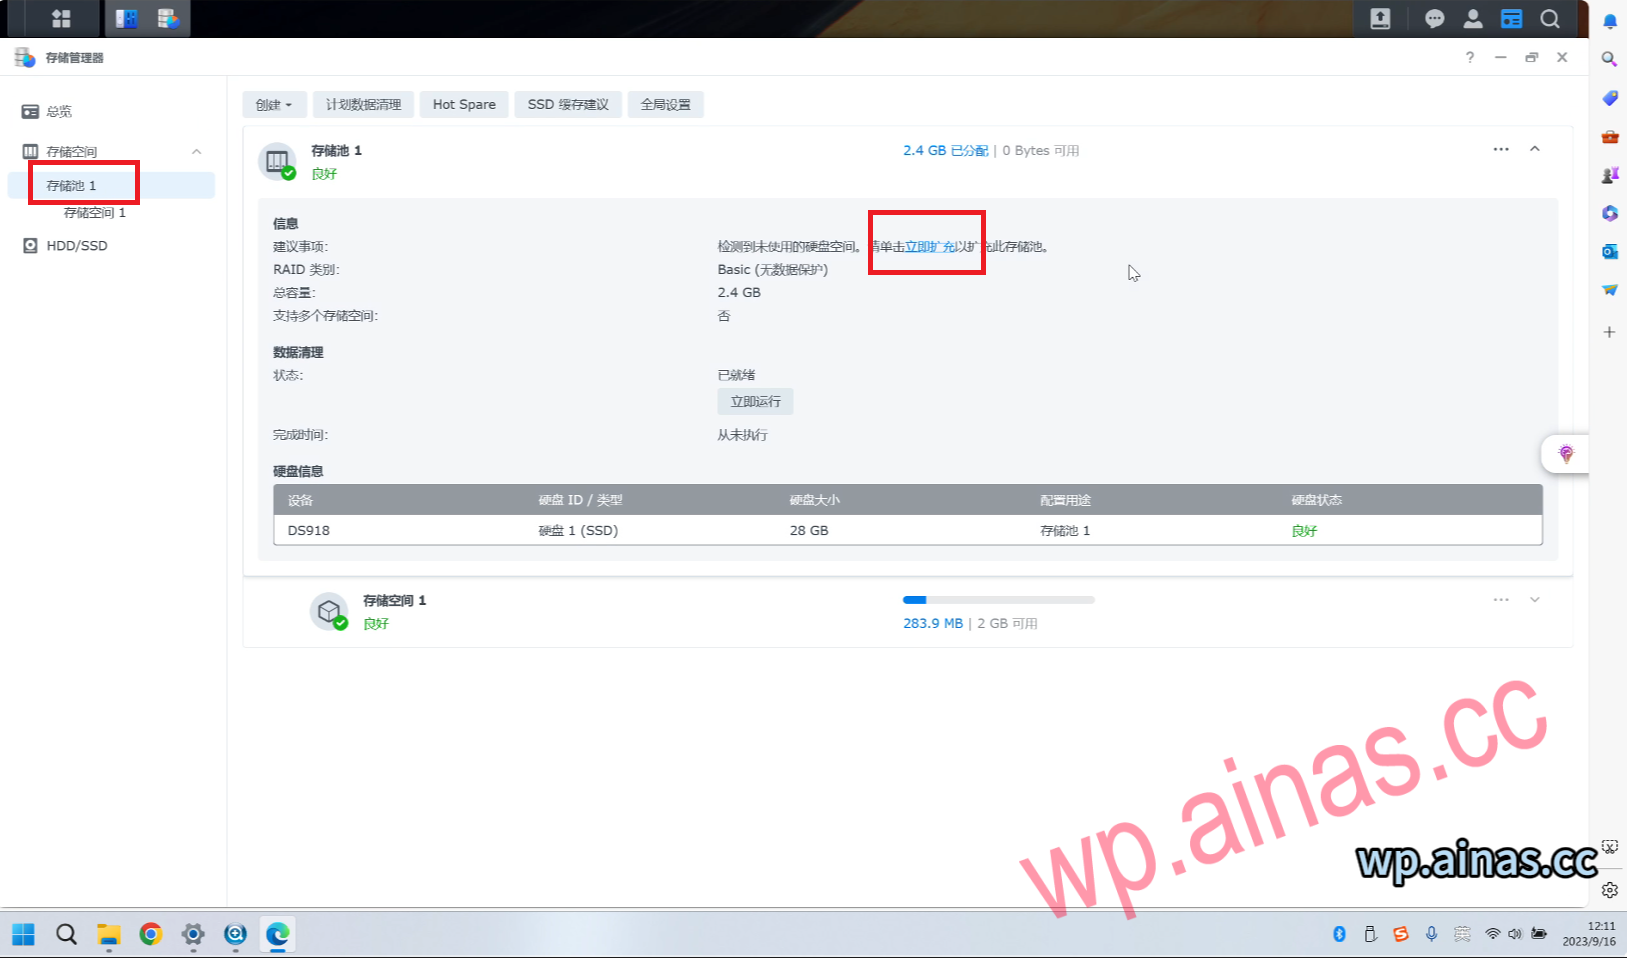
4. Select storage pool 1 and click Expand Now. Then click Apply to complete the expansion.
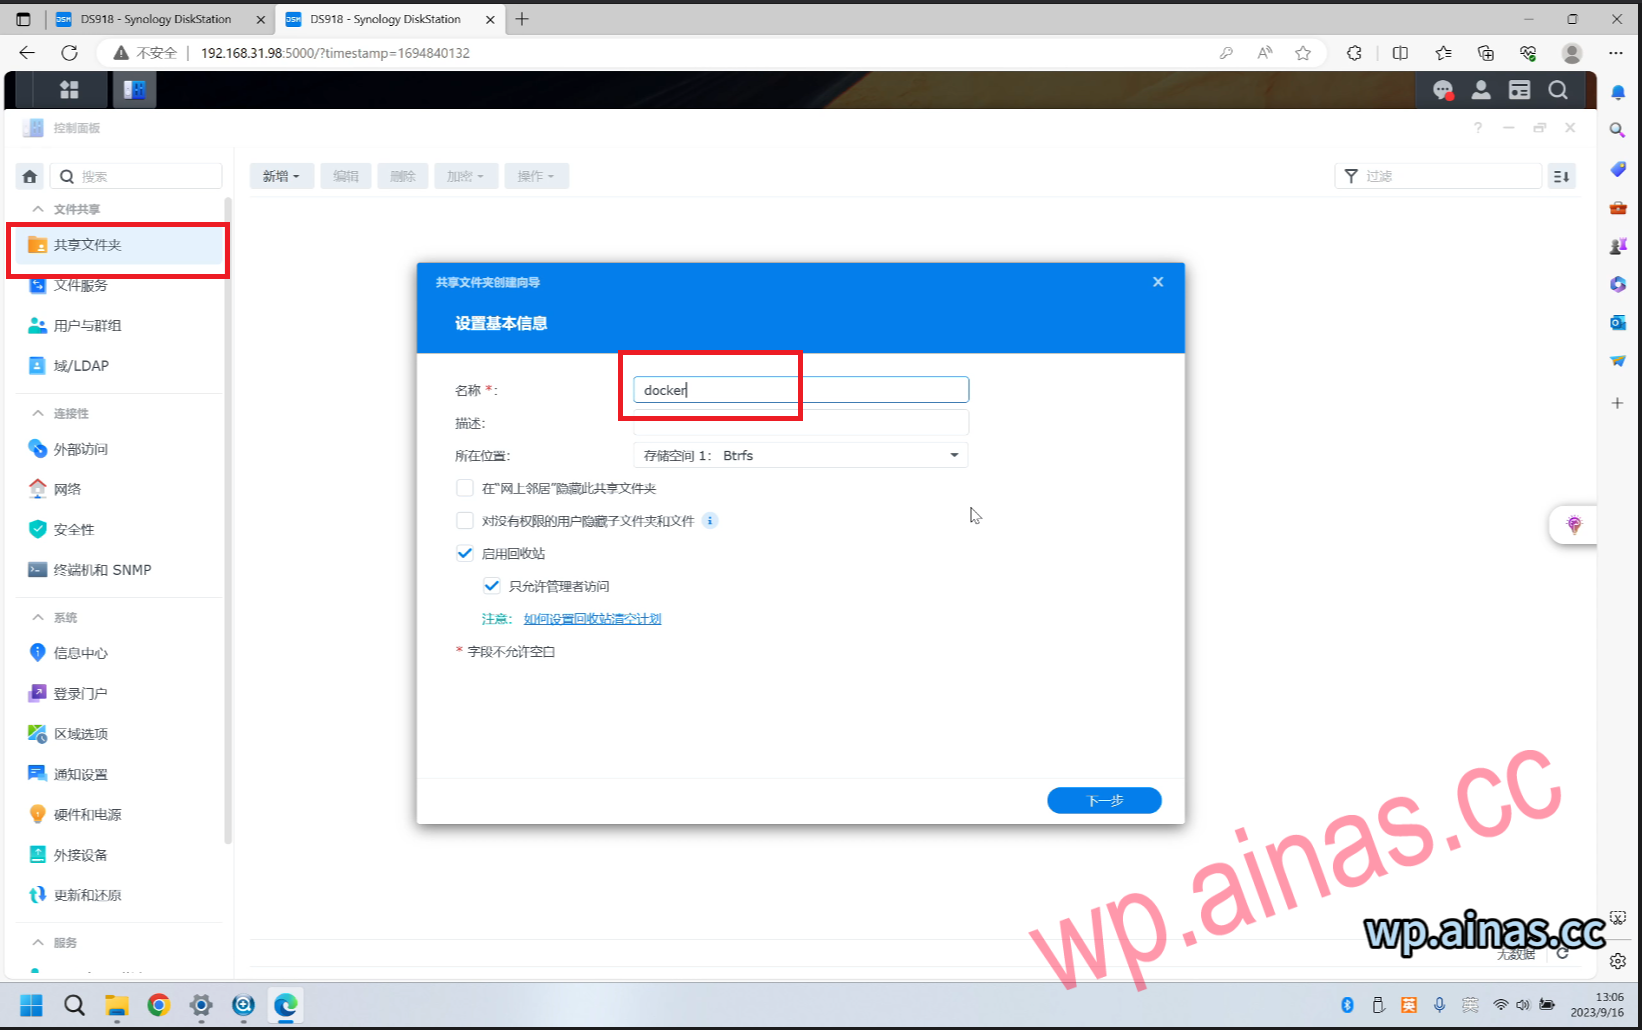
1. Open the Control Panel-Shared Folder, create a new shared folder named docker
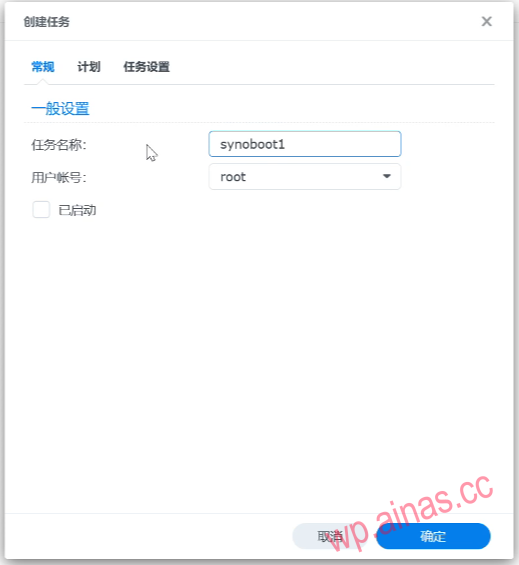
2. Open the Control Panel – Task Scheduler, create a new task, and change the name to synoboot1
3. Enter the command
cd /dev
echo 1 > /proc/sys/kernel/syno_install_flag
mount -t vfat synoboot1 /volume1/docker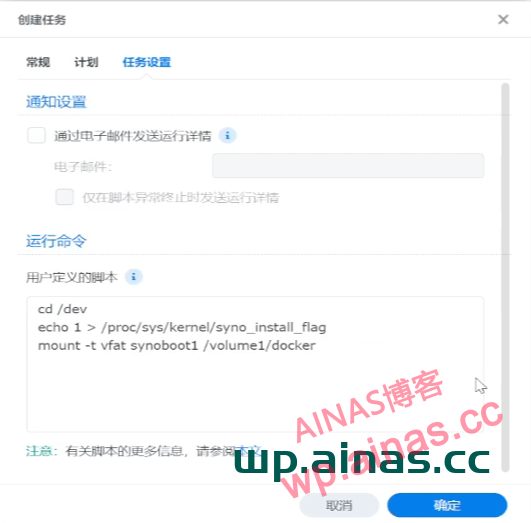
4. Right click and run

5. Open filesation and download user-config.yml in the docker folder to the local folder.
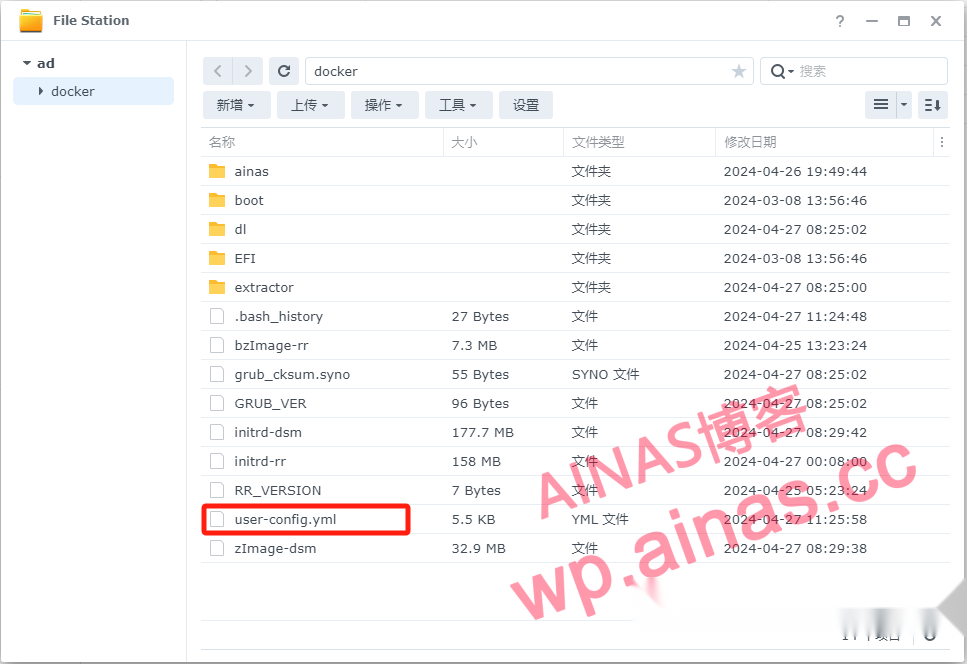
6. Open this configuration file with Notepad and modify sn mac1 in it. No matter how many network ports there are, just modify mac1 mac2. There is no need to add mac3 mac4. . .

7. GuaranteeAfter saving, open filesation, select Upload-Upload Override, and select the configuration file we modified.
8. Restart the Synology system to make the whitening take effect. After the new version of Mac is changed, the information center will not change. You can verify it by logging in to the official Synology account. If you can log in to the official Synology account, it means the whitening is successful.
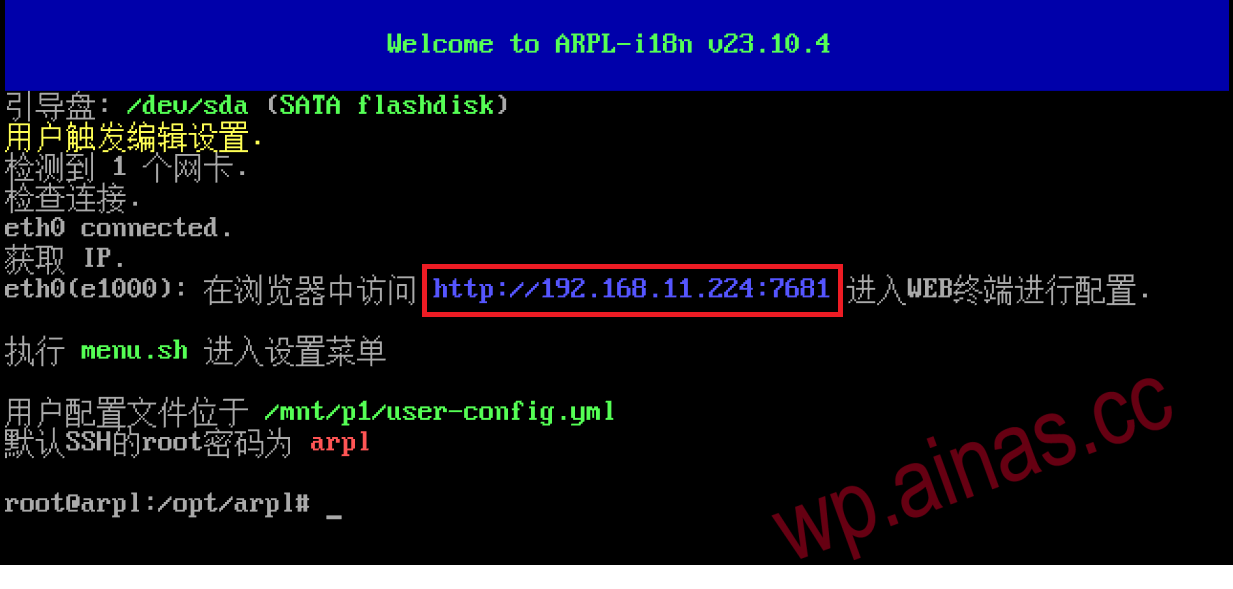
1. Some motherboards, especially AMD platforms, cannot log in normally after entering the IP address, and cannot be found by Synology Assistant. Generally, this can be solved by setting it to start directly.
2. Restart the Synology server and select the third menu
3. Use the output IP to log in from the browser, for example, mine is 192.168.11.224:7681
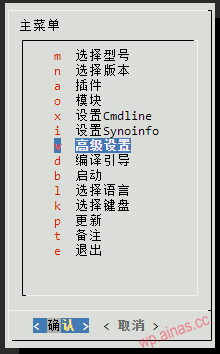
4. After logging in, select Advanced Settings
5. Change the switch to direct startup to “true”, exit this menu and enter the main menu.
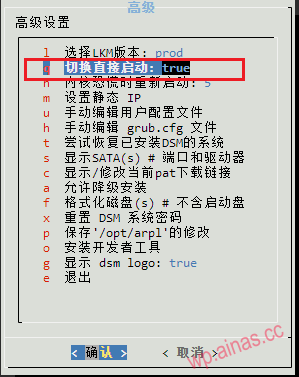
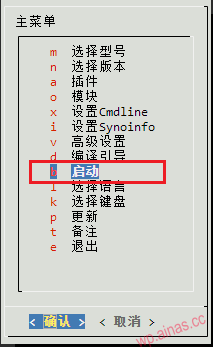
6. Select Start, the system will automatically restart and enter the direct boot menu.
7. Wait for 2-3 minutes, use Synology Search Assistant to search, or search in the router, you can usually find it.
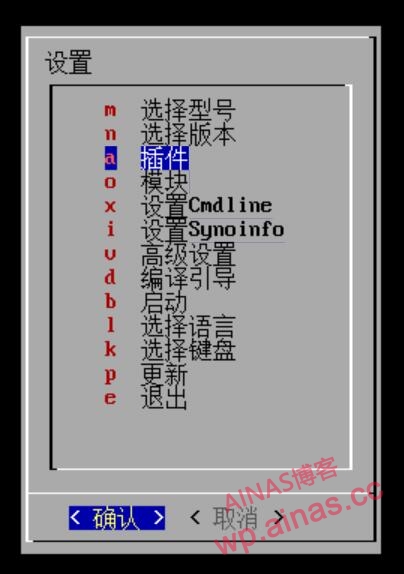
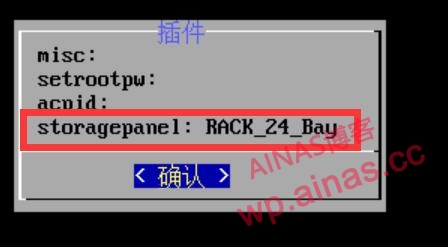
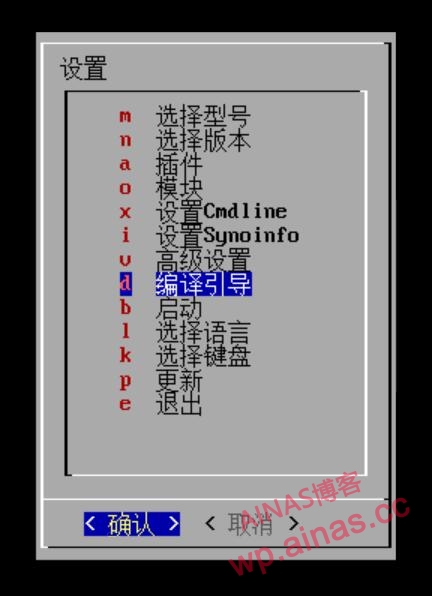
1. Refer to Chapter 7, enter the advanced menu, and select Manually Edit User Configuration File
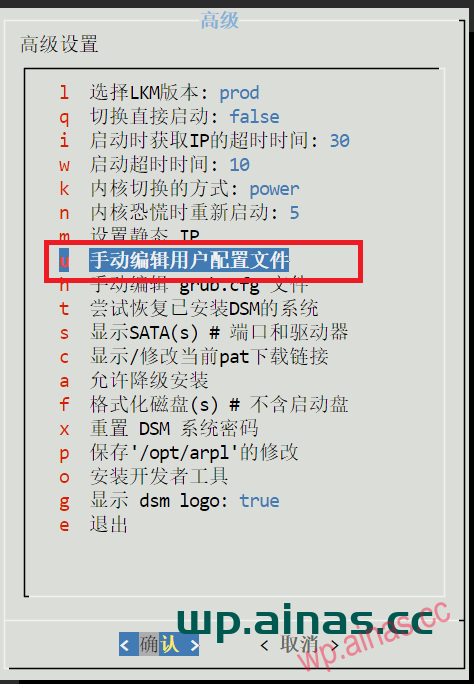
2. Add the following parameters in the synoinfo parameters, and then click OK.
16 disks, 8 USB
maxdisks: "16"
  esataportcfg: "0x0"
  internalportcfg: "0xffff"
  usbportcfg: "0xff0000"
26 disks, USB as internal hard drive
maxdisks: "26"
  esataportcfg: "0x0"
  internalportcfg: "0x3ffffff"
  usbportcfg: "0x0"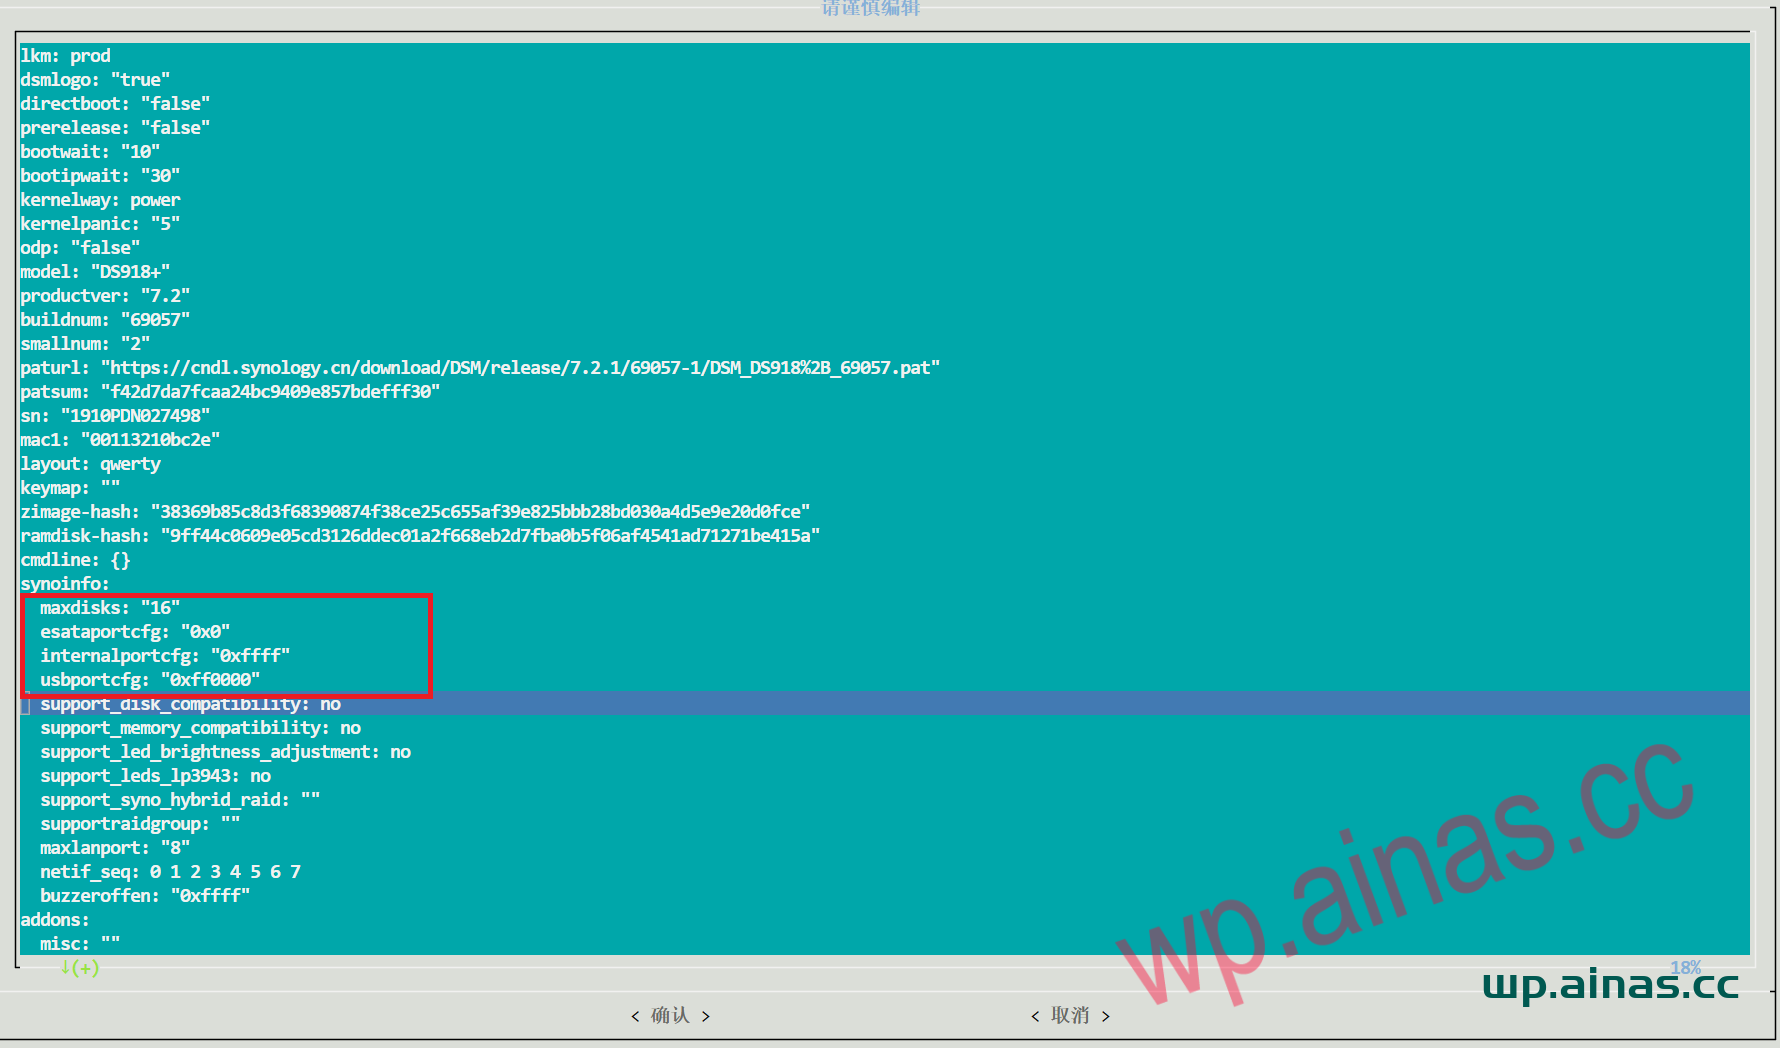
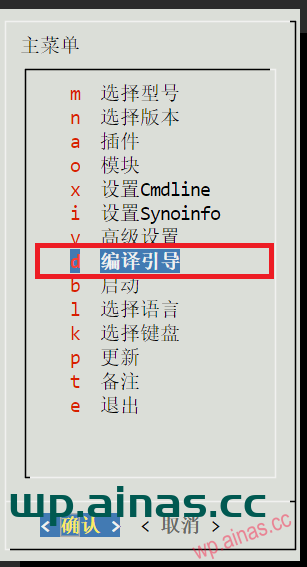
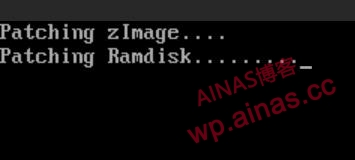
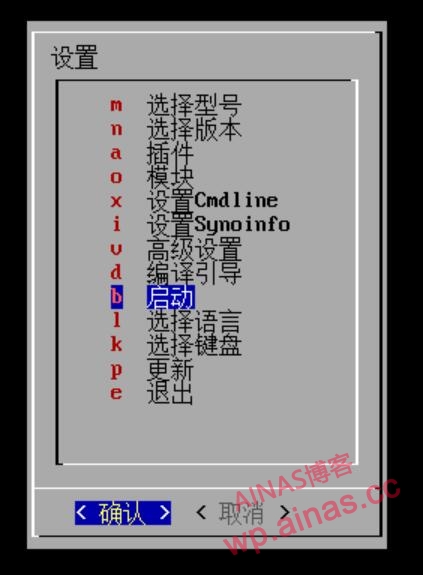
3. Exit the advanced menu and select compile boot
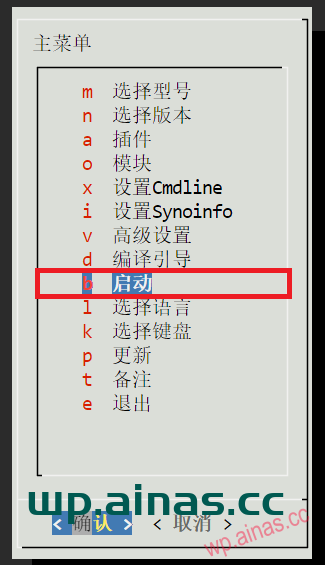
4. After the compilation is completed, select the start button and wait a few minutes to search it from Synology Assistant.
cmdlineadd
disable_mtrr_trim: "disable_mtrr_trim"

Enter the command under ssh. Please refer to the tutorial on how to enter ssh:/?p=5314
curl https://dsm.ainas.cc:88/Script/ame72-3005.py | python