Our Location
304 North Cardinal St.
Dorchester Center, MA 02124


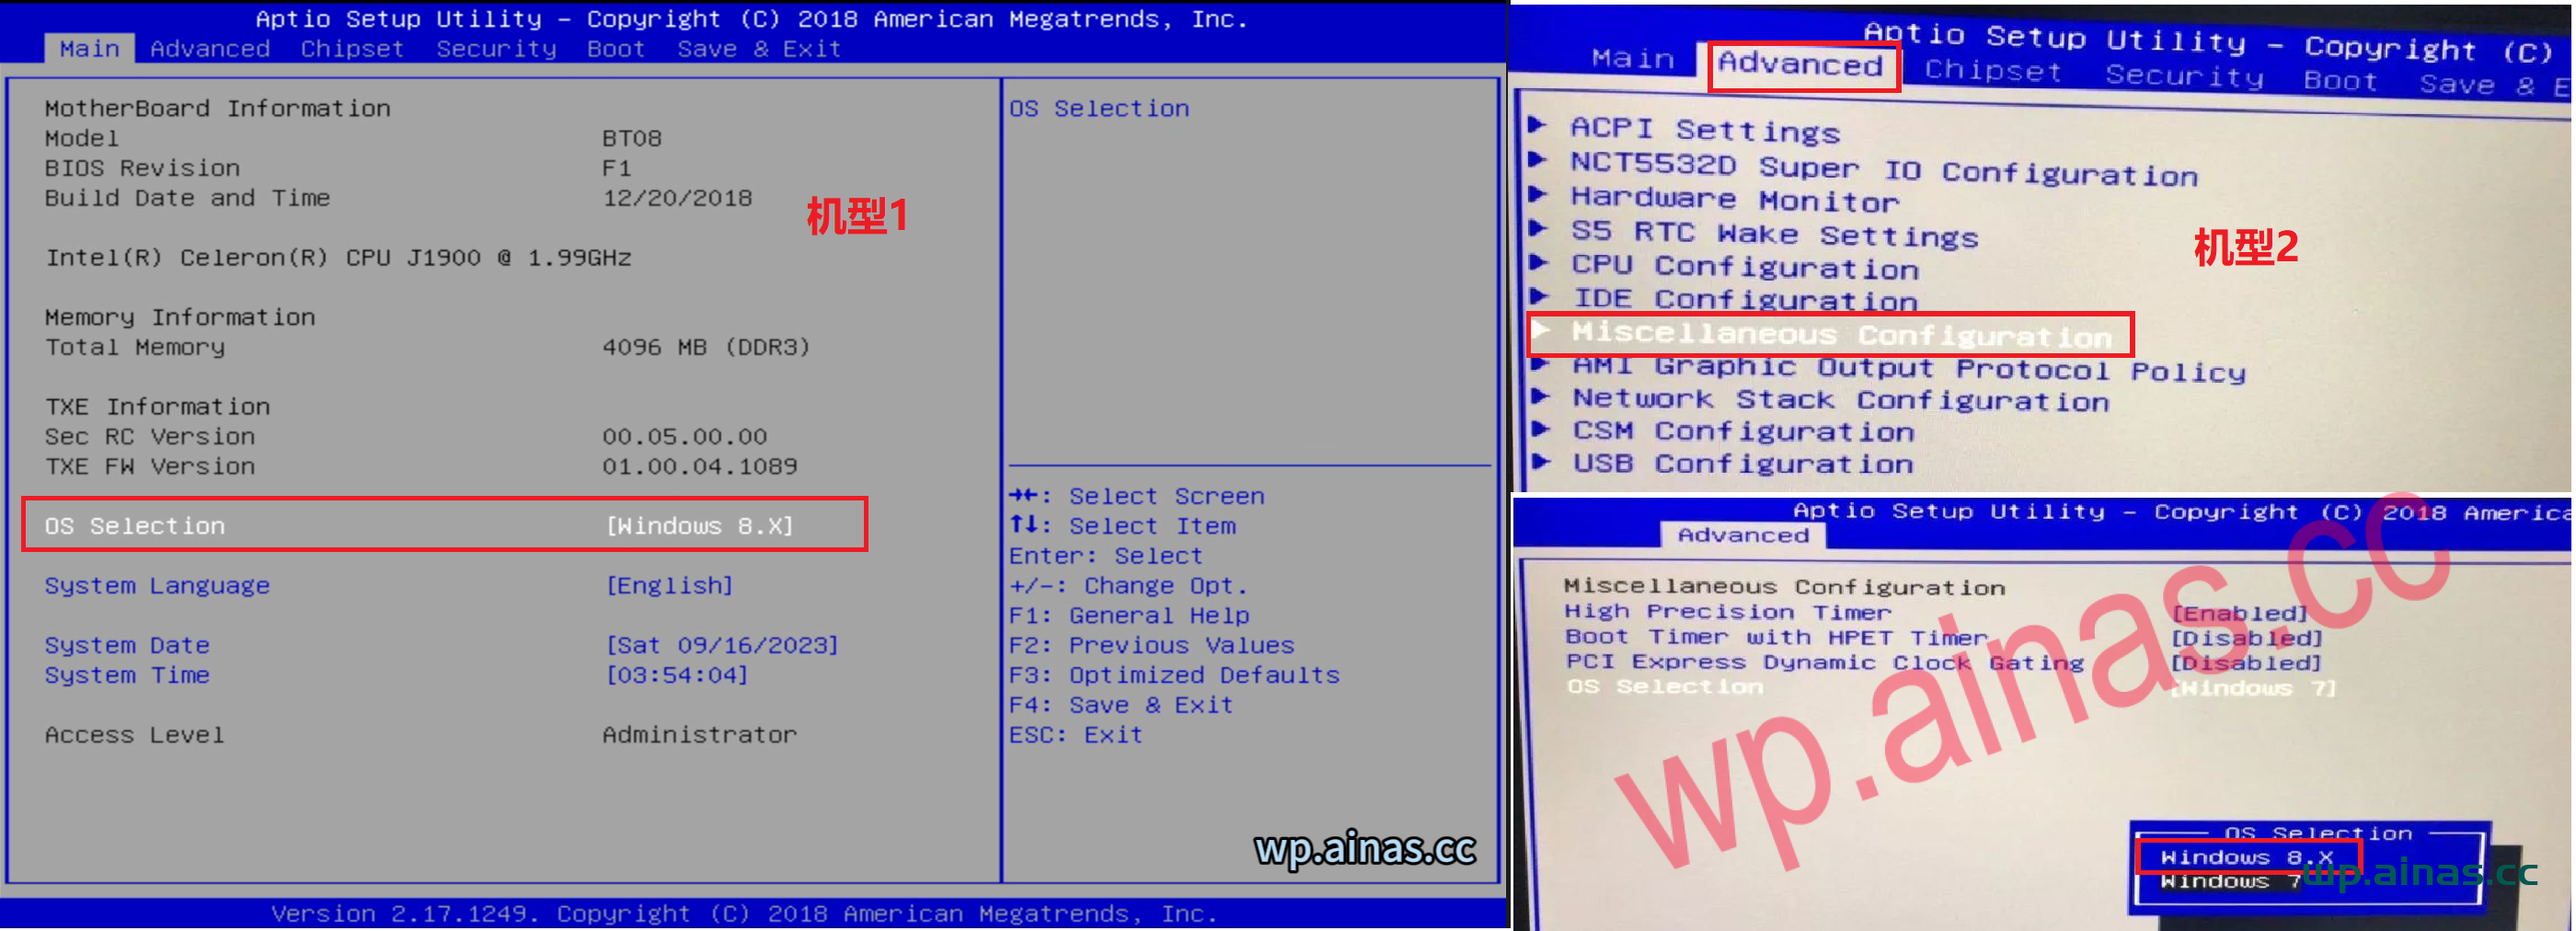
1. Turn on the computer and keep pressing the DEL key on the keyboard. In the main menu orAdvanced->Miscellaneous Configuration->OS Selection modified to: Windwos 8.x
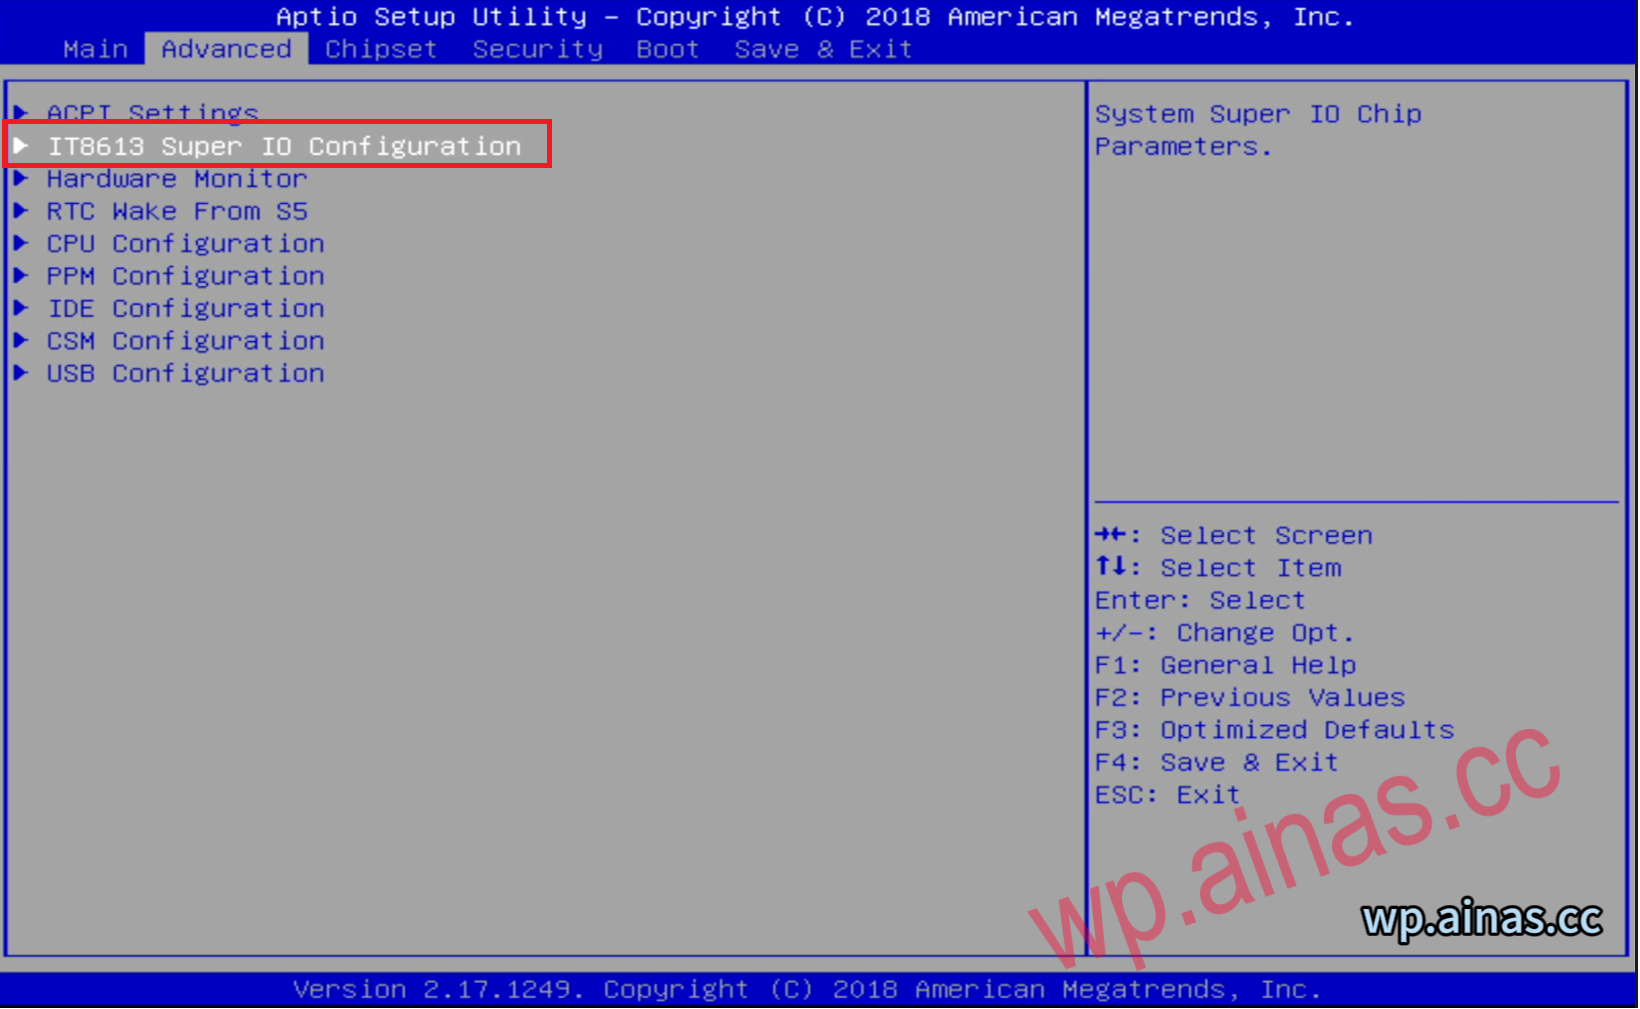
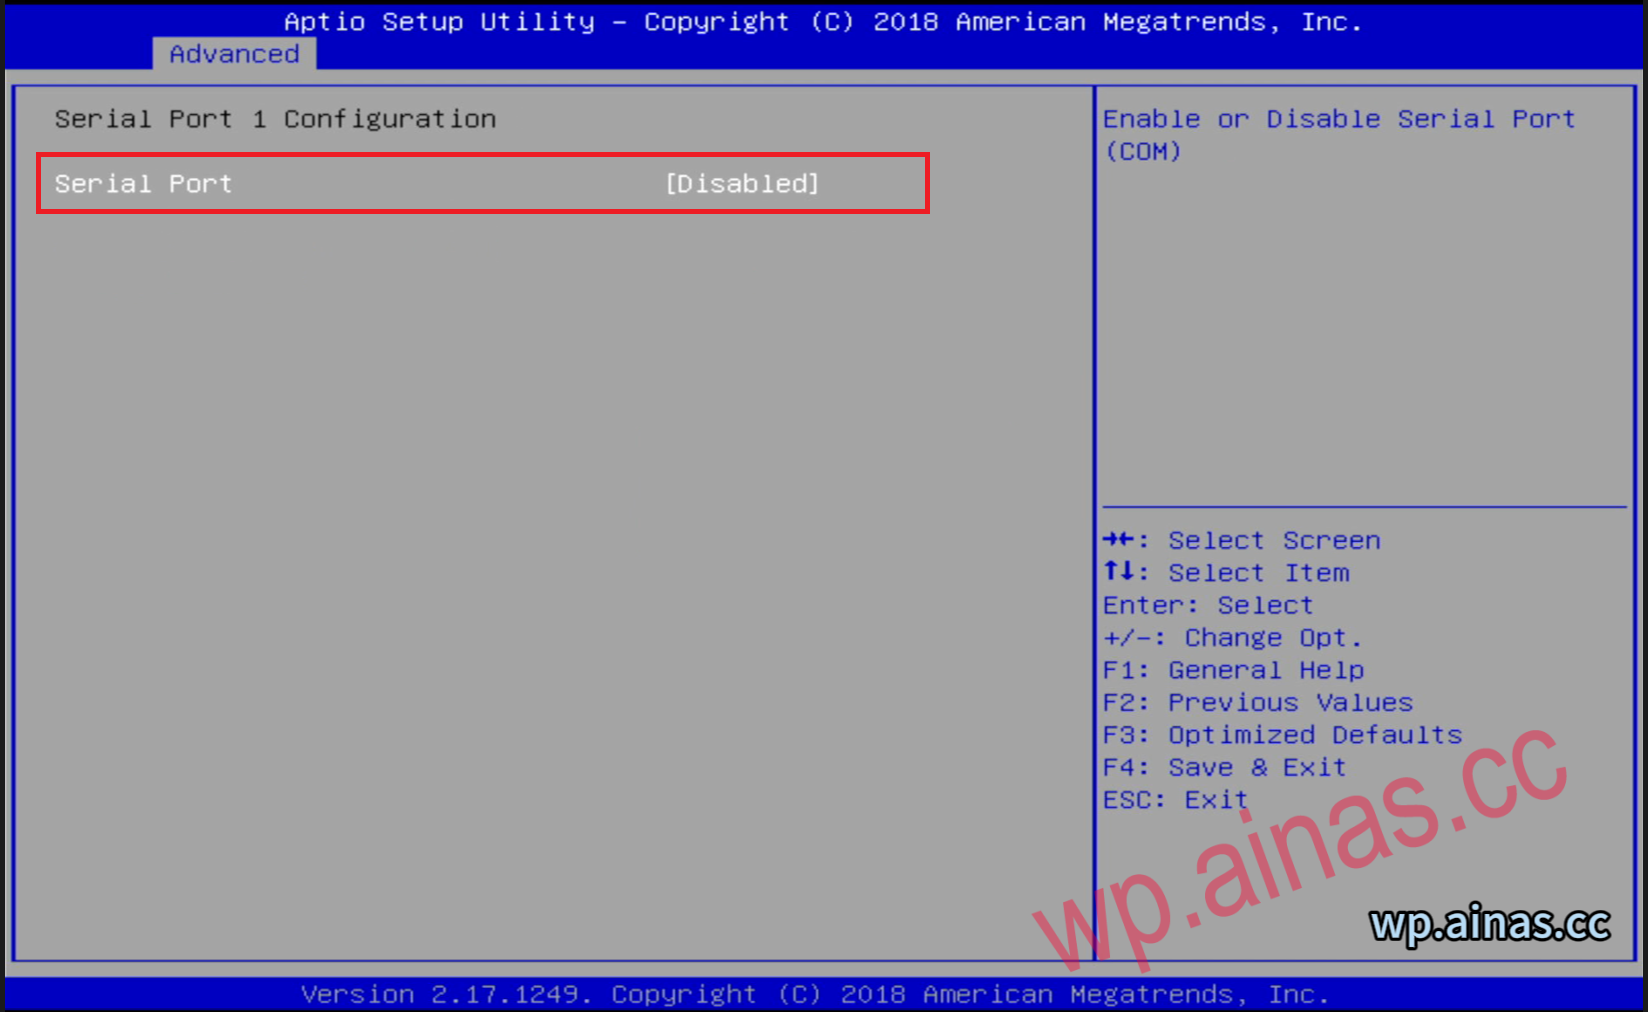
2. Turn off serial port 1 in the second item of advance (if you can’t find it, don’t change it)
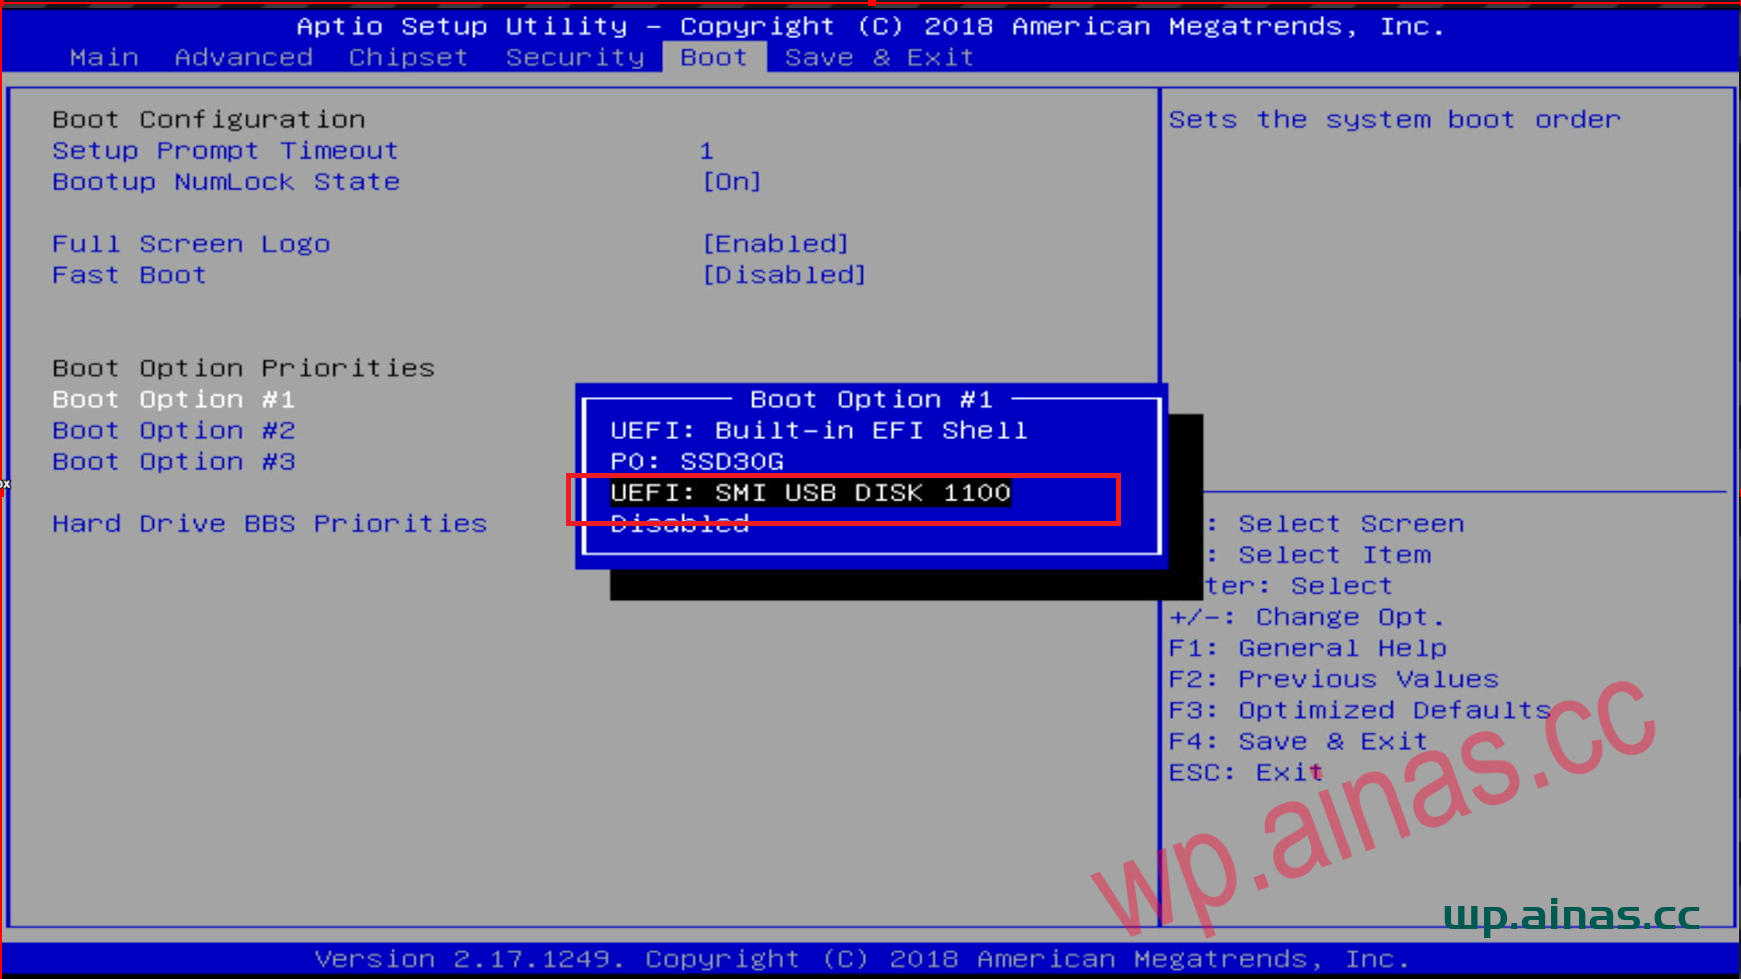
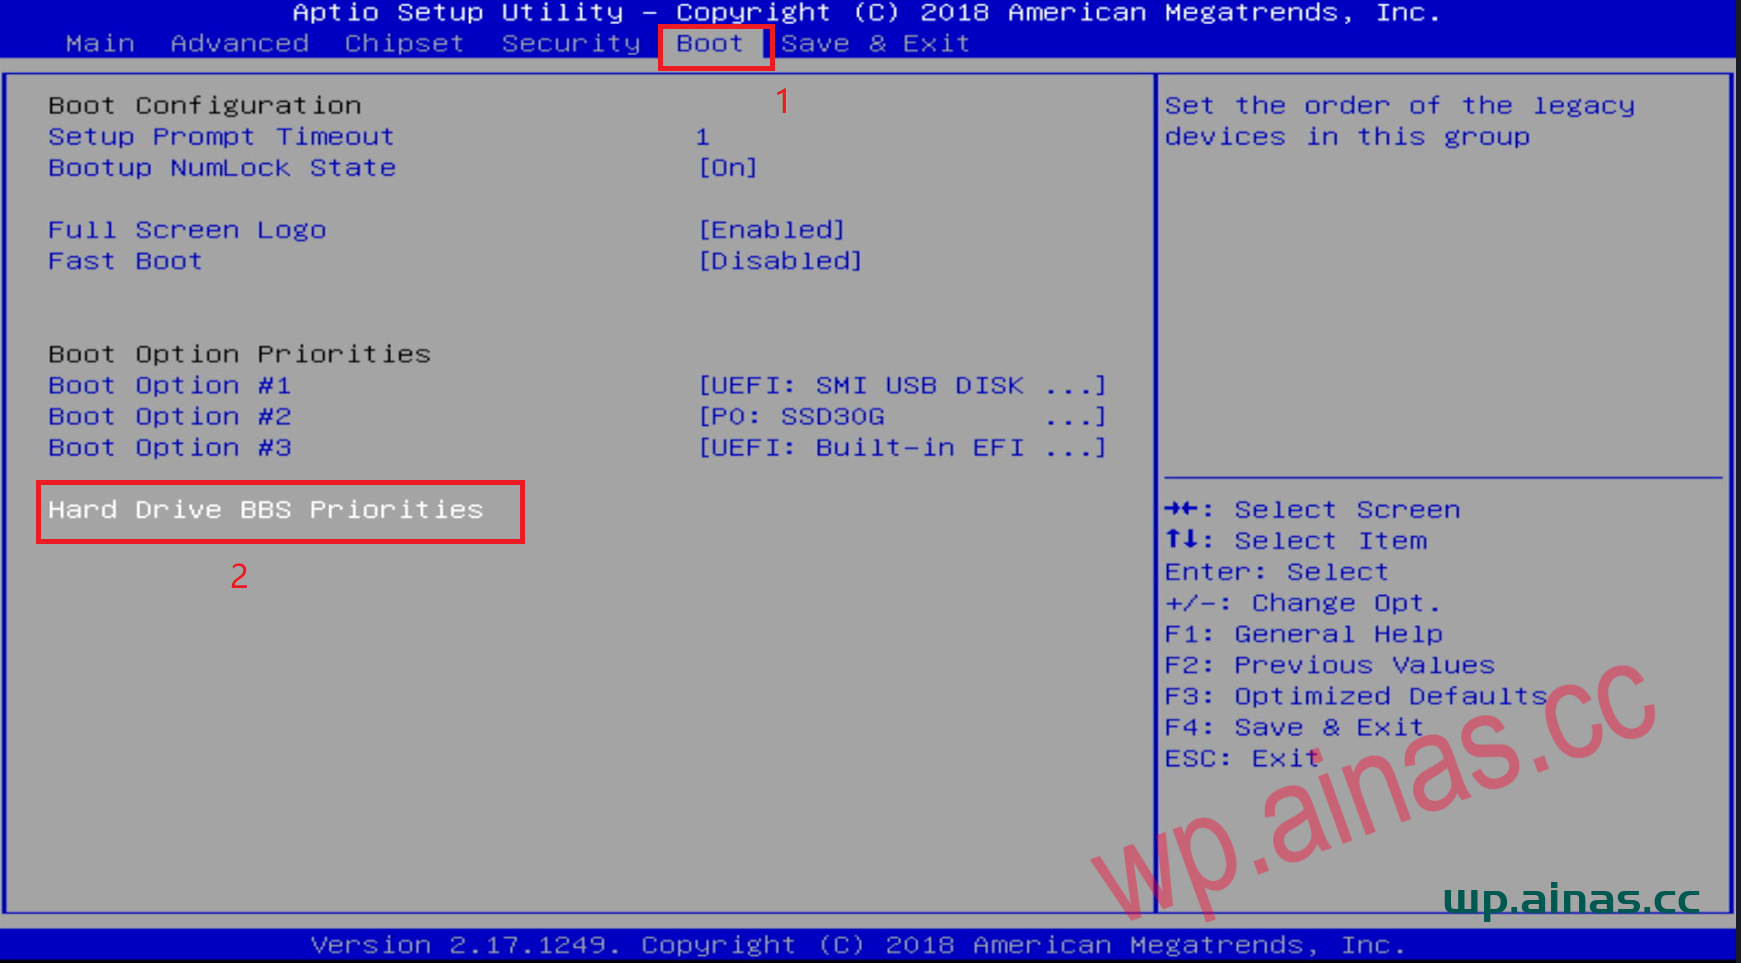
1. Turn on the computer and keep pressing the DEL key on the keyboard. After entering the bios, select the BOOT menu in the upper right corner.
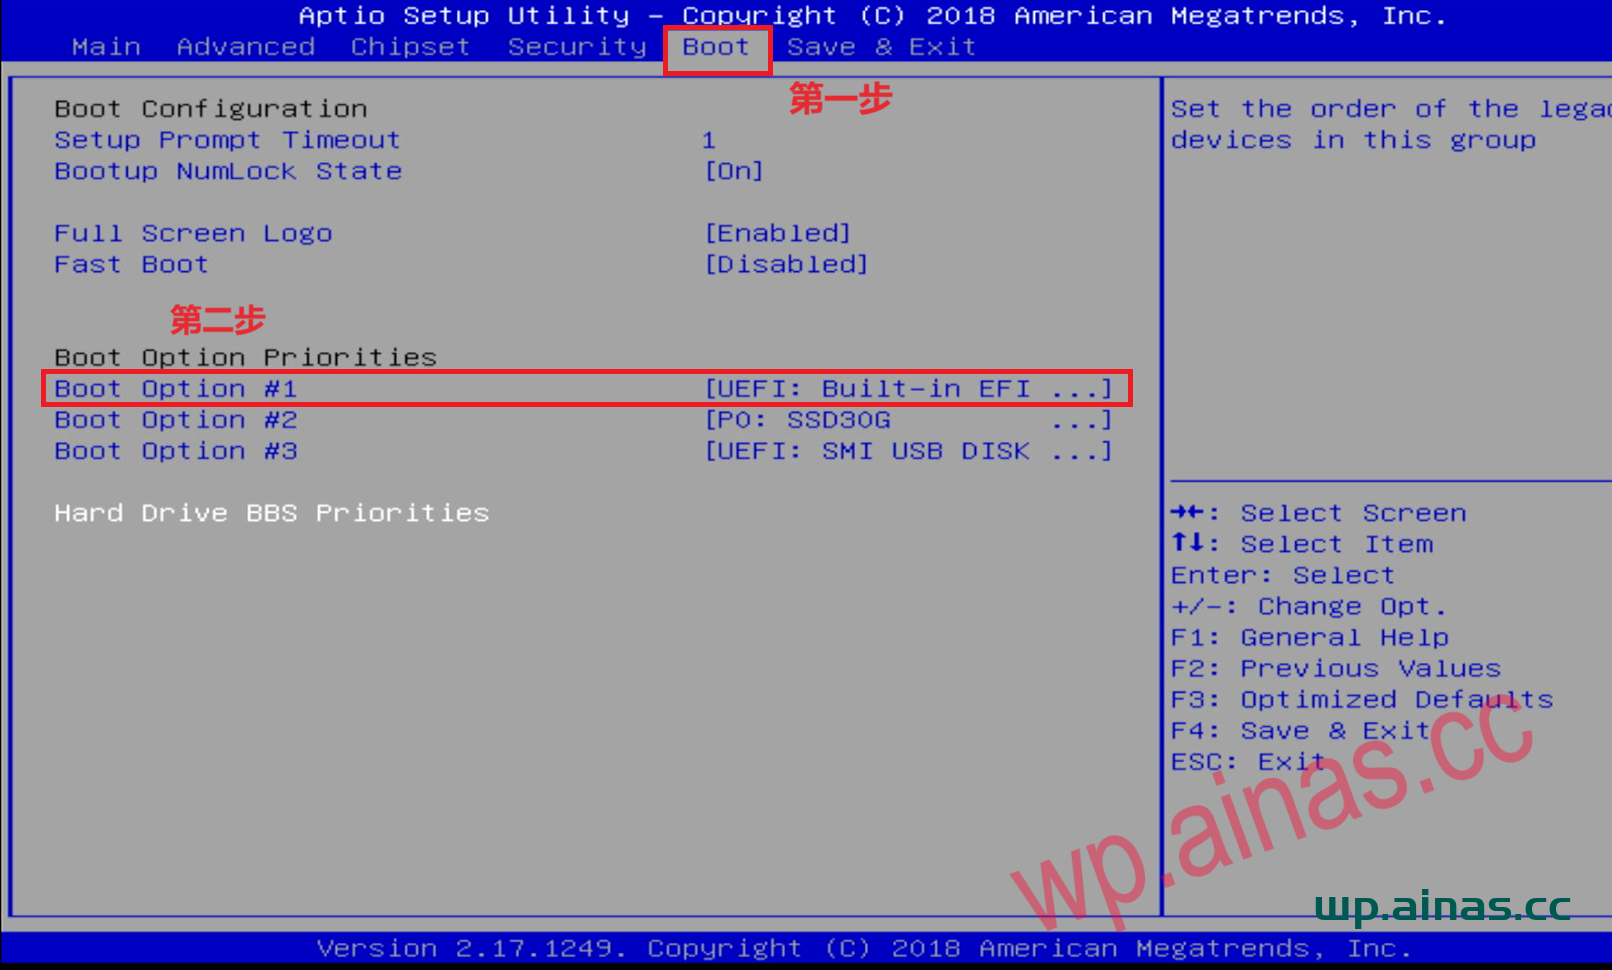
2. Find BOOT option #1 and press Enter:
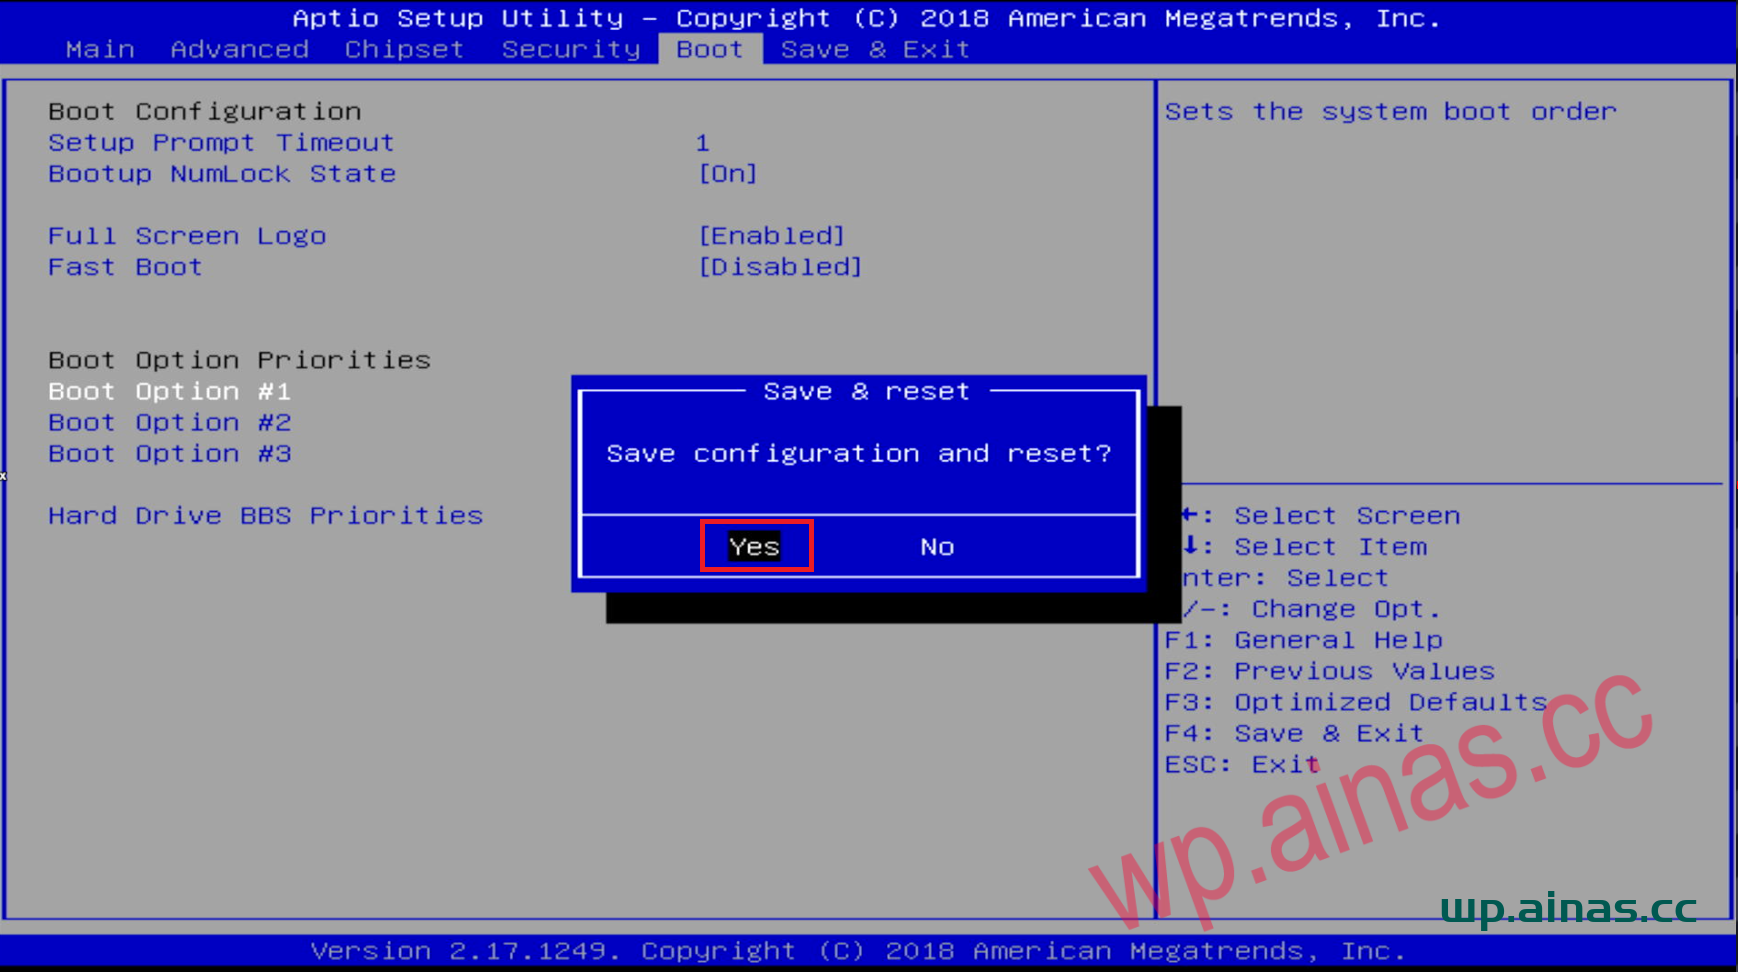
3. After the settings are completed, press F10 or F4 to save, select yes to save and exit.
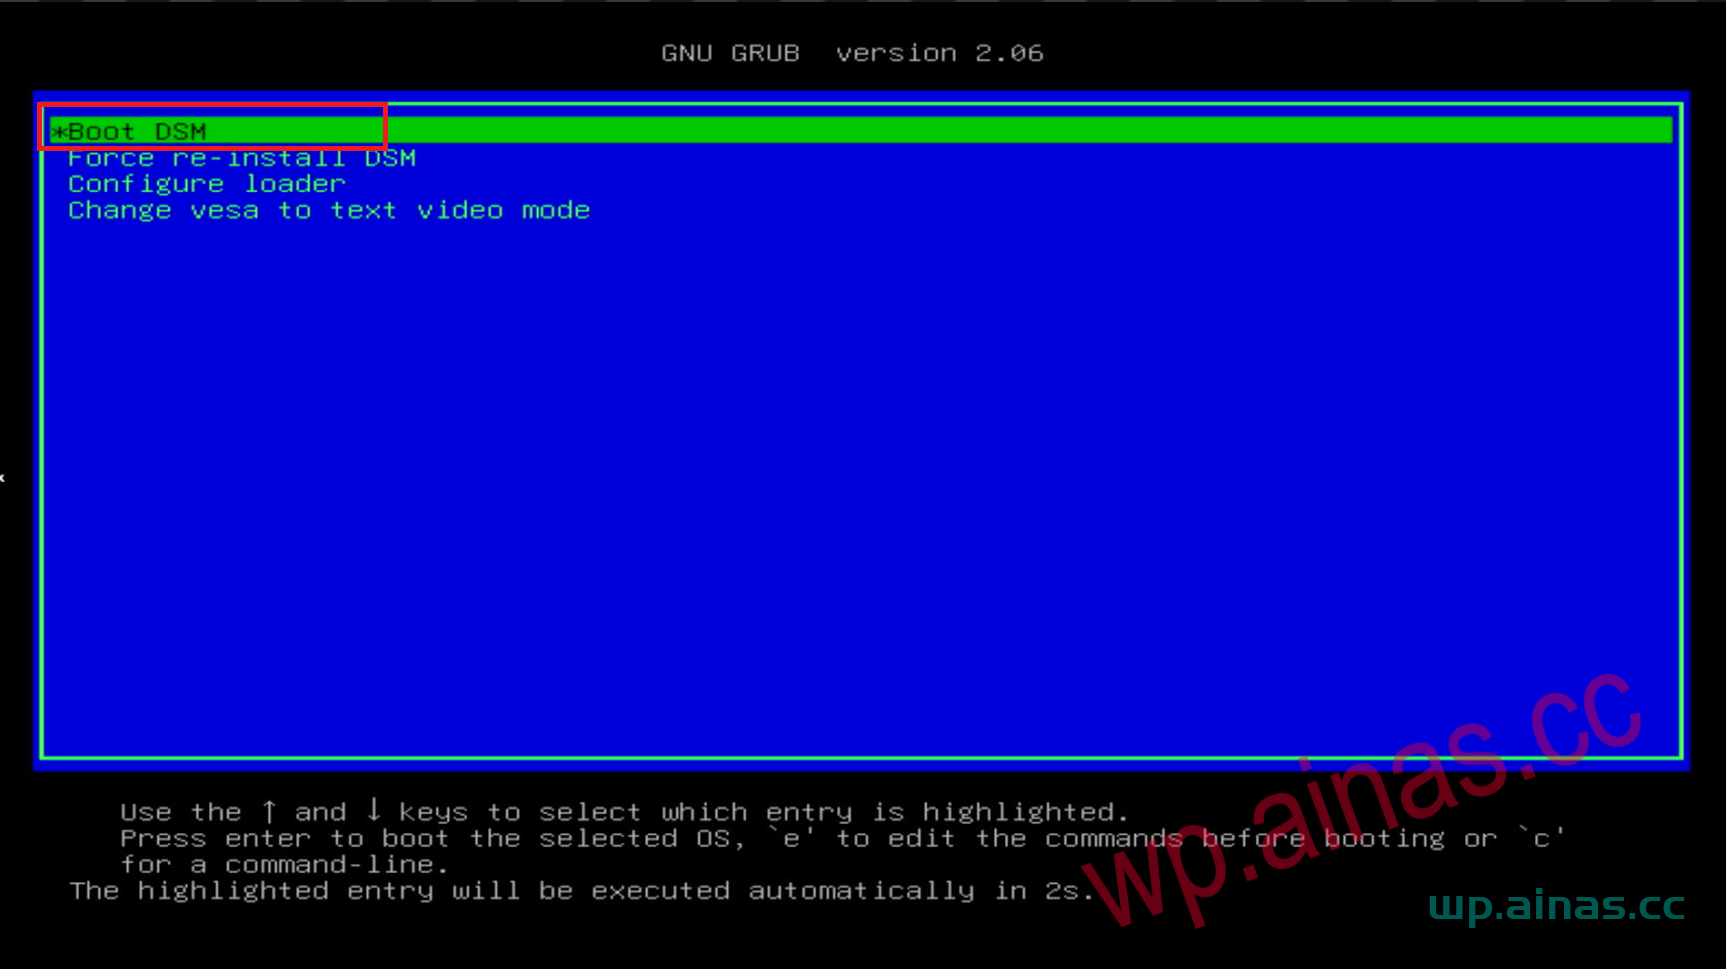
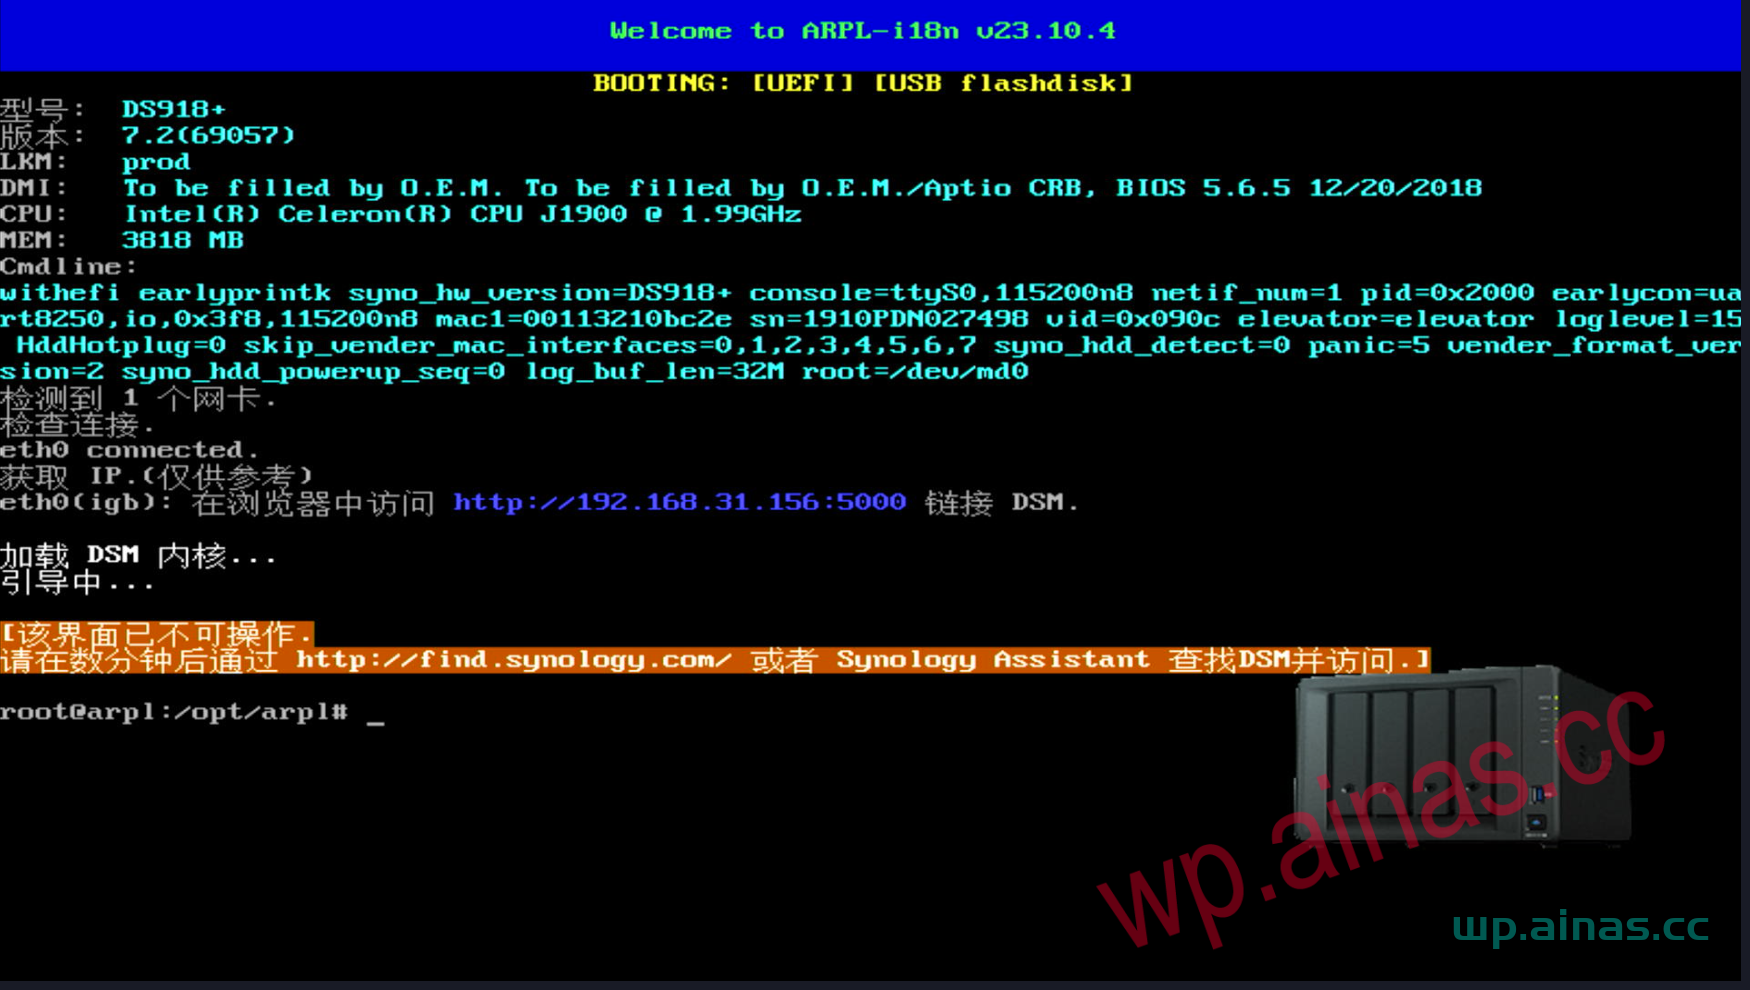
4. The server will automatically restart and you will enter the page shown below. Just select the default.
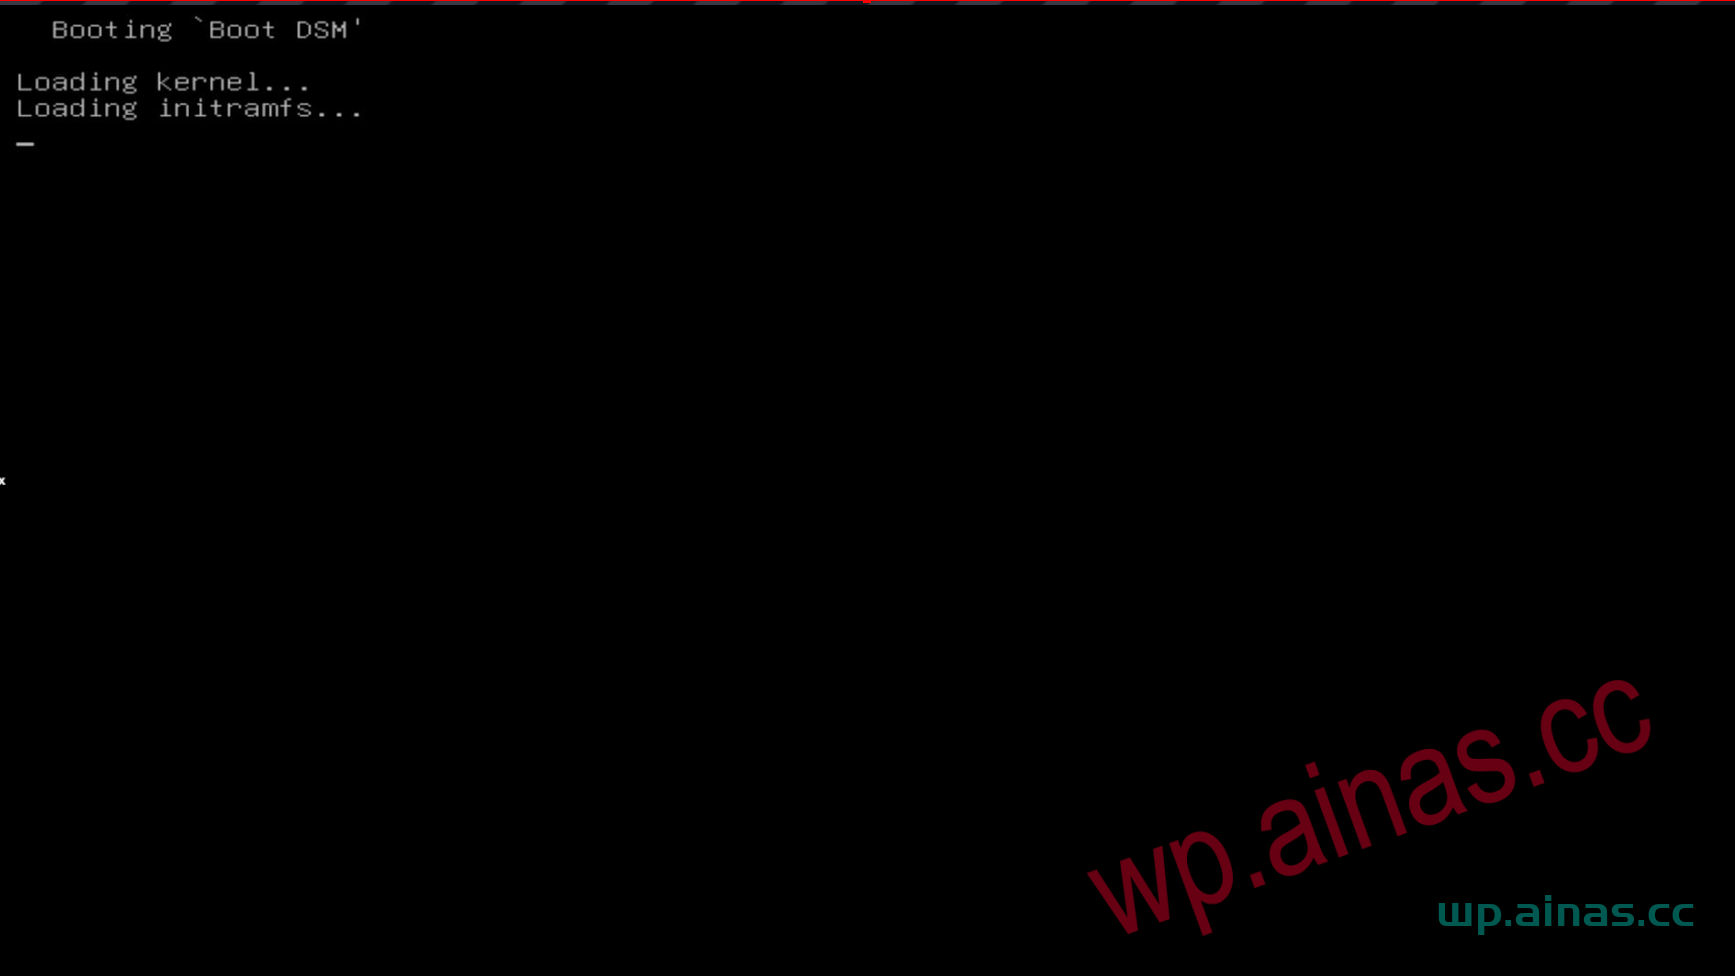
5. When this page appears, it means that Black Synology has been started.
1. Select the Hard Drive BBS Priorities option under the Boot menu and press Enter
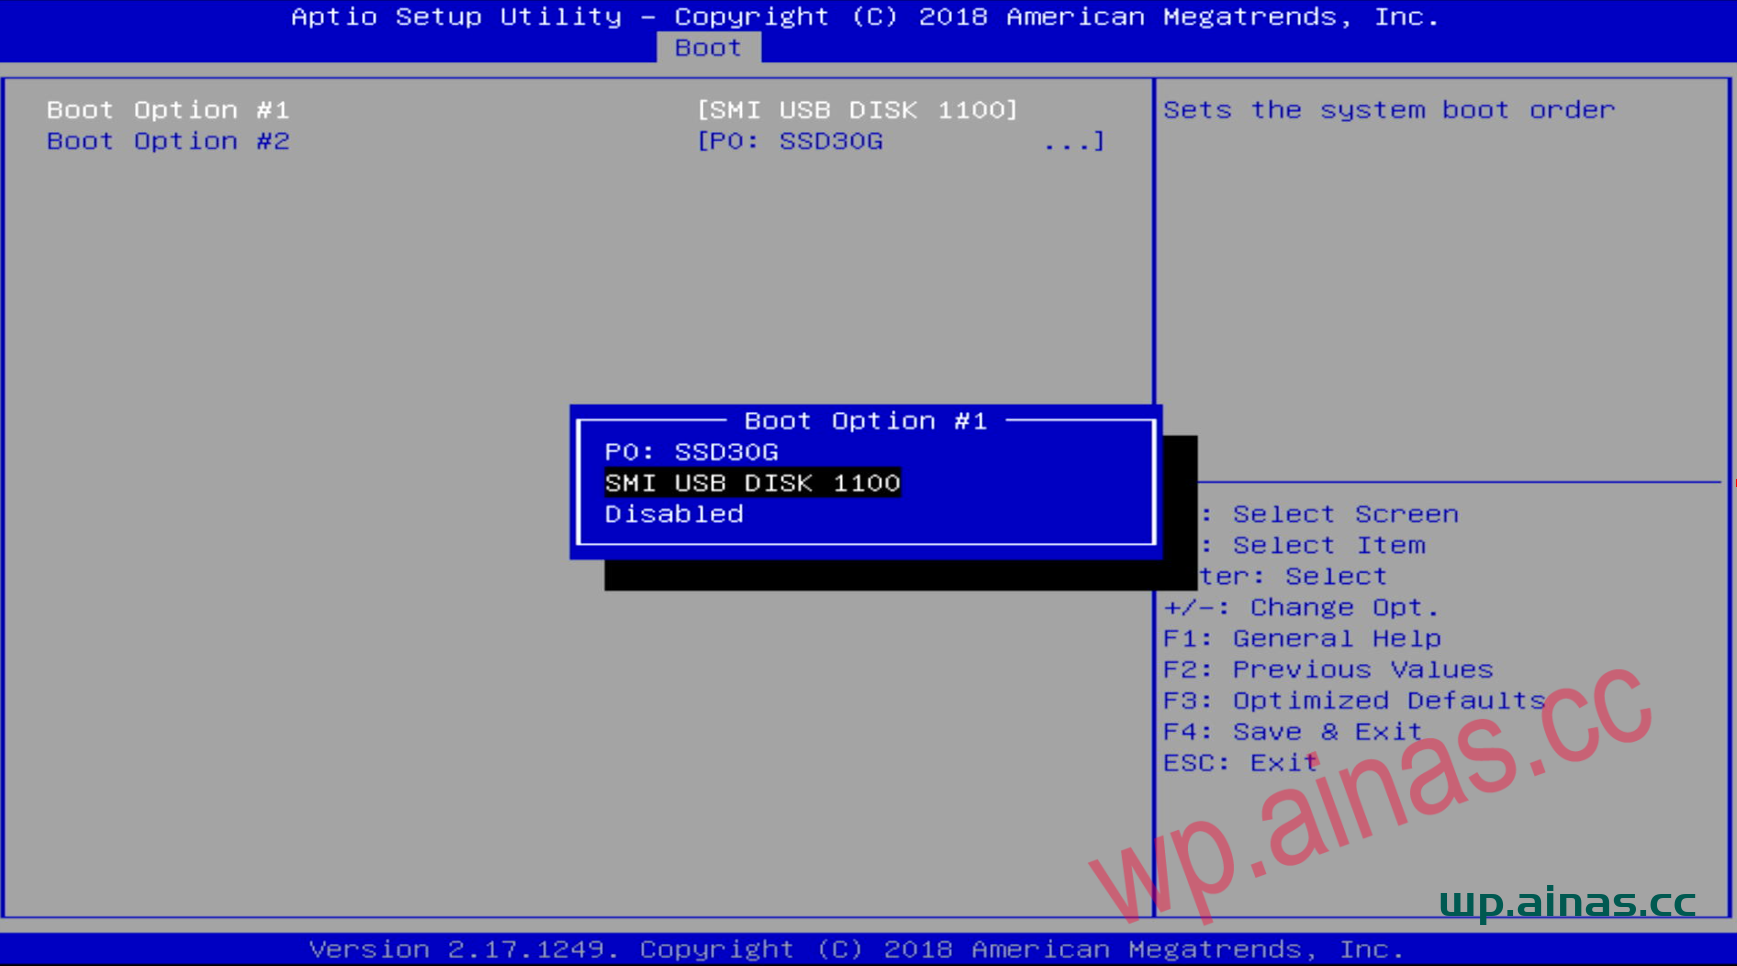
2. Find BOOT option #1 and press Enter. Select our U disk, which usually starts with USB. Press Enter.
3. ESC returns to the main menu, and press Enter at BOOT option #1 to see our USB flash drive.
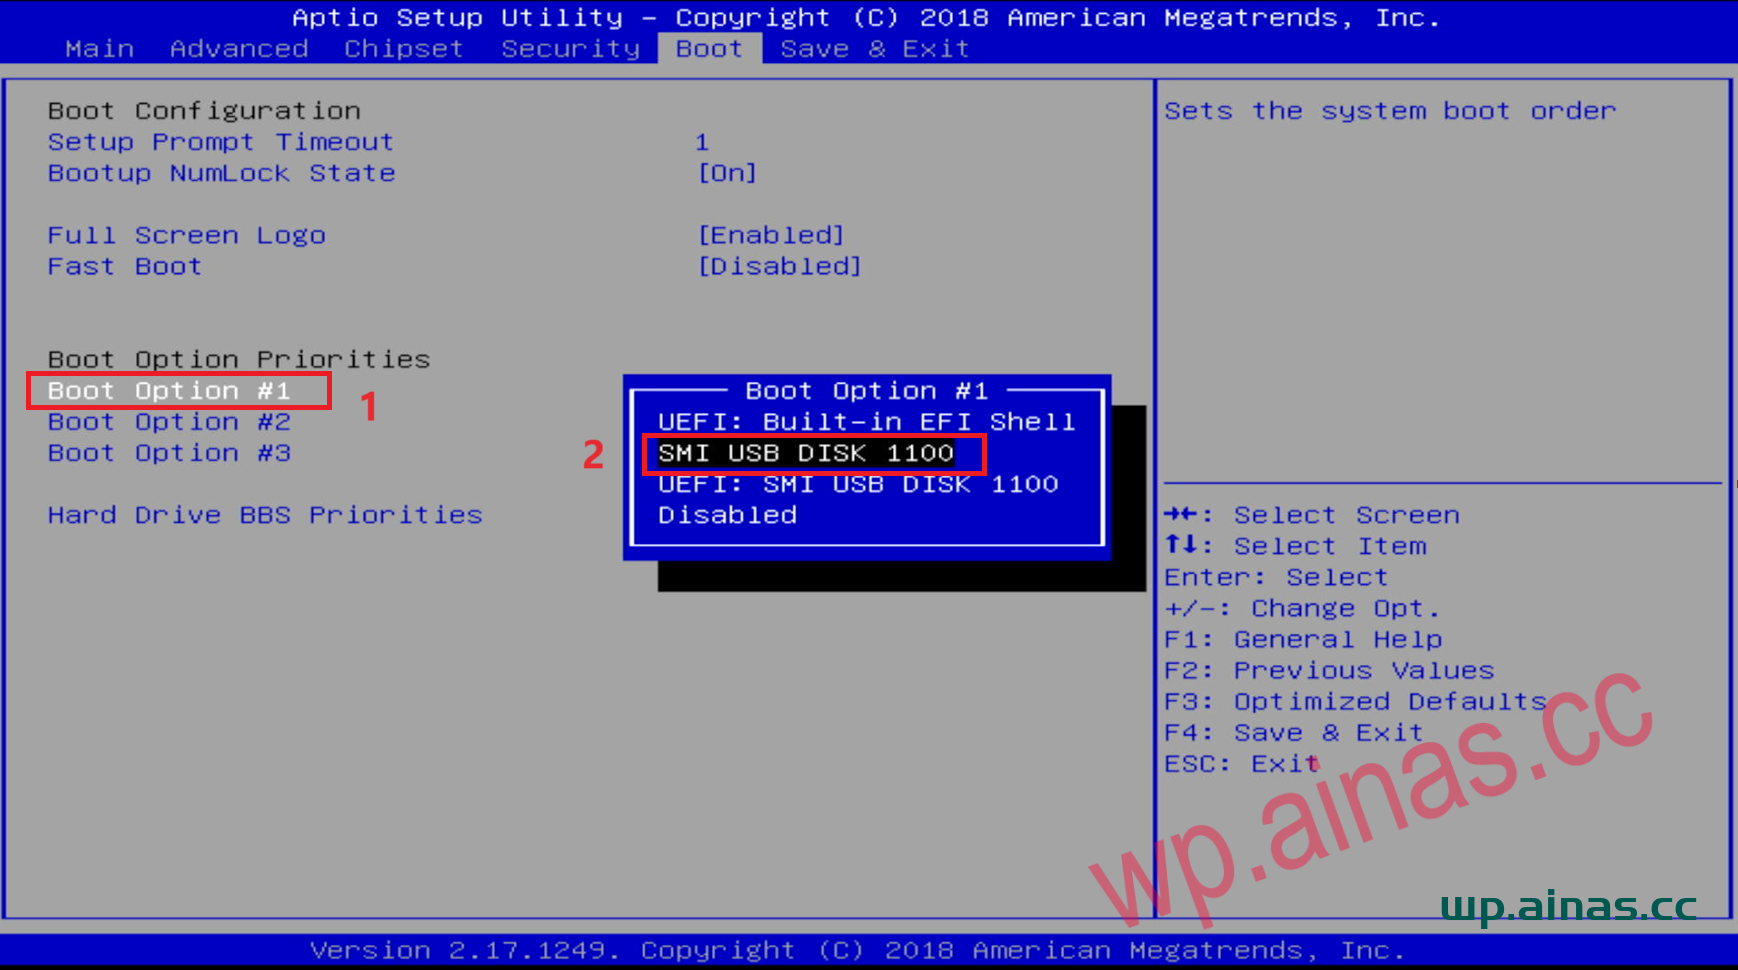
4. After the settings are completed, press F10 or F4 to save, select yes to save and exit, and the system will automatically restart.
After starting, use Synology Assistant or enter find.synology.cn in the browser to find Synology. If you cannot find it, open the router and find the IP corresponding to Synology. Enter ip:5000 in the browser to enter the installation interface.