Our Location
304 North Cardinal St.
Dorchester Center, MA 02124


With Synology NAS, the easiest way to access the external network is QuickConnect, but friends who have used it know that its speed is really hard to describe. I have even encountered disconnections. The only advantage of it is that it is not limited to the home network. Even if you do not have a public network IP, you can still access the NAS at home.
However, public network IP is so precious now, especially in big cities, that it is hard to find, so many friends choose various intranet penetration solutions. At present, common intranet penetration solutions are either various DDNS (dandelion, peanut shells, etc.) that require money, or free penetration tools such as frp, nps, ngrok, etc. (for example, Zerotier recommended in the tutorial of my previous article, although the free speed cannot be guaranteed, but the actual test is more reliable than QuickConnect).
Because my home has always had a public IP address from China Telecom, to be honest, I never thought it was very useful before. I usually just used it to access the router at home, or remotely switch on and off the computer at home. It wasn’t until I got a NAS that I realized how great it is to use a public IP address! At least when accessing the external network, it can save us almost no trouble and detours, or save money on purchasing special intranet penetration hardware.
So next I will share some common sense about public IP and the simplest intranet penetration solution for Synology NAS to use its own DDNS under public IP.

About public IP:
The public IP is actually an independent IP address. Simply put, it is the only IP address in the world given to us by the broadband operator we use. However, this IP address for ordinary users is not fixed, so we need to use DDNS to access it. Otherwise, your router may be redialed after restarting, and then your public IP will change and you will no longer be able to access it.
The benefits of public IP for NAS:
Having a public IP is like your router opening a door, and this door can directly connect to the NAS at home. With this door, we can directly open this door to access the NAS at home anytime we are outside. But without a public IP, it is equivalent to the router not having this door. We cannot directly access the NAS from the outside. So if we need to visit, we still need to go through an intermediary to “match up the connections.” There are free intermediaries (Zerotier…) and paid ones (Dandelion, Peanut Shell…). There will definitely be restrictions on the free ones, and the effect depends on the mood of the person. Maybe your time will be delayed, and you still can’t access it. The later period of charging will be a bottomless pit. This is obviously not a wise choice for us “white P party”.
So our choice is clear, that is: public IP!
Determine whether it is a public IP:
1. If it is dial-up via optical modem, log in to the optical modem backend to view the wan port IP of optical modem.
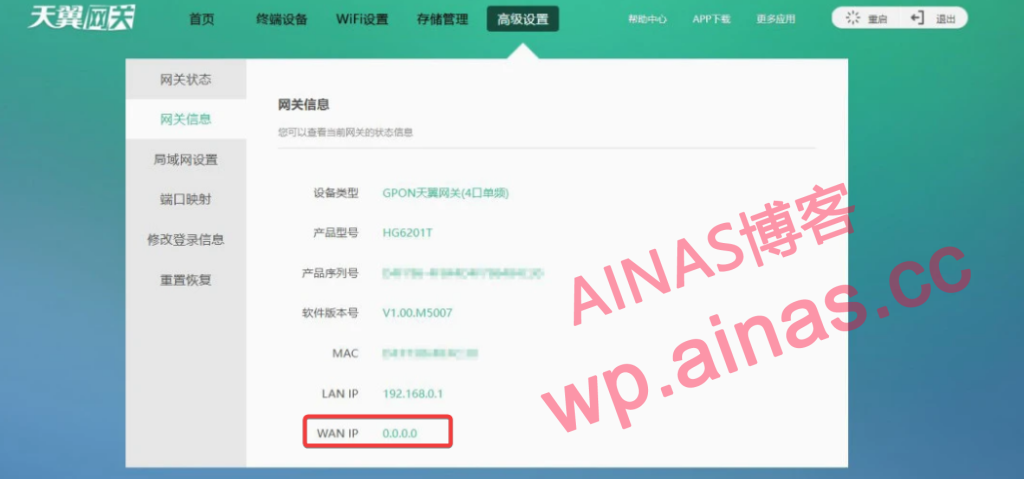
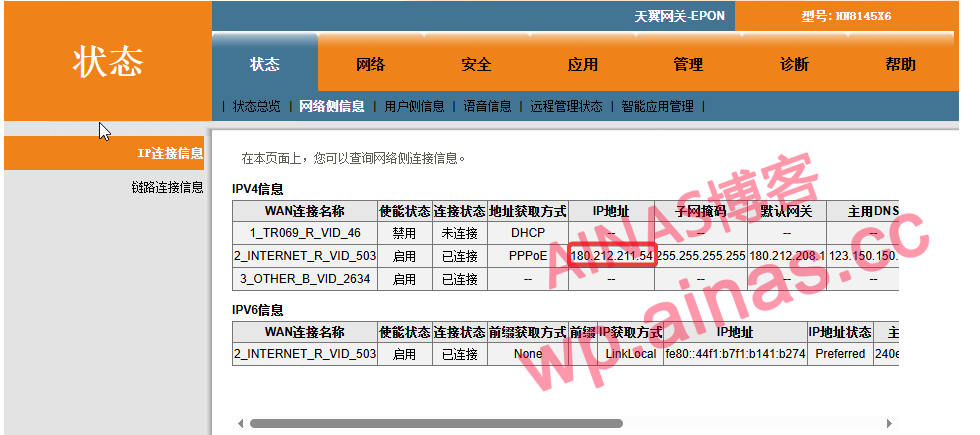
2. If it is a router dialing, check the router wan port ip
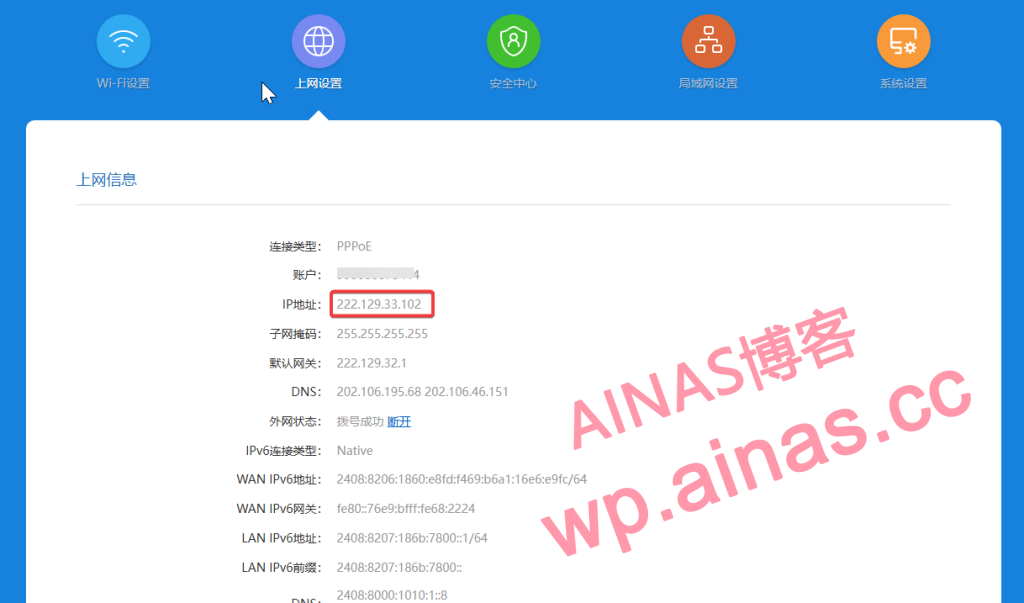
3. If the IP address does not start with 192, 100, 10, or 172, congratulations, you have obtained the public IP.
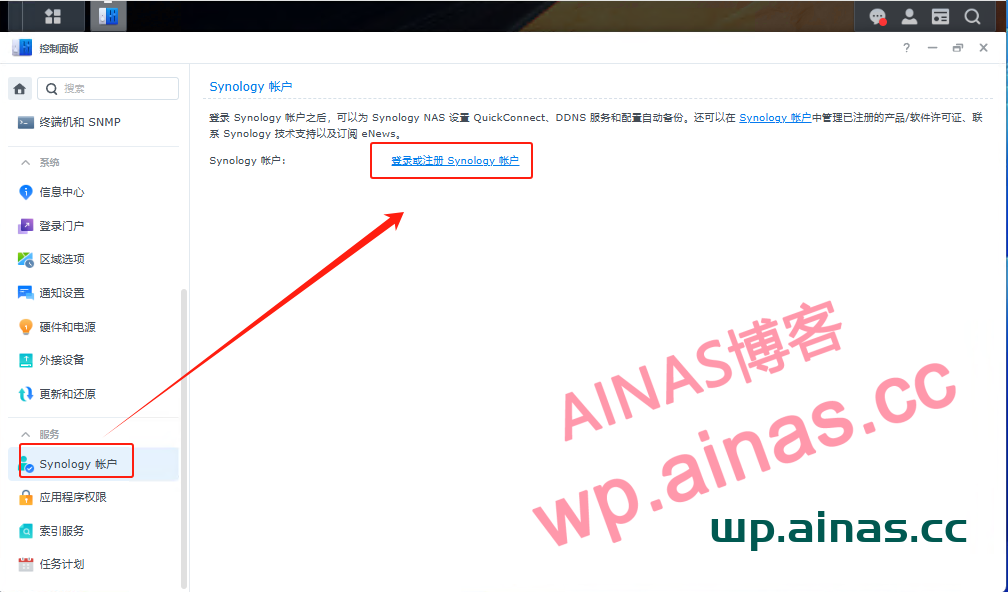
1. Open Synology’s “Control Panel – Synology Account” and log in. If you don’t have an account, you need to register a global account and log in. Registration tutorial:Tutorial link
2. Open Synology’s “Control Panel–External Access–DDNS–Add”
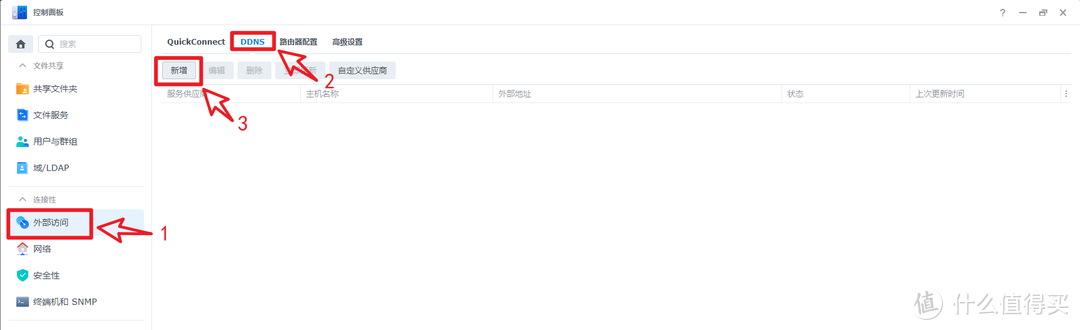
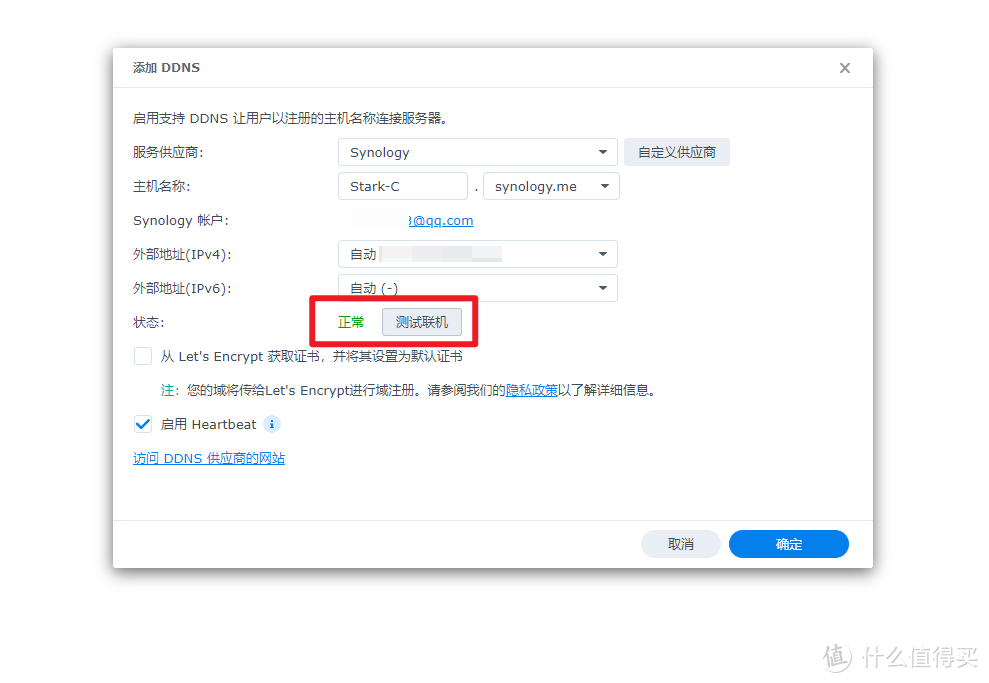
3. Make the following settings on this page: Service provider: Synology, host name: fill in whatever you want, and select the suffix as you like. Then click the “Test Connection” button after the status. If “Normal” is displayed, just click the “OK” button in the lower right corner.
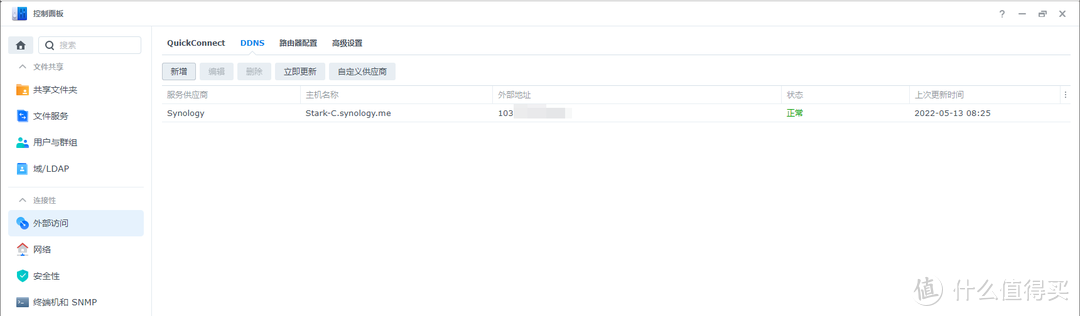
When you return to the DDNS page, you will see that we have added it to the host we just created. The host name is our remote access address. At this point, the Synology setup is complete!
Here we only introduce the setting method of router dial-up. If it is optical mode dial-up, and all devices connect to the network through the router, you need to first map the optical mode to the router wan port and then the router to the NAS. The example is as follows:
Optical modem (192.168.1.1) → Router (WAN port: 192.168.1.3) → NAS (192.168.31.100)
Of course, although we have a remote access address on Synology, we cannot access it directly. After all, Synology is still under our router, so we still need to make some necessary settings on the router.
The router is very simple to set up, the most important thing is port forwarding.
Why we need port forwarding: After we have the public IP, we cannot directly access our Synology server, because the public IP is our dial-up device, that is, the router. The router will allocate the intranet IP to our device through DHCP. In this way, the router can only be accessed on the public network. We need to establish a bridge between the router and the Synology server, allowing us to pass the public IP You can access servers such as Synology on the intranet, and you have port forwarding. Simply put, port forwarding is to map the port of one IP to the port of another IP (this port can be customized), and establish a channel from this port to that port. In addition, port forwarding can also forward some commonly used service ports to less commonly used ports to avoid being scanned by machines in batches, thus providing certain security protection.
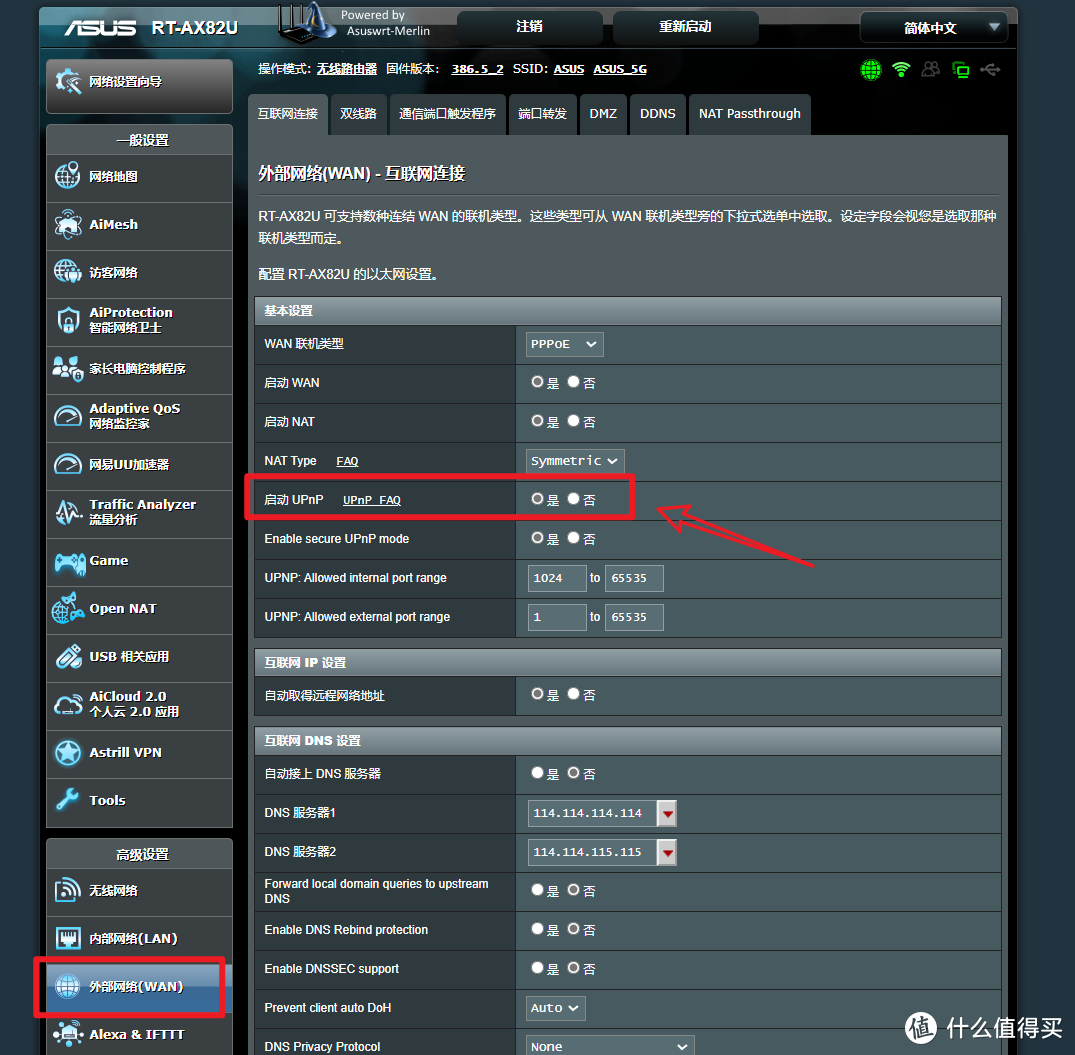
You need to enable UPnP on the router before operating. Generally it is enabled by default. The picture above shows the UPnP location of the ASUS router. Different routers have different opening methods, so please search for it yourself.
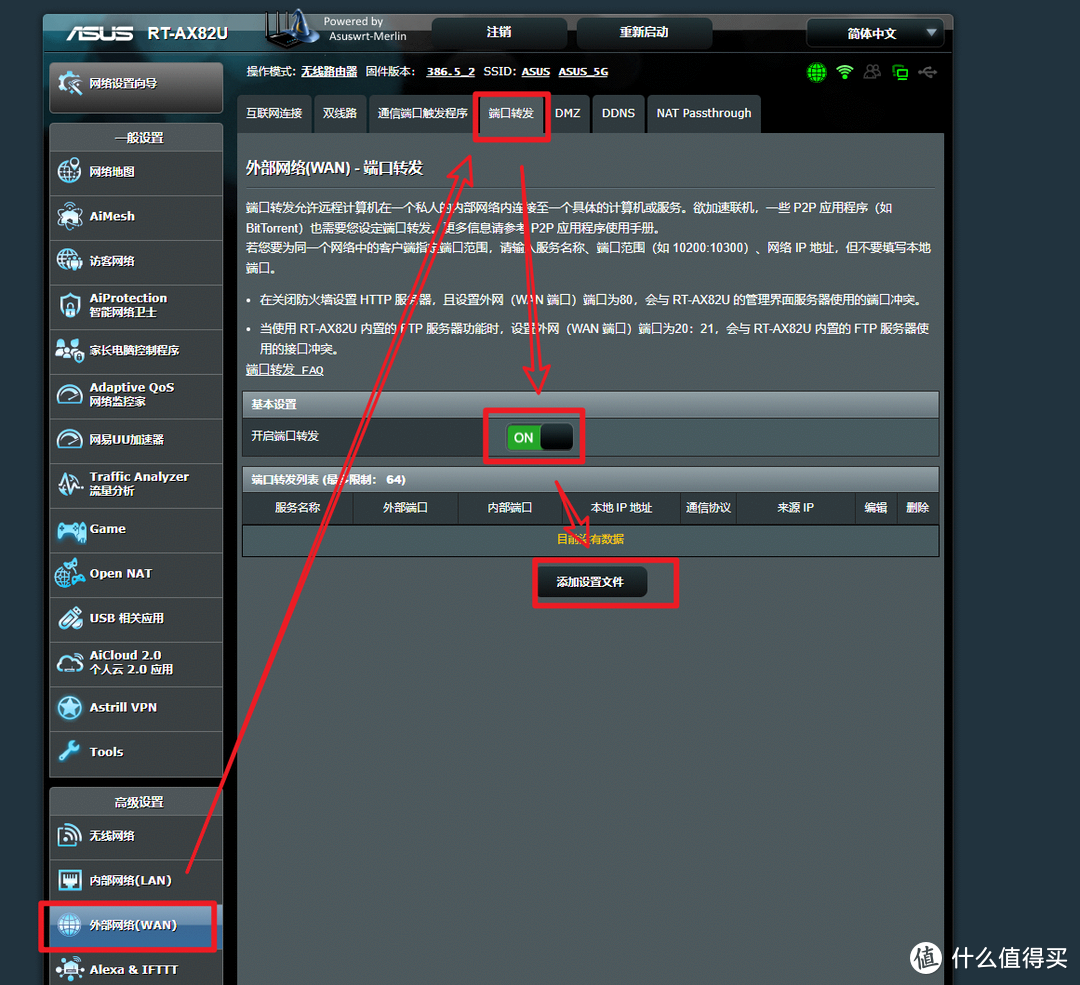
The router’s port forwarding (some are called port forwarding) is usually in the “external network” in the settings. I take the ASUS router as an example and open “External Network–Port Forwarding–Open–Add Settings File”
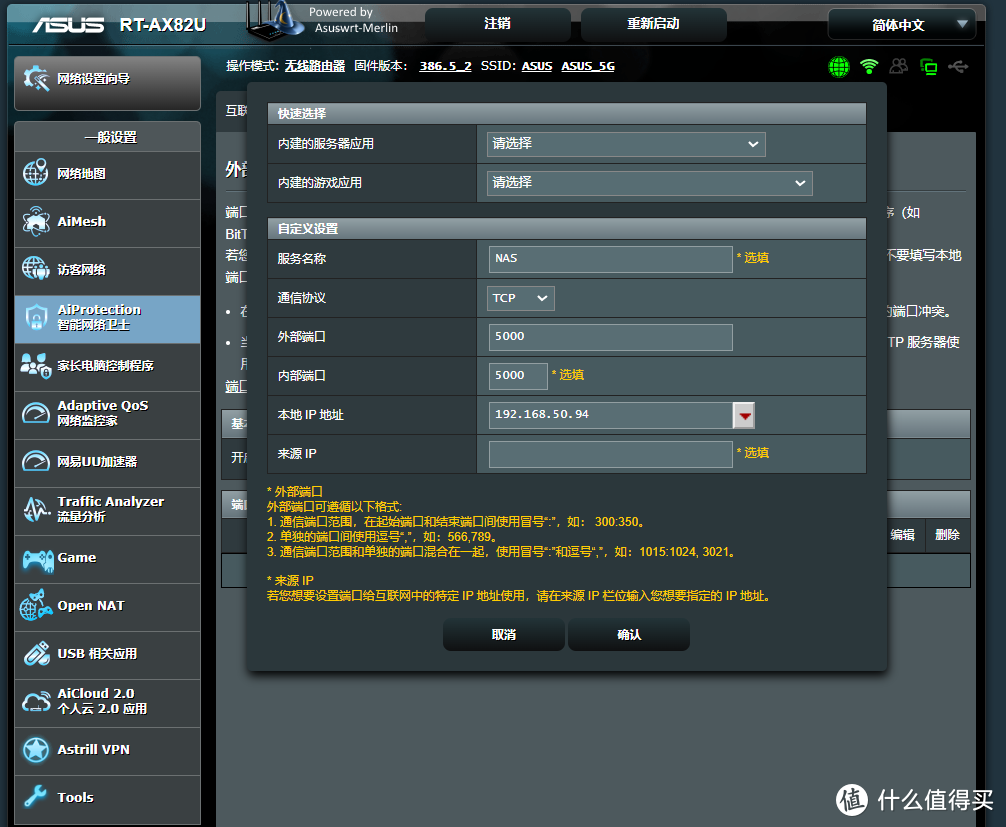
Configure port forwarding as shown above.
Service name: any
Communication protocol: TCP
External port: the port corresponding to Synology
Internal port: Same as above
Local IP address: Synology local IP
Source IP: You can ignore it
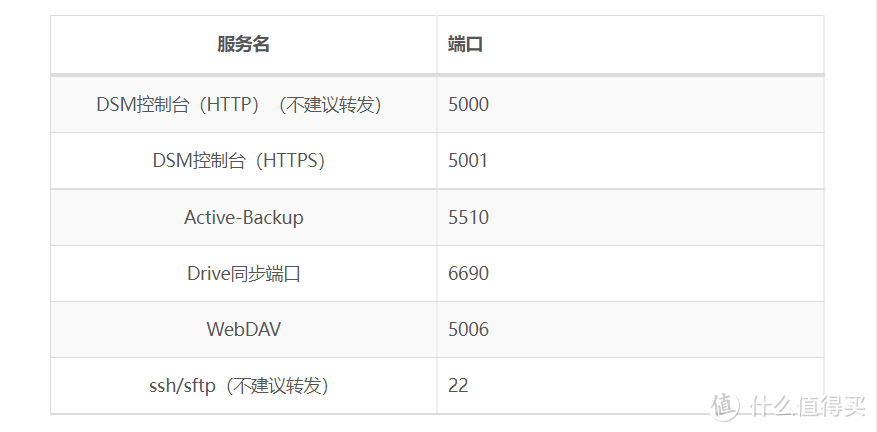
By the way, let’s talk about several ports commonly used by Synology. Generally, you only need to use the two ports 5000 and 5001 to access the external network happily. Port 22 should not be forwarded unless necessary, as it is easy to be attacked.
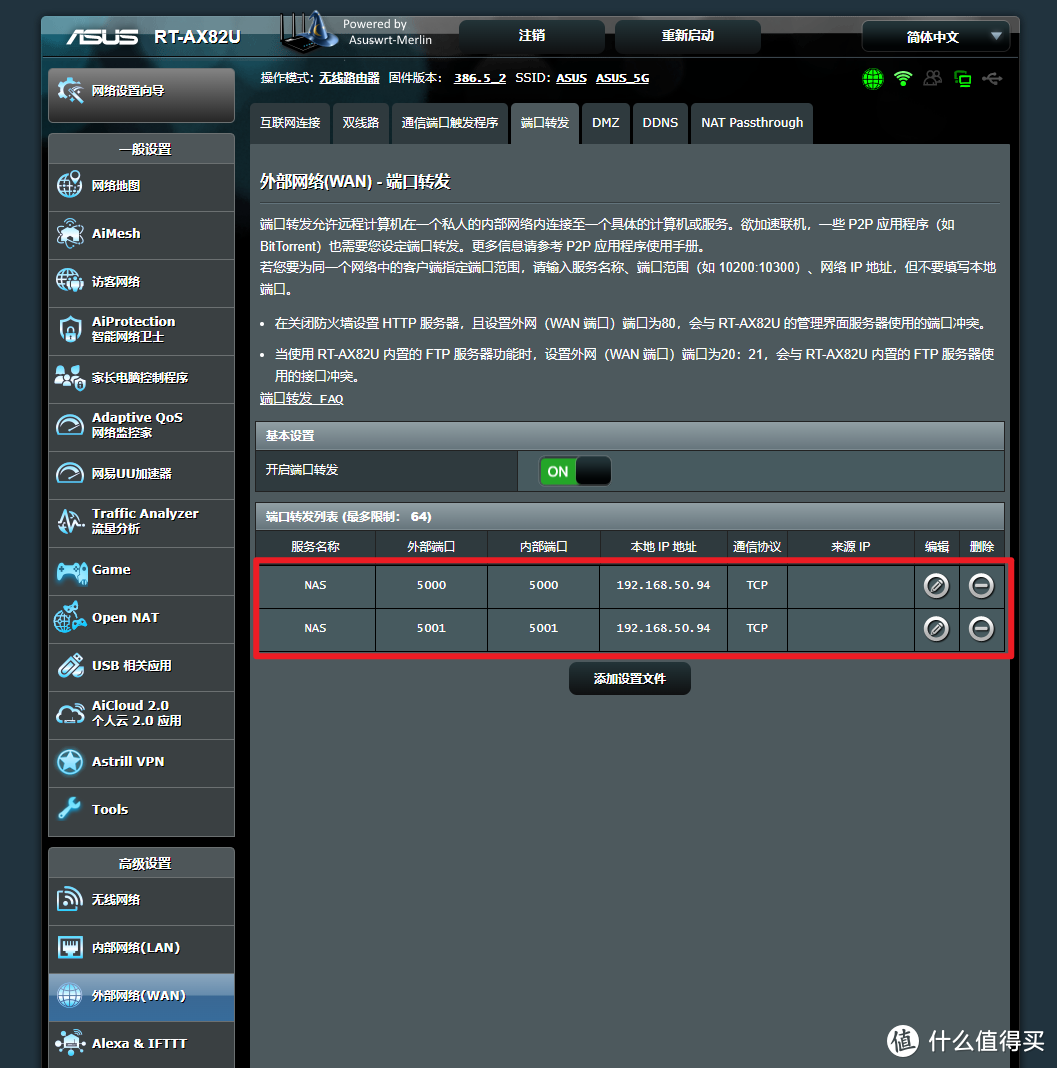
When finished, it will look like the picture above.
At this point, the settings on the router are completed.
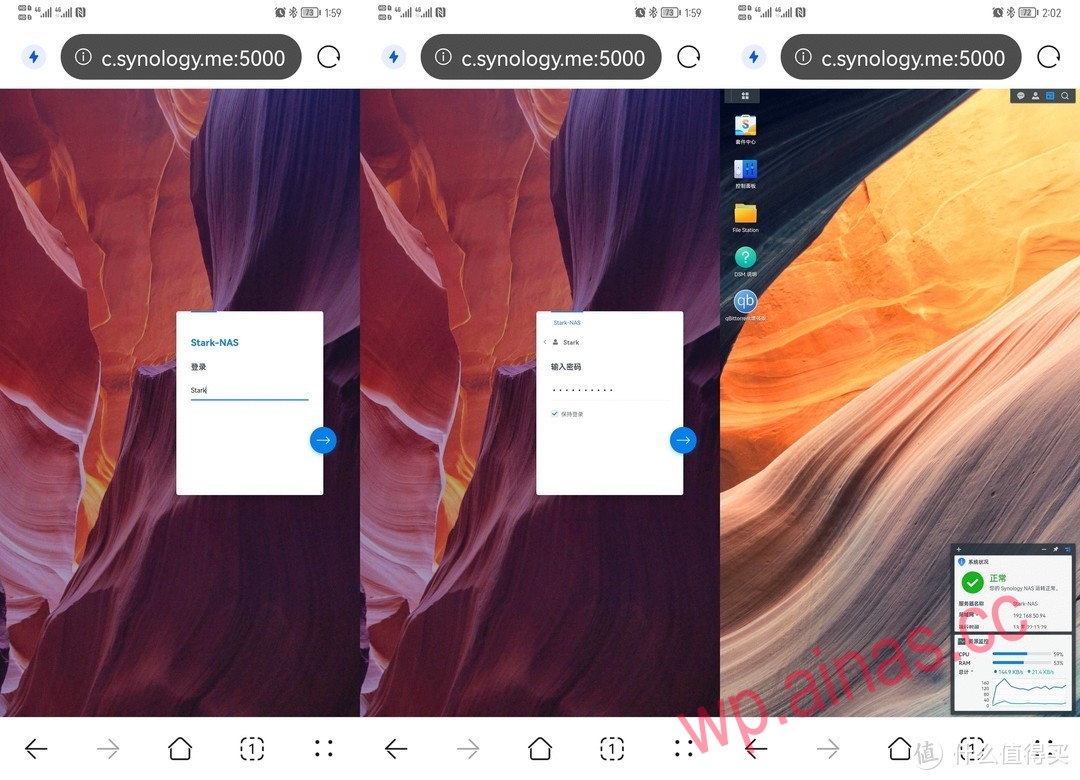
Then test the results of our settings. Turn off the WIFI on your phone, use traffic to open the browser, enter the DDNS address on Synology, plus the port number, and access it smoothly. NICE!
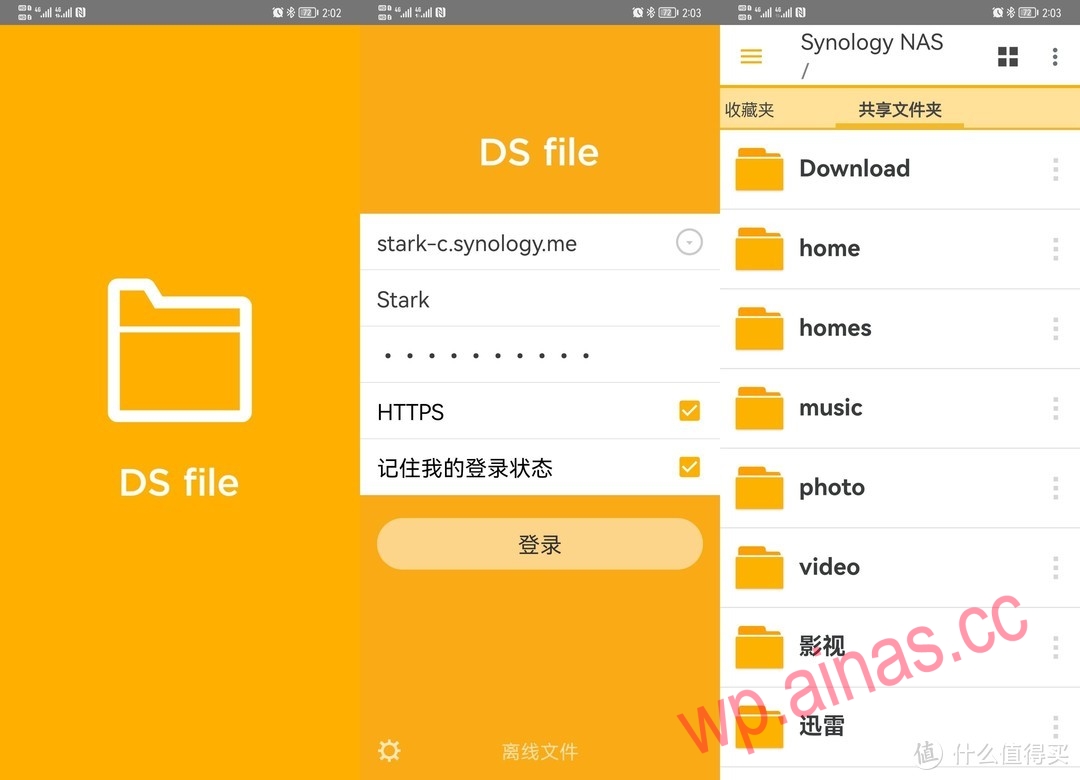
Then log in to some official Synology APPs and open them perfectly, NICE!
The access speed is amazing, very cool!