Our Location
304 North Cardinal St.
Dorchester Center, MA 02124

Method 2a: UseSSH toolsMount modification (7.X version)
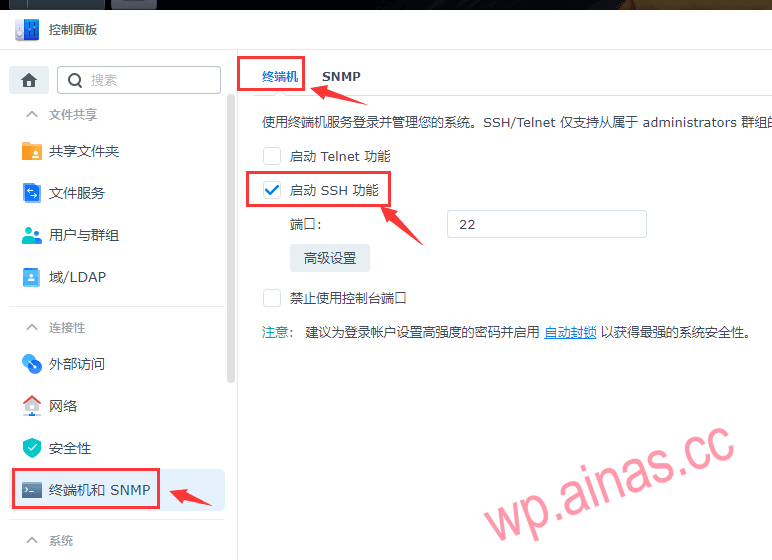
Open Control Panel—-Terminal and SNMP—-Enable SSH function
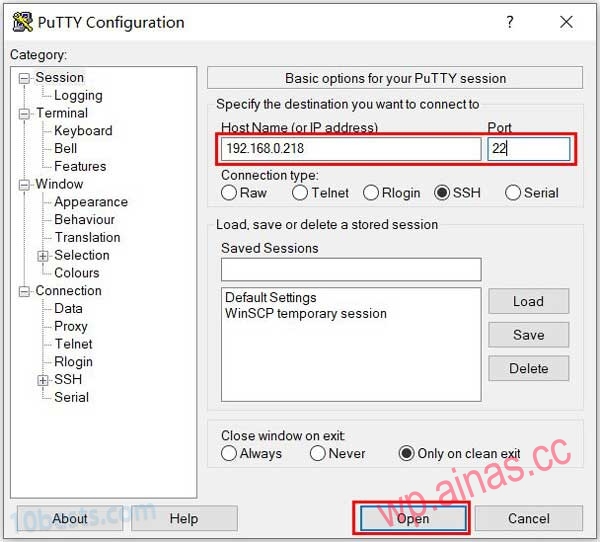
1.Openputtysoftware, enter the Synology intranet management IP and SSH port number, and click “OPEN” to establish a connection with Synology.
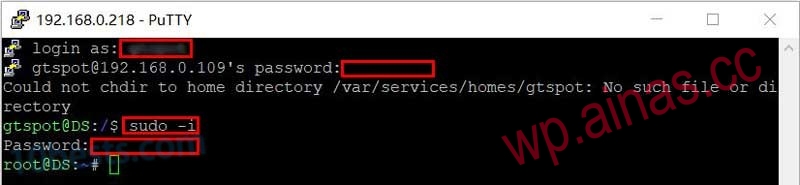
1. Enter the Synology management account and password. The first account created when installing the Synology system is the management account.
2. Elevate the privilege management account to obtain root privileges.
sudo -iAfter pressing Enter, you will be prompted to enter the password. Enter the password of the current login account again and press Enter. After the privilege escalation is successful, it will become“root@XX:~#”.
mkdir -p /tmp/boot
cd /dev Then enter sfdisk -l to view each hard disk and partition information, as shown below:
 The Synology virtual machine under esxi I tested here, if you boot it with a USB flash drive, the display will be like this.
mount -t vfat synoboot1 /tmp/boot/ Then switch to the mounting directory
cd /tmp/boot Then use the ls command to check the mounted content.
 The boot directory inside is the directory where we need to change the serial number and mac address.
via command
cd boot/grubAfter entering grub, edit the grub.cfg file through the vi command to modify the SN and MAC.
vi grub.cfgOpen to enter
Press the “i” key on your keyboard to enter modification editing
Move to the end, as shown below (change sn and mac to your own whitewashing code) After all modifications are made, click the “ESC” key in the upper left corner of the keyboard
Then enter the colon “:”
After the colon appears, enter wq to save and exit. If you want to force exit without saving, enter q! The above has been modified. Restart the machine for the changes to take effect