Our Location
304 North Cardinal St.
Dorchester Center, MA 02124

1. Log in to Synology backend
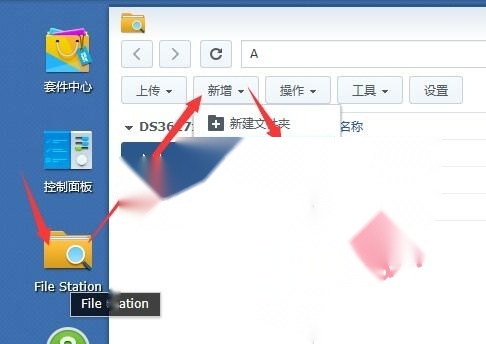
2. Create a new tmp shared folder


1. Switch to advanced mode

2. Select the task plan

3. Added – Scheduled tasks – User-defined scripts


4. Paste the following code

script code
mkdir -p /volume1/tmp/boot
cd /dev
mount -t vfat synoboot1 /volume1/tmp/boot/
mount -t vfat sda /volume1/tmp/boot/
mount -t vfat sda1 /volume1/tmp/boot/
mount -t vfat sda2 /volume1/tmp/boot/
mount -t vfat sda3 /volume1/tmp/boot/
mount -t vfat sda4 /volume1/tmp/boot/
mount -t vfat sdb /volume1/tmp/boot/
mount -t vfat sdb1 /volume1/tmp/boot/
mount -t vfat sdb2 /volume1/tmp/boot/
mount -t vfat sdb3 /volume1/tmp/boot/
mount -t vfat sdb4 /volume1/tmp/boot/
mount -t vfat sdc /volume1/tmp/boot/
mount -t vfat sdc1 /volume1/tmp/boot/
mount -t vfat sdc2 /volume1/tmp/boot/
mount -t vfat sdc3 /volume1/tmp/boot/
mount -t vfat sdc4 /volume1/tmp/boot/
mount -t vfat sdc4 /volume1/tmp/boot/
mount -t vfat sdd /volume1/tmp/boot/
mount -t vfat sdd1 /volume1/tmp/boot/
mount -t vfat sdd2 /volume1/tmp/boot/
mount -t vfat sdd3 /volume1/tmp/boot/
mount -t vfat sdd4 /volume1/tmp/boot/
mount -t vfat sde /volume1/tmp/boot/
mount -t vfat sde1 /volume1/tmp/boot/
mount -t vfat sde2 /volume1/tmp/boot/
mount -t vfat sde3 /volume1/tmp/boot/
mount -t vfat sde4 /volume1/tmp/boot/
mount -t vfat sdf /volume1/tmp/boot/
mount -t vfat sdf1 /volume1/tmp/boot/
mount -t vfat sdf2 /volume1/tmp/boot/
mount -t vfat sdf3 /volume1/tmp/boot/
mount -t vfat sdf4 /volume1/tmp/boot/
mount -t vfat synobios /volume1/tmp/boot/
mount -t vfat synobios1 /volume1/tmp/boot/
mount -t vfat synobios2 /volume1/tmp/boot/
mount -t vfat sdag1 /volume1/tmp/boot/
mount -t vfat sdag2 /volume1/tmp/boot/
mount -t vfat md01 /volume1/tmp/boot/
mount -t vfat md11 /volume1/tmp/boot/
mount -t vfat md21 /volume1/tmp/boot/
5. Select the script you just created and click Run

1. Download grub.cfg

Get the grub.cfg file

It is best to make an extra copy to prevent errors that cannot be recovered, especially for customers who do not plan to modify Notepad2.
2. Download Notepad2.exe
Of course, Notepad or other text editors can also modify it, but Notepad2 is easier to use and less easy to correct errors. MAC users can just open and modify it directly as a text file. (Opening an ordinary text editor will be very confusing, and you can only find the location where the text needs to be modified by searching)
3. Open grub.cfg with Notepad2

4. After modification, overwrite the upload to the original location.

5. Look at the upper right corner and it will say the upload is successful. That’s it.

1. Click the task icon in the upper corner and click Restart


If the router is set to bind IP to MAC, it will not be found. Please unbind it yourself.
After restarting, changing the MAC address may cause the IP address to change, and the original IP address may not be able to access the machine.
Use Synology Assistant/ Synology Assistant to search again and check whether sn and mac have changed.
If Synology Assistant/ Synology Assistant is not installedSoftware download address

If it is not correct, please re-run the script and do it again. Remember not to forget to save the file.
2. Log in to the Synology web version again and delete the created shared folders and scheduled tasks.


Note that the IP address may change due to whitewashing and replacing the mac address, which may cause the router’s defense mechanism. Please test your device yourself.