Our Location
304 North Cardinal St.
Dorchester Center, MA 02124

Preparation: Download related tools:DSM installation essentials.zip
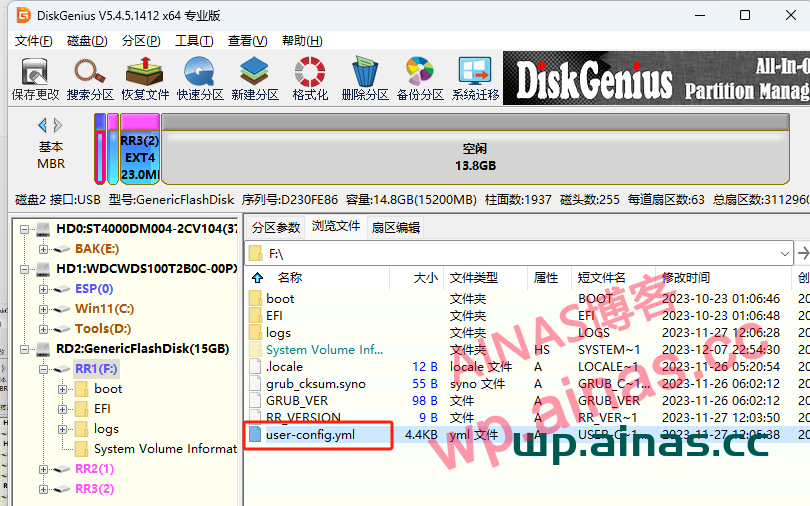
1. Use Diskgenius on your computer to open the first partition of the USB flash drive;Click the boot file to load the first partition of the virtual disk and browse the file;
2. Find user-config.yml,Copy to computer desktop;
1. Use the Notepad2 editor to open it and find the following SN/MAC location. The quotation marks can be modified according to actual needs; no matter how many network ports there are,Just fill in two.

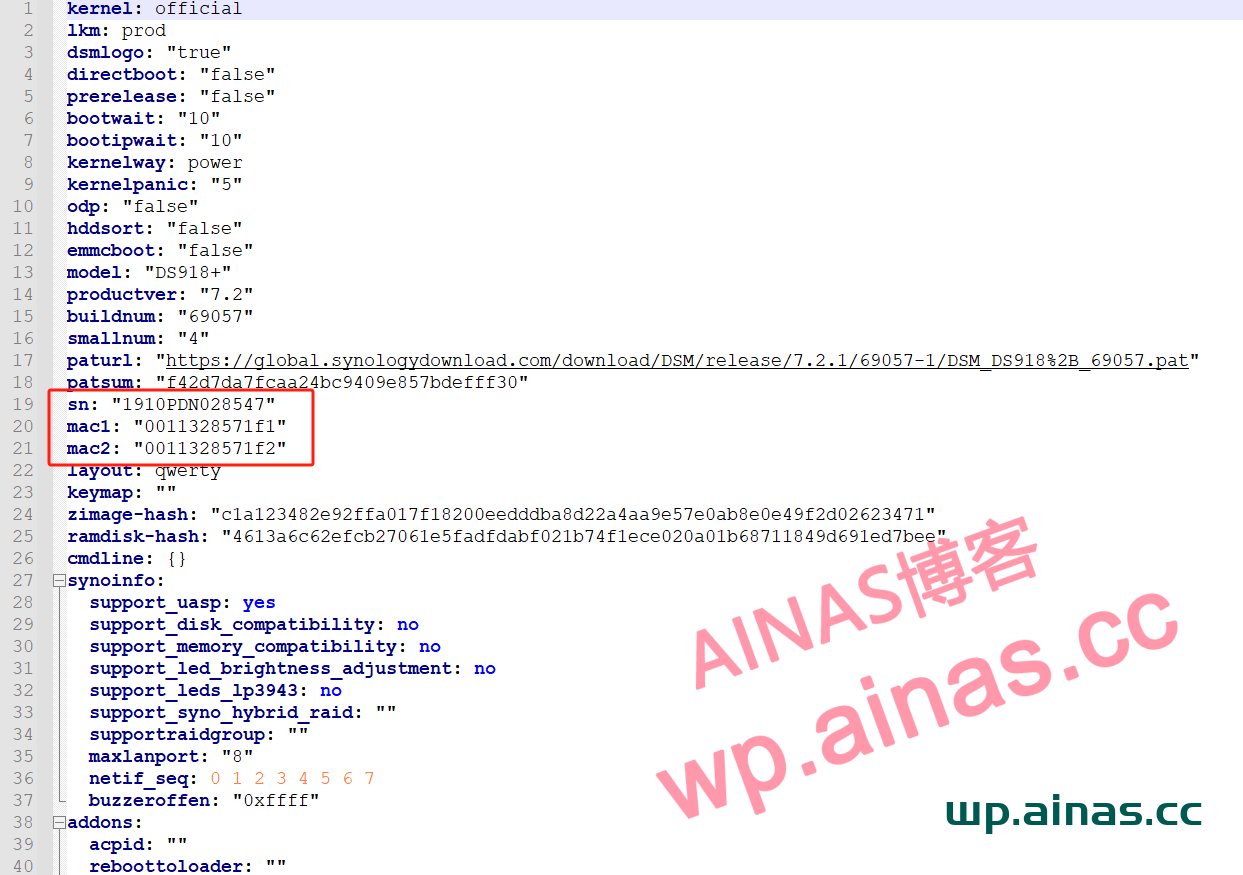
2. Note: The format in user-config.yml must be modified strictly in accordance with the prescribed writing format. If the format is incorrect, the boot disk may not be able to start.
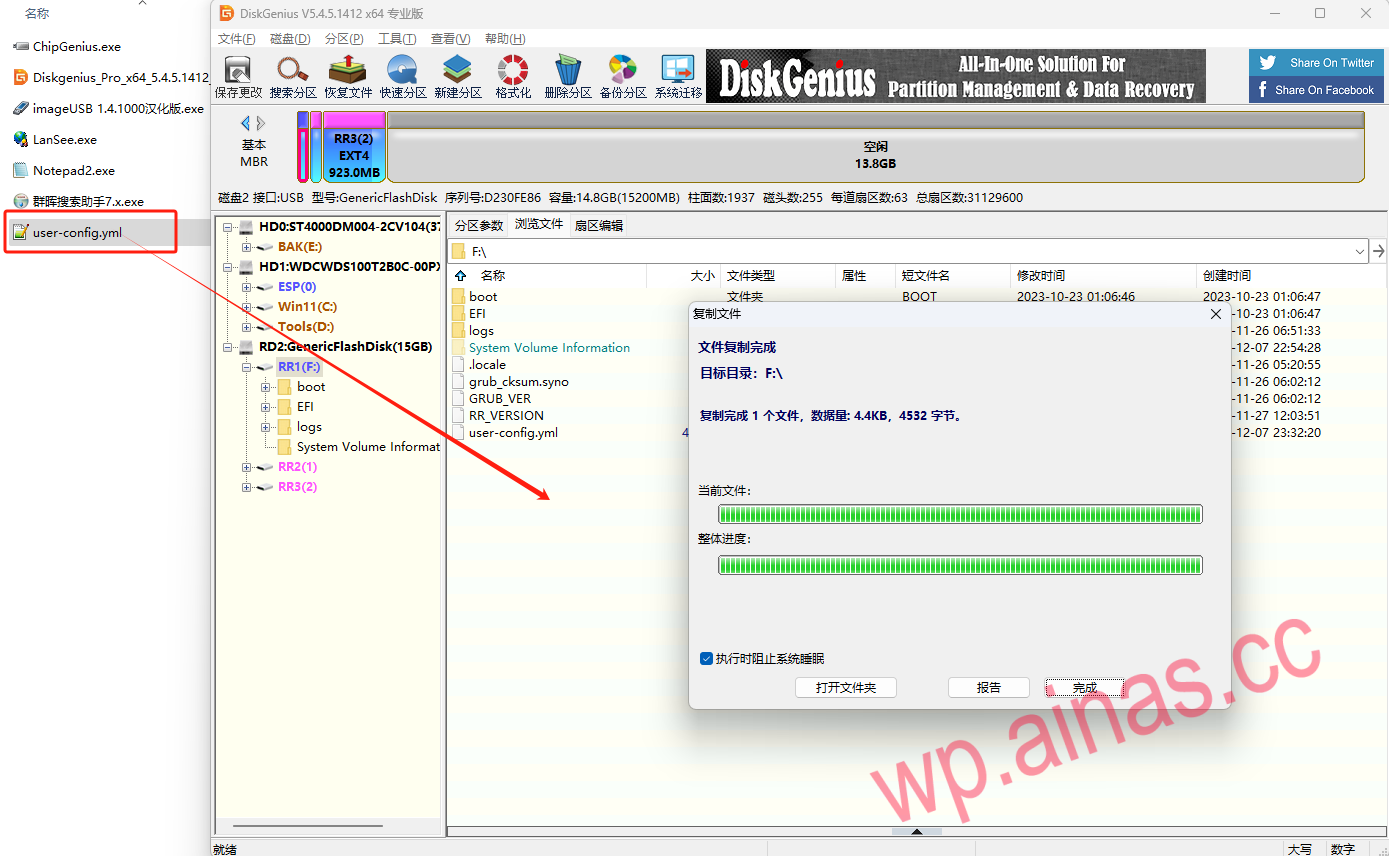
3.Switch to the DiskGenius you just opened and changeuser-config.ymlDrag into the first partition of the USB flash drive, replace the current file, and exit the partition software.
If you really want to synchronize to the network card (there is no benefit except that it looks consistent), add skip_vender_mac_interfaces=”” to cmdline