Our Location
304 North Cardinal St.
Dorchester Center, MA 02124


The above is Synology’s official explanation of QuickConnect. Simply put, QuickConnect is a benefit for genuine Synology users, allowing entry-level users to easily penetrate the intranet and remotely access Synology NAS resources on the external network. This is also one of the competitive advantages of Synology NAS.
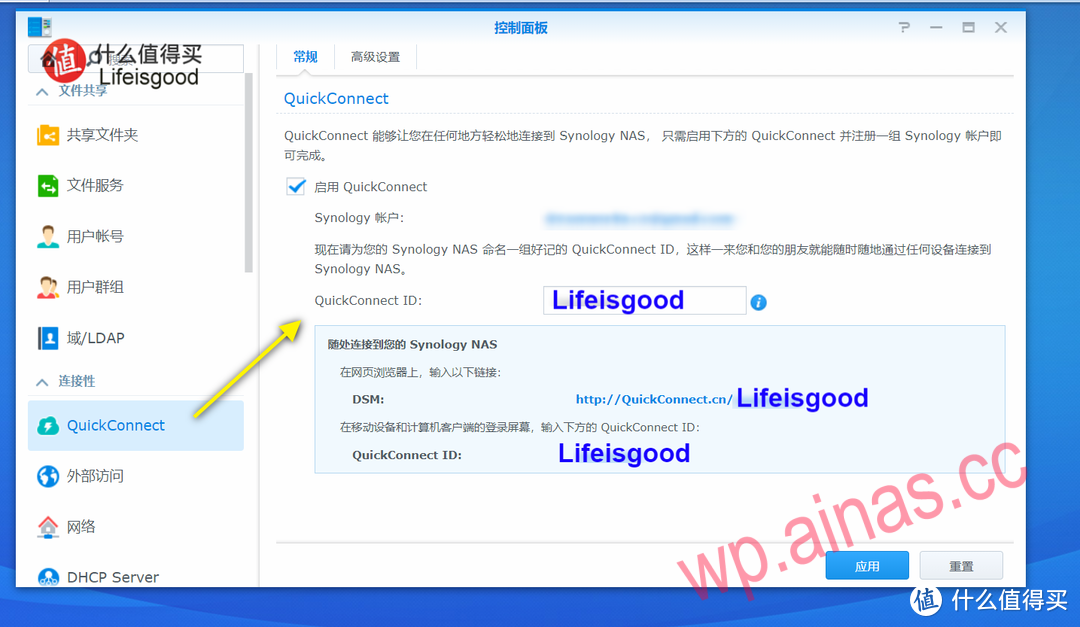
After enabling QuickConnect, you will register a QuickConnect ID, which is equivalent to opening a second-level domain name for your Synology NAS. Through the QuickConnect ID, you can easily access your Synology NAS. Example:
Under normal circumstances, there will be no problem using QuickConnect ID to remotely access Synology NAS. I have a NAS. For five or six years, connection failures are basically due to external environmental reasons, such as the surrounding construction site cutting off the optical fiber, or power outages, etc.
However, in April last year, we encountered a problem where the external network could not be accessed using QuickConnect ID.
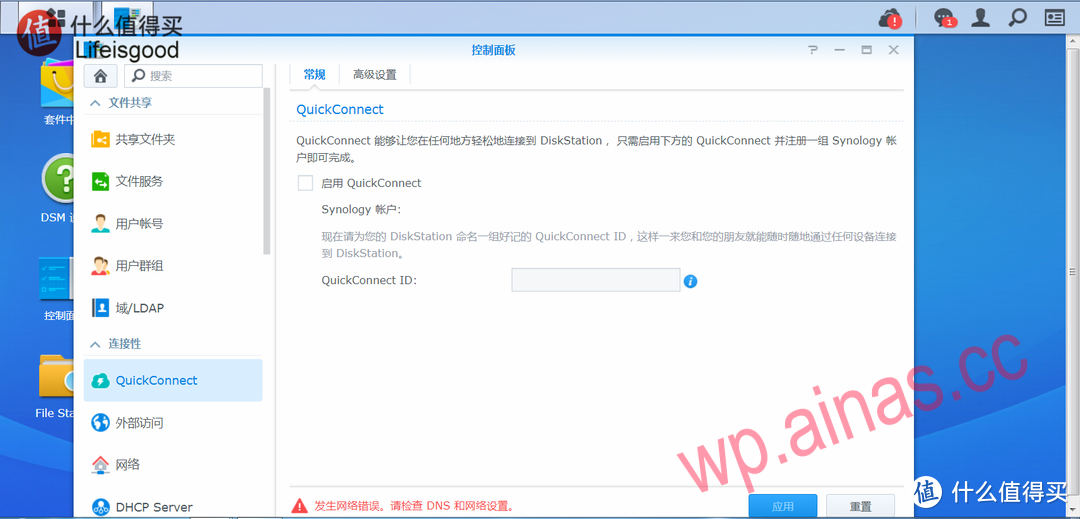
If remote access is not possible for the time being, then come to the same LAN as the Synology NAS for troubleshooting and debugging. Log in to the DSM system, go to Control Panel-Connectivity-QuickConnect, and find that there is indeed a problem. First, the check to enable QuickConnect has been cancelled; second, in the status bar at the bottom, there is a line of red prompts “A network error has occurred, please check DNS and network settings.”
Step 1. Check the network connection.

In the Control Panel-Network-Network interface, view the LAN connection. Your Synology NAS may be connected to your home router or your office network. Make sure it says Connected here.
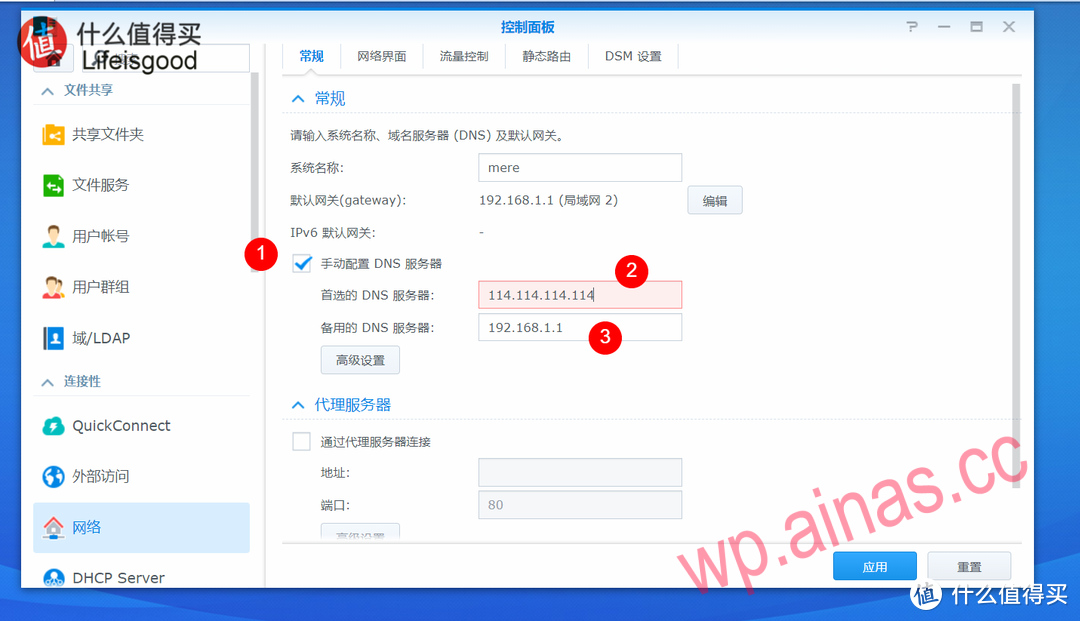
Step 2. Modify DNS settings.
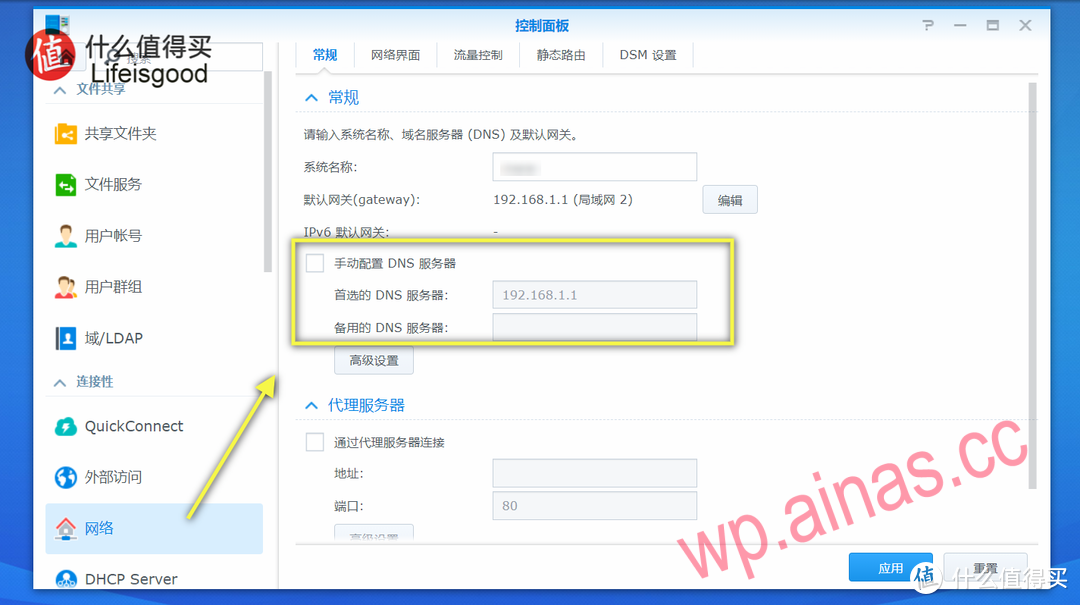
Go to the Control Panel-Network-General page and first look at the DNS server settings. Usually there is no need to fill in here, and an automatically obtained DNS server address will be displayed by default. In this example, 192.168.1.1 is the address of the home router. Such a setting can no longer support QuickConnect connections. It needs to be modified below.
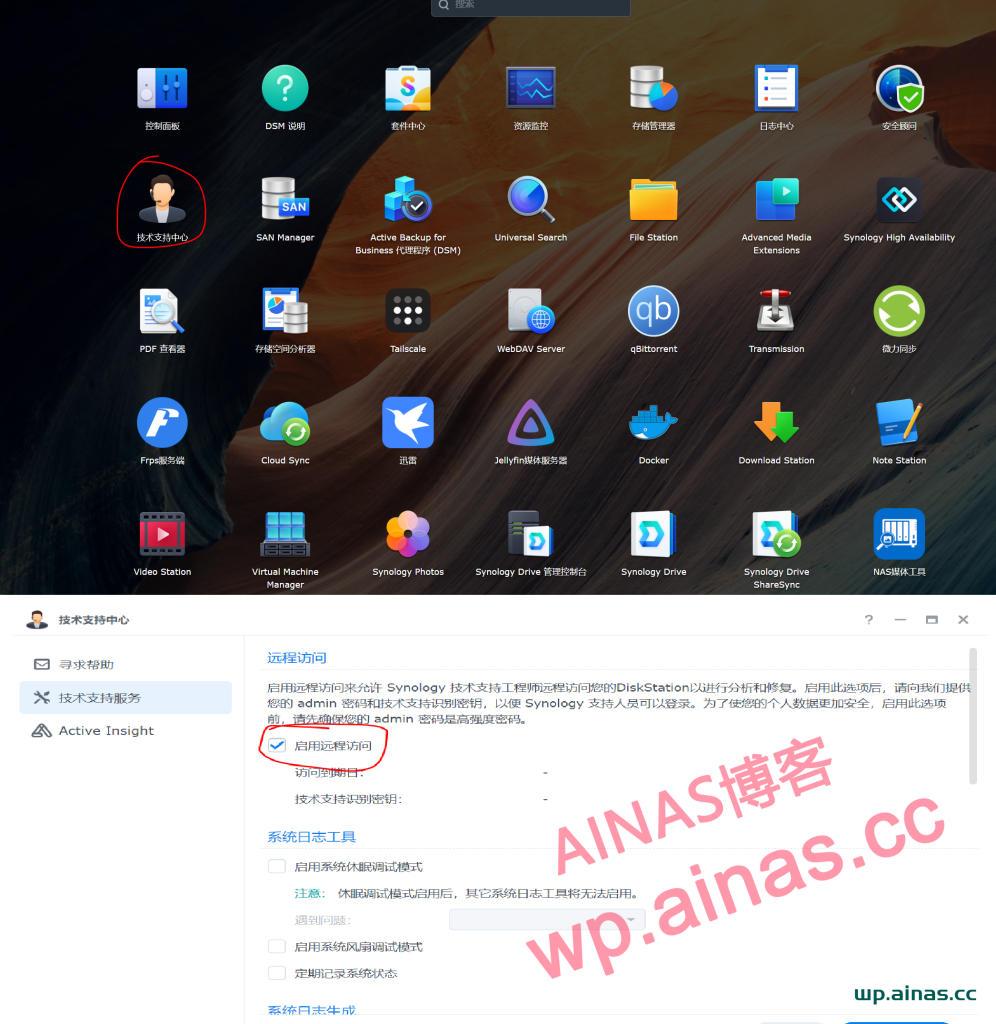
1. Open the start menu in the upper left corner, select “Technical Support Center” – check “Enable remote access”
2. Enter the control panel-information center-synology account, choose to log out, and then log in again.