Synology 7.x cleaning method 3: Modify scheduled tasks

1. Video tutorial

2. Open the control panel

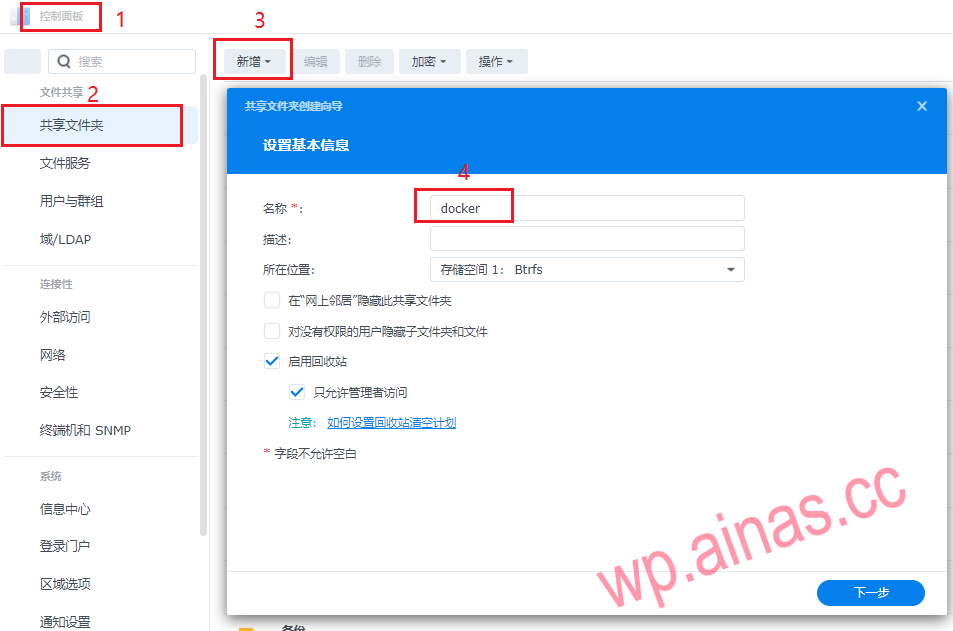
Select Shared Folder-Add-New Docker Shared Folder, please ignore if there is one.

群晖激活方法4d:arpl自编译修改计划任务修改(虚拟机安装)

3. Open the Control Panel – Task Scheduler

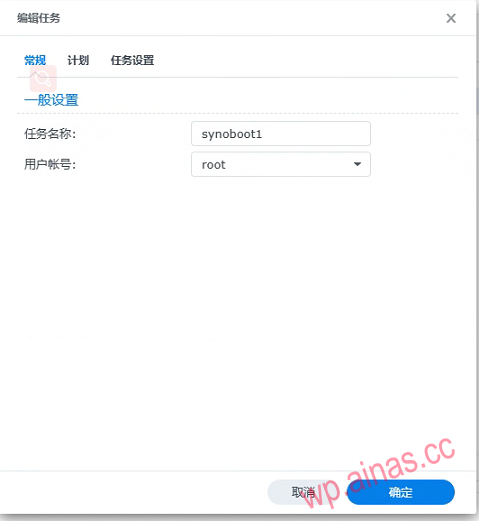
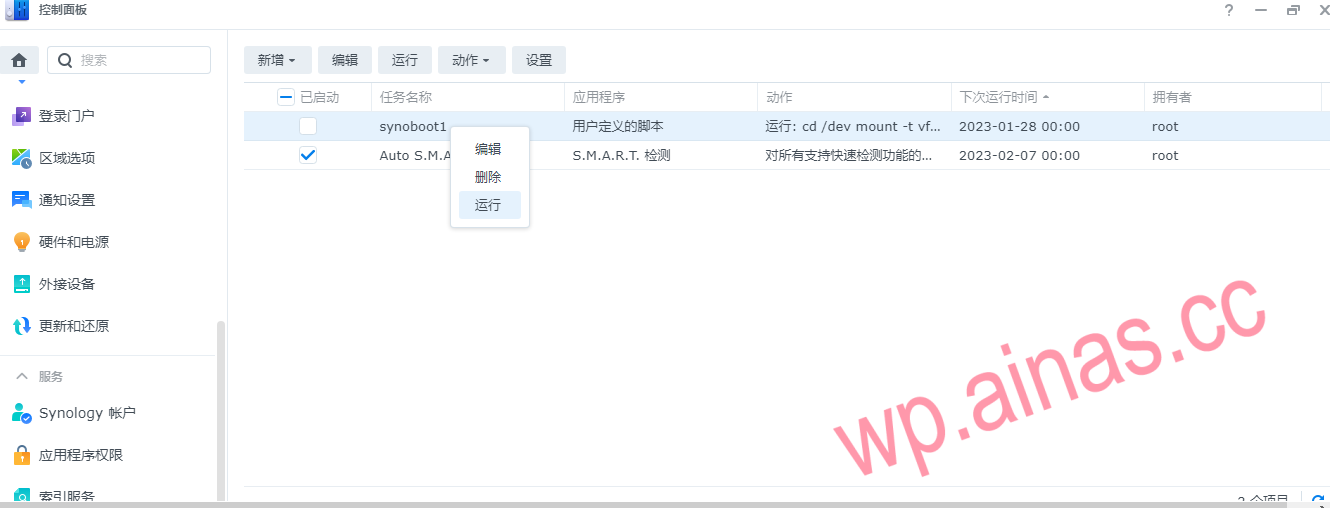
Create a new task with a random name and user account root

群晖激活方法4d:arpl自编译修改计划任务修改(虚拟机安装)

4. Open the task settings and enter the command (the mounting directory is optional)

cd /dev
echo 1 > /proc/sys/kernel/syno_install_flag
mount -t vfat synoboot1 /volume1/docker
群晖7.x激活方法3:计划任务修改

5. Click Confirm, then right-click and select Run

群晖激活方法4d:arpl自编译修改计划任务修改(虚拟机安装)

6. Open the docker folder

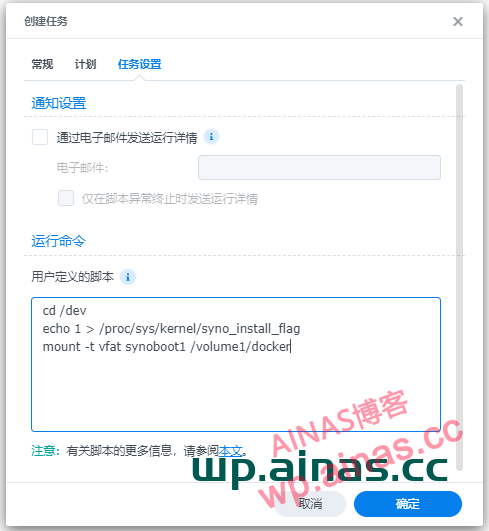
1. Download user-config.yml to local

群晖激活方法4d:arpl自编译修改计划任务修改(虚拟机安装)

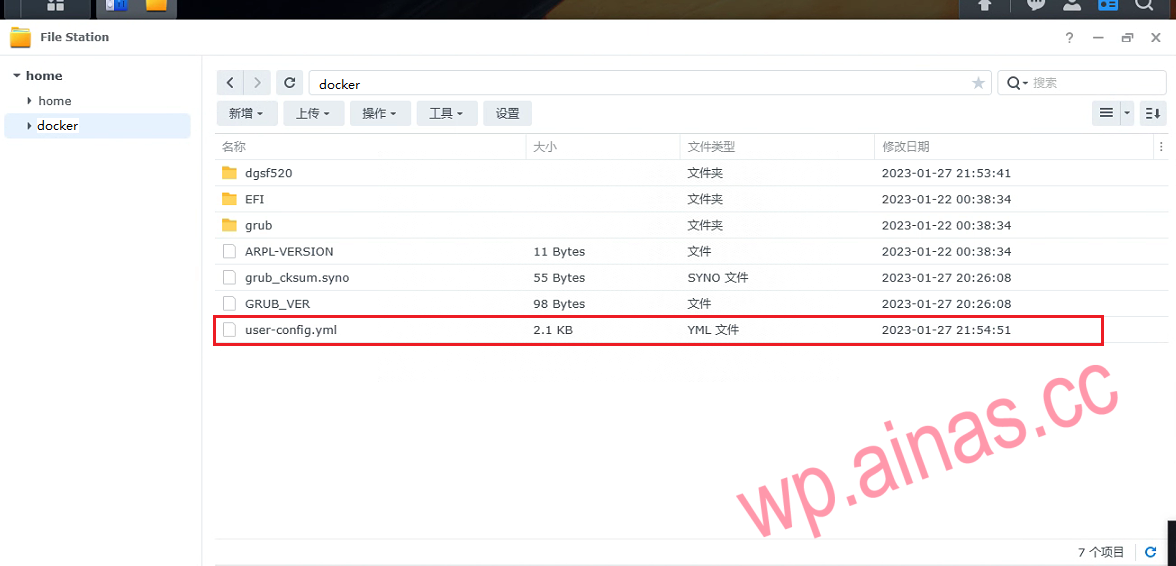
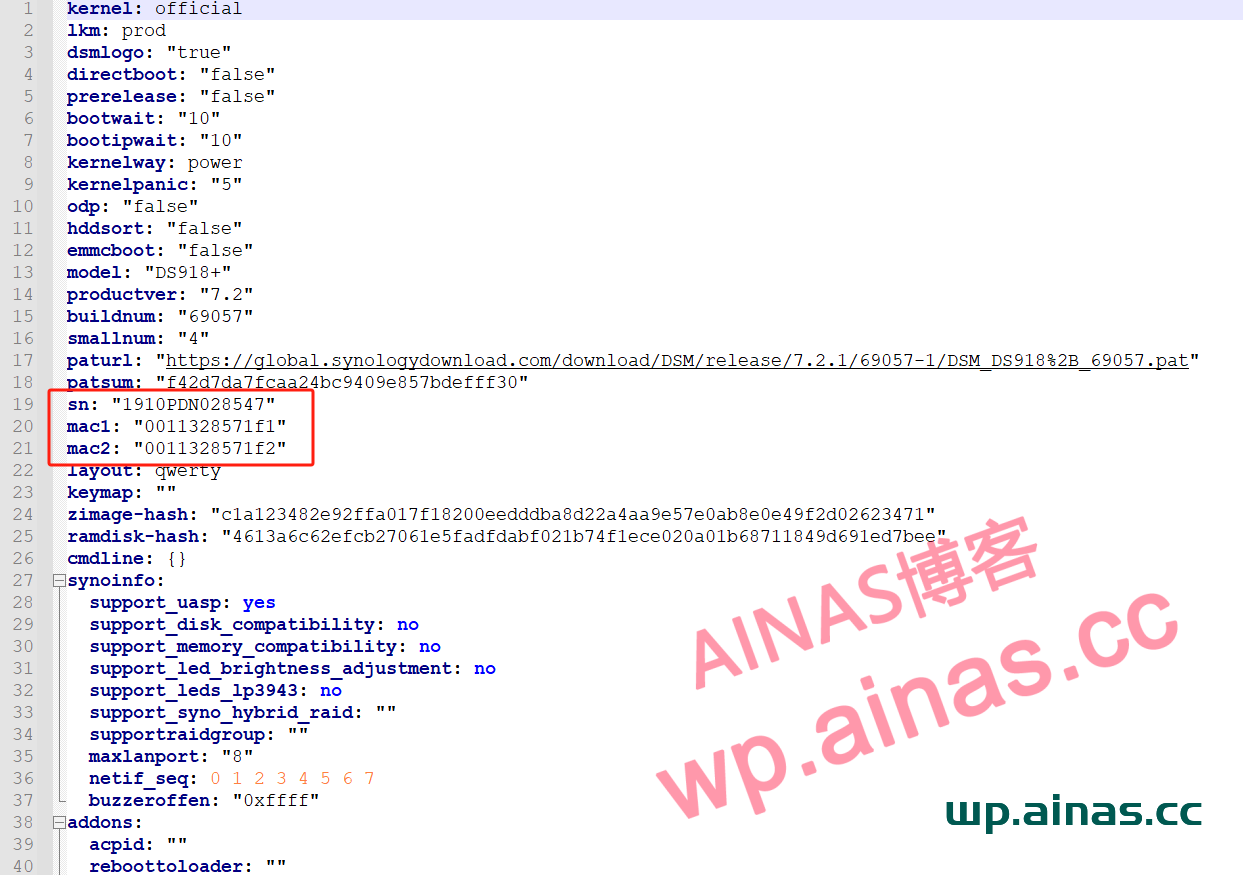
2. Use Notepad to open the user-config.yml file and modify the corresponding SN and MAC interfaces. No matter how many network ports there are, just modify two.

群晖7.x激活方法3:计划任务修改

6.3 Replace the modified files and restart

At present, the MAC address in cmdline is only used for whitewashing and will not be synchronized to the network card. The network card always maintains the original real MAC to prevent some network cards from being unable to DHCP and wake up from the network after modifying the mac, and it will not affect the authentication of official applications.
If you really want to synchronize to the network card (there is no benefit except that it looks consistent), add skip_vender_mac_interfaces=”” to cmdline

Newsletter Updates

Enter your email address below and subscribe to our newsletter