Our Location
304 North Cardinal St.
Dorchester Center, MA 02124

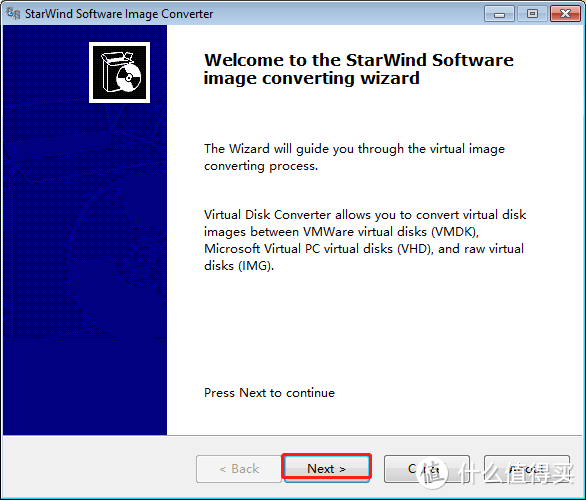
1. UseStarWindConverterGenerate VMDK image file, the image file can be found inDownload Centerdownload,

Open StarWindConverter. Directly next step
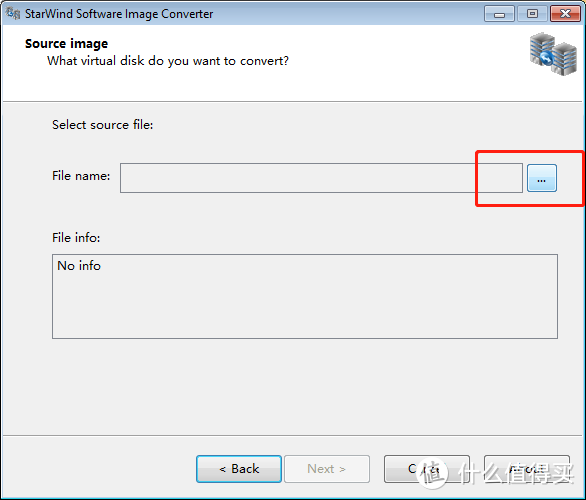
Click… to find the img image

Select and open
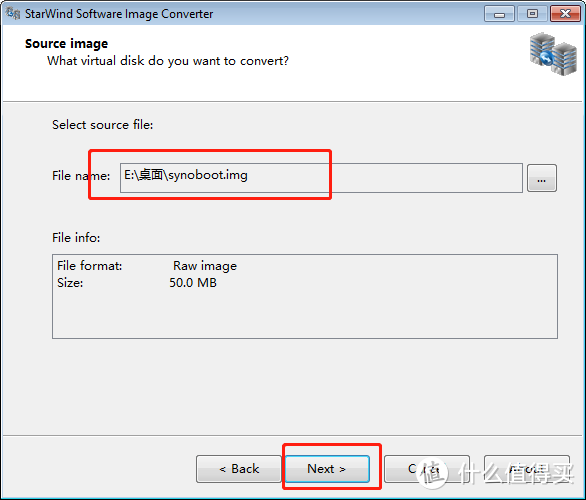
Click next as shown above
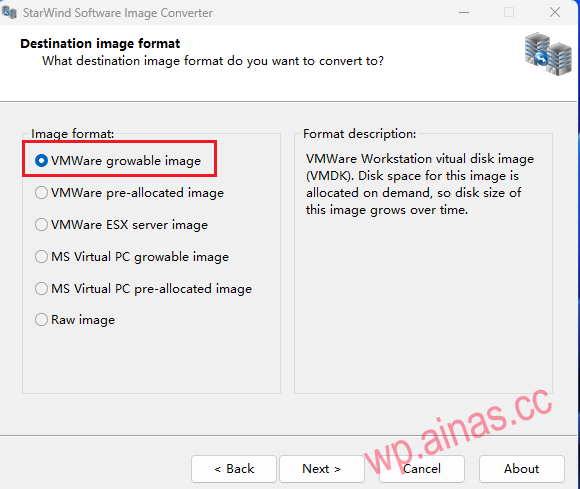
Select the second pre-allocated image as shown above

Be sure to choose IDE, next step
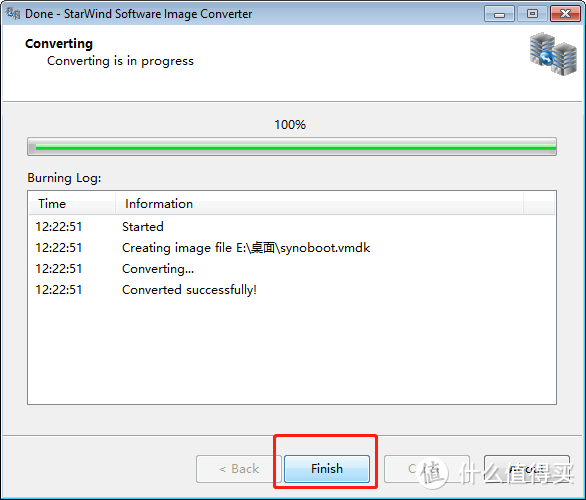
The conversion is completed and the vmdk virtual machine file is generated.
1. Create a new folder to store the virtual machine
2.Move the generated files and put them in your newly created folder where you want to put the virtual machine. Example: vm installs dsm.
3. Use VM 15 pro to create a virtual machine
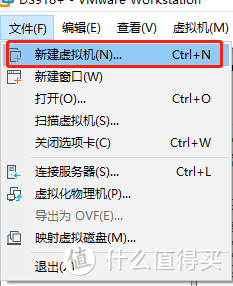
Open our vm, skip the VM installation method
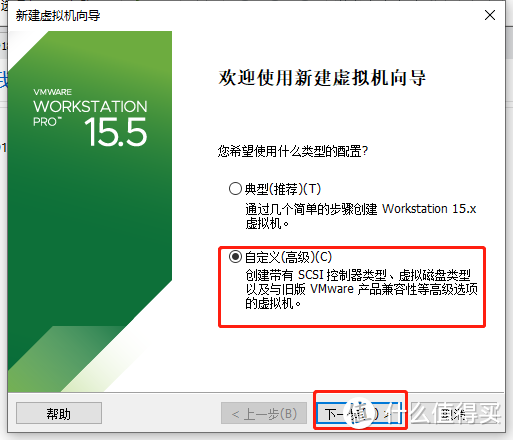
Select Custom-Next
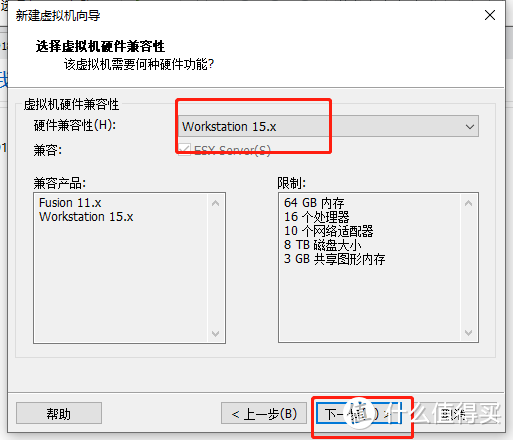
Select 15.x-Next step
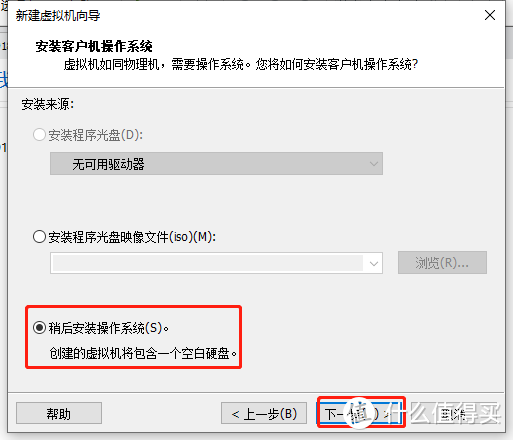
Choose to install the system later – Next step
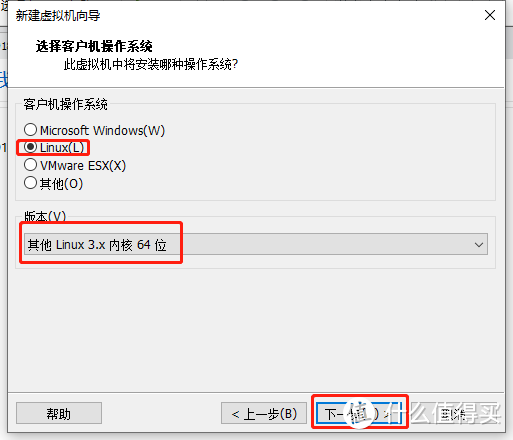
Select linux 3.x, as shown in the figure – next step
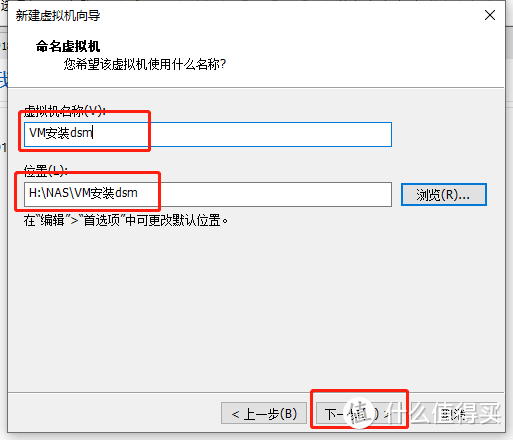
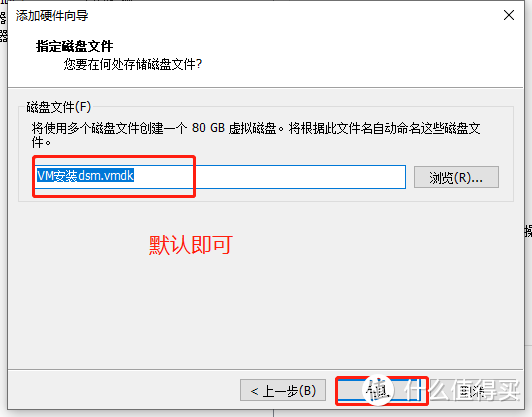
Here set the folder we just created and give it a name – next step
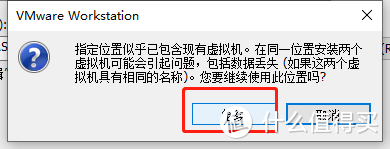
It says that this will not affect you. Just click Continue. This is because we have placed the vmdk virtual disk file in advance and it will not affect you.
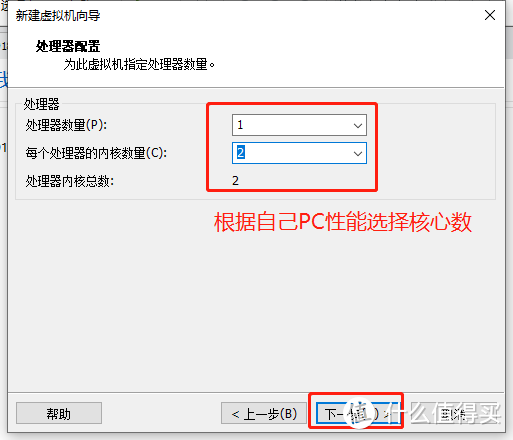
As shown in the figure, choose the number of cores according to your PC performance
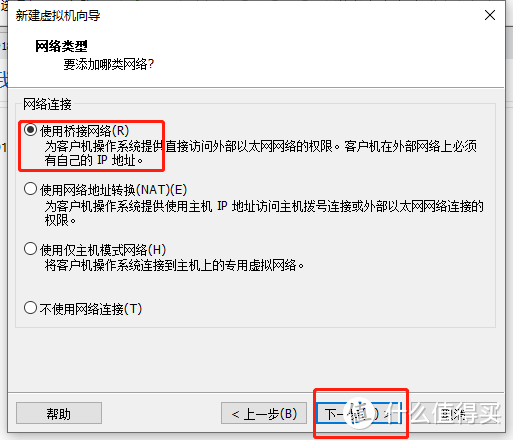
Use bridge to facilitate access to dsm from our local area network
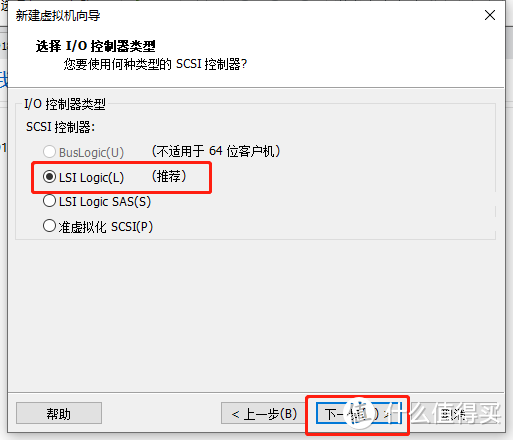
Select LSI Logic(L)-Next step
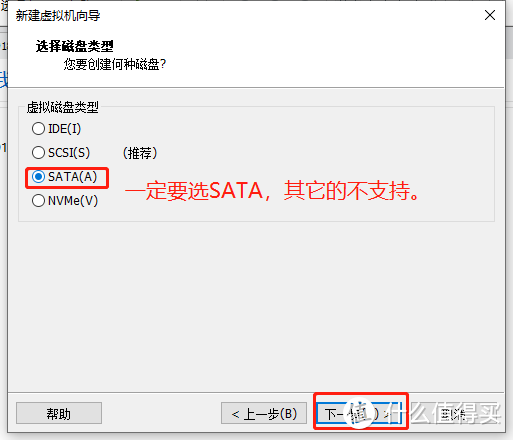
Select SATA-Next step
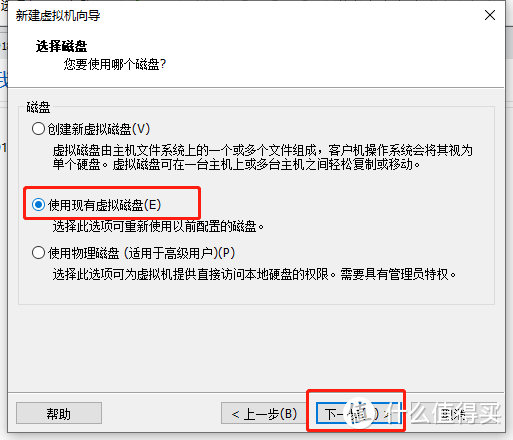
Use existing disk – next step
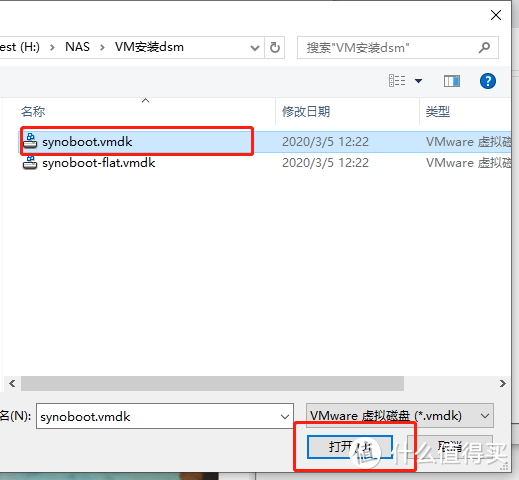
Select the folder we just put in, select synoboot.vmdk, and open it
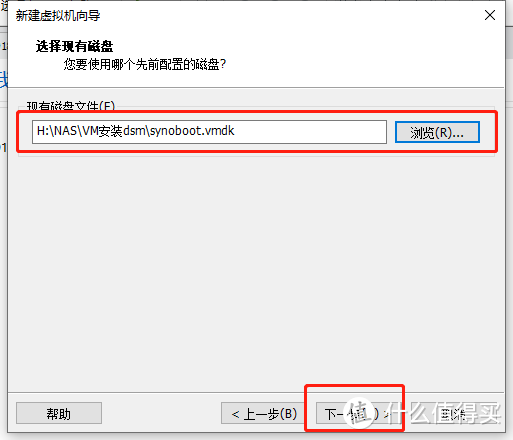
Then as shown above – next step
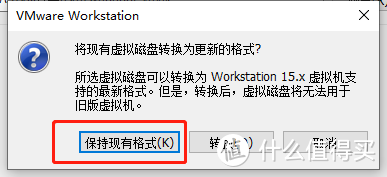
Keep existing format unchanged
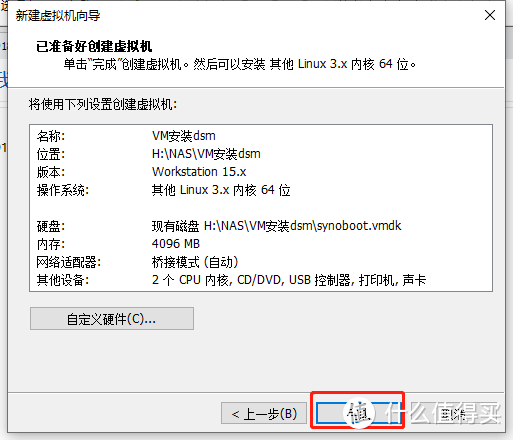
Finish
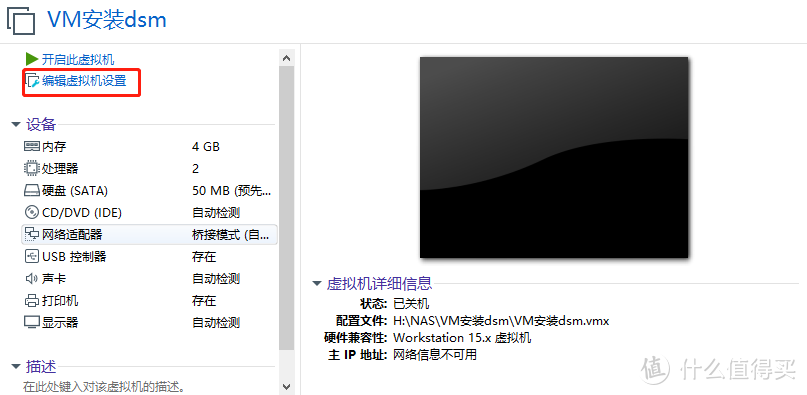
Edit virtual machine
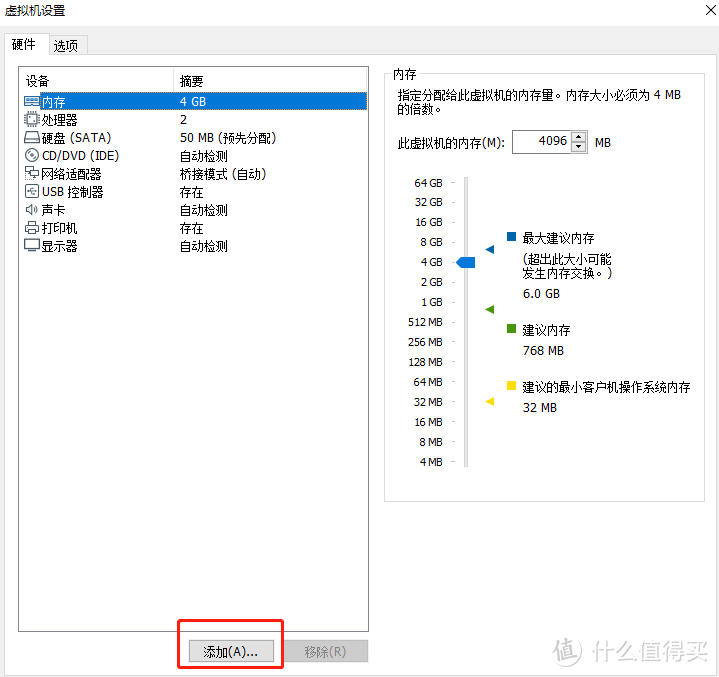
Add a hard drive to store data
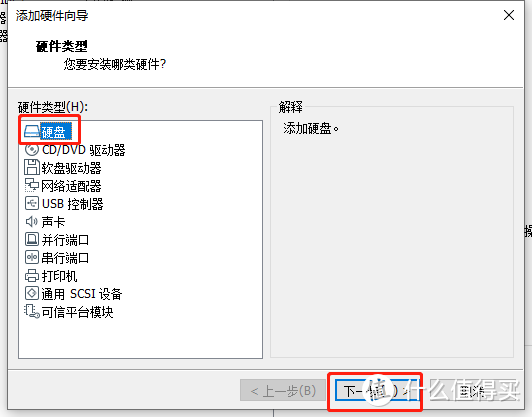
Hard drive – next step
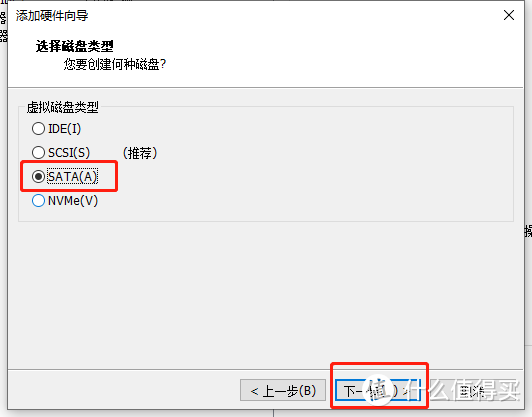
SATA-Next step
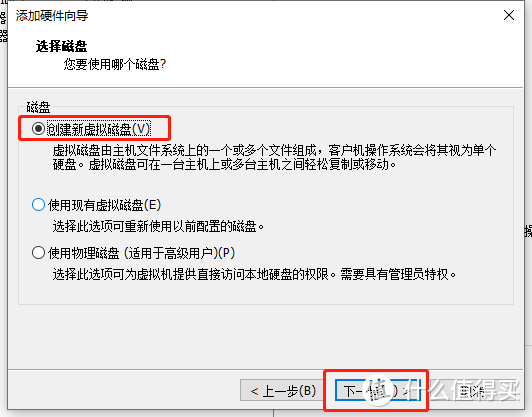
Create a new virtual disk – next step
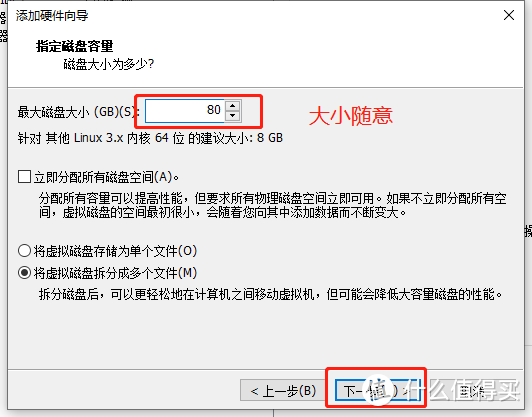
The capacity does not matter, the other defaults are – next step
Default – Done
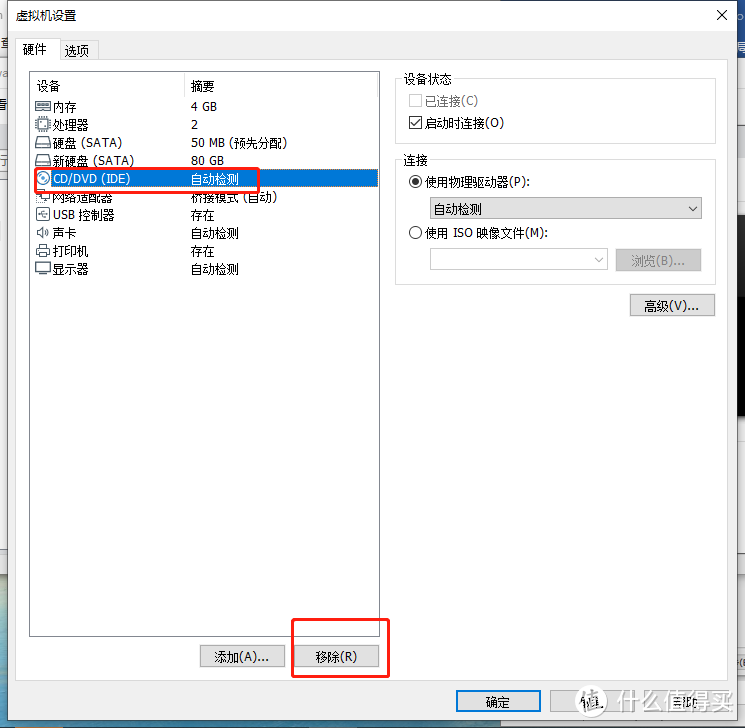
Remove optical drive
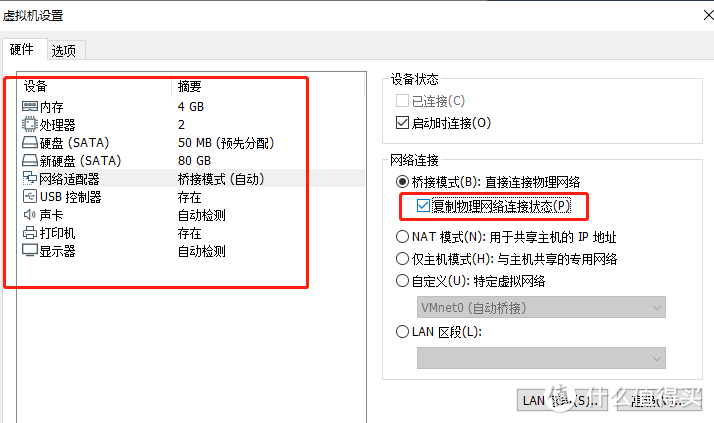
Check the hardware status of the left and right, check the network connection and copy the physical network connection status – then click OK
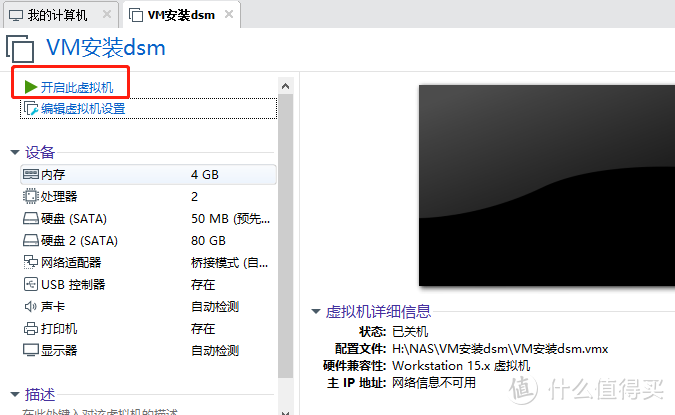
The virtual machine is created and the exciting time has come – booting it up
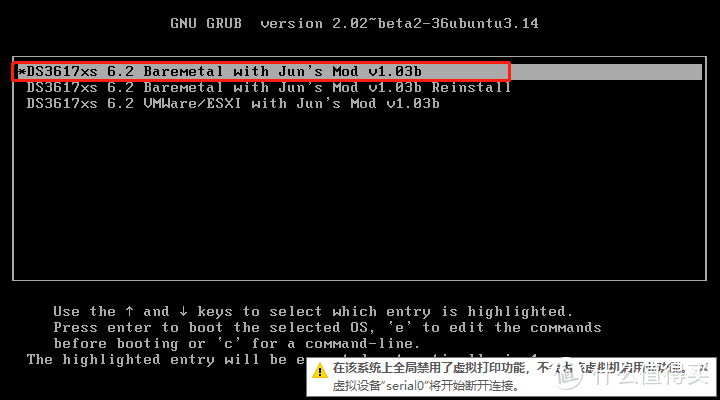
Just select the first one by default
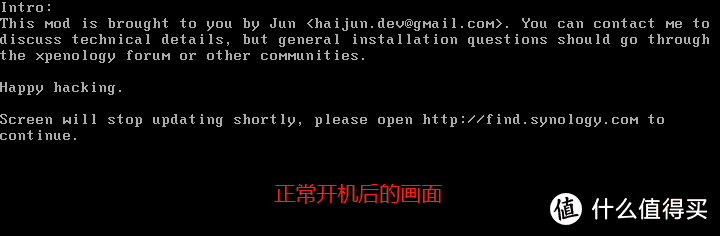
As shown in the figure, it indicates that the boot is successful. Don’t wait for a few minutes for DSM to start up and run and obtain the IP automatically.
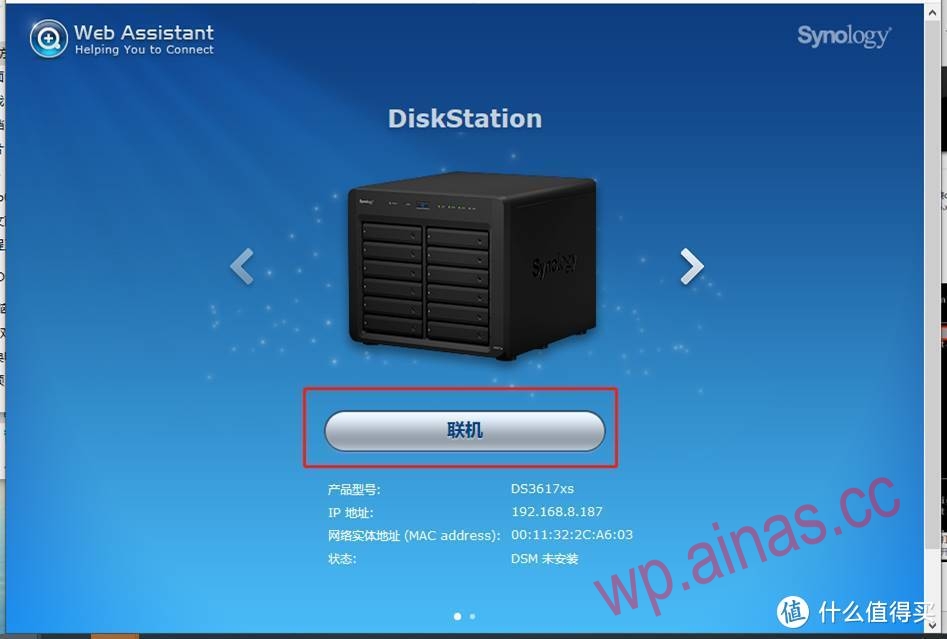
Search http://find.synology.com/# and this screen will appear. Success is not far away.
Open the search software: Synology Assistant or open the websitehttp://find.synology.com/#search
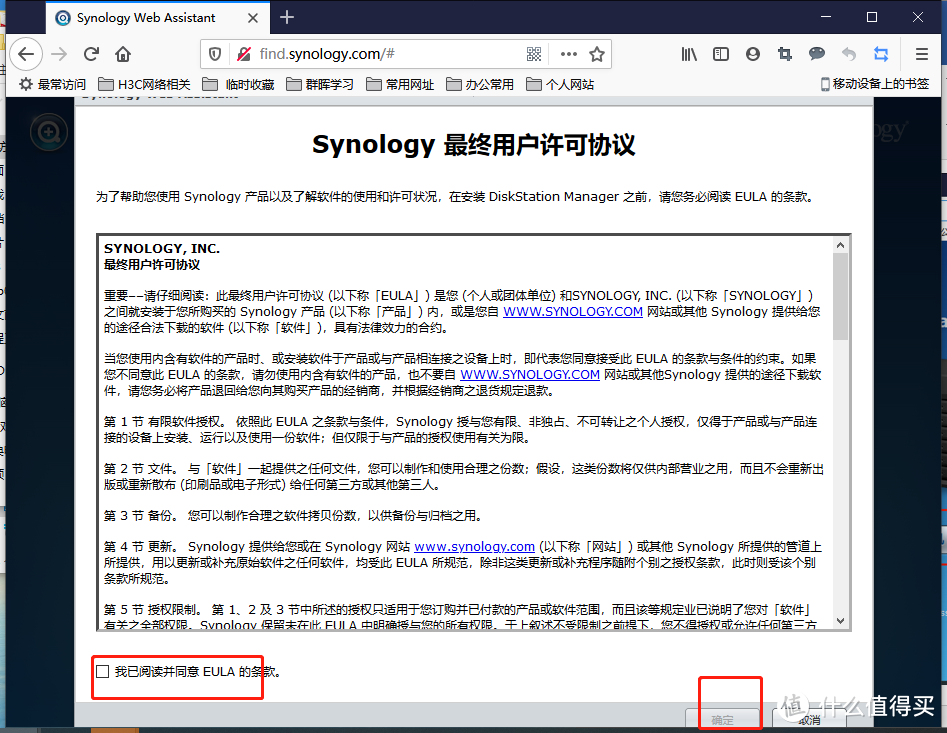
Check the box to agree and click OK
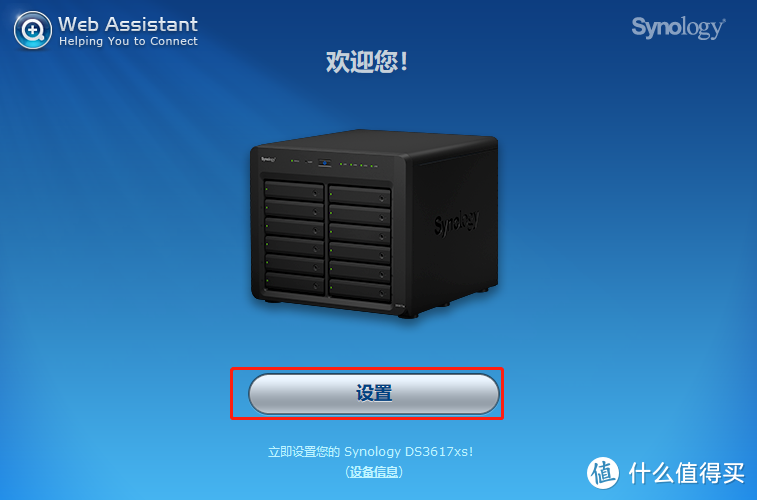
set up
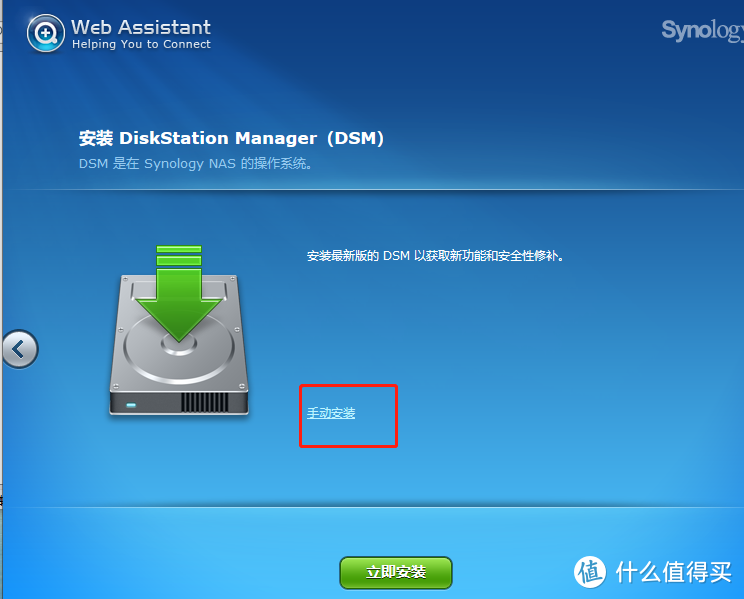
Manual installation
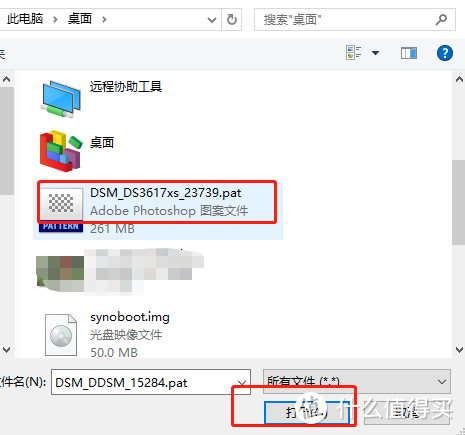
Manually select the image I gave you – open it
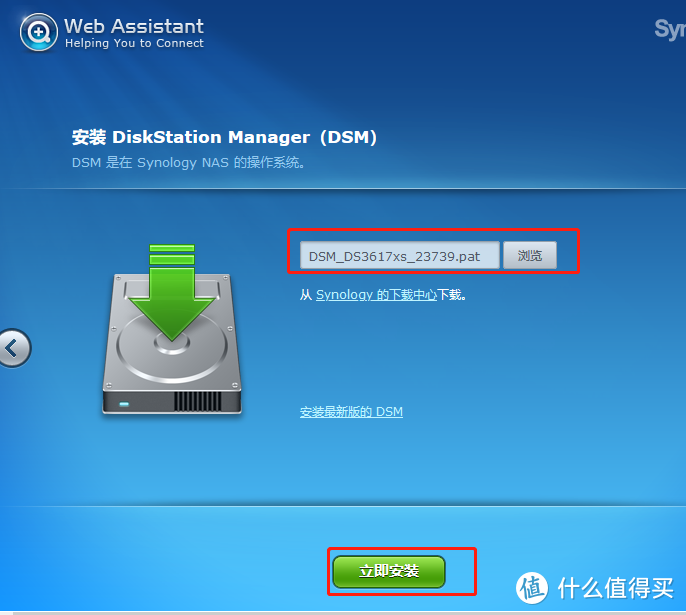
As shown above, install it now
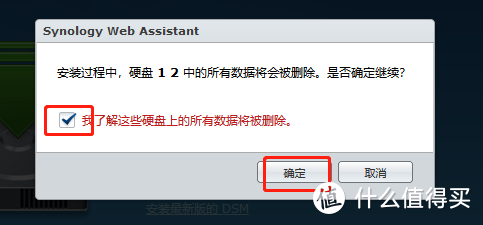
As shown above, the newly added 80G hard drive will be formatted – click OK
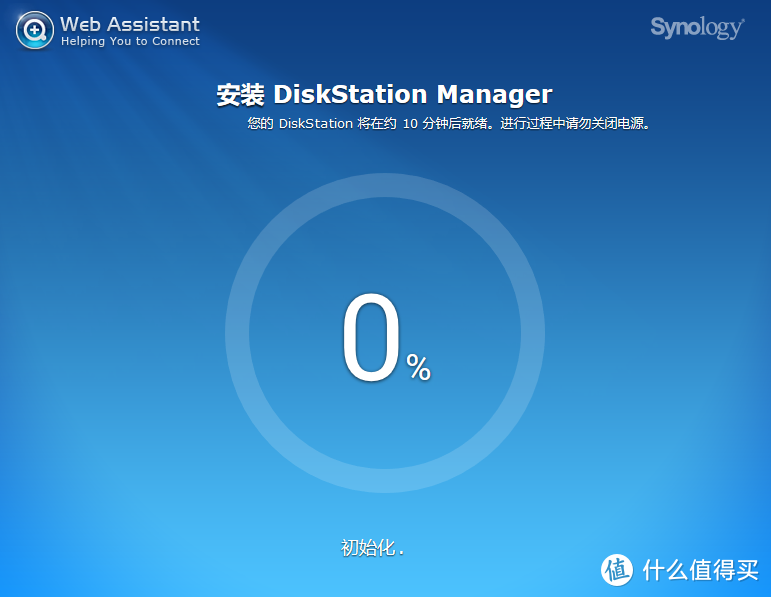
Start installation
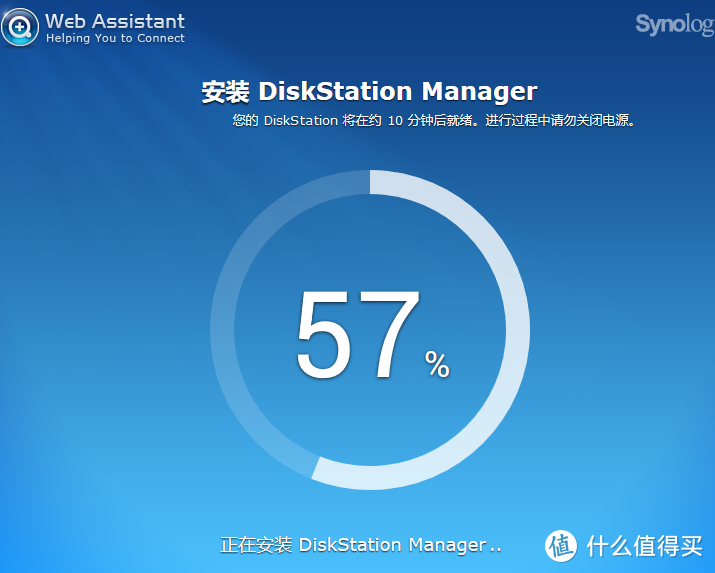
67%, install DSM
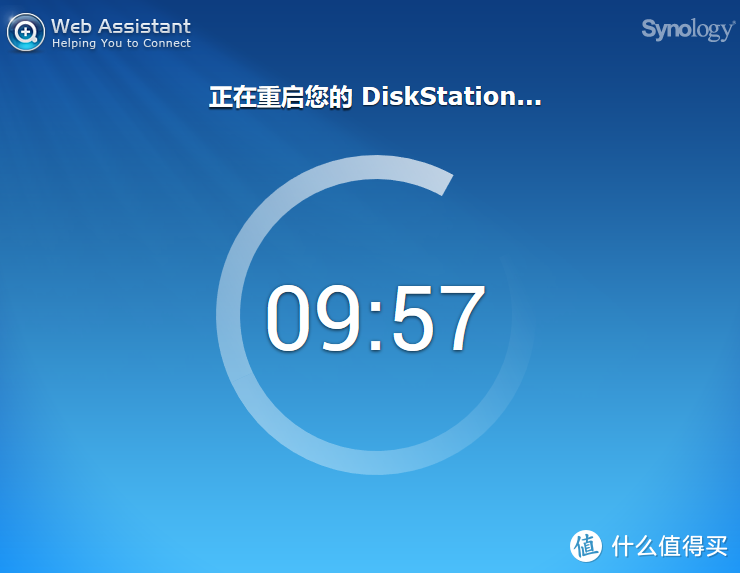
It will restart after successful installation. Do not close this page, wait, wait. . . It will automatically refresh in about 5 minutes.
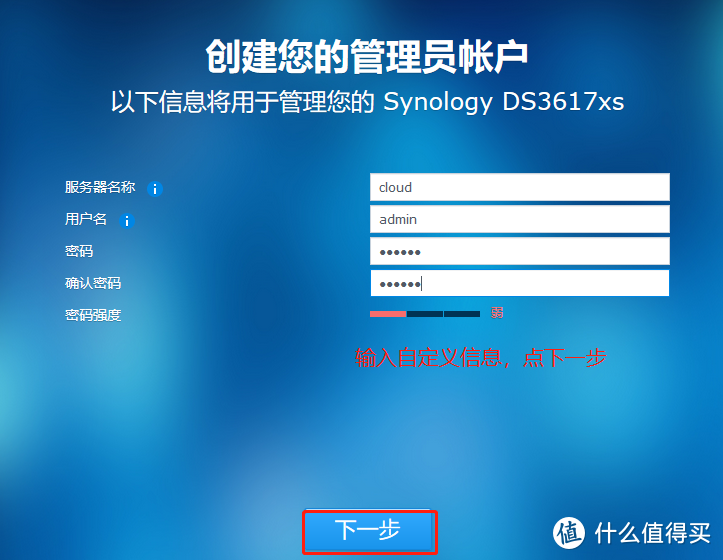
Here you go, enter your information and write whatever you want
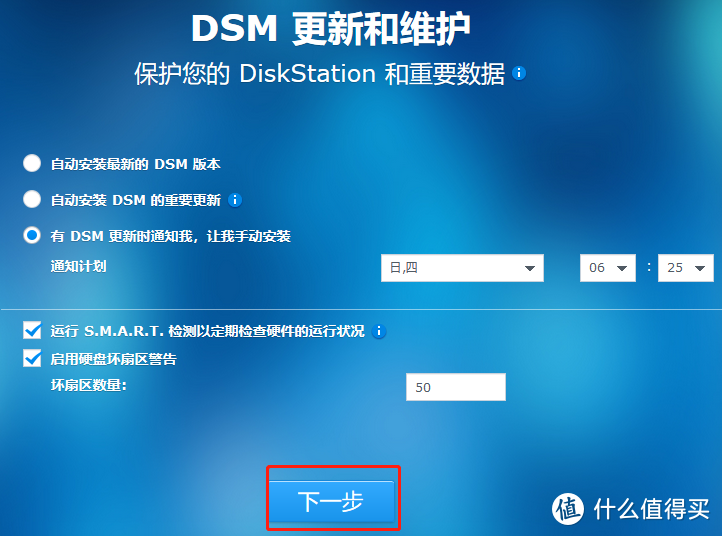
Choose the third one and notify me – next step
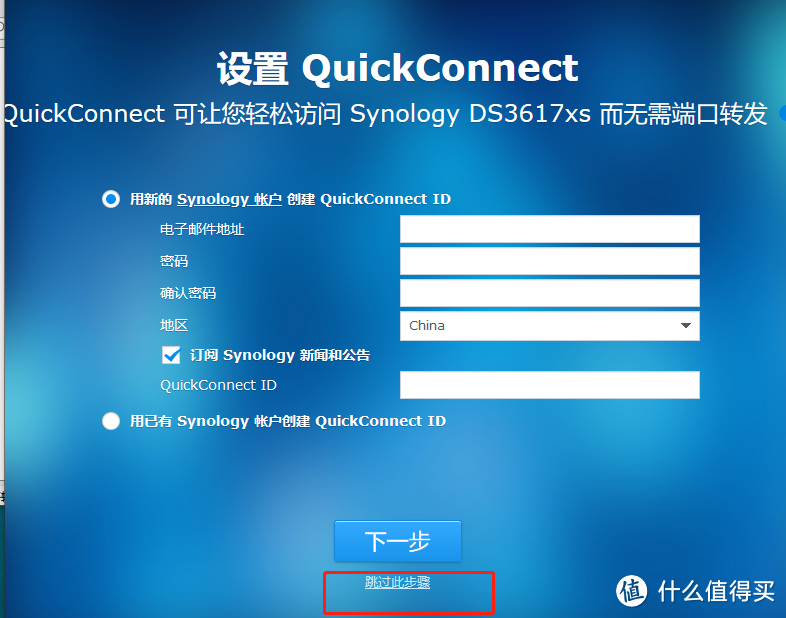
skip this
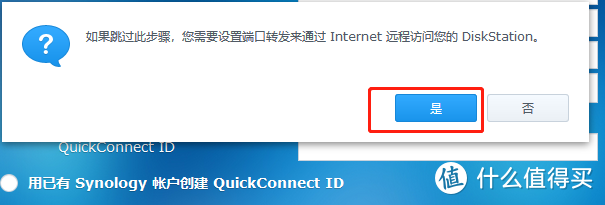
The point is, no need
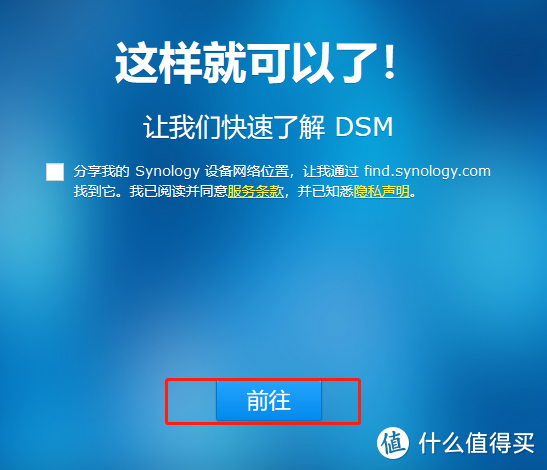
Okay, go
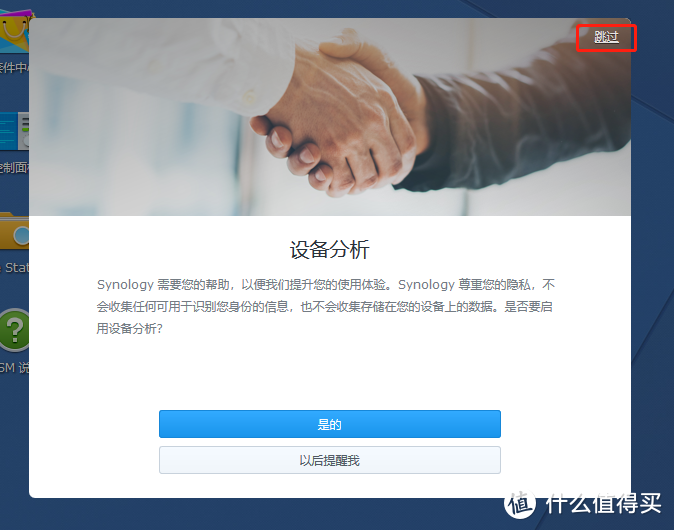
Device analysis is also skipped
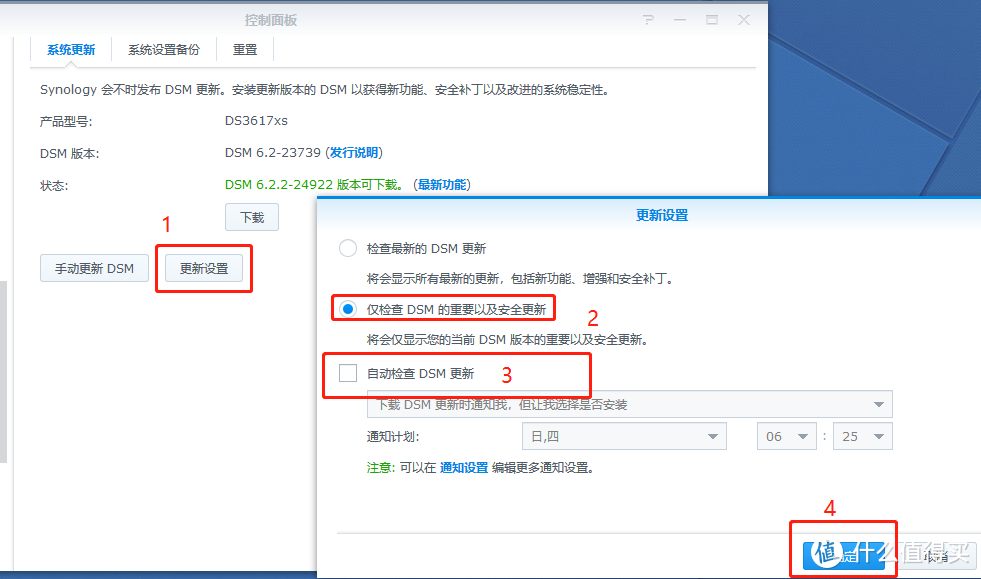
Close the update – the installation is complete and you can use it. You can explore other settings by yourself. You need to create a new storage capacity and add an 80G hard drive to install the package. Let’s start our happy experience process.