Our Location
304 North Cardinal St.
Dorchester Center, MA 02124

Proxmox VE 6.3 / 6.4 / 7.0 / 7.1 / 7.2 / 7.3 / 7.4 / 8.0 / 8.1 Remove unsubscribed prompts
Note: After removing the subscription pop-up reminder, you must clear the browser cache data (clear the browser cache) to take effect.
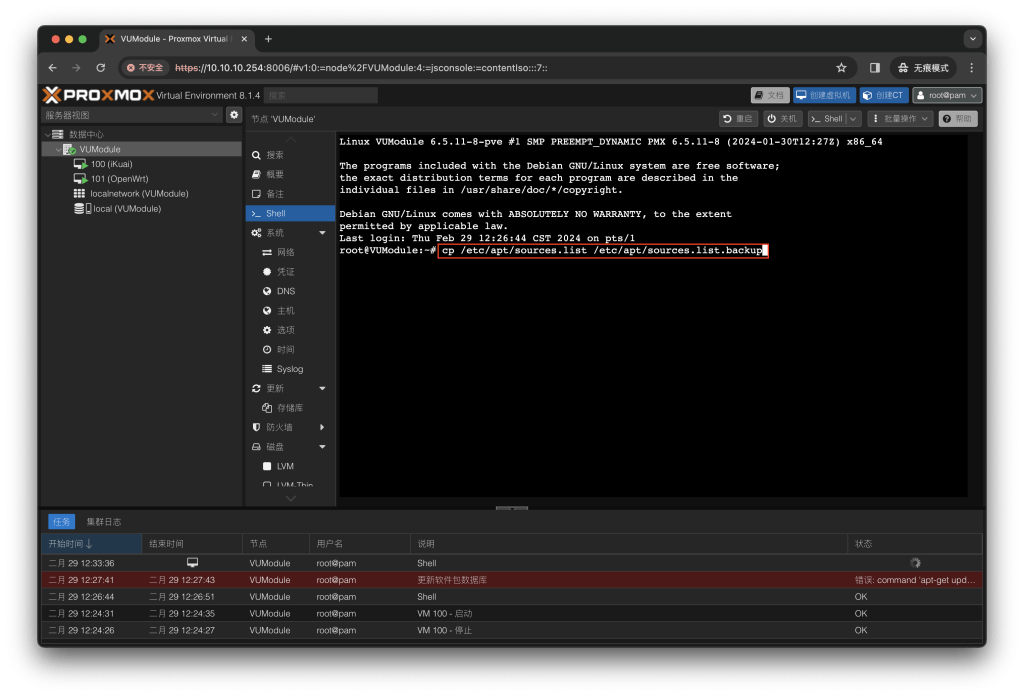
sed -i_orig "s/data.status === 'Active'/true/g" /usr/share/pve-manager/js/pvemanagerlib.jssed -i_orig "s/if (res === null || res === undefined || \!res || res/if(/g" /usr/share/javascript/proxmox-widget-toolkit/proxmoxlib.jssed -i_orig "s/.data.status.toLowerCase() !== 'active'/false/g" /usr/share/javascript/proxmox-widget-toolkit/proxmoxlib.jssystemctl restart pveproxycp /etc/apt/sources.list /etc/apt/sources.list.backup![图片[2]-VUM-PVE整合包关于如何更换国内源问题「VUM-PVE说明书」-VUM星球](https://www.vumstar.com/wp-content/uploads/2024/02/20240229123407532-%E6%88%AA%E5%B1%8F2024-02-29-12.33.42-1024x697.png)
There are two pieces of code. The entire first piece of code is copied at once.
cat <<EOF > /etc/apt/sources.list
deb http://mirrors.ustc.edu.cn/debian/ bookworm main non-free-firmware
deb-src http://mirrors.ustc.edu.cn/debian/ bookworm main non-free-firmware

deb https://mirrors.ustc.edu.cn/debian-security bookworm-security main contrib

deb http://mirrors.ustc.edu.cn/debian/ bookworm-updates main non-free-firmware
deb-src http://mirrors.ustc.edu.cn/debian/ bookworm-updates main non-free-firmware
EOF![图片[3]-VUM-PVE整合包关于如何更换国内源问题「VUM-PVE说明书」-VUM星球](https://www.vumstar.com/wp-content/uploads/2024/02/20240229123619508-%E6%88%AA%E5%B1%8F2024-02-29-12.35.19-1024x697.png)
echo "deb https://mirrors.tuna.tsinghua.edu.cn/proxmox/debian bookworm pve-no-subscription" > /etc/apt/sources.list.d/pve-no-subscription.list![图片[4]-VUM-PVE整合包关于如何更换国内源问题「VUM-PVE说明书」-VUM星球](https://www.vumstar.com/wp-content/uploads/2024/02/20240229123823345-%E6%88%AA%E5%B1%8F2024-02-29-12.38.01-1024x697.png)
sed -i 's/^deb https:\/\/enterprise.proxmox.com\/debian\/pve/#deb https:\/\/enterprise.proxmox.com\/debian\/pve/' /etc/apt/sources.list.d/pve-enterprise.list![图片[5]-VUM-PVE整合包关于如何更换国内源问题「VUM-PVE说明书」-VUM星球](https://www.vumstar.com/wp-content/uploads/2024/02/20240229123953905-%E6%88%AA%E5%B1%8F2024-02-29-12.39.26-1024x697.png)
sed -i 's/^deb https:\/\/enterprise.proxmox.com\/debian\/ceph-quincy/#deb https:\/\/enterprise.proxmox.com\/debian\/ceph-quincy/' /etc/apt/sources.list.d/ceph.list![图片[6]-VUM-PVE整合包关于如何更换国内源问题「VUM-PVE说明书」-VUM星球](https://www.vumstar.com/wp-content/uploads/2024/02/20240229124154431-%E6%88%AA%E5%B1%8F2024-02-29-12.41.33-1024x697.png)
apt-get update![图片[7]-VUM-PVE整合包关于如何更换国内源问题「VUM-PVE说明书」-VUM星球](https://www.vumstar.com/wp-content/uploads/2024/02/20240229124329760-%E6%88%AA%E5%B1%8F2024-02-29-12.43.05-1024x697.png)
Q: Why downgrade the kernel?
A: Because the PVE version we are currently using is the latest 8.2.4 and the kernel version is 6.8.4, and the author of the i915-sriov-dkms project used has only updated the latest supported kernel version to 6.5, so the kernel needs to be downgraded.
Enter the following command to see that the current PVE version is 8.2.4 and the kernel version is 6.8.4
pveversion![图片[1]-2024陪伴级教程PVE无论什么版本正确开启SR-IOV虚拟化核显方式-VUM星球](https://www.vumstar.com/wp-content/uploads/2024/07/20240710225809253-%E6%88%AA%E5%B1%8F2024-07-10-22.57.44-1024x907.png)
proxmox-boot-tool kernel list![图片[2]-2024陪伴级教程PVE无论什么版本正确开启SR-IOV虚拟化核显方式-VUM星球](https://www.vumstar.com/wp-content/uploads/2024/07/20240710230158236-%E6%88%AA%E5%B1%8F2024-07-10-23.01.24-1024x907.png)
At this point, you can see that the system has a kernel version of 6.5.13-5 by default, which is version 6.5 that meets the project requirements. However, the author of the i915-sriov-dkms project has not yet updated to this version, so compilation cannot be successful using this version directly, so we still need to continue to downgrade the kernel operation.
After my testing, version 6.5.13-1 is relatively stable, so we downgraded to this version.
update source
apt updateFind available cores
apt-cache search pve-kernel![图片[3]-2024陪伴级教程PVE无论什么版本正确开启SR-IOV虚拟化核显方式-VUM星球](https://www.vumstar.com/wp-content/uploads/2024/07/20240710230744584-%E6%88%AA%E5%B1%8F2024-07-10-23.07.22-1024x907.png)
Install this version of the kernel
apt install pve-kernel-6.5.13-1-pve![图片[4]-2024陪伴级教程PVE无论什么版本正确开启SR-IOV虚拟化核显方式-VUM星球](https://www.vumstar.com/wp-content/uploads/2024/07/20240710231014681-%E6%88%AA%E5%B1%8F2024-07-10-23.09.50-1024x907.png)
Update Grub boot configuration
update-grub![图片[5]-2024陪伴级教程PVE无论什么版本正确开启SR-IOV虚拟化核显方式-VUM星球](https://www.vumstar.com/wp-content/uploads/2024/07/20240710231231562-%E6%88%AA%E5%B1%8F2024-07-10-23.12.21-1024x907.png)
proxmox-boot-tool kernel pin 6.5.13-1-pve![图片[6]-2024陪伴级教程PVE无论什么版本正确开启SR-IOV虚拟化核显方式-VUM星球](https://www.vumstar.com/wp-content/uploads/2024/07/20240710231512352-%E6%88%AA%E5%B1%8F2024-07-10-23.14.59-1024x907.png)
Check if curing is successful
proxmox-boot-tool kernel listIf you see the red box in the picture below, it means the curing is successful.
![图片[7]-2024陪伴级教程PVE无论什么版本正确开启SR-IOV虚拟化核显方式-VUM星球](https://www.vumstar.com/wp-content/uploads/2024/07/20240710231626588-%E6%88%AA%E5%B1%8F2024-07-10-23.15.45-1024x907.png)
apt install pve-headers-6.5.13-1-pve![图片[8]-2024陪伴级教程PVE无论什么版本正确开启SR-IOV虚拟化核显方式-VUM星球](https://www.vumstar.com/wp-content/uploads/2024/07/20240710231847390-%E6%88%AA%E5%B1%8F2024-07-10-23.18.36-1024x907.png)
sed -i '/^GRUB_CMDLINE_LINUX_DEFAULT/c\GRUB_CMDLINE_LINUX_DEFAULT="quiet intel_iommu=on iommu=pt pcie_acs_override=downstream i915.enable_guc=3 i915.max_vfs=7"' /etc/default/grubIf you use our VUM-PVE integration package, you don’t need to configure this step.
echo -e "vfio\nvfio_iommu_type1\nvfio_pci\nvfio_virqfd" | tee -a /etc/modulesThis step is a huge pitfall. Be sure to pay attention. If you have configured this step before, go in and delete them all. If you have not configured it, leave it alone.
nano /etc/modprobe.d/blacklist.conf![图片[9]-2024陪伴级教程PVE无论什么版本正确开启SR-IOV虚拟化核显方式-VUM星球](https://www.vumstar.com/wp-content/uploads/2024/07/20240710232755190-%E6%88%AA%E5%B1%8F2024-07-10-23.25.50-1024x907.png)
update-grub
update-initramfs -u -k allrebootuname -rPVE has been successfully started with the 6.5.13-1 kernel version and cured successfully.
![图片[10]-2024陪伴级教程PVE无论什么版本正确开启SR-IOV虚拟化核显方式-VUM星球](https://www.vumstar.com/wp-content/uploads/2024/07/20240710233844537-%E6%88%AA%E5%B1%8F2024-07-10-23.37.36-1024x907.png)
apt-get install --no-install-recommends git mokutil sysfsutils -yapt install --reinstall dkms -yKERNEL=$(uname -r); KERNEL=${KERNEL%-pve}Project address: https://github.com/strongtz/i915-sriov-dkms.git
git clone https://github.com/strongtz/i915-sriov-dkms.git

cd i915-sriov-dkms/

sed -i 's/"@_PKGBASE@"/"i915-sriov-dkms"/g' ~/i915-sriov-dkms/dkms.conf

sed -i 's/"@PKGVER@"/"'"$KERNEL"'"/g' ~/i915-sriov-dkms/dkms.confcat ~/i915-sriov-dkms/dkms.conf![图片[11]-2024陪伴级教程PVE无论什么版本正确开启SR-IOV虚拟化核显方式-VUM星球](https://www.vumstar.com/wp-content/uploads/2024/07/20240710235224852-%E6%88%AA%E5%B1%8F2024-07-10-23.51.27-1024x907.png)
dkms add .![图片[12]-2024陪伴级教程PVE无论什么版本正确开启SR-IOV虚拟化核显方式-VUM星球](https://www.vumstar.com/wp-content/uploads/2024/07/20240710235649437-%E6%88%AA%E5%B1%8F2024-07-10-23.54.30-1024x907.png)
cd /usr/src/i915-sriov-dkms-$KERNEL![图片[13]-2024陪伴级教程PVE无论什么版本正确开启SR-IOV虚拟化核显方式-VUM星球](https://www.vumstar.com/wp-content/uploads/2024/07/20240710235758850-%E6%88%AA%E5%B1%8F2024-07-10-23.57.34-1024x907.png)
dkms status![图片[14]-2024陪伴级教程PVE无论什么版本正确开启SR-IOV虚拟化核显方式-VUM星球](https://www.vumstar.com/wp-content/uploads/2024/07/20240710235930597-%E6%88%AA%E5%B1%8F2024-07-10-23.59.07-1024x907.png)
dkms install -m i915-sriov-dkms -v $KERNEL -k $(uname -r) --force -j 1The compilation process takes a little longer and you need to wait.
![图片[15]-2024陪伴级教程PVE无论什么版本正确开启SR-IOV虚拟化核显方式-VUM星球](https://www.vumstar.com/wp-content/uploads/2024/07/20240711000300634-%E6%88%AA%E5%B1%8F2024-07-11-00.02.32-1024x857.png)
![图片[16]-2024陪伴级教程PVE无论什么版本正确开启SR-IOV虚拟化核显方式-VUM星球](https://www.vumstar.com/wp-content/uploads/2024/07/20240711000535146-%E6%88%AA%E5%B1%8F2024-07-11-00.05.12-1024x857.png)
Check again whether the compilation is successful
dkms status![图片[17]-2024陪伴级教程PVE无论什么版本正确开启SR-IOV虚拟化核显方式-VUM星球](https://www.vumstar.com/wp-content/uploads/2024/07/20240711000636193-%E6%88%AA%E5%B1%8F2024-07-11-00.06.09-1024x857.png)
lspci | grep VGA![图片[18]-2024陪伴级教程PVE无论什么版本正确开启SR-IOV虚拟化核显方式-VUM星球](https://www.vumstar.com/wp-content/uploads/2024/07/20240711001013941-%E6%88%AA%E5%B1%8F2024-07-11-00.09.36-1024x857.png)
Here it shows 00:02.0, the complete PCI address 0000:00:02.0
echo "devices/pci0000:00/0000:00:02.0/sriov_numvfs = 7" > /etc/sysfs.conf

# 0000:00:02.0 Change this to your ID
# Change the 7 in sriov_numvfs = 7 to other values, do not exceed 7rebootlspci | grep VGA![图片[19]-2024陪伴级教程PVE无论什么版本正确开启SR-IOV虚拟化核显方式-VUM星球](https://www.vumstar.com/wp-content/uploads/2024/07/20240711002158863-%E6%88%AA%E5%B1%8F2024-07-11-00.21.36-1024x857.png)
If your CPU does not support SR-IOV, or you do not want to enable SR-IOV, please use the following command to pass through the PCIE device:
sed -i '/^GRUB_CMDLINE_LINUX_DEFAULT/c\GRUB_CMDLINE_LINUX_DEFAULT="quiet intel_iommu=on iommu=pt pcie_acs_override=downstream"' /etc/default/grubecho -e "vfio\nvfio_iommu_type1\nvfio_pci\nvfio_virqfd" | tee -a /etc/modulesupdate-grubupdate-initramfs -u -k allreboot